
7. How to Automate Affiliate Hubs
Automating your affiliate hubs lets you route incoming clients to the right desks without manual intervention, ensuring timely follow-up, consistent SLA adherence, and clear ownership. You can choose a simple “all leads go here” approach, or build sophisticated rules based on the time of day or the source channel.
The Automation section allows you to set up automated client assignment to relevant desks.
To begin, enable automation:
1. Open the Automation tab within your affiliate hub.
2. Toggle on Active automation so it turns blue.
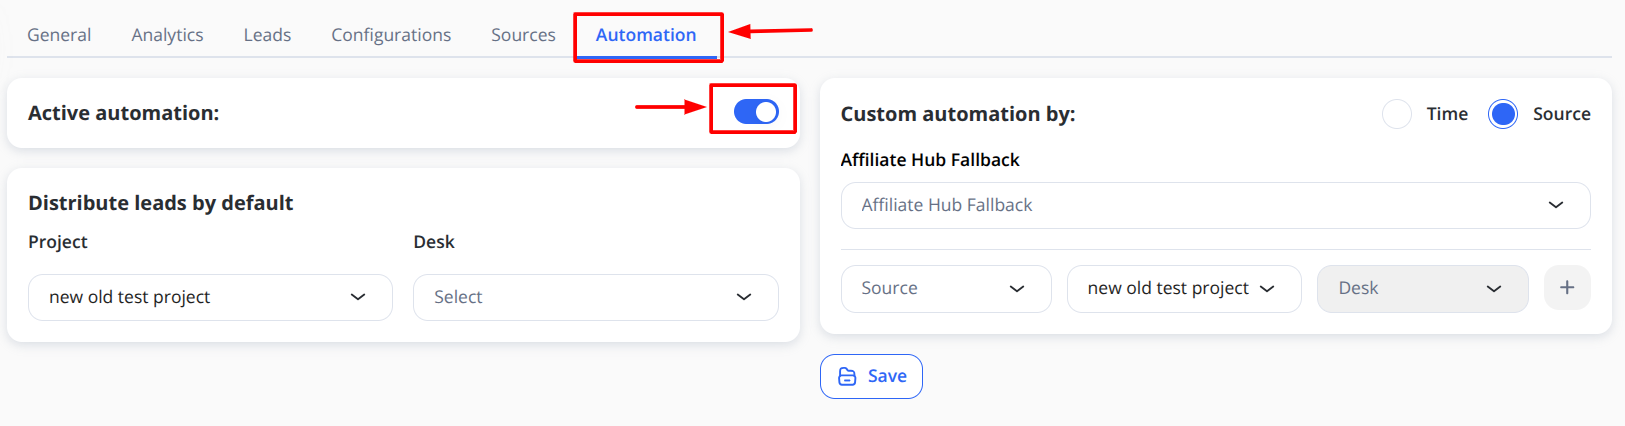
Tip: Flip this switch off any time to pause automation and fall back to manual desk assignments.
Note: To disable automation, click the toggle again. If disabled, you will need to assign clients to desks manually. Instructions on manual assignment can be found [here].
To automatically assign all new clients to one desk (with no conditions):
1. In Distribute leads by Default→ Select Project and Desk from the dropdown.
2. Click Save to apply changes.
All new leads will now land on that desk, straight out of the box.
To set up custom automation:
Use time-based rules when, for example, you have different support teams on different shifts.
1. Under Custom automation by, choose one of the options, Time or Source.
Note: You can choose automation based on either time or source, but not both simultaneously.
For custom automation by time:
1. Select the Affiliate Hub Fallback desk from the drop-down list. Clients that do not match within the specified time periods will be assigned here.
2. Set the Start time and End time to specify the time period. Then select the Project and Desk for that period from the drop-down list and click the plus icon (+).
Note: Time periods may overlap if entered that way (e.g., 8:00–14:00 and 6:00–16:00). In such cases, the first matching period in the list will be selected.
3. You can add an unlimited number of time periods to separate clients. A new line for adding a period will appear once you have added the previous one.
4. You can edit or delete all created periods by clicking the relevant icons.
For custom automation by source:
Route based on where the lead came from (e.g., “Twitter” vs. “Affiliate A”).
1. Select the Affiliate Hub Fallback desk from the drop-down list. Clients that do not match within the specified sources will be assigned here.
2. Select the Source, Project, and Desk from the drop-down lists. Then click the plus icon (+).
3. You can add as many sources as you have set up in Configurations. A new line for adding a source will appear once you have added the previous one.
4. You can edit or delete all created sources by clicking the relevant icons.
5. Once your default desk, time windows, or source mappings are in place, click Save at the bottom of the panel. All new leads into this affiliate hub will immediately flow according to your rules.
By leveraging affiliate hub automation:
Reduce manual work—no more one-by-one desk assignments.
Enforce SLAs—ensure leads always land with the right team at the right time.
Adapt on the fly—update time windows or source mappings in seconds.
Automated routing keeps your pipeline moving smoothly, so your teams can focus on closing rather than chasing down new leads.
No Comments