
7. How to Automate Buckets
The Automation section allows you to set up automated client assignment to relevant desks.
To begin, enable automation:
-
-
Click the toggle next to Active automation. When active, the toggle will turn blue.
-
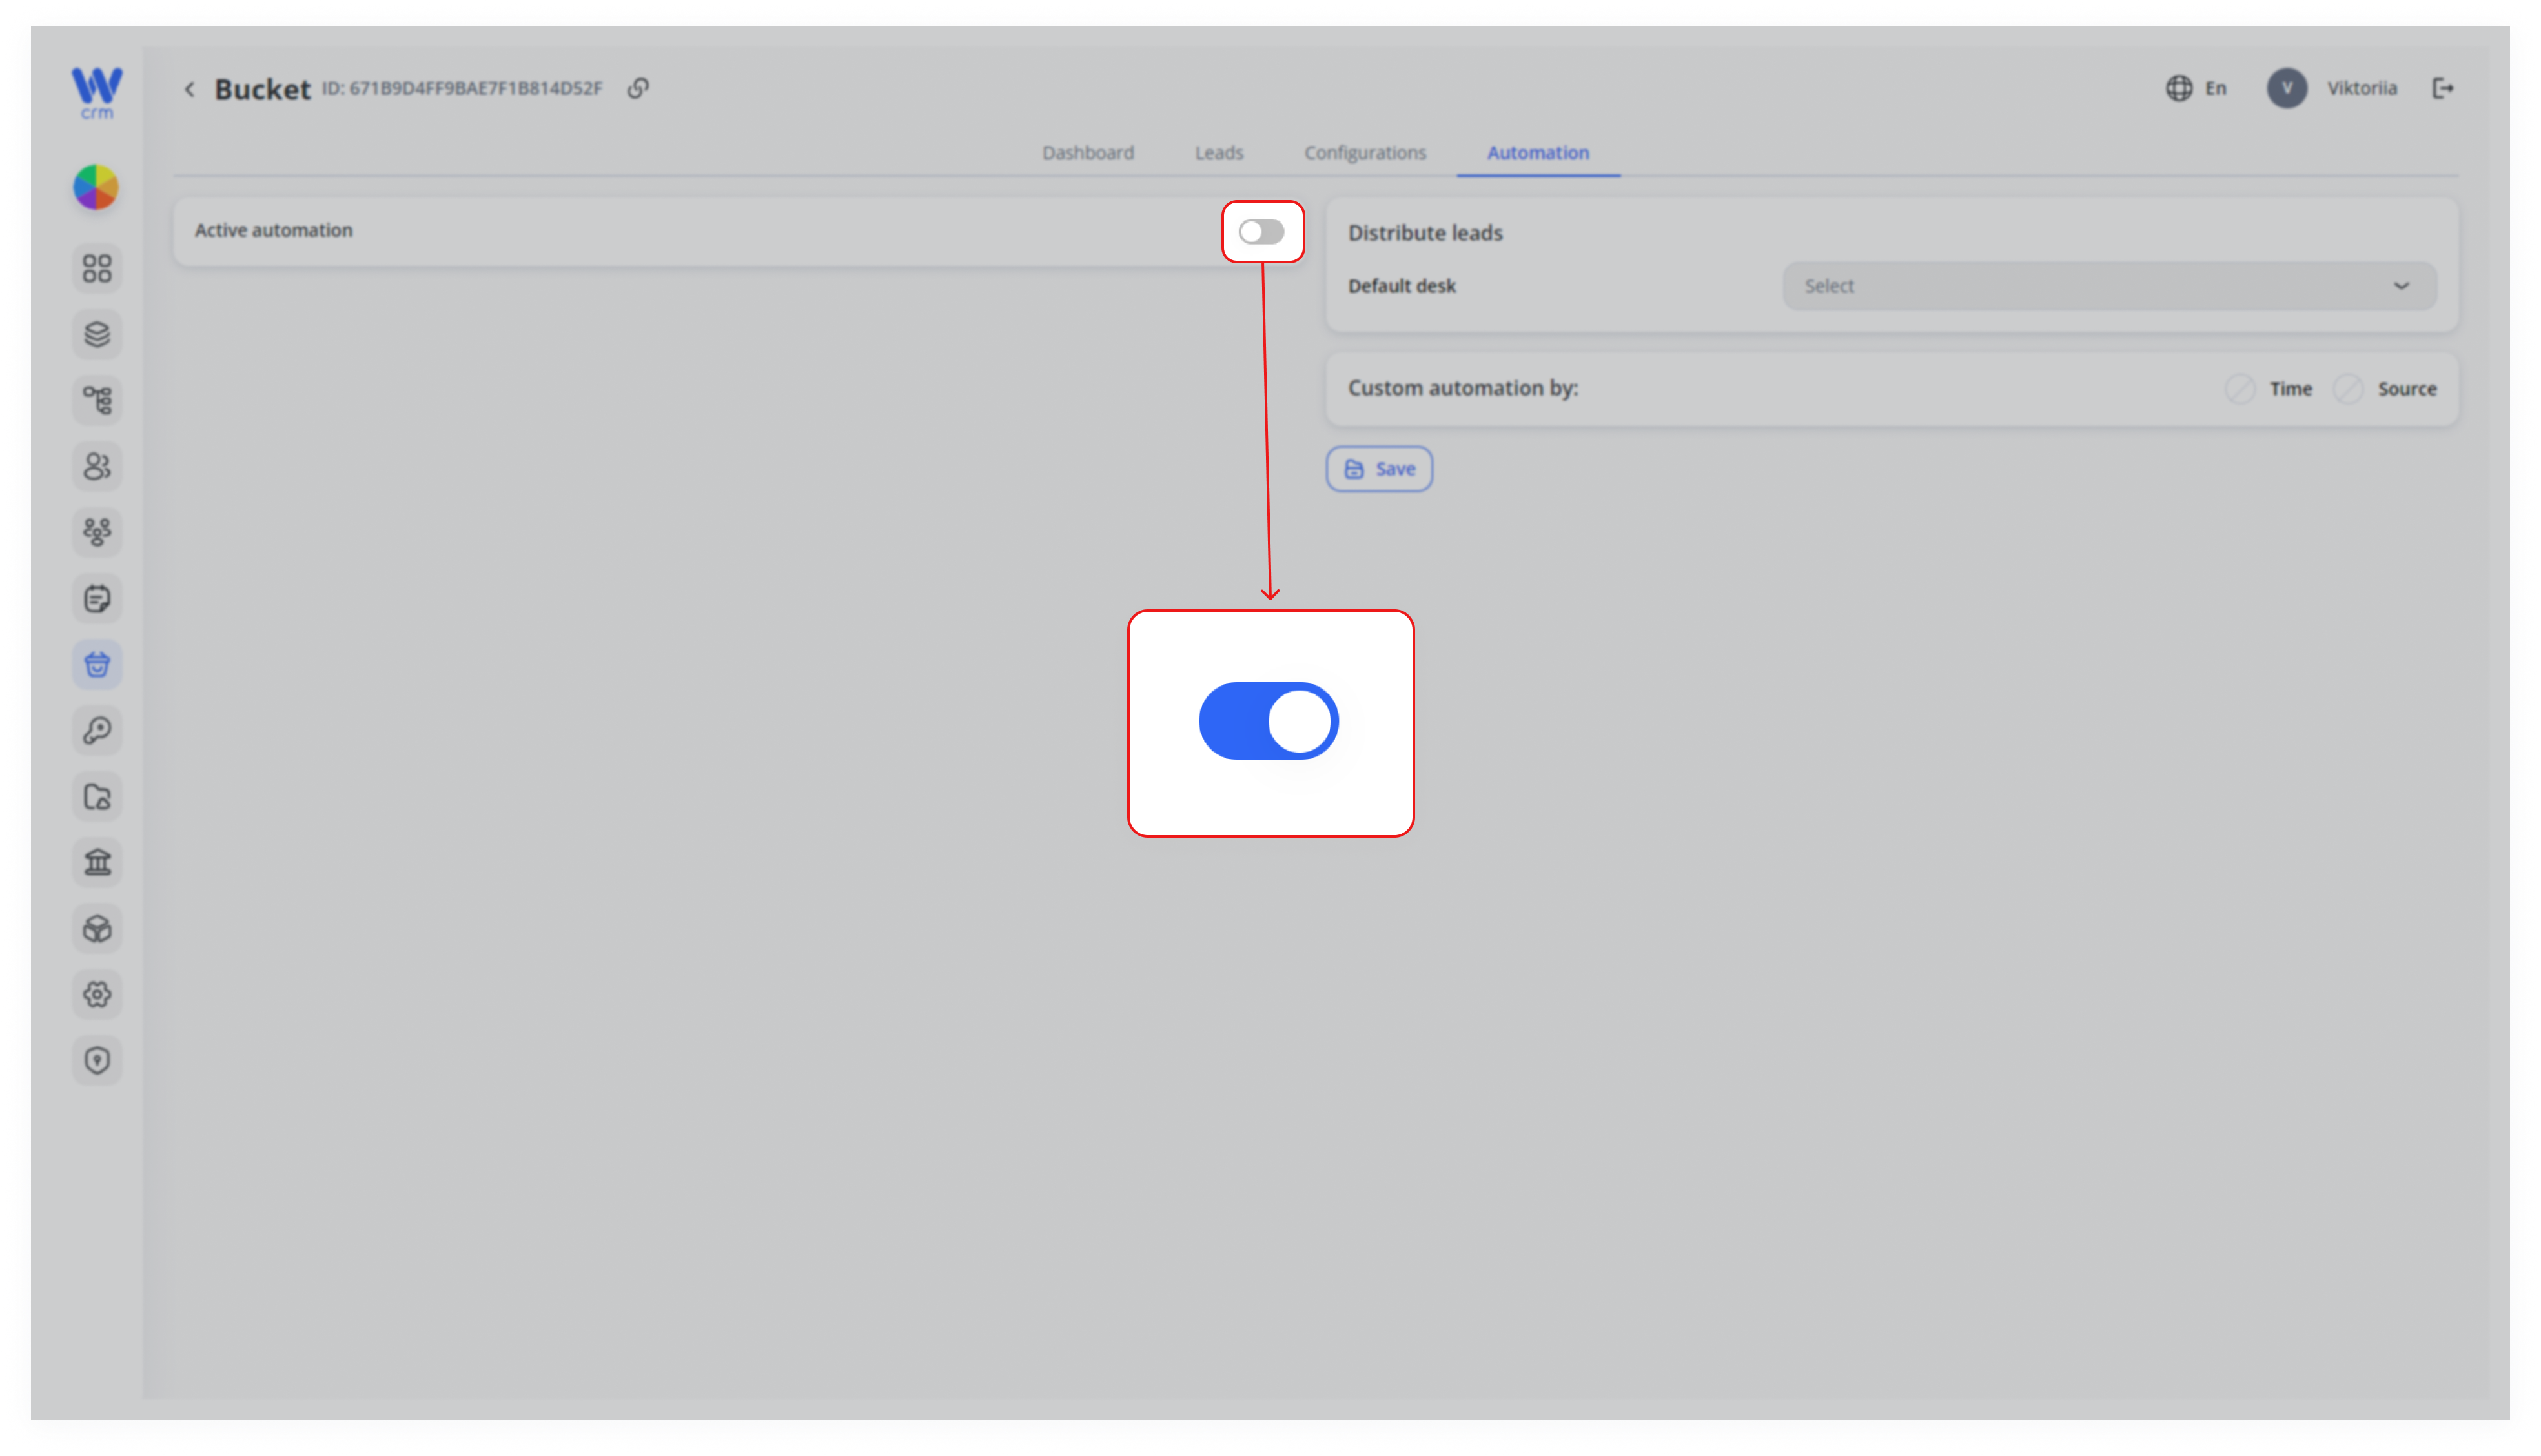
Note: To disable automation, click the toggle again. If disabled, you will need to assign clients to desks manually. Instructions on manual assignment can be found [here].
To automatically assign all new clients to one desk (with no conditions):
1. Select the the Default desk from the drop-down list.
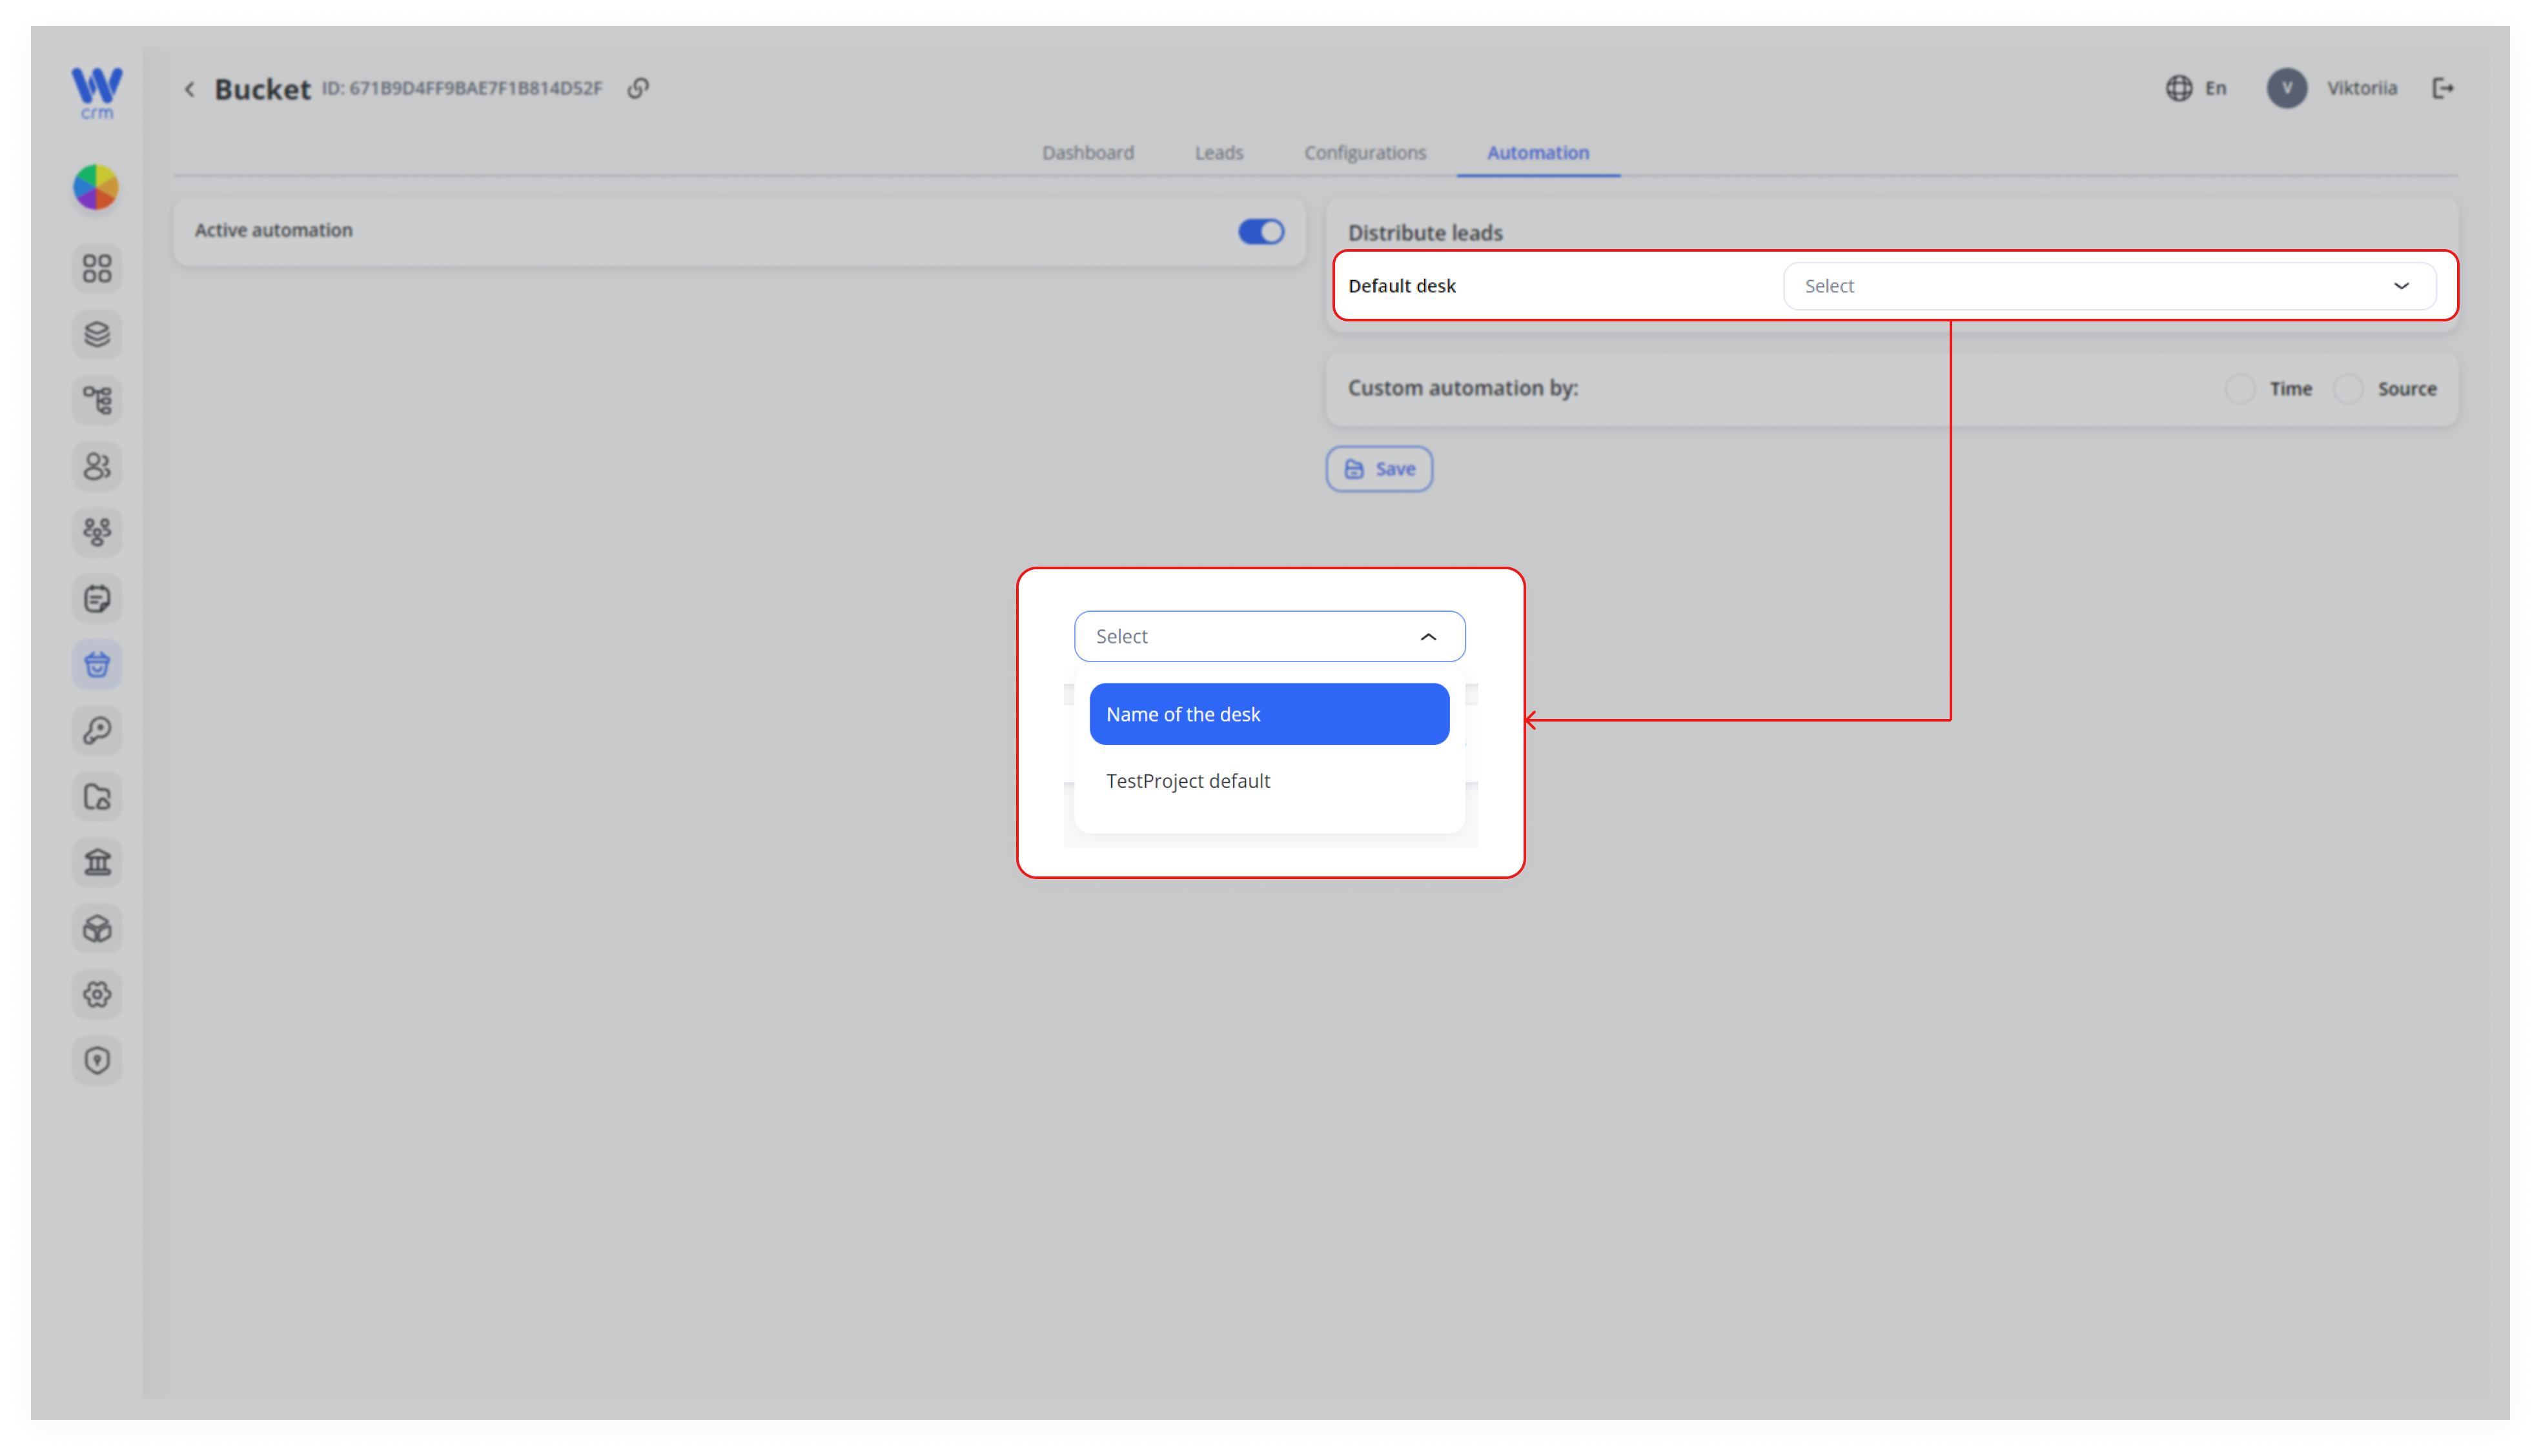
2. Click Save to apply changes.
To set up custom automation:
1. Select the criterion for automation: by Time or Source.
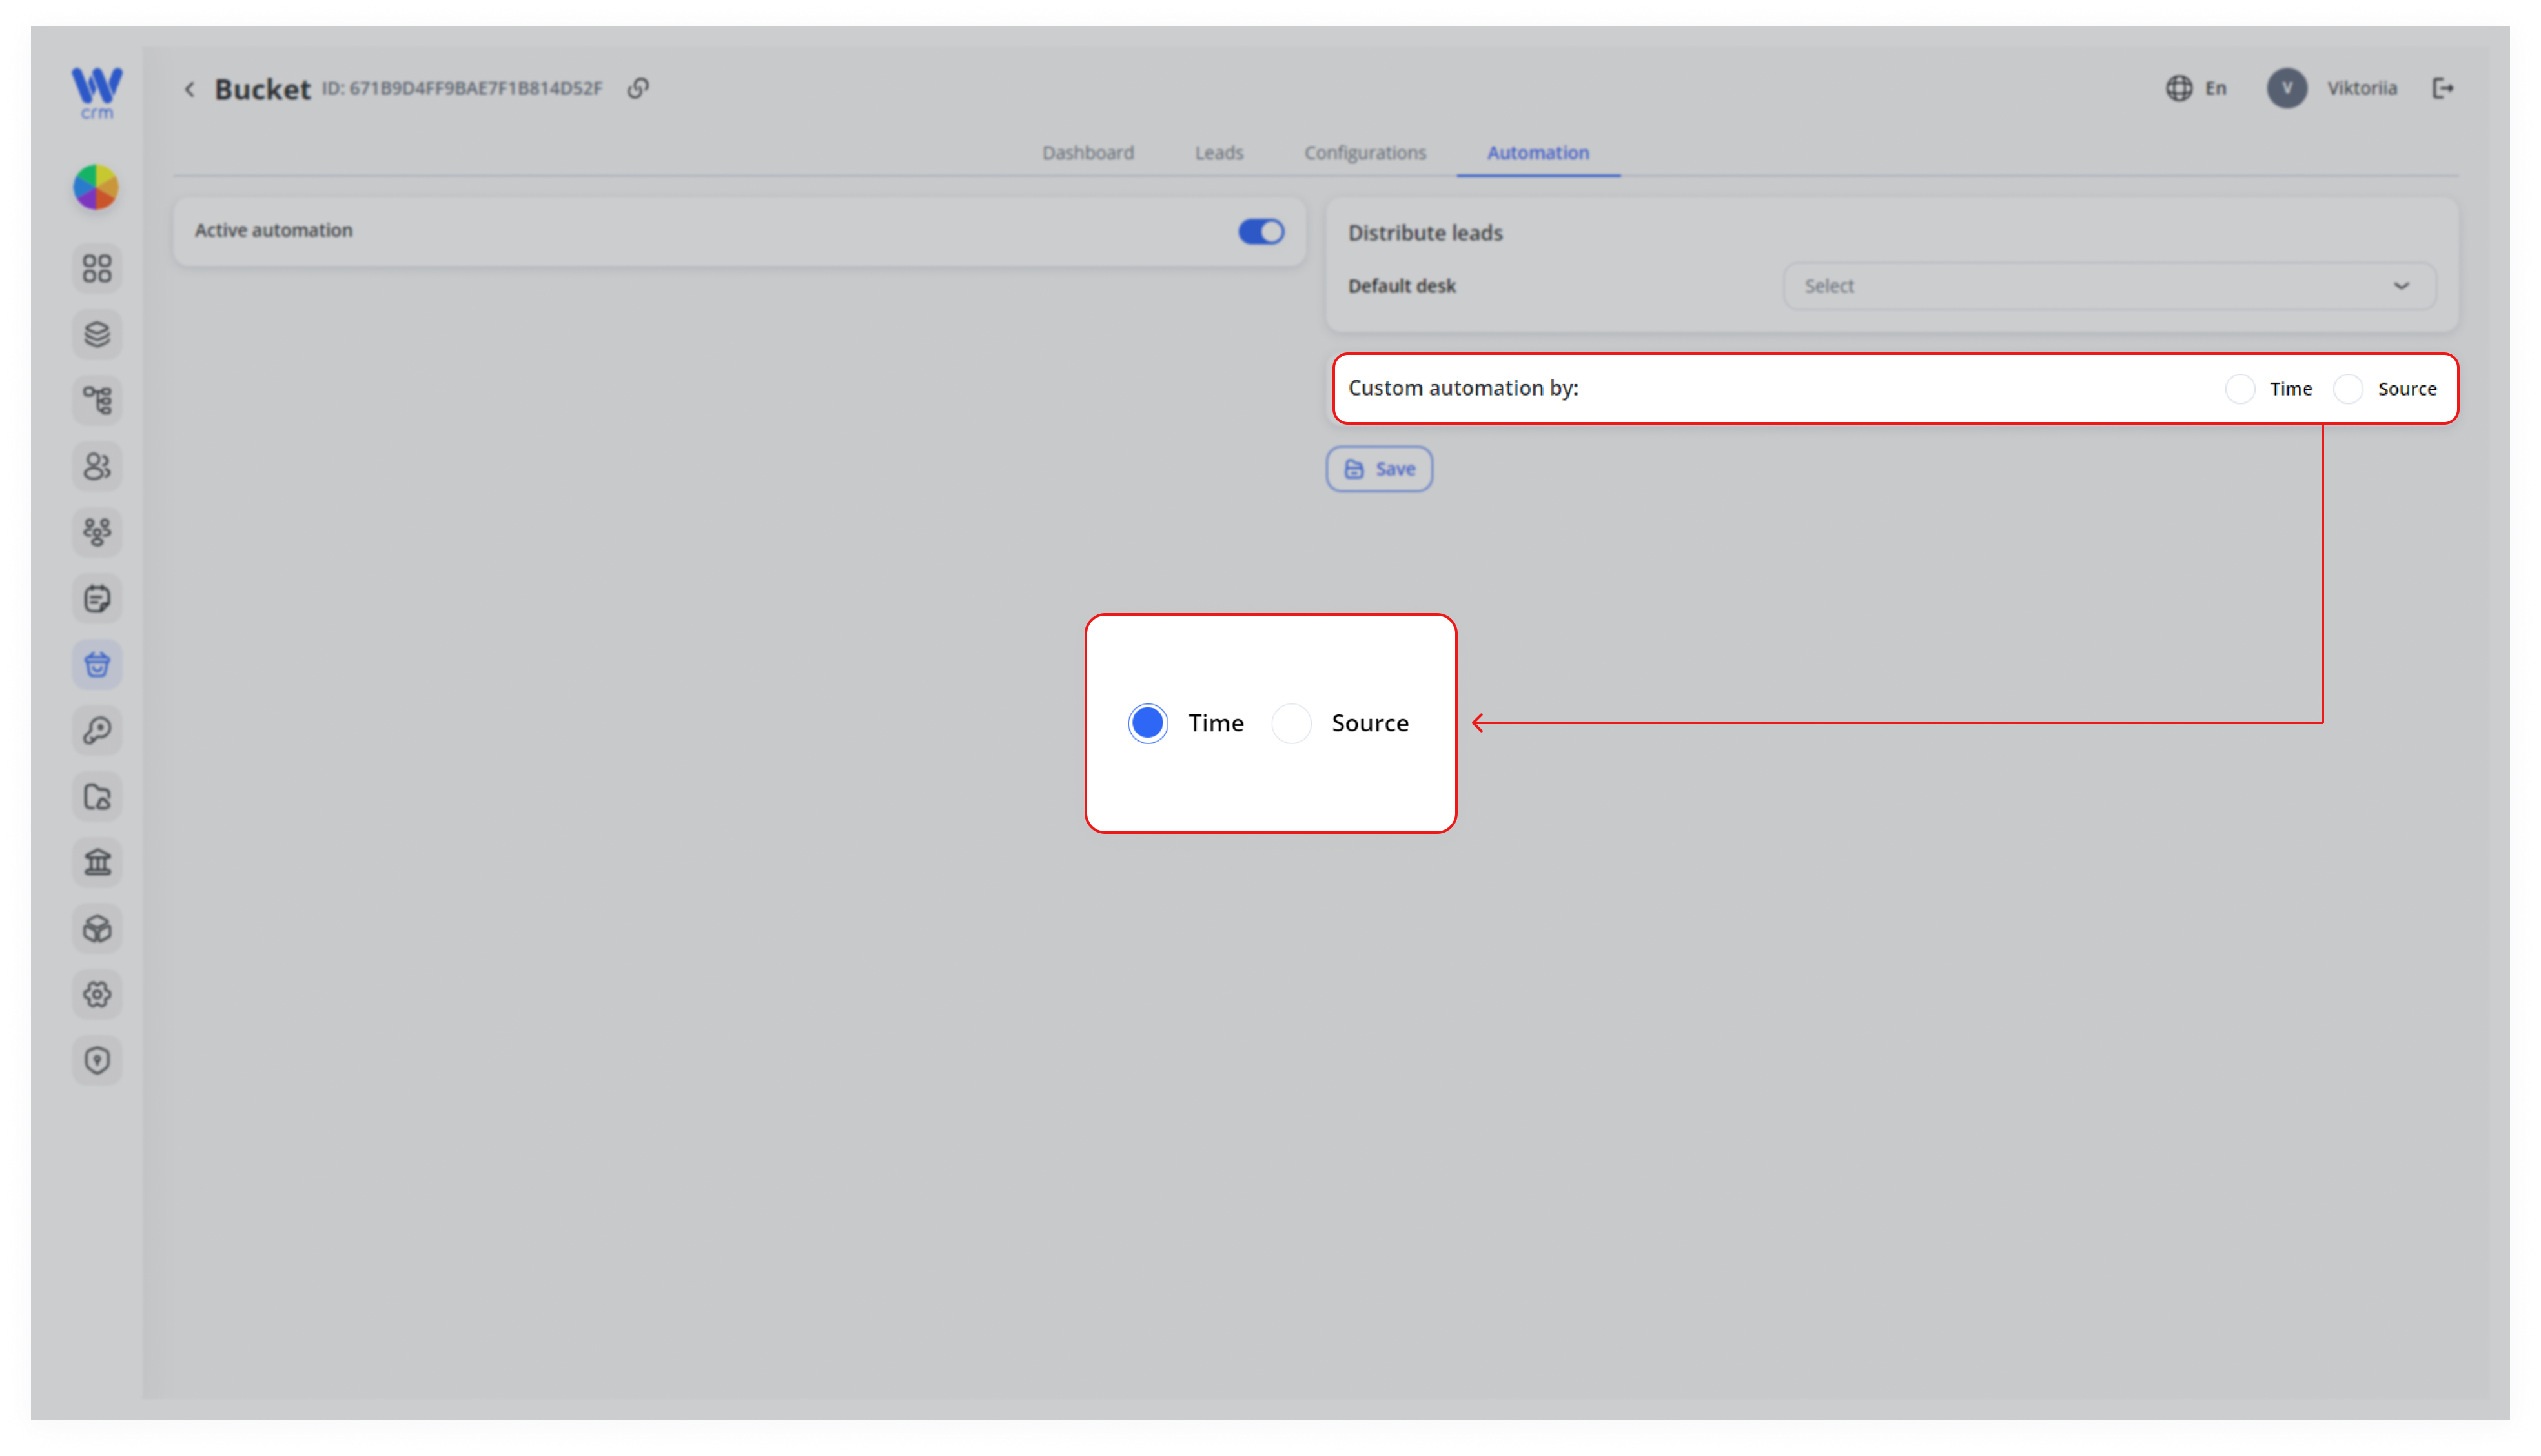
Note: You can choose automation based on either time or source, but not both simultaneously.
2. For custom automation by time:
-
-
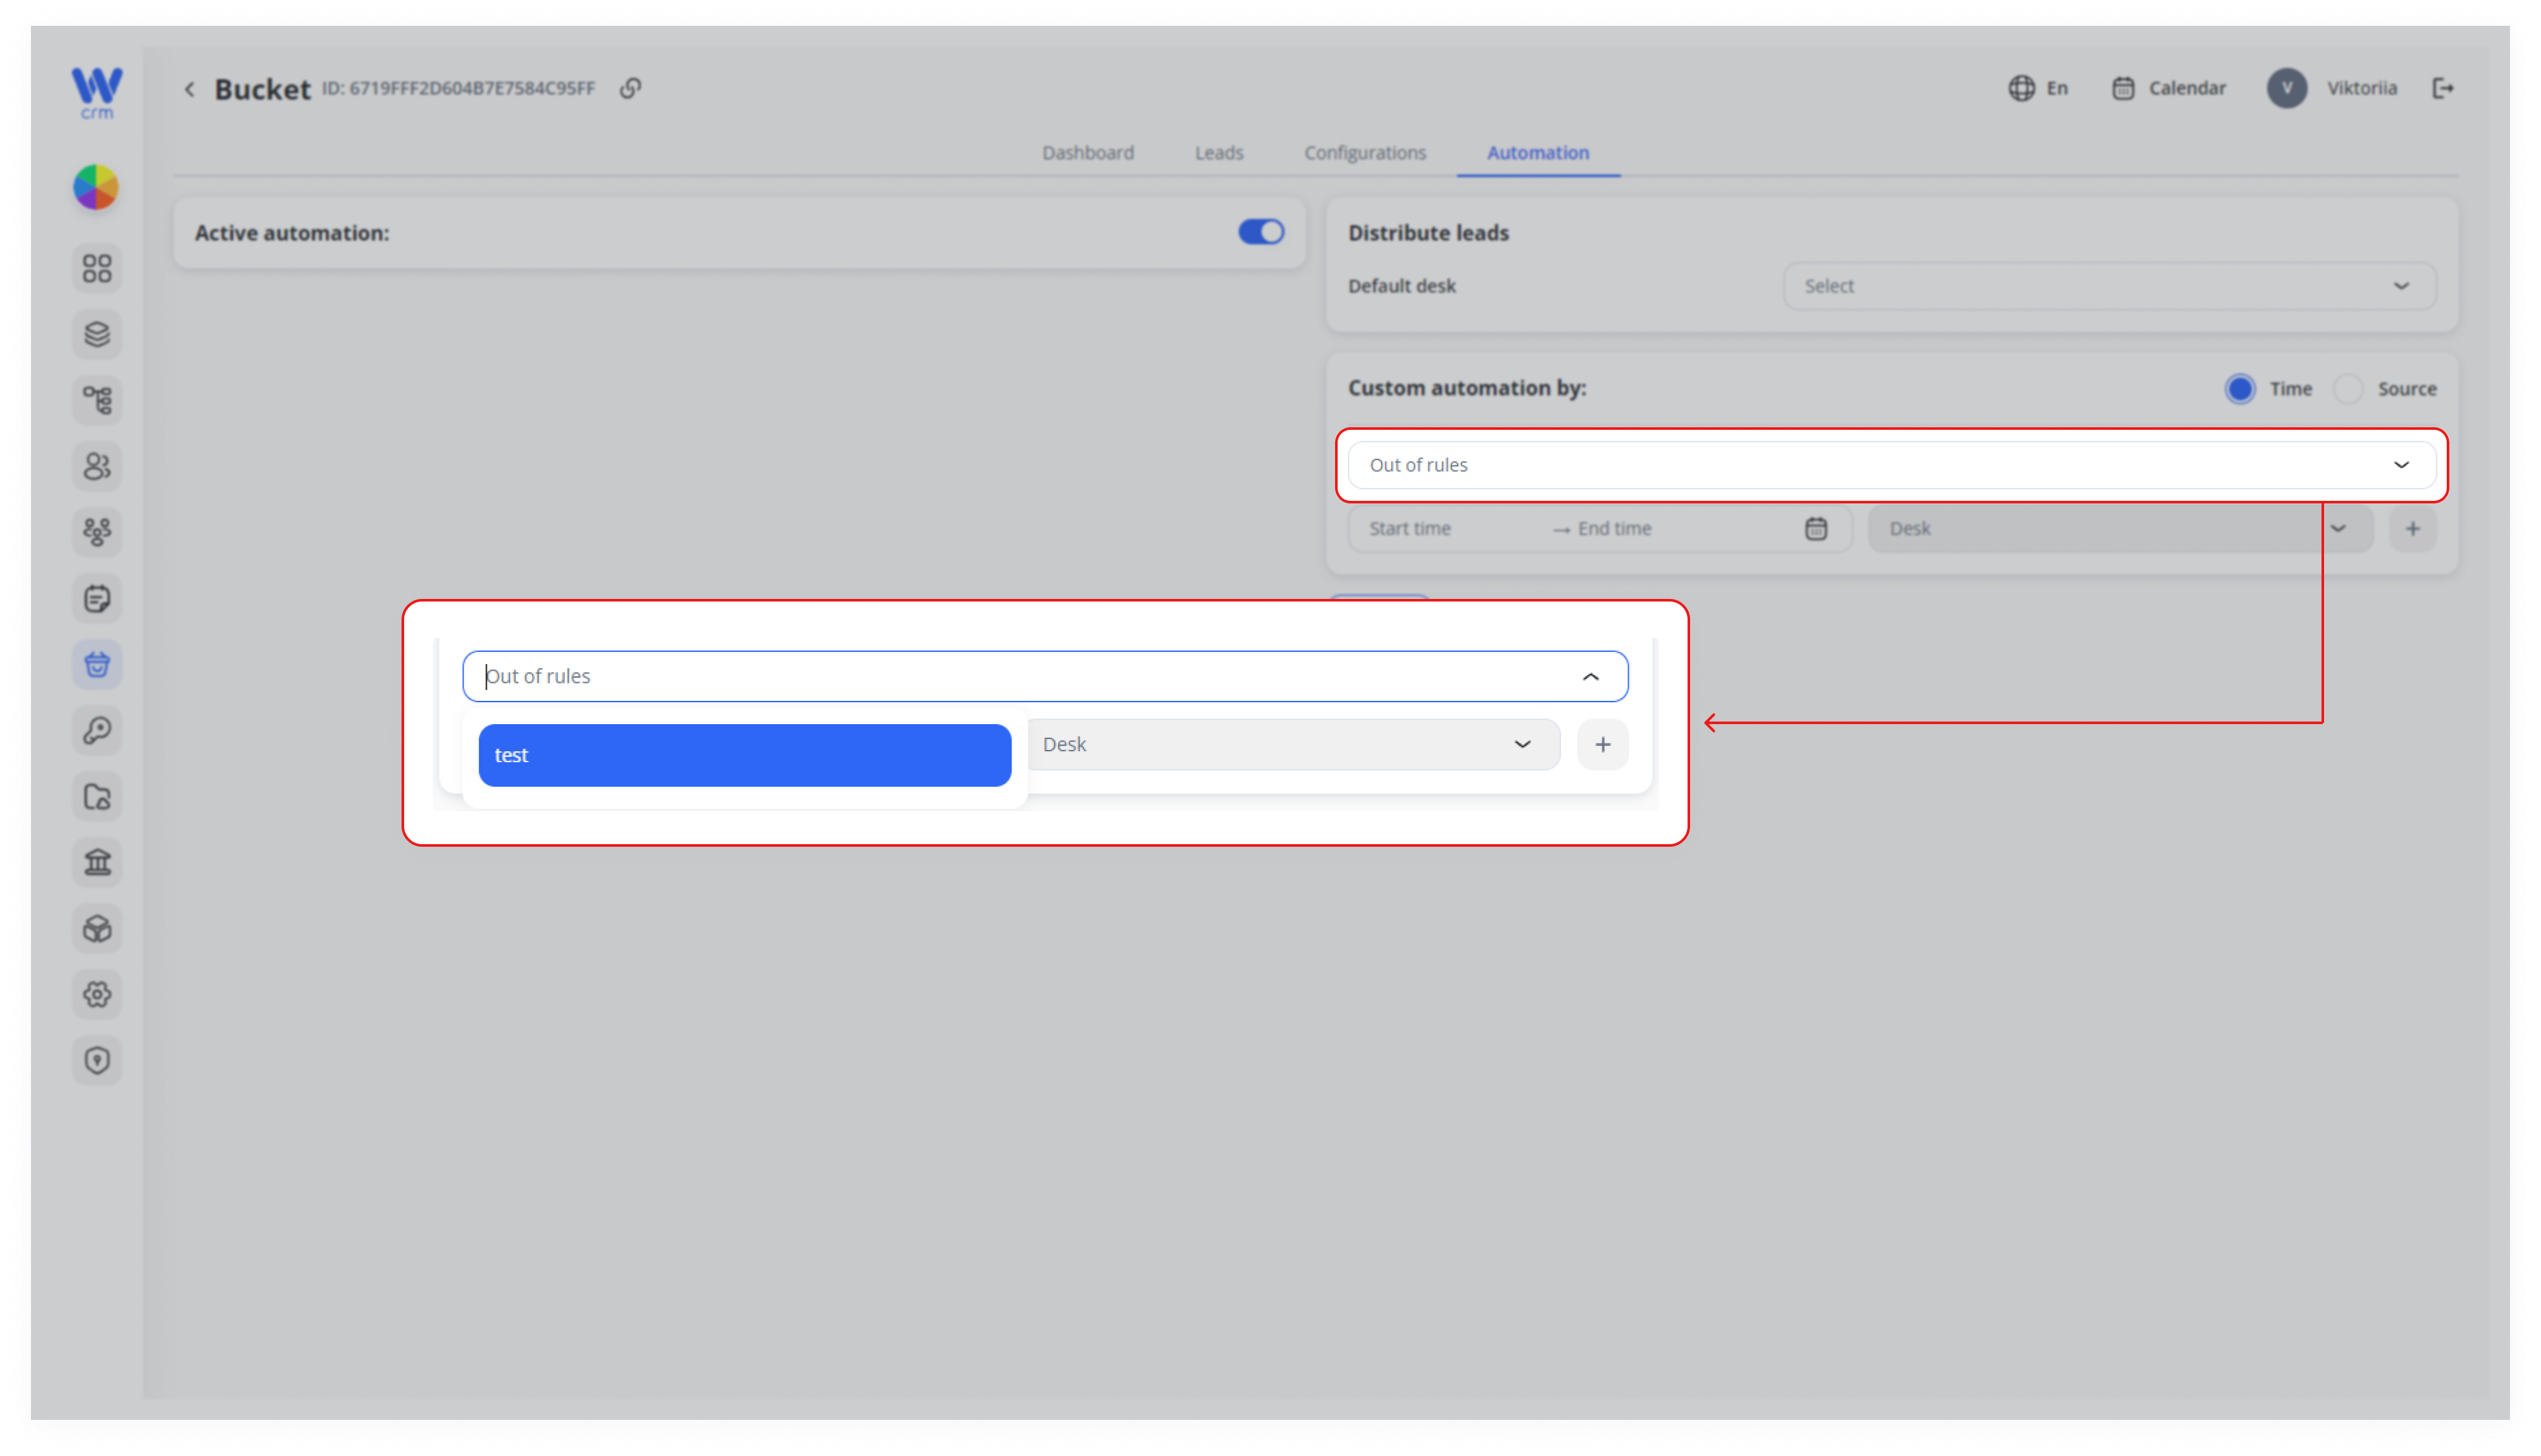
- Select the Out of rules desk from the drop-down list. Clients that do not match within the specified time periods will be assigned here.
-
-
-
- Set the Start time and End time to specify the time period. Then select the Desk for that period from the drop-down list and click the plus icon (+).
-
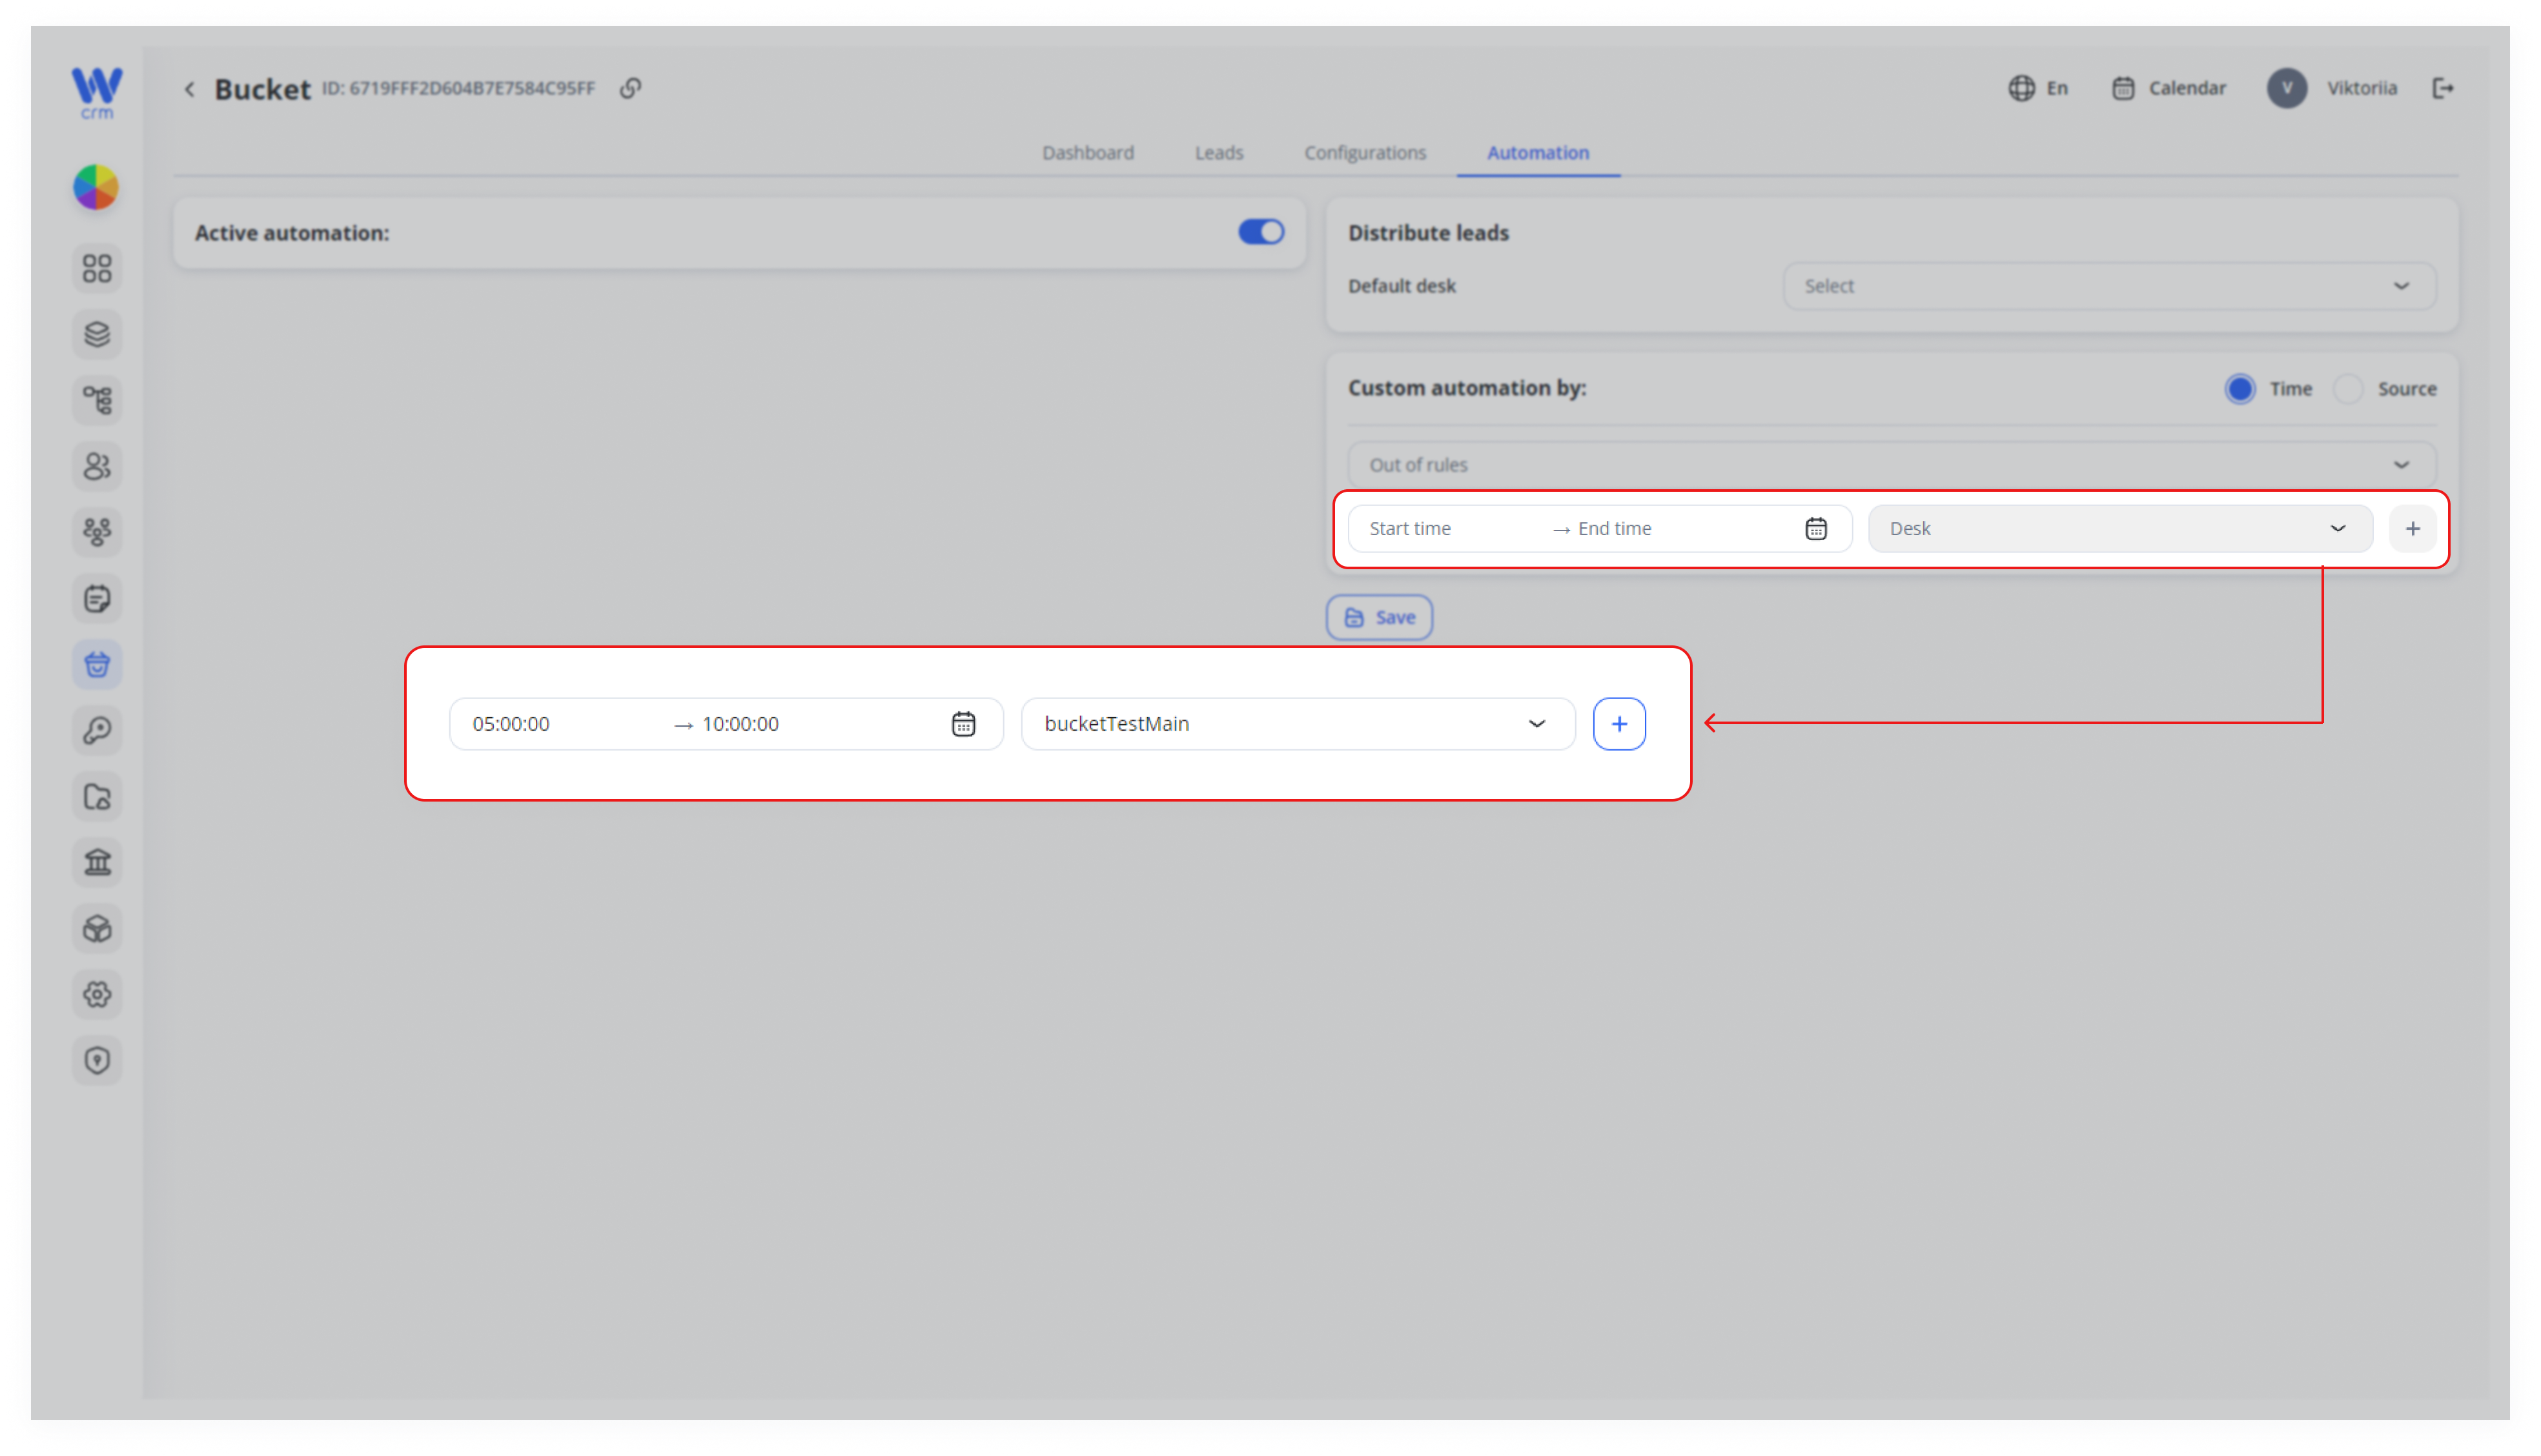
Note: Time periods may overlap if entered that way (e.g., 8:00–14:00 and 6:00–16:00). In such cases, the first matching period in the list will be selected.
-
-
-
You can add an unlimited number of time periods to separate clients. A new line for adding a period will appear once you have added the previous one.
-
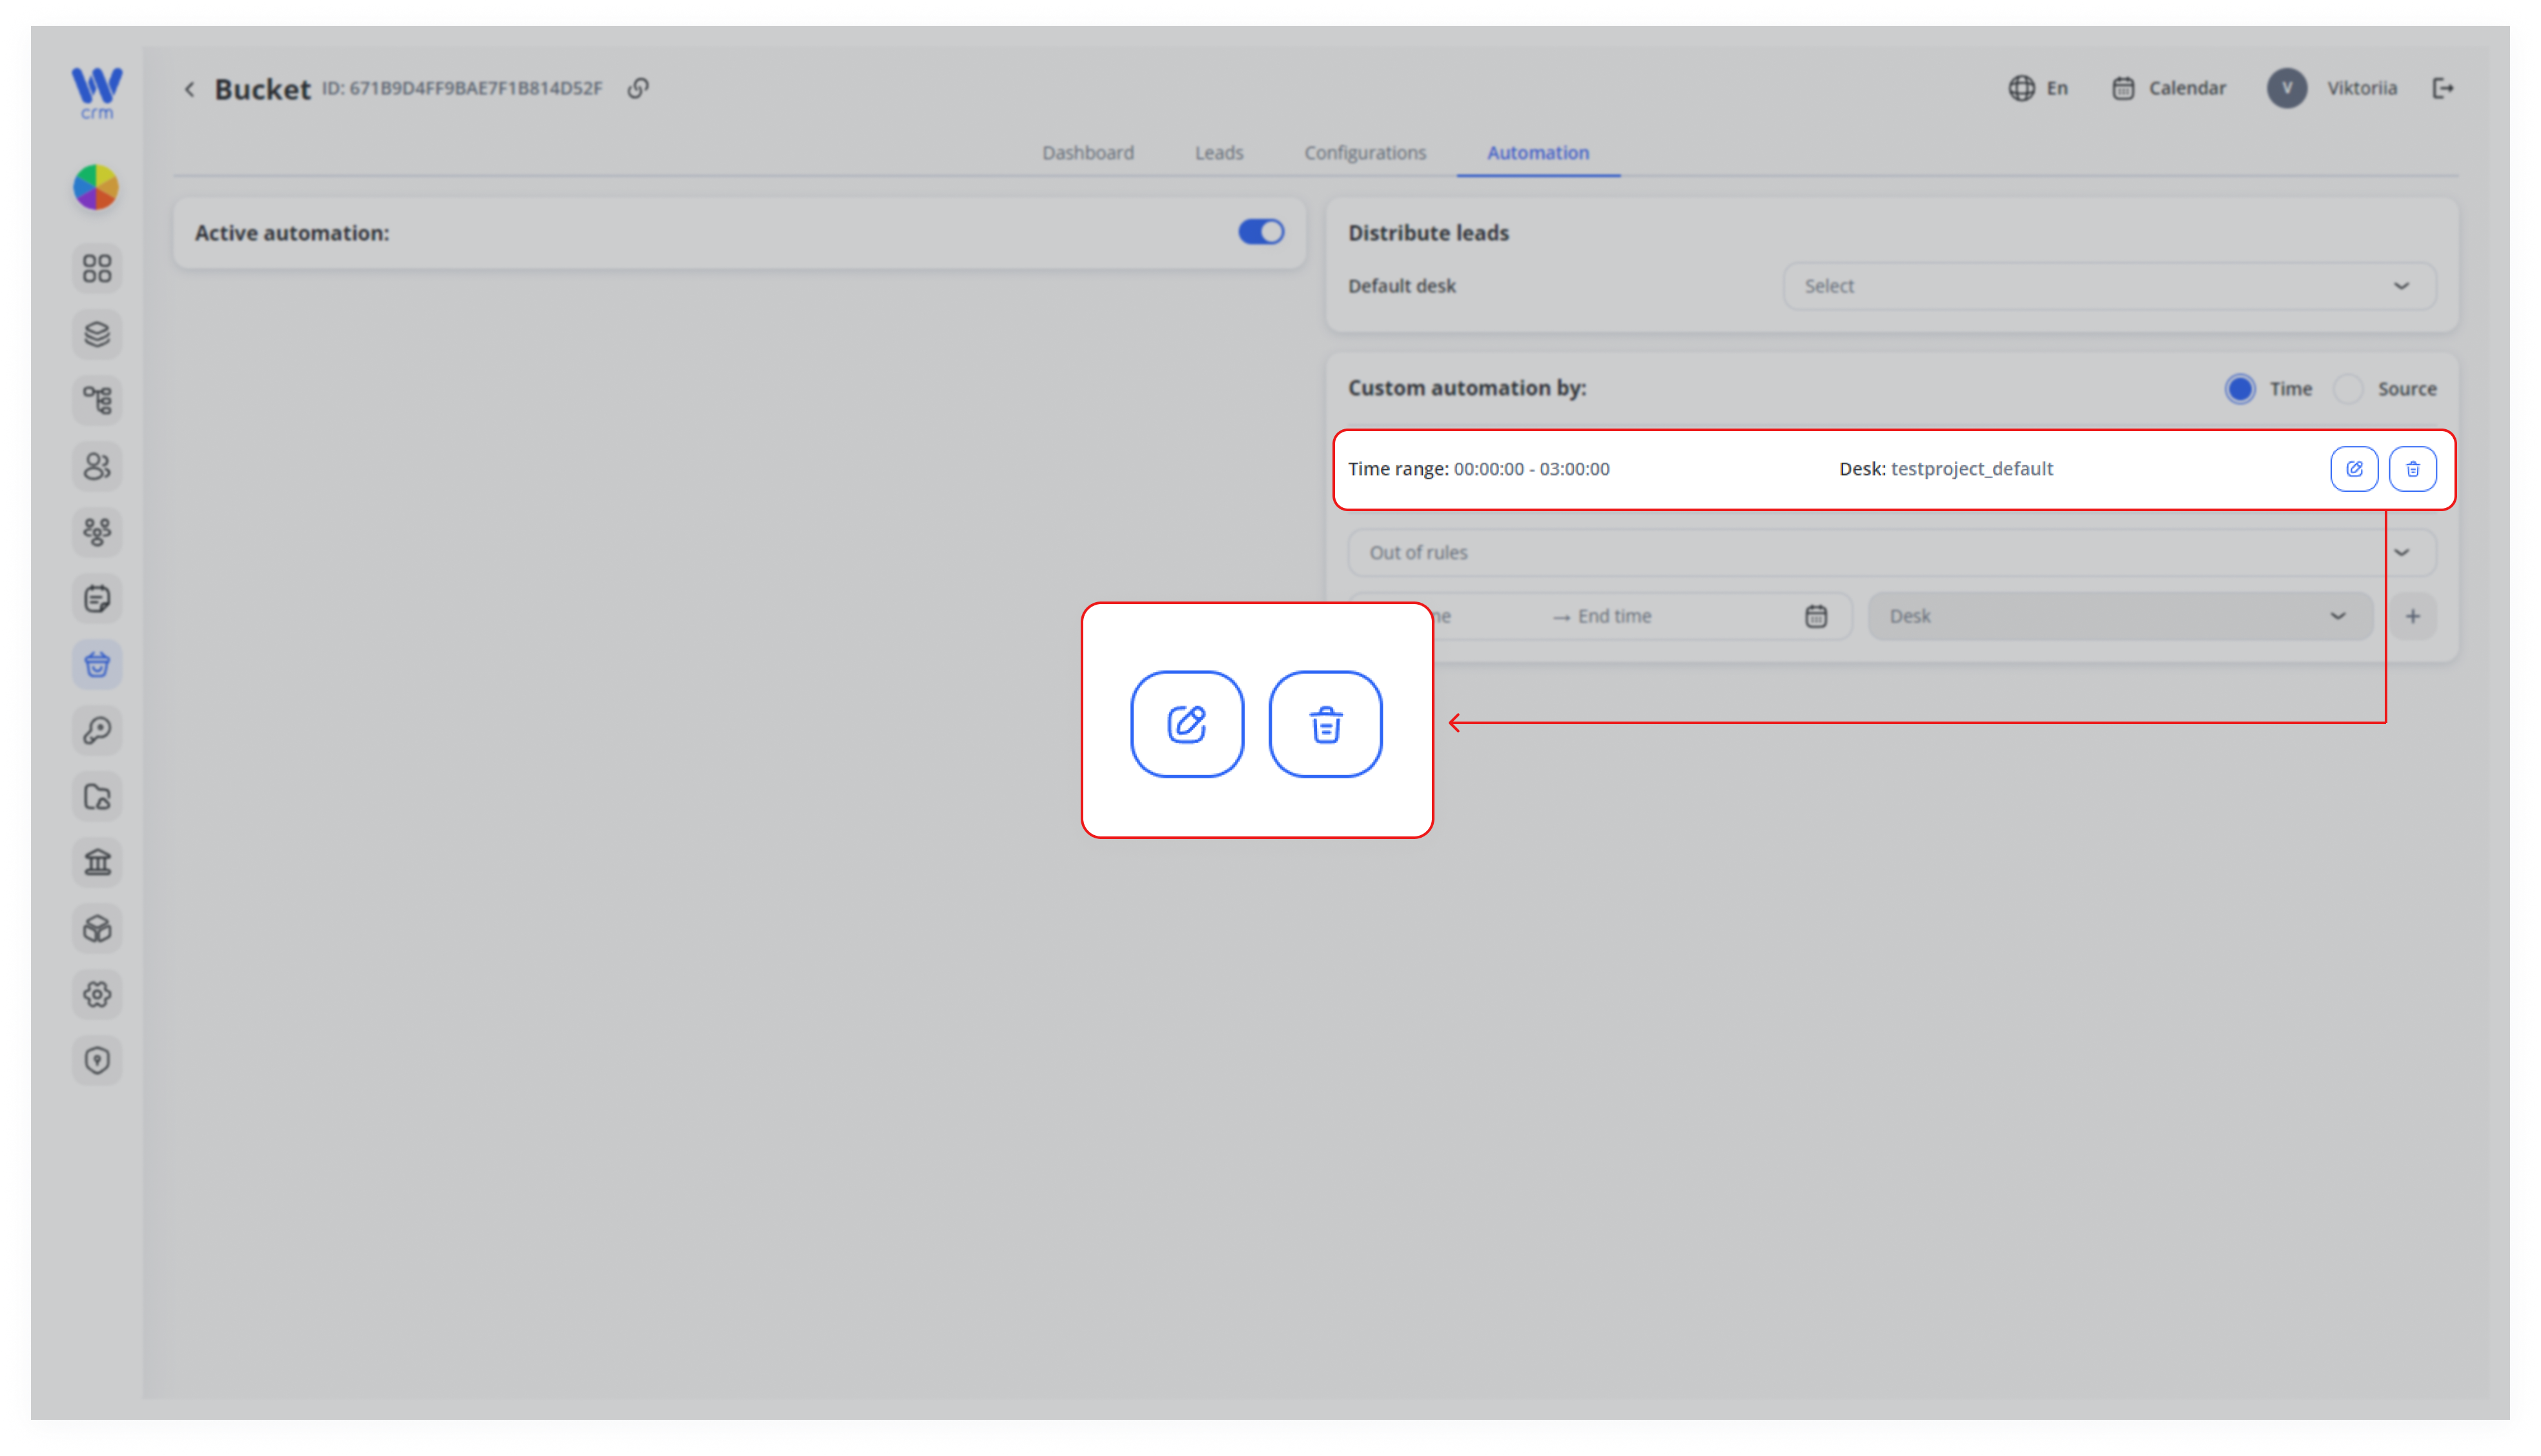
You can edit or delete all created periods by clicking the relevant icons.
-
-
3. For custom automation by source:
-
-
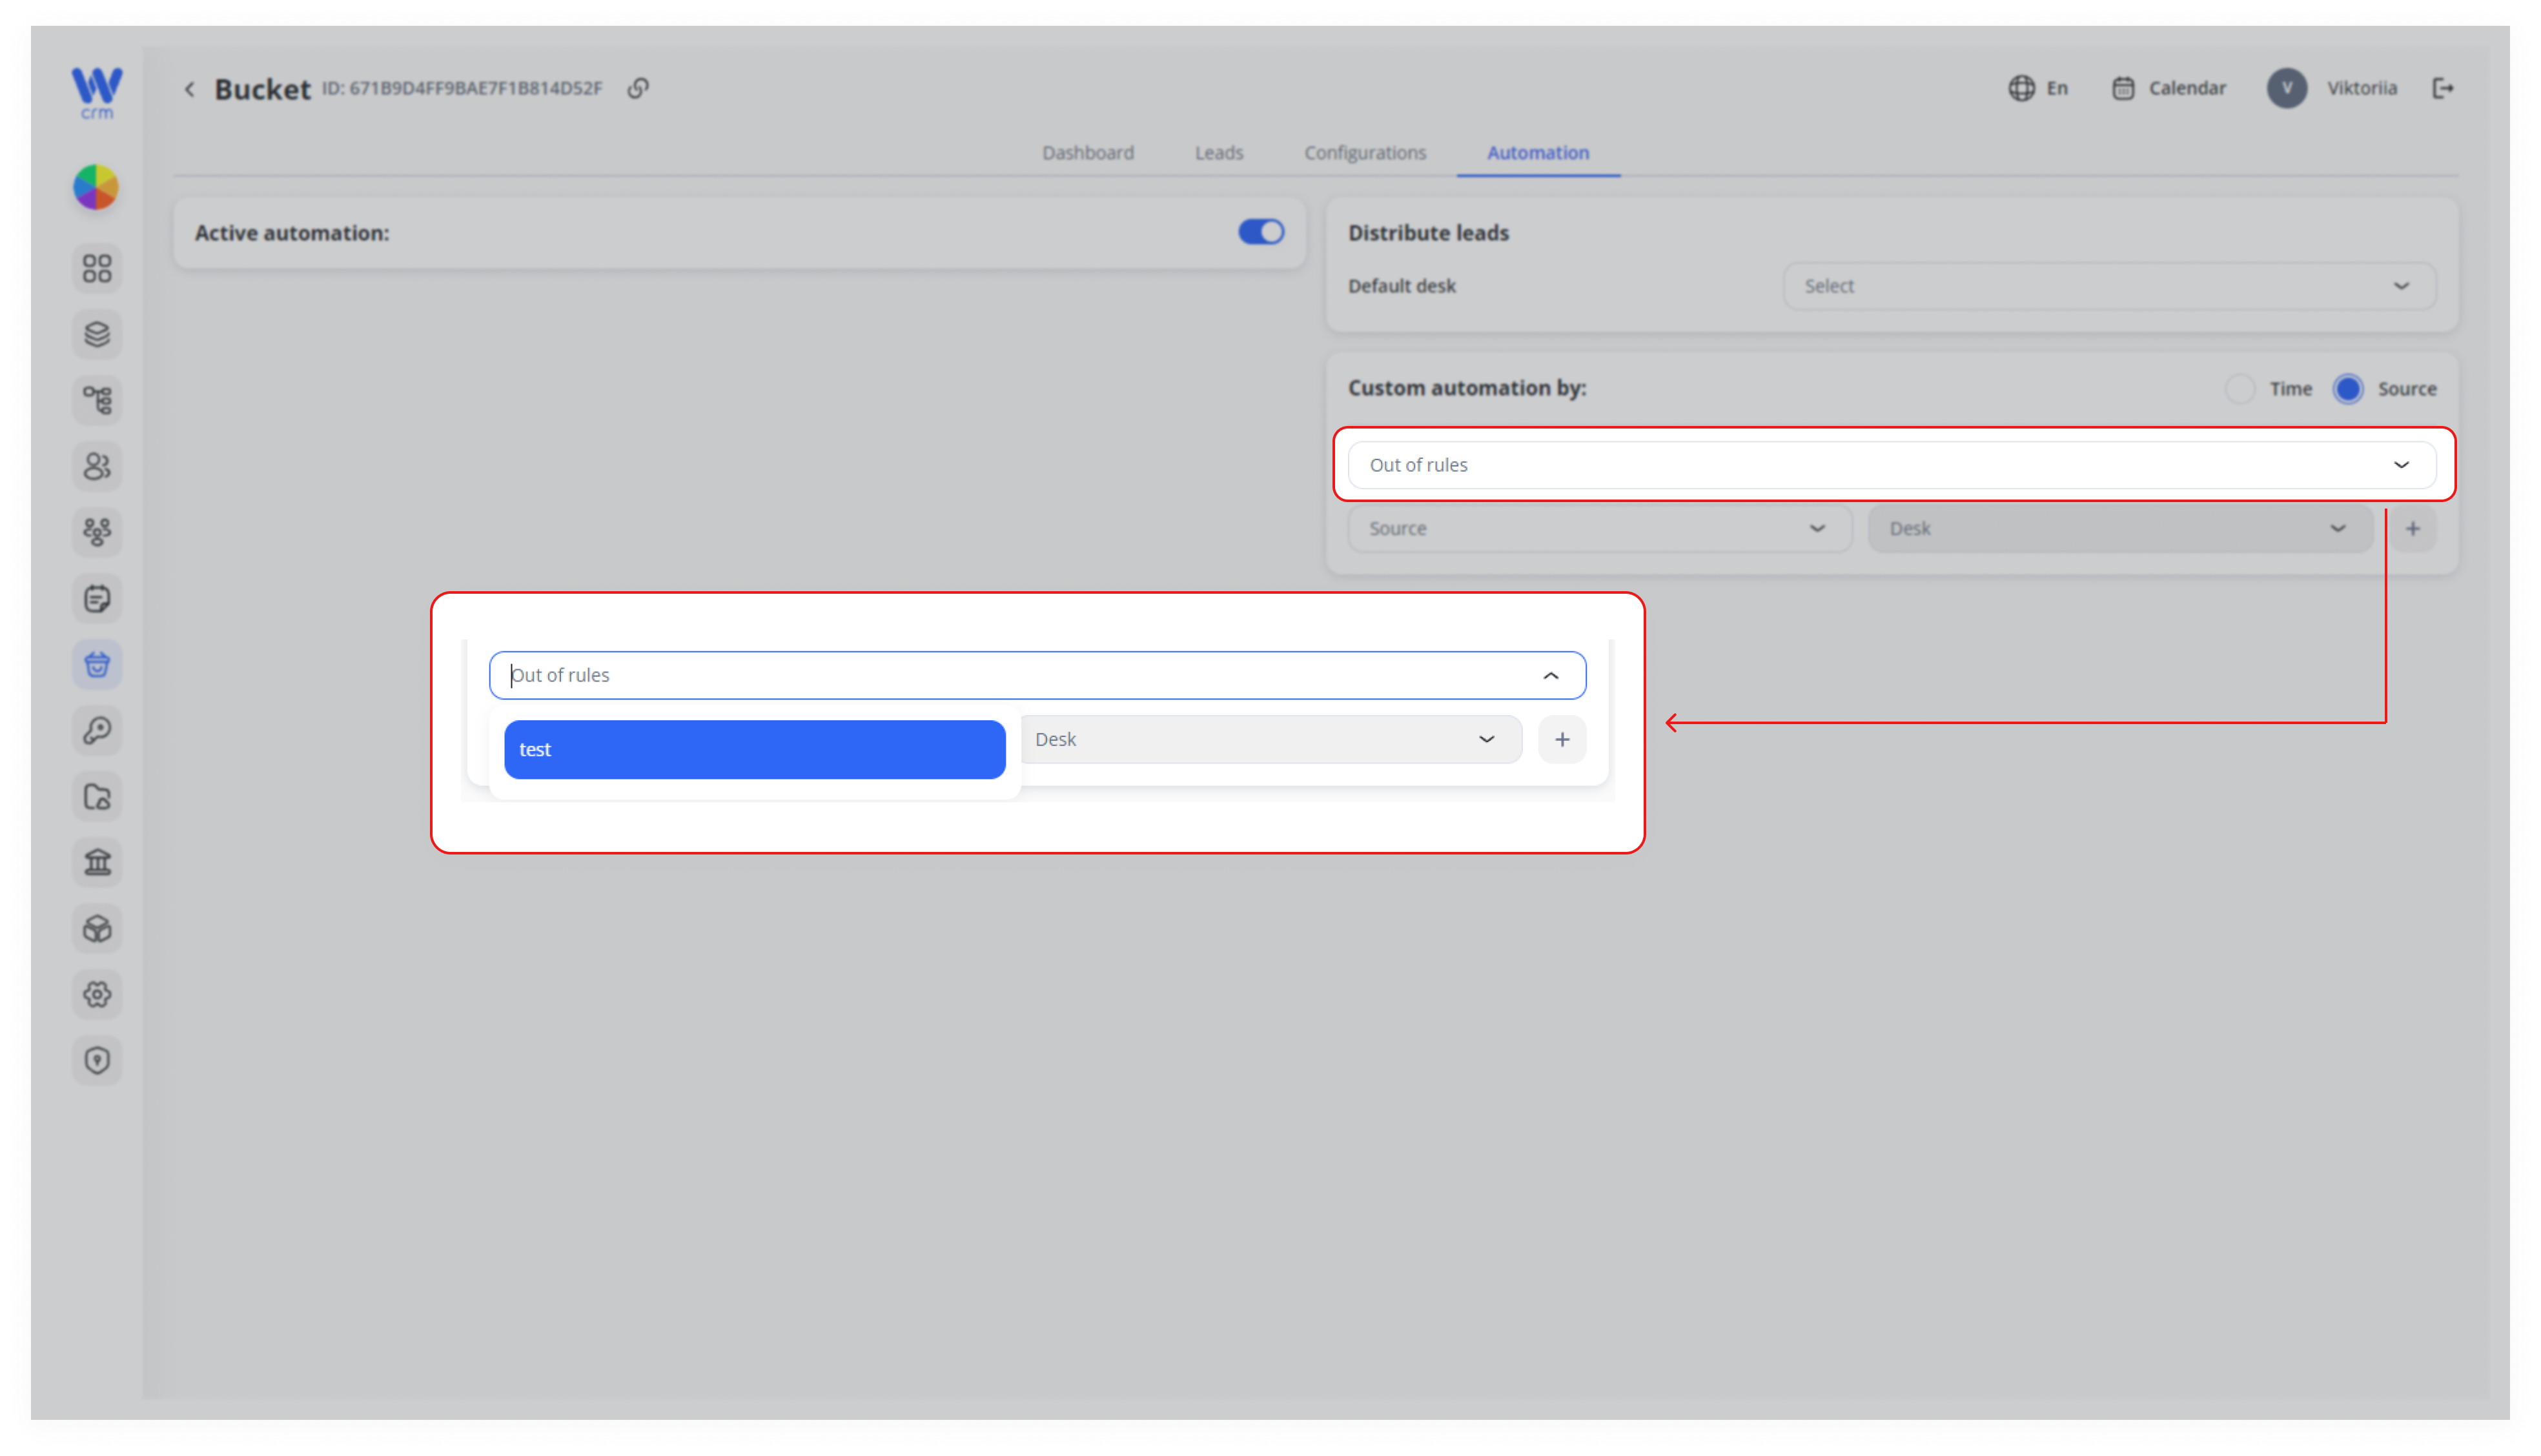
- Select the Out of rules desk from the drop-down list. Clients that do not match within the specified sources will be assigned here.
-
-
-
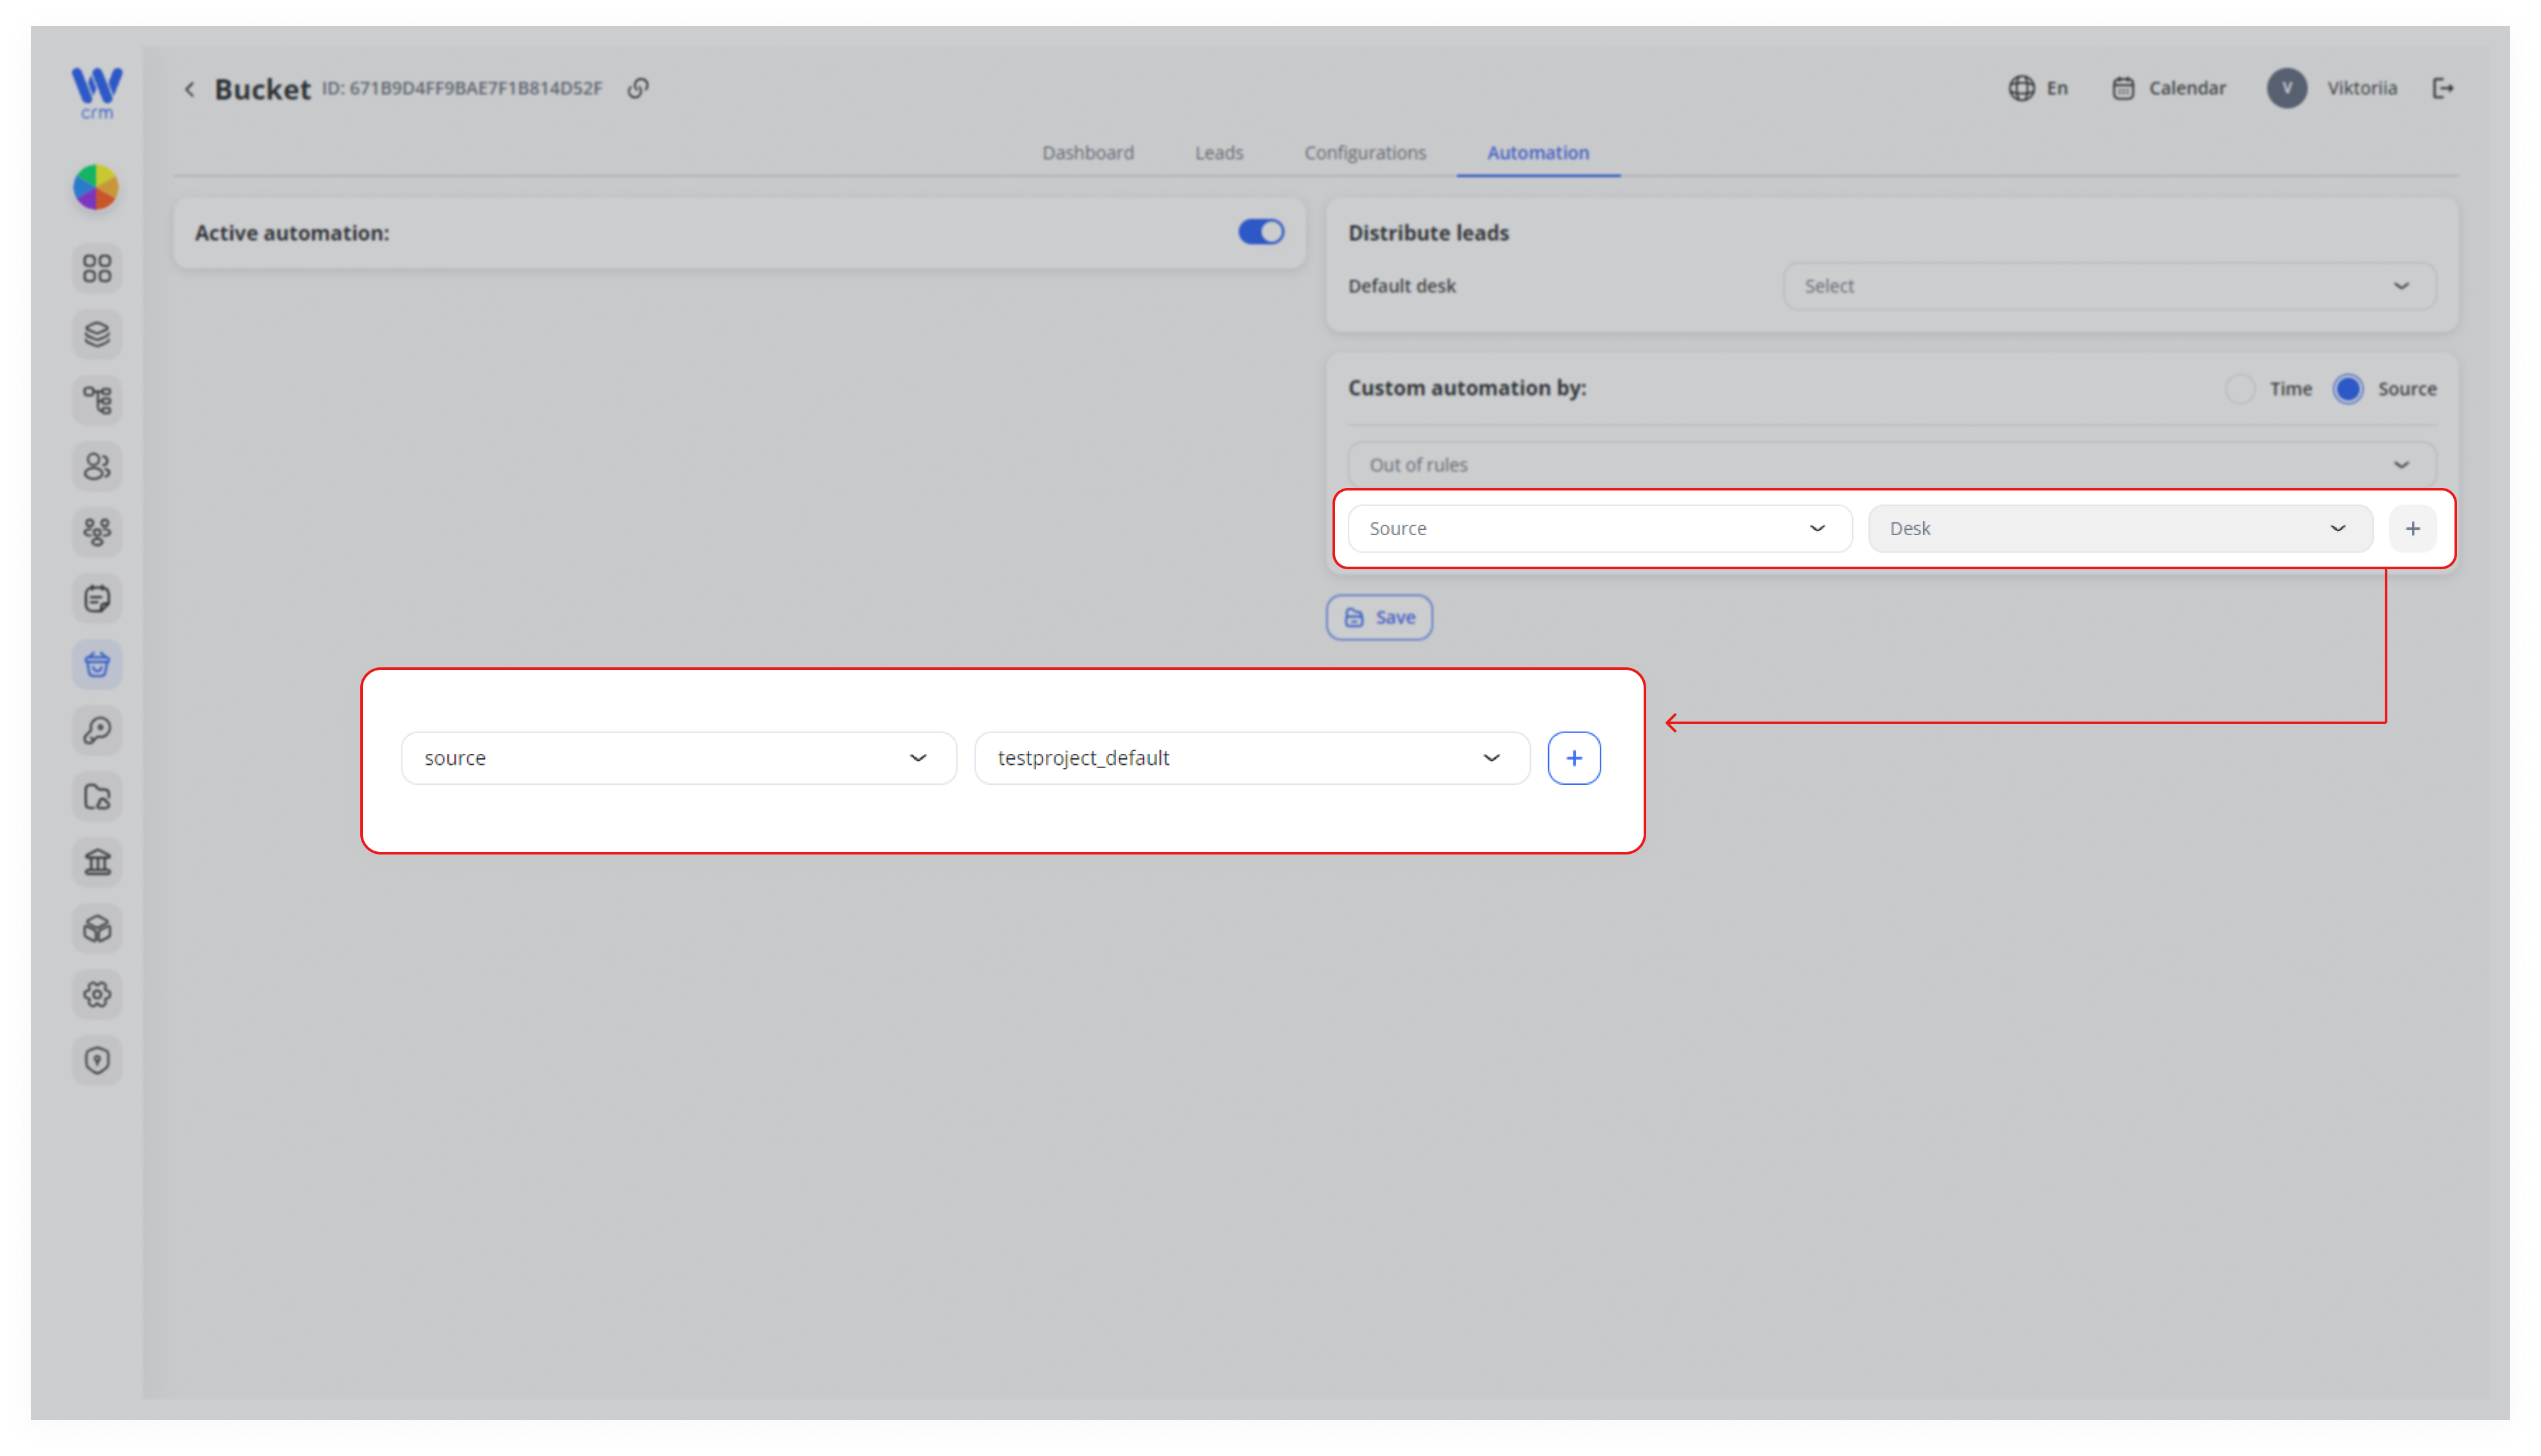
- Select the Source and Desk for that source from the drop-down lists. Then click the plus icon (+).
-
-
-
-
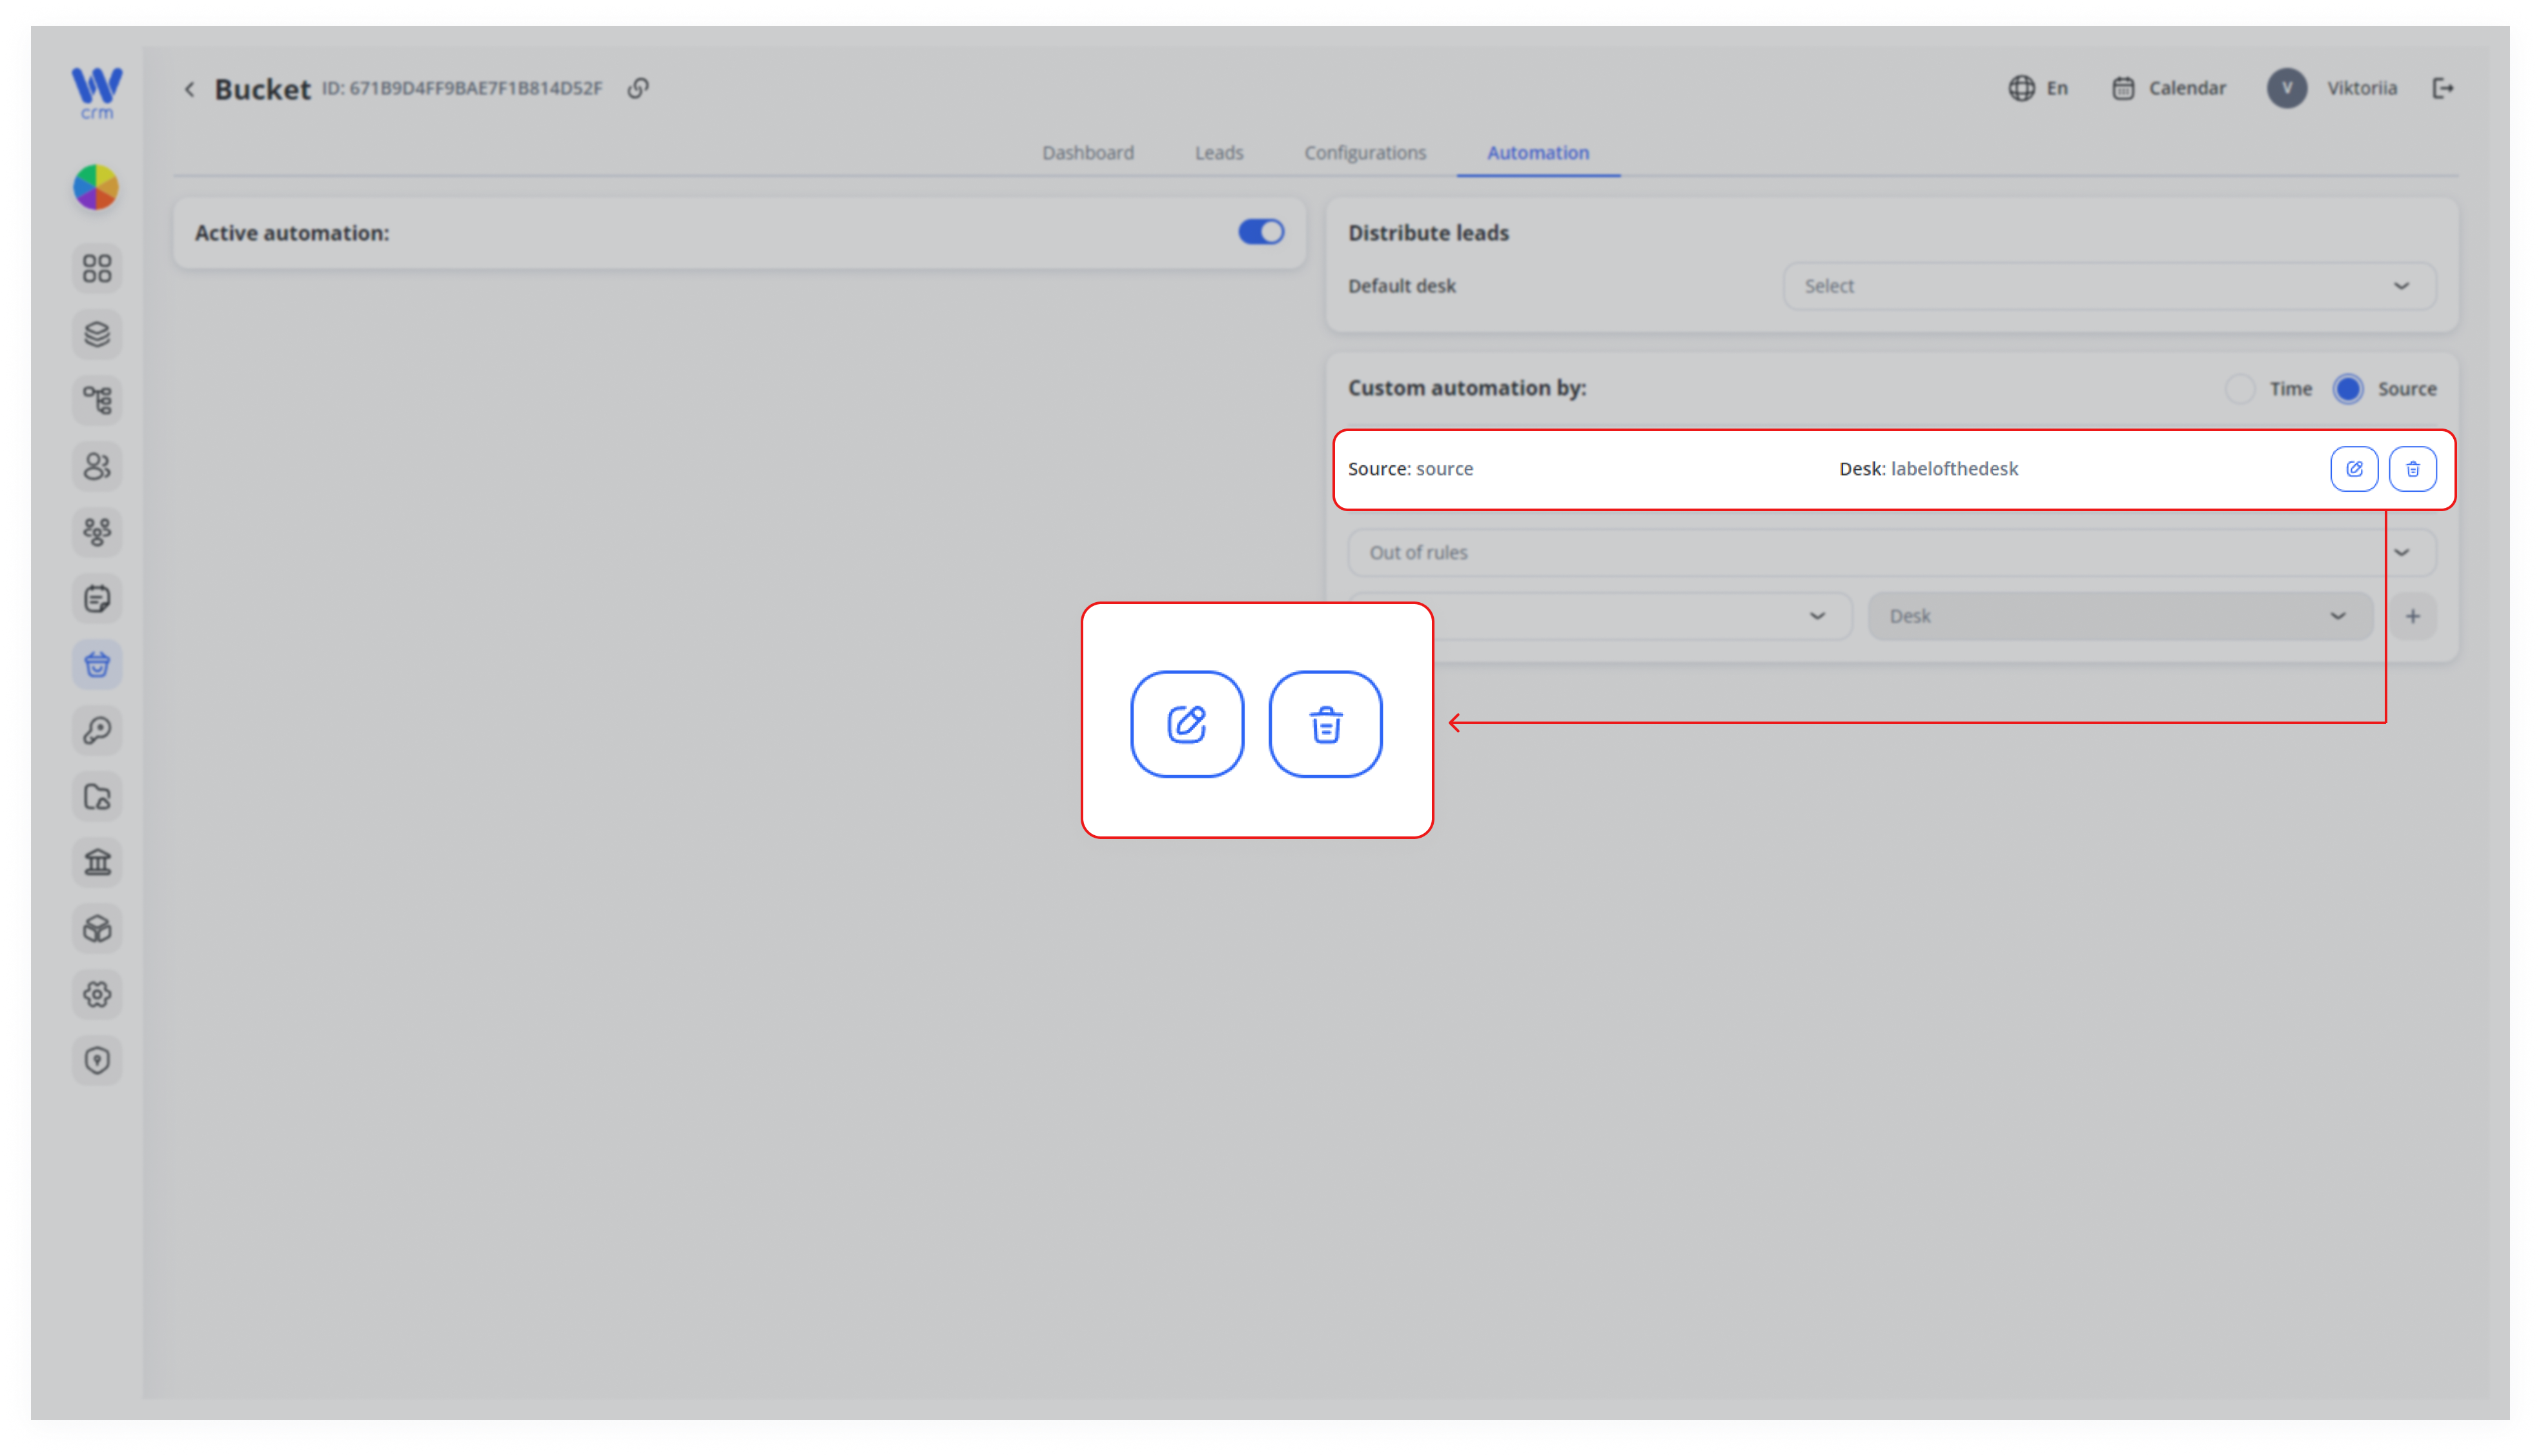
You can add as many sources as you have set up in Configurations. A new line for adding a source will appear once you have added the previous one.
-
You
cancan edit or delete all created sources by clicking the relevant icons.
-
-
4. Click Click Save to apply changes.