
9. How to Manually Assign Leads to Desks
While the Automation section streamlines lead distribution, you can always take direct control by manually assigning individual or multiple leads to any desk. This is useful for special cases or overrides.
To manually assign leads to desks:
2. Click on the Assign icon. If the icon is gray and not clickable,Find the lead hasyou already been processed and assignedwant to a desk.assign.
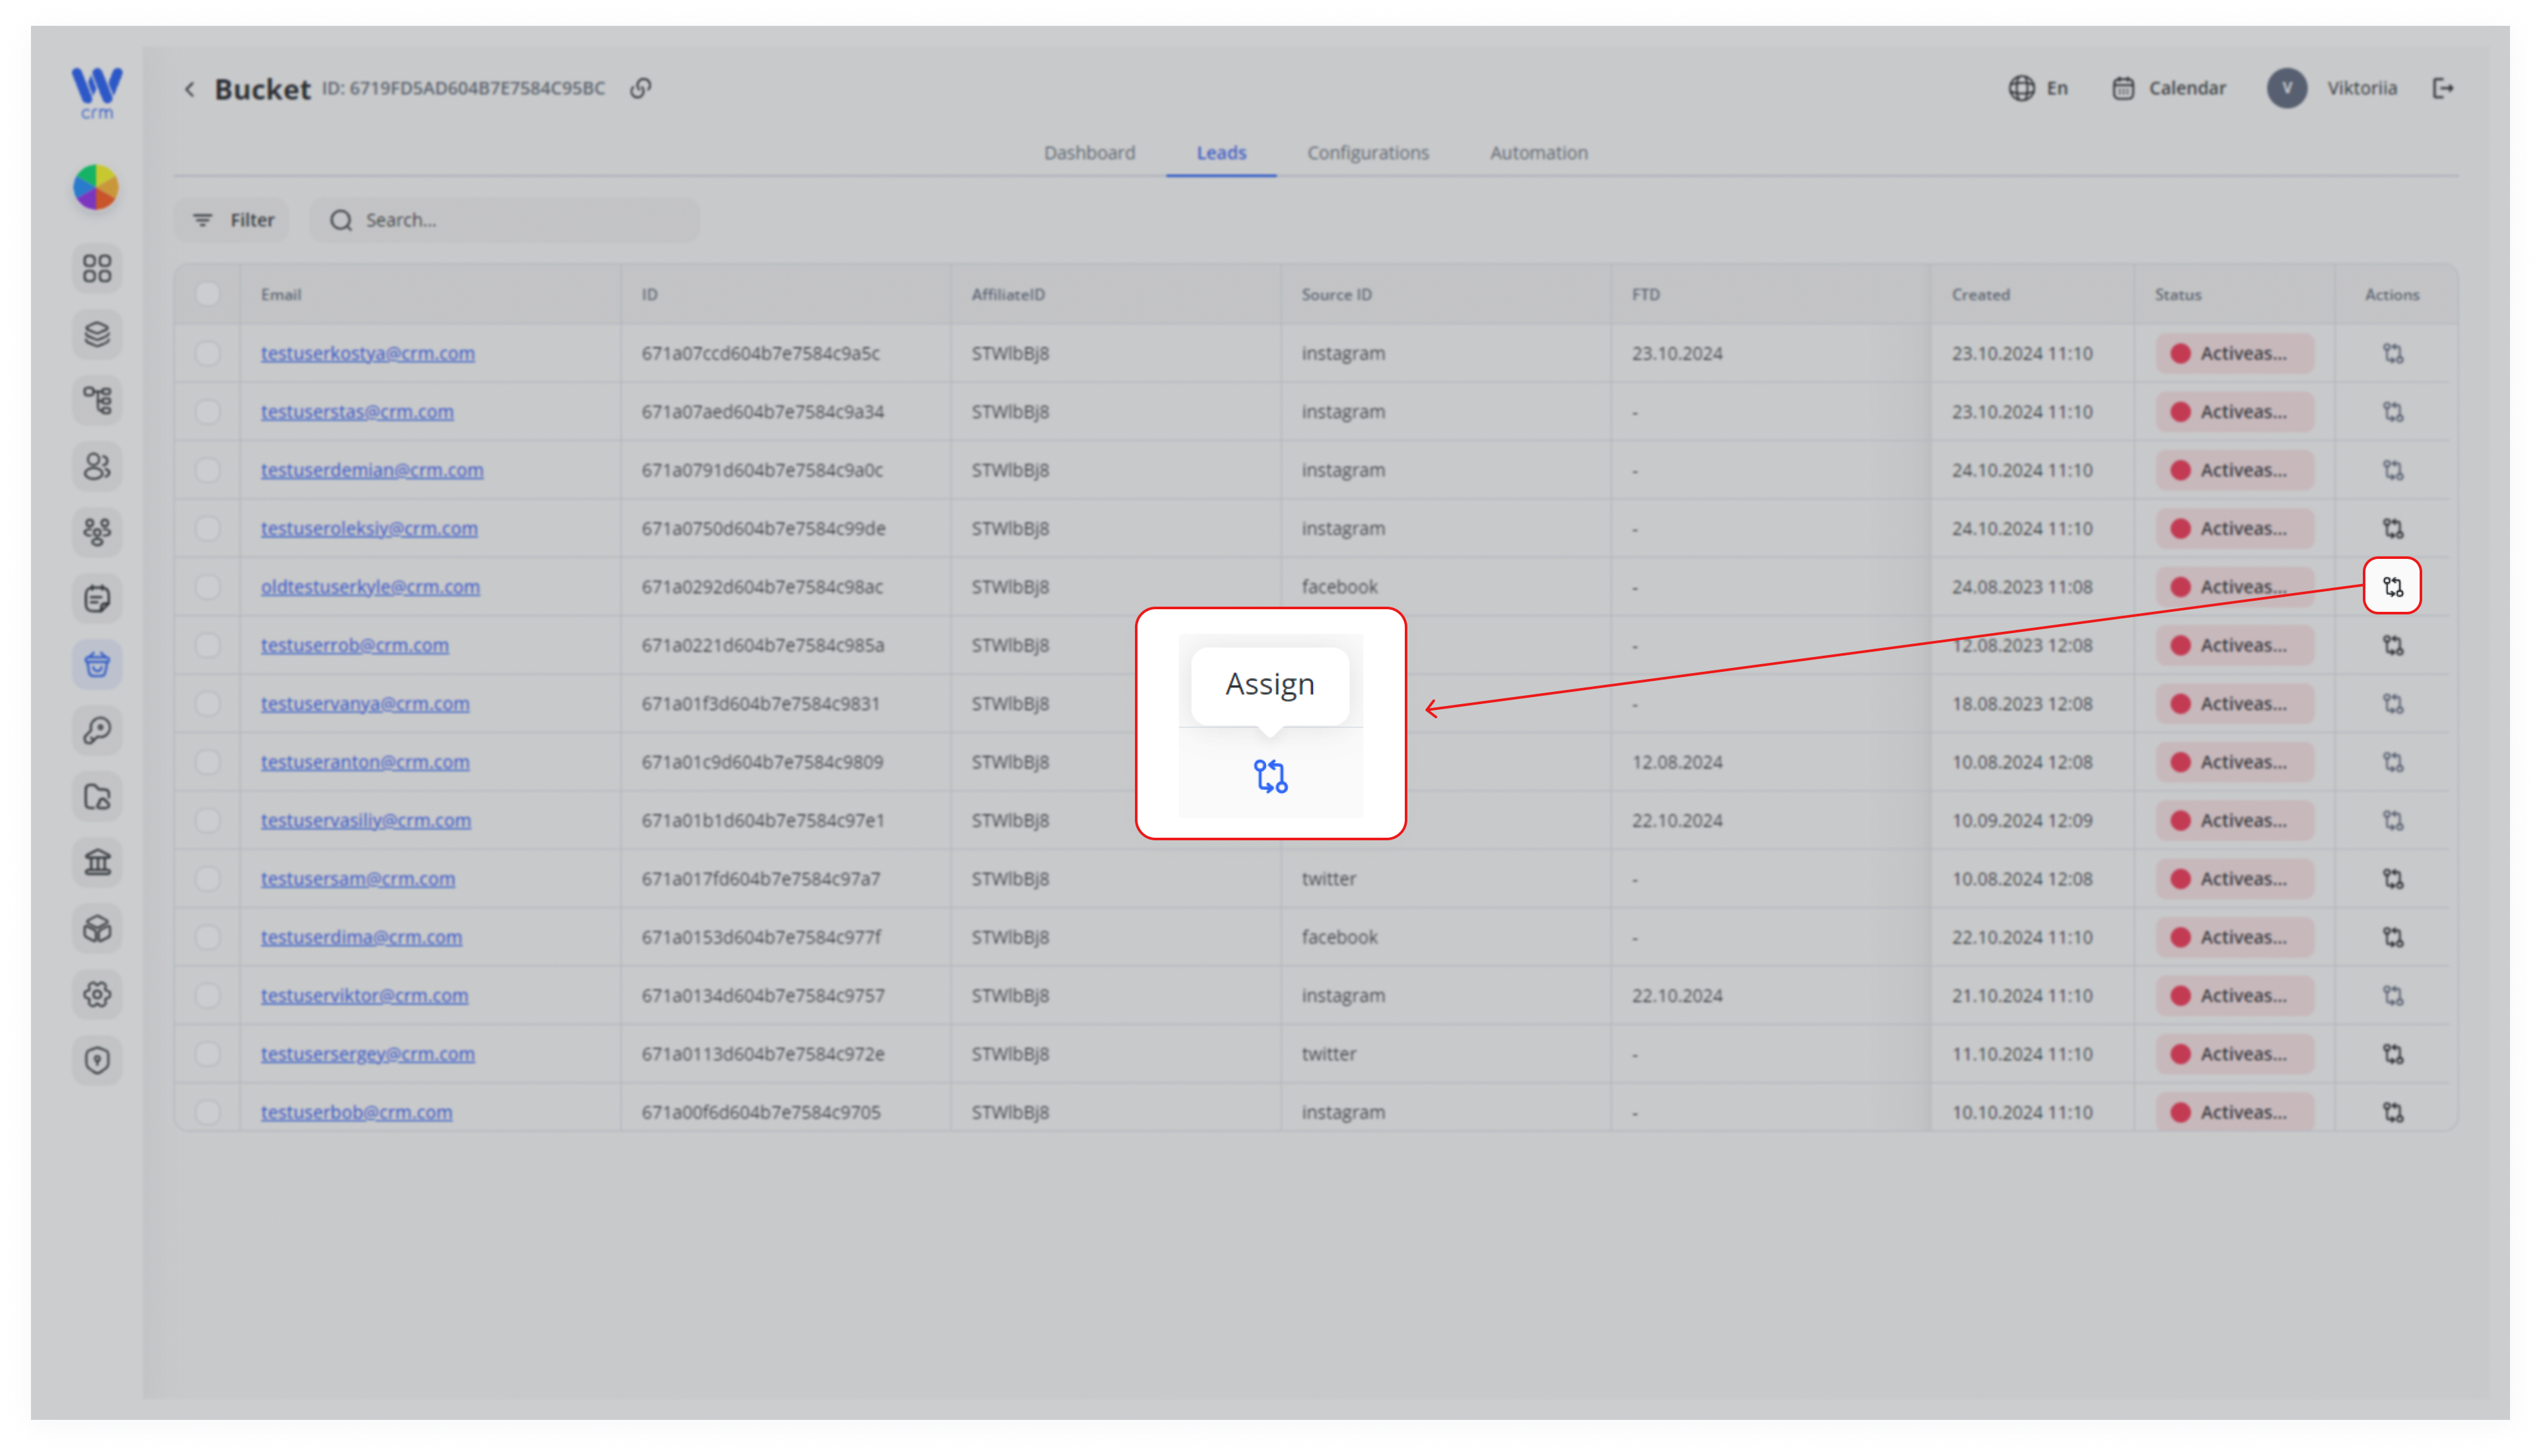
3. To assign multiple leads toClick the same desk, check the boxes next to the lead emails and then click Assign icon at the end of that lead’s row.
- If the icon is gray and unclickable, that lead has already been assigned (either manually or via automation).
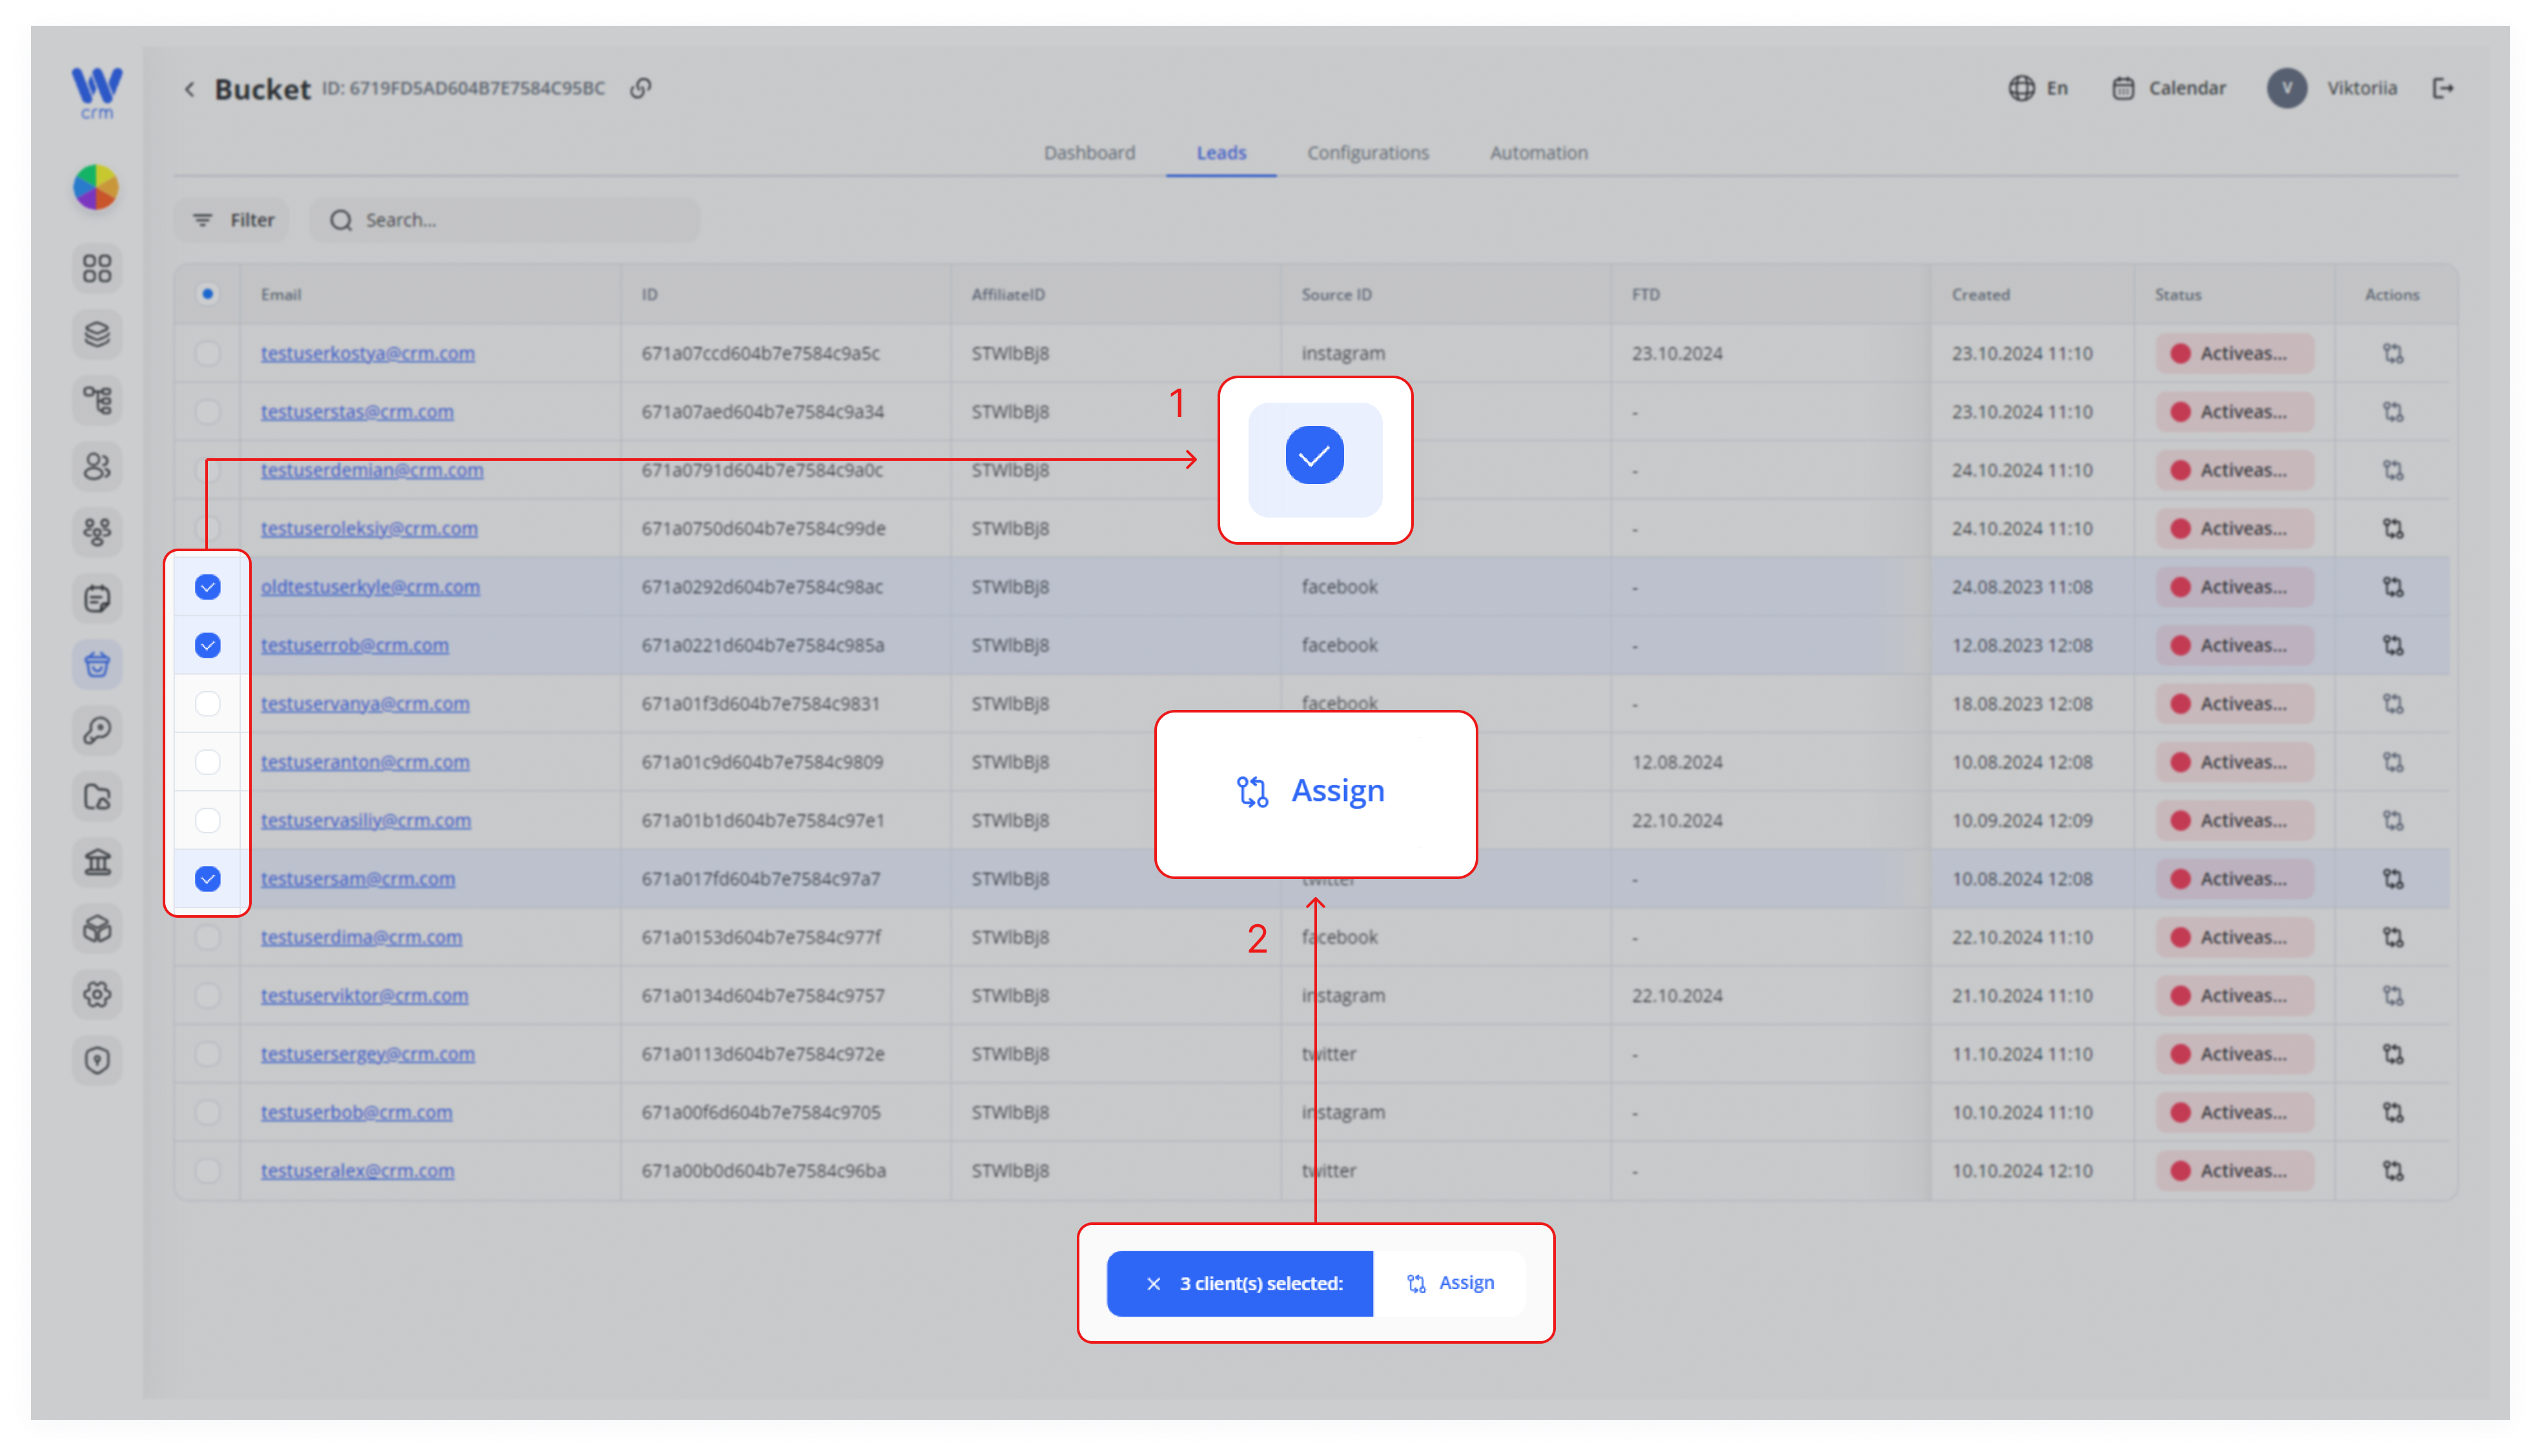
4. SelectIn athe deskright-hand drawer, choose the Desk from the drop-down list.
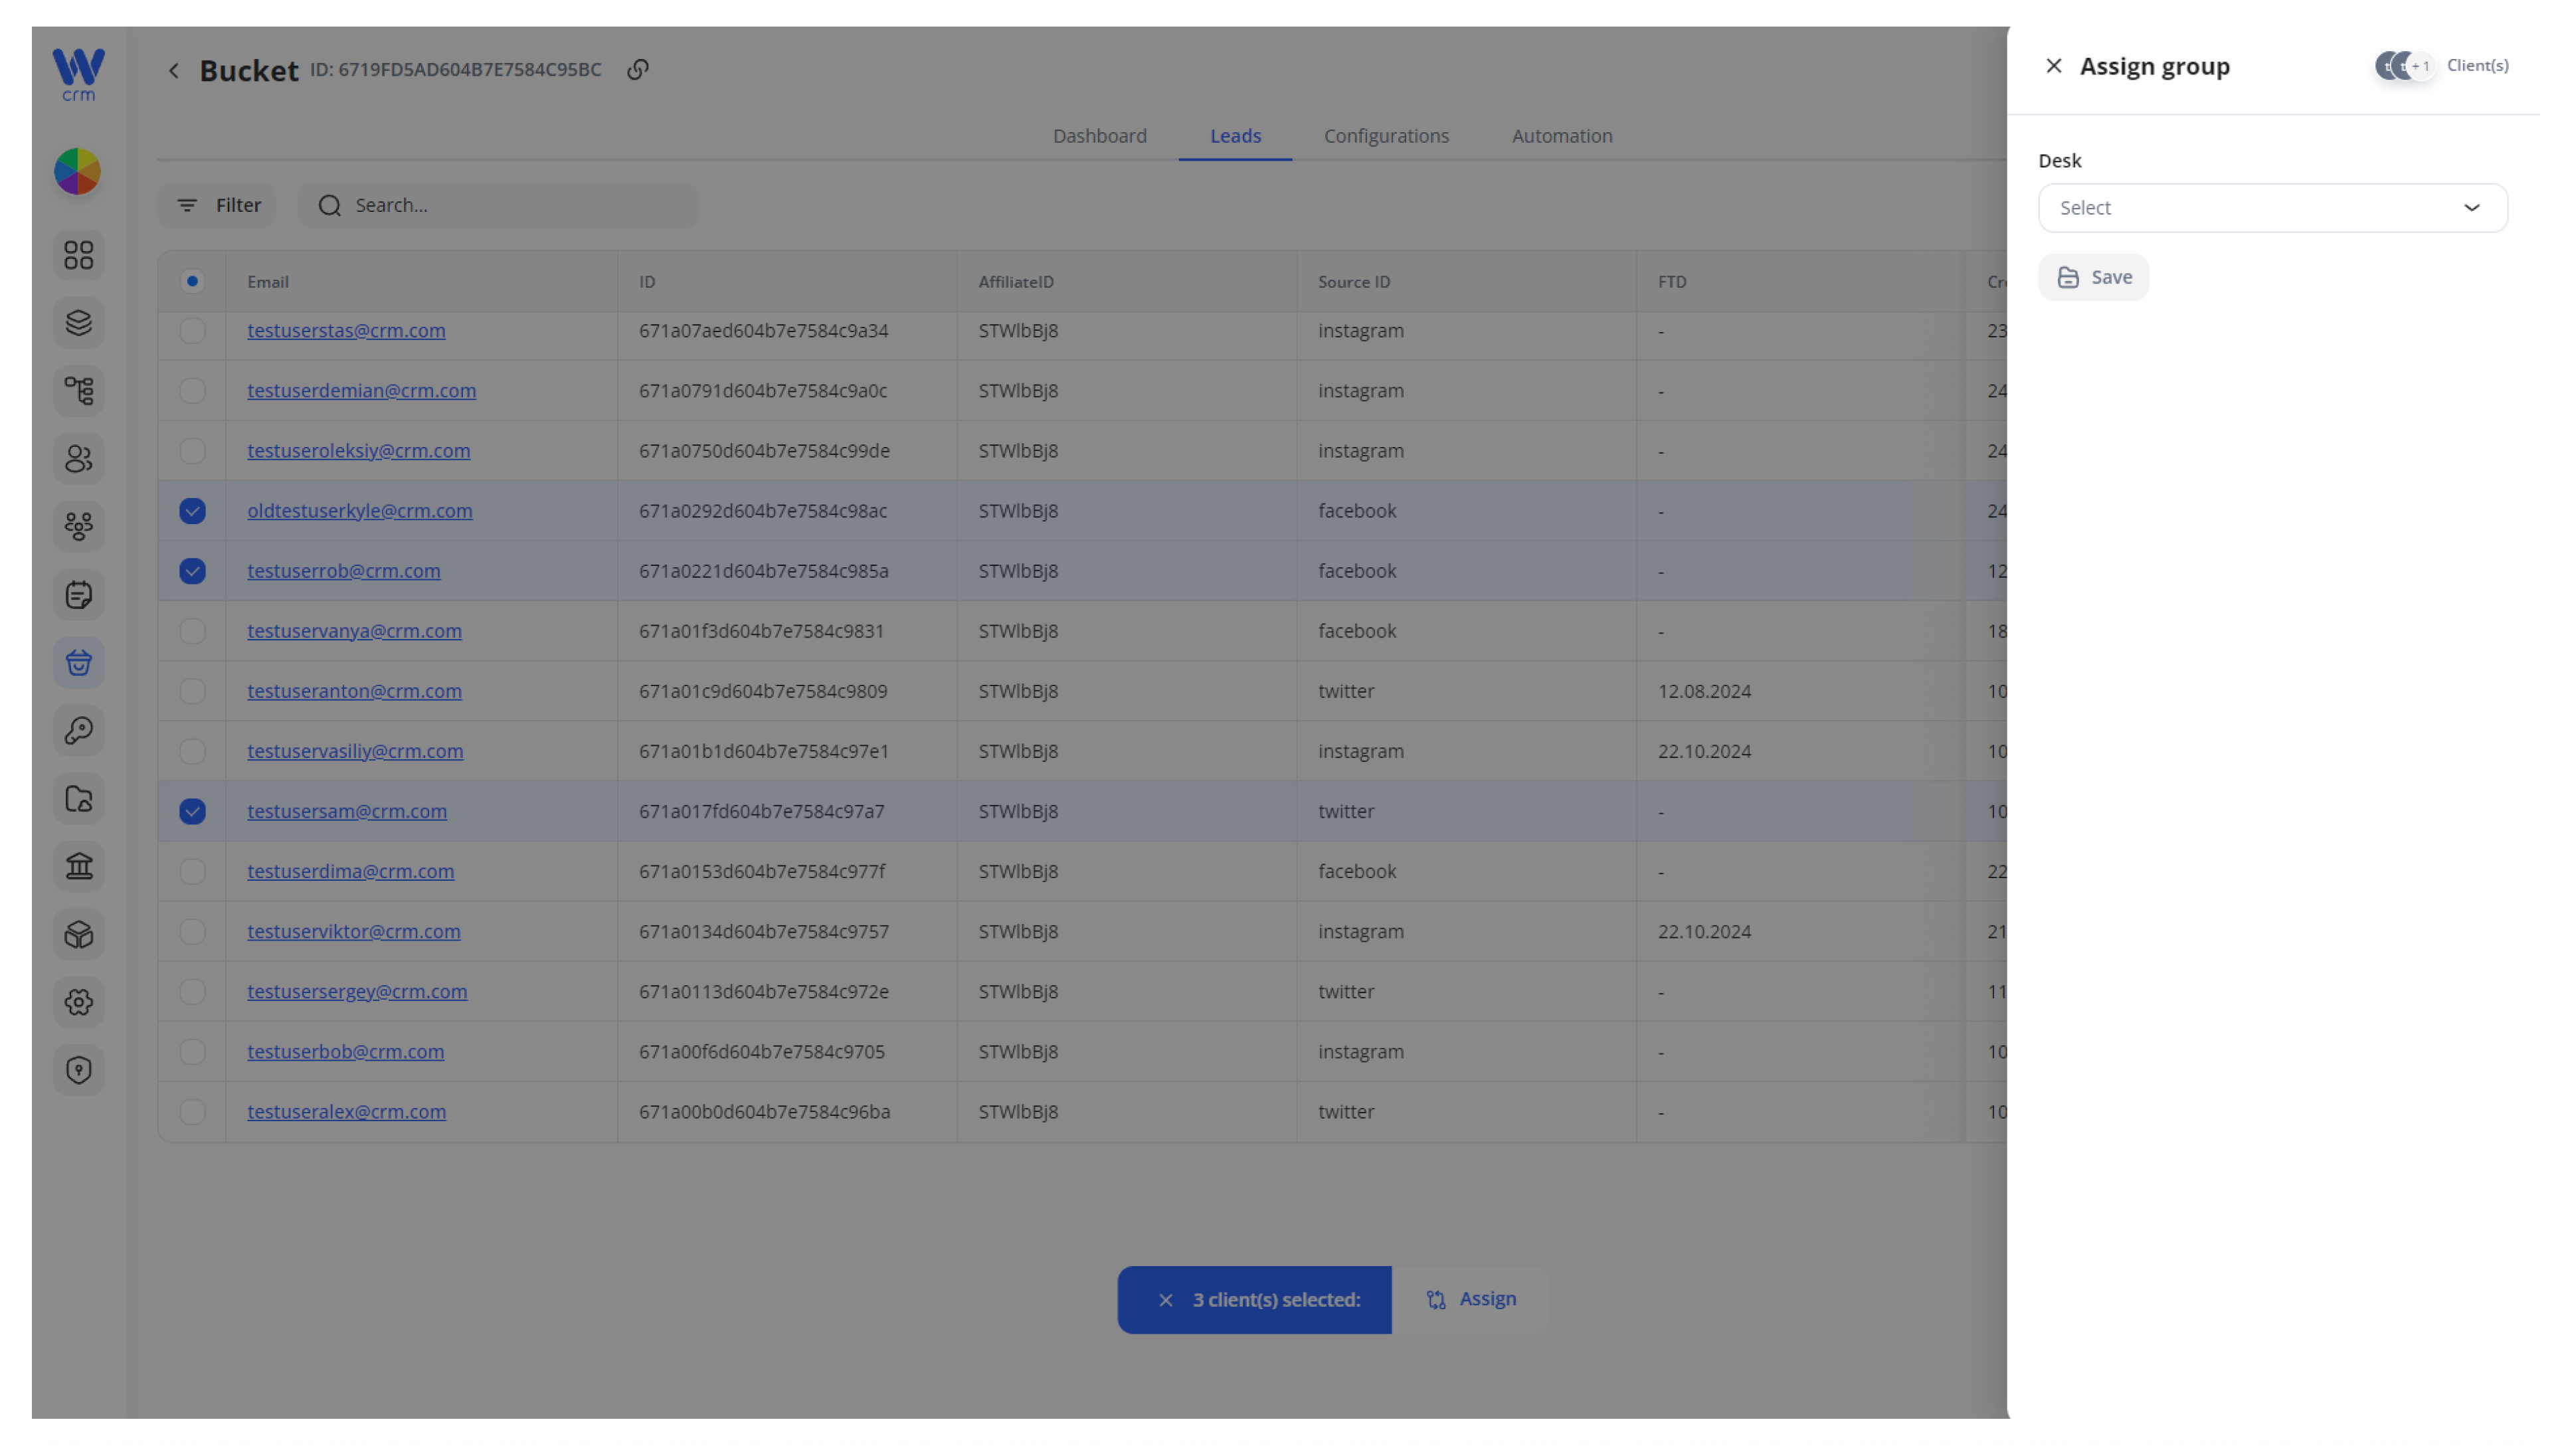
5. Click Save to applyapply. The lead’s Status column will update to reflect the changes.new desk assignment.
Note: You can assign a lead to the desk through the Buckets module only once. To reassign a client, use the Clients module.
Tips & Best Practices
-
Quick Unassign/Reassign: To change a single lead’s desk after assignment, simply click its (now blue) Assign icon again and pick a different desk.
-
Bulk Moves: Use the checkbox column to handle large reassignments—e.g., when teams change or campaigns close.
-
Audit Trail: Each assignment action updates the lead’s Status badge; you can filter by status to review who still needs manual assignment.
With these steps, you retain full control over client flow—whether you’re handling exceptions one-by-one or orchestrating bulk moves across your teams.