
9. How to Export Clients
The Export feature offers a simple and efficient way to manage and retrieve large volumes of client data. With just a few clicks, you can export client records in a CSV format for offline analysis, reporting, backups, or seamless data migration. The export functionality is designed to support both complete data exports and customized exports by applying filters based on your business needs. This flexibility ensures that you can access the exact data you need for various operational purposes—whether it's regular backups, analyzing client trends, or preparing data for integration with other systems.
Use Cases
-
Regular Data Backup
Export all client records in CSV format regularly for secure offline storage, ensuring compliance and quick recovery in case of system issues. -
Custom Data Analysis
Export filtered data (e.g., by date range, verification status) for offline analysis and tailored reporting. -
Data Migration to Other Systems
Export client records for seamless migration or integration with other platforms, preserving client information structure.
1. Filter (Optional)
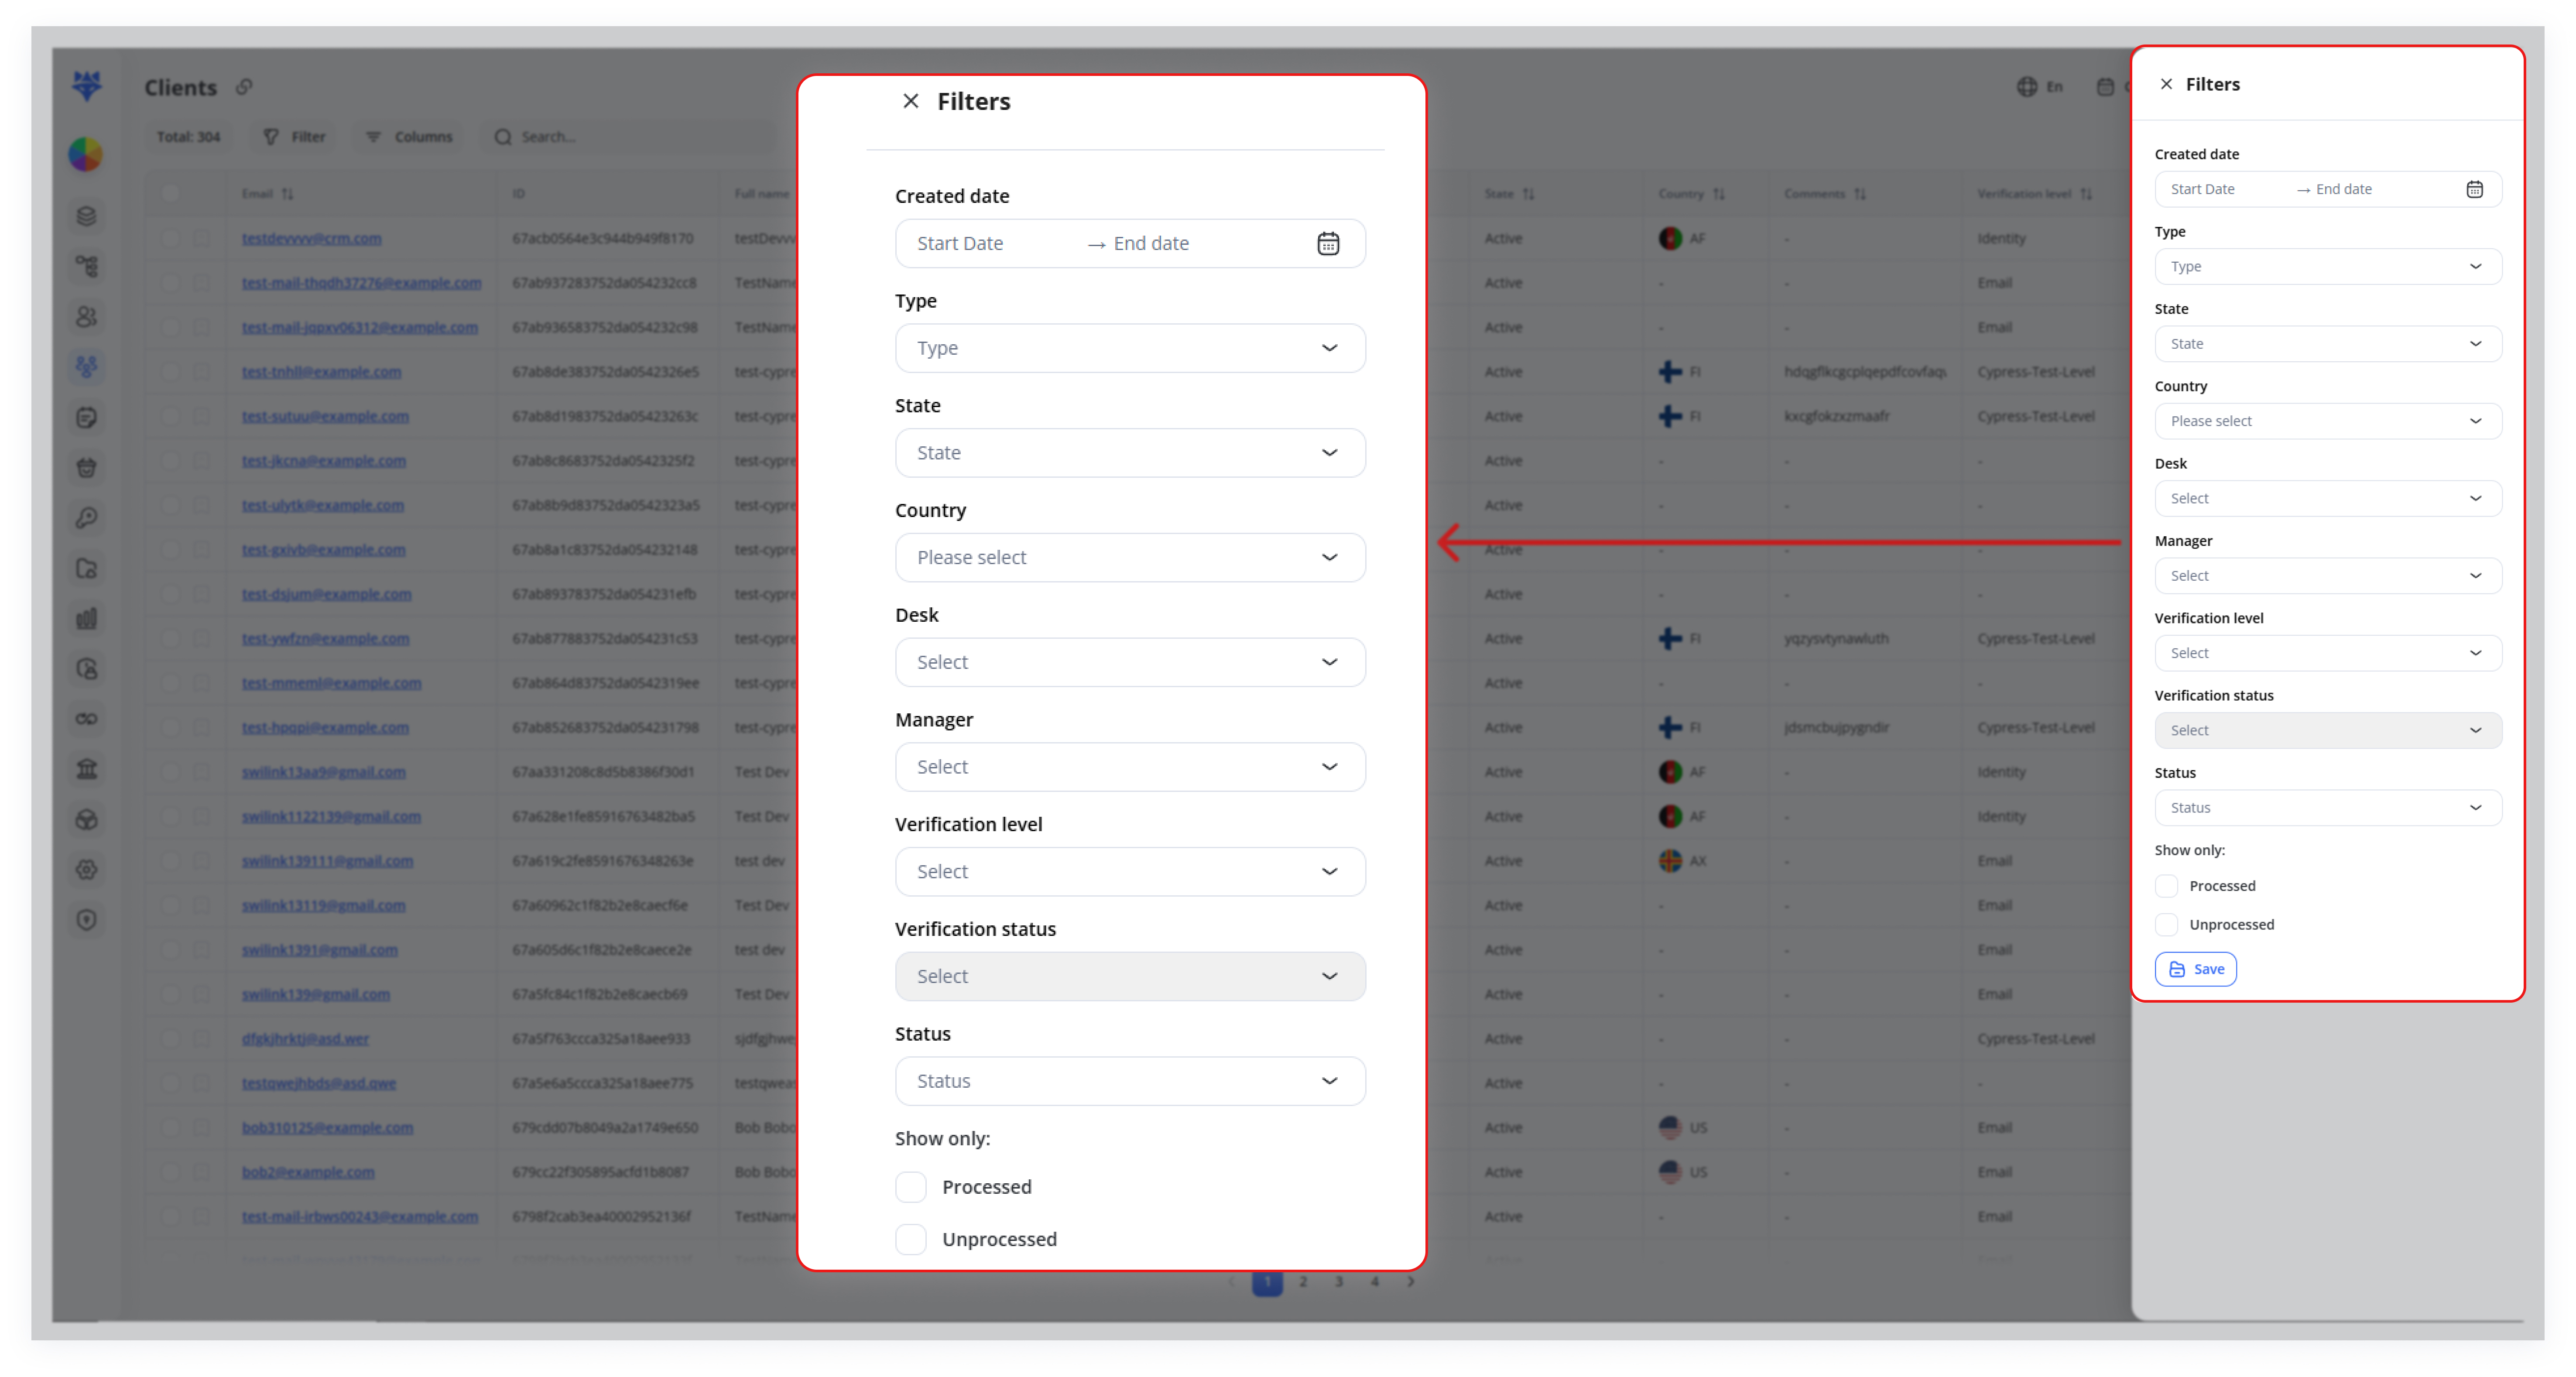
If you wish to export only a subset of clients, first use the Filter button at the top.
-
If you only need a specific segment of your clients—such as those created in the last month or those with “Pending” verification—click Filter at the top of the Clients page.
-
In the Filters panel, set your criteria (e.g. date range, State, Manager, Verification status) then click Save.
-
The main client list will refresh to show only matching records.
2. Click “Export”
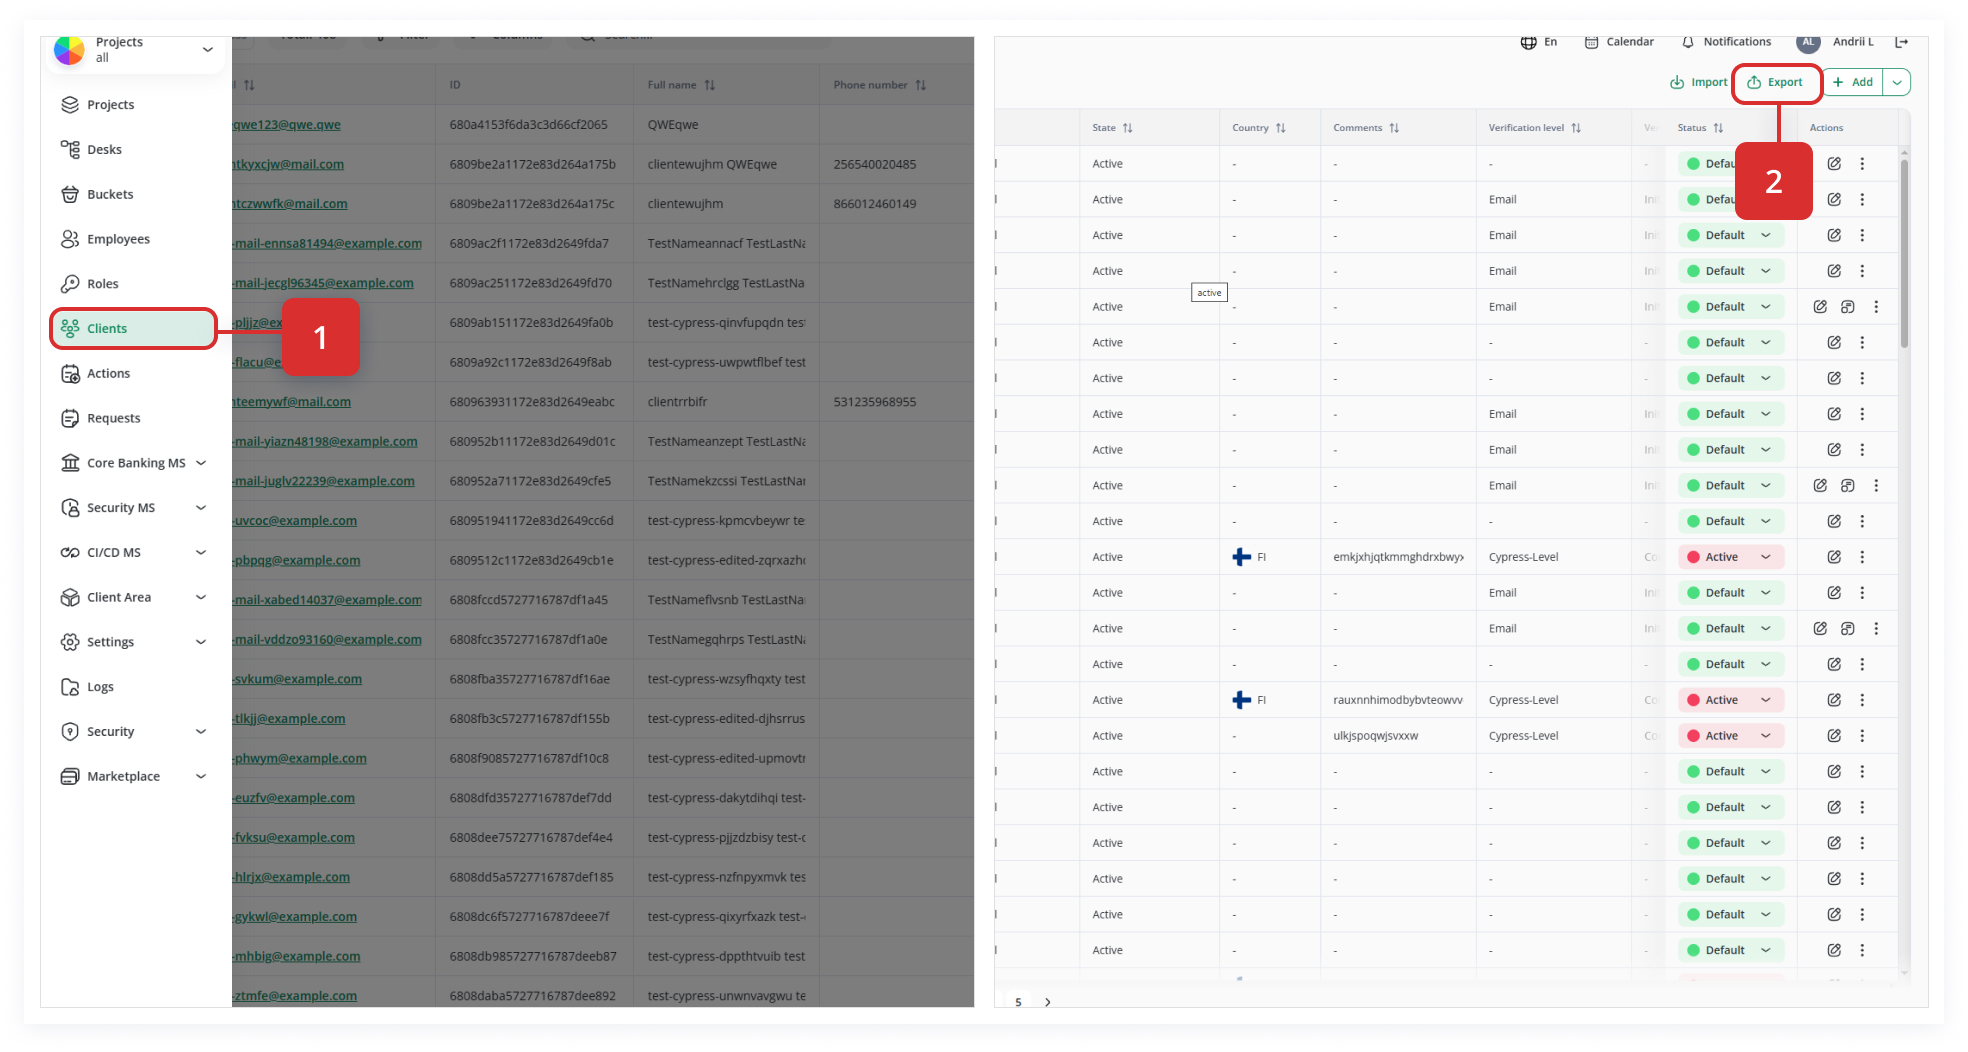
With your filtered list displayed (or with no filters if you want every client), click the Export button in the top-right corner.
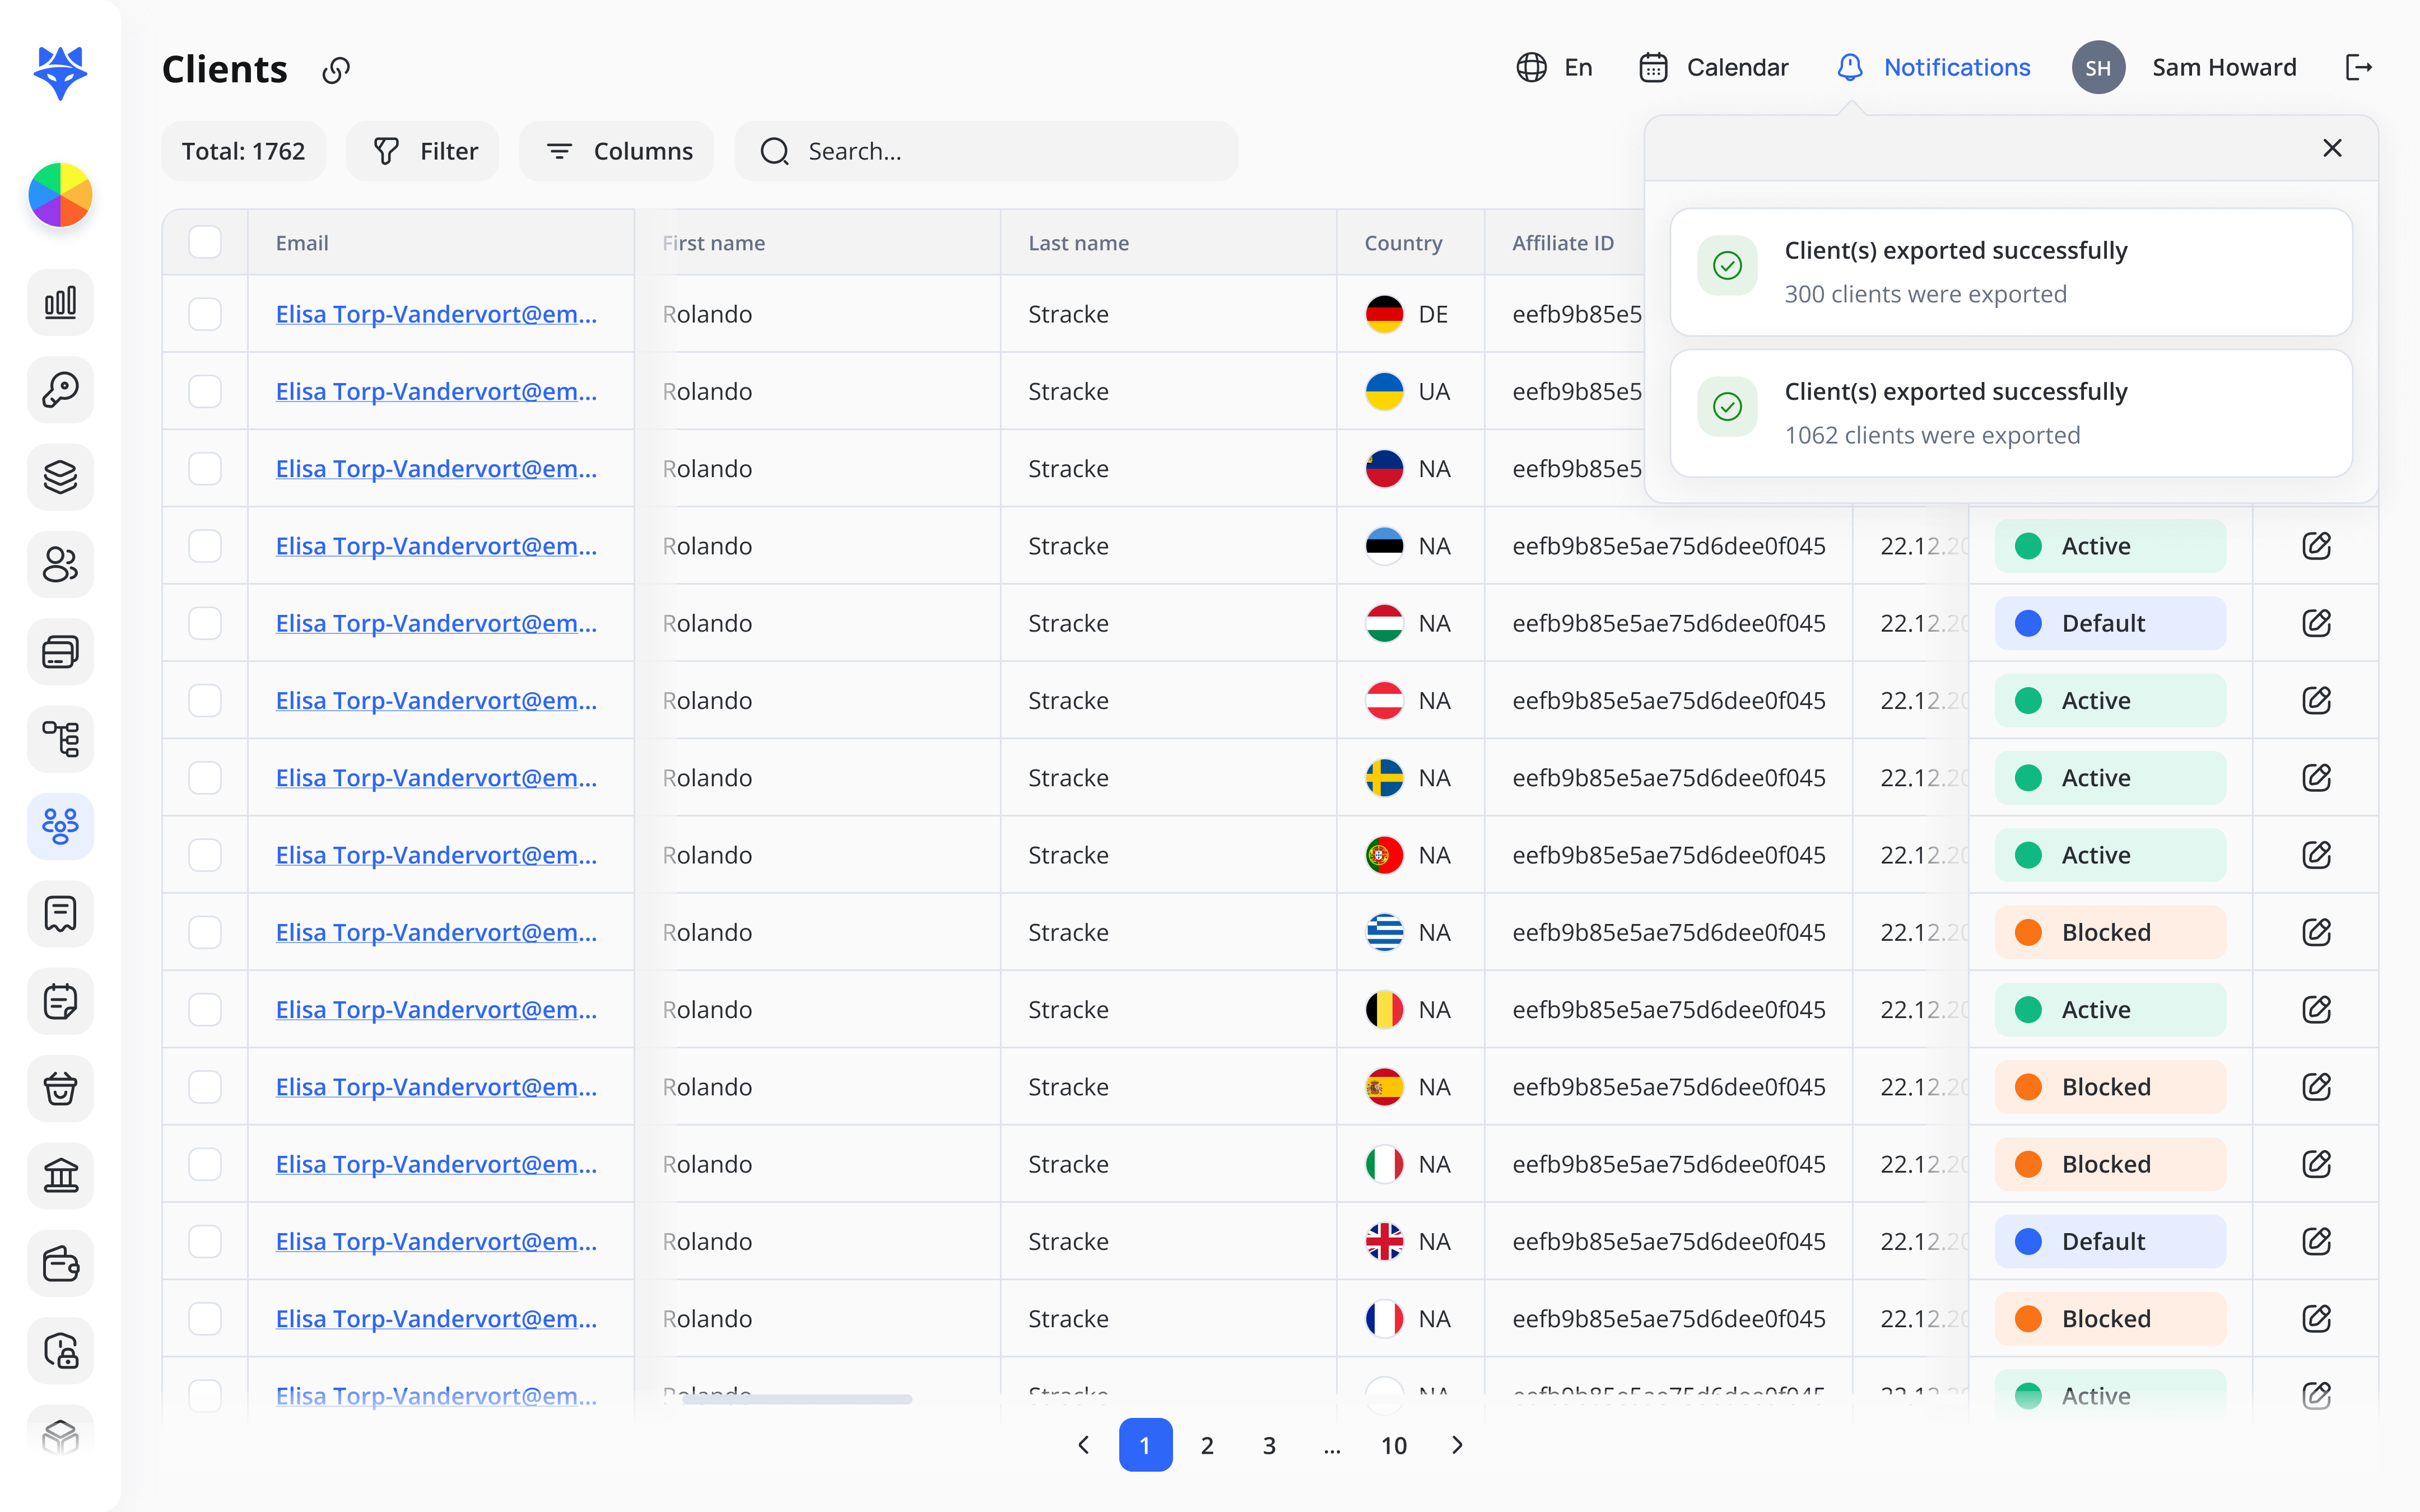
3. Download the CSV
Once you click Export, the system begins packaging the CSV. For very large datasets (thousands of rows), this may take a few seconds.
You can continue working in the app; the export runs in the background.
Note: A CSV file (containing whichever records match your filters) will download to your computer.
4. Download & Verify
Shortly thereafter, a download will be triggered automatically. Depending on your browser, it may appear in your downloads bar or folder as clients_export_<timestamp>.csv.
Open the CSV in your preferred spreadsheet tool (Excel, Google Sheets, etc.) to confirm that:
- The number of rows matches the count shown on-screen (check the “Total:” indicator at top-left).
- All required fields (Email, ID, First Name, etc.) are present and correctly populated.
5. Handle Multiple Pages (if needed)
If your Clients list spans multiple pages and you did not filter first, the export will include all records across pages automatically—so there’s no need to navigate page by page.
However, if you used page-level selections (checkboxes) instead of filters, be sure to use filters or confirm that “Select All” applies to every page before exporting.
Tips & Best Practices
-
Consistent Naming: Prepend your export files with a date (e.g.,
clients_2025-05-07.csv) for clear versioning. -
Field Selection: If you only need certain columns, consider requesting a custom export template from your admin settings (if available) or post-process the CSV in Excel to remove extraneous fields.
-
Security: Treat exported CSVs as sensitive data. Store them in secure, access-controlled locations and purge outdated backups per your data retention policy.
-
Automation: For recurring exports, explore scheduled reporting tools or APIs (if supported) to automate this process and avoid manual steps.
By following these detailed steps, you can confidently export any slice of your client data—full or filtered—ensuring you always have the right information on hand for your operational, analytical, or compliance needs.