
8. Configurations: Verification levels
In Configurations, Verification Levels play a key role in managing the client verification process. Each client type (e.g., Personal or Business) can have its own set of verification levels, which are linked to different verification statuses. These levels determine how a client progresses through authentication, ensuring compliance with KYC (Know Your Customer) requirements.
Use Cases
-
Multi-Step KYC
Financial institutions can define verification levels such as “Email,” “Phone,” “Identity”, with statuses progressing from init to approved for enhanced security.
-
Business vs. Personal Clients
Verification processes can be tailored—business accounts may require additional documents and higher verification levels than personal accounts.
-
Automation & Compliance
The system can automatically update a client’s “verified” status when they reach a specific level/status threshold (e.g., “email/pending” or “identity/approved”), ensuring compliance without manual intervention.
Accessing Verification Levels
Verification Levels Tab
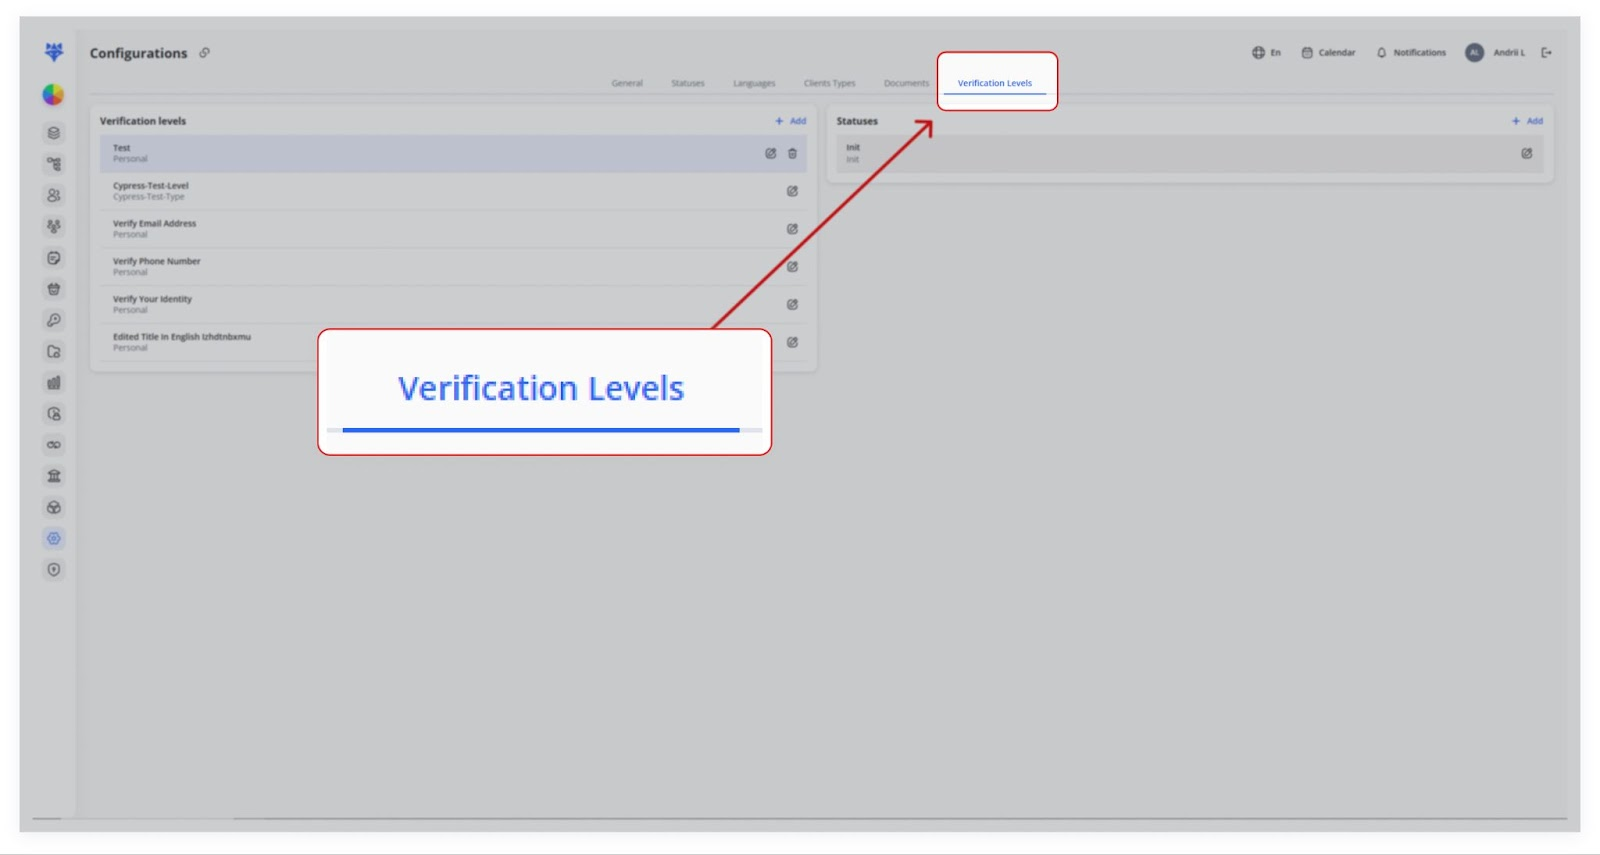
AlongTo manage your verification flows, first switch to the top,Verification Levels tab in Configurations:
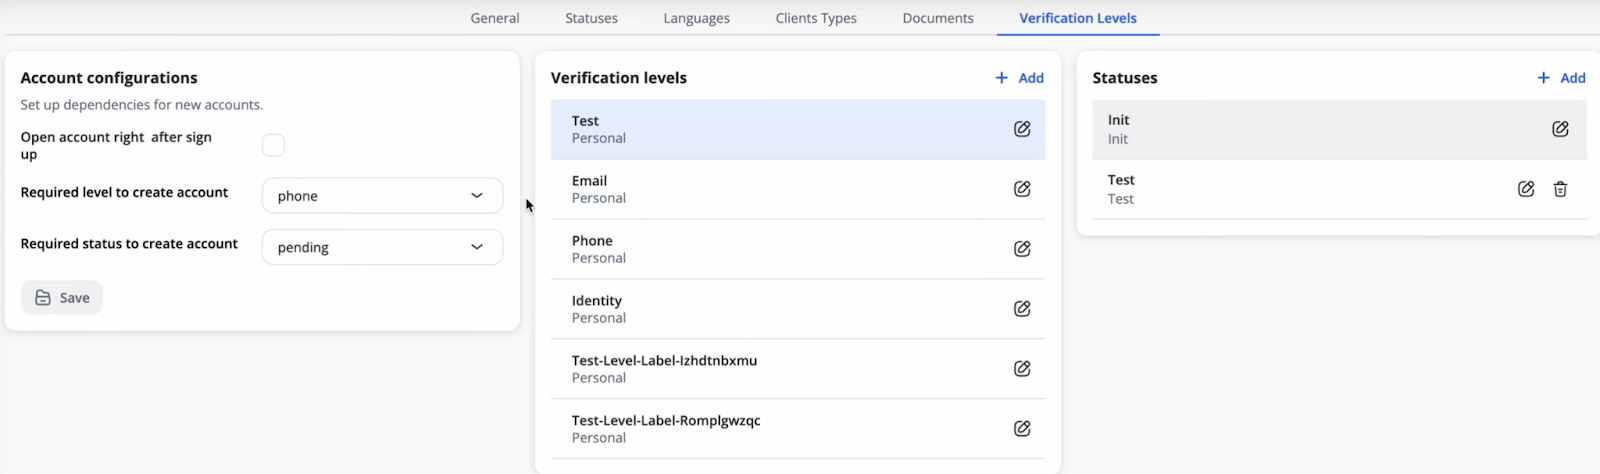
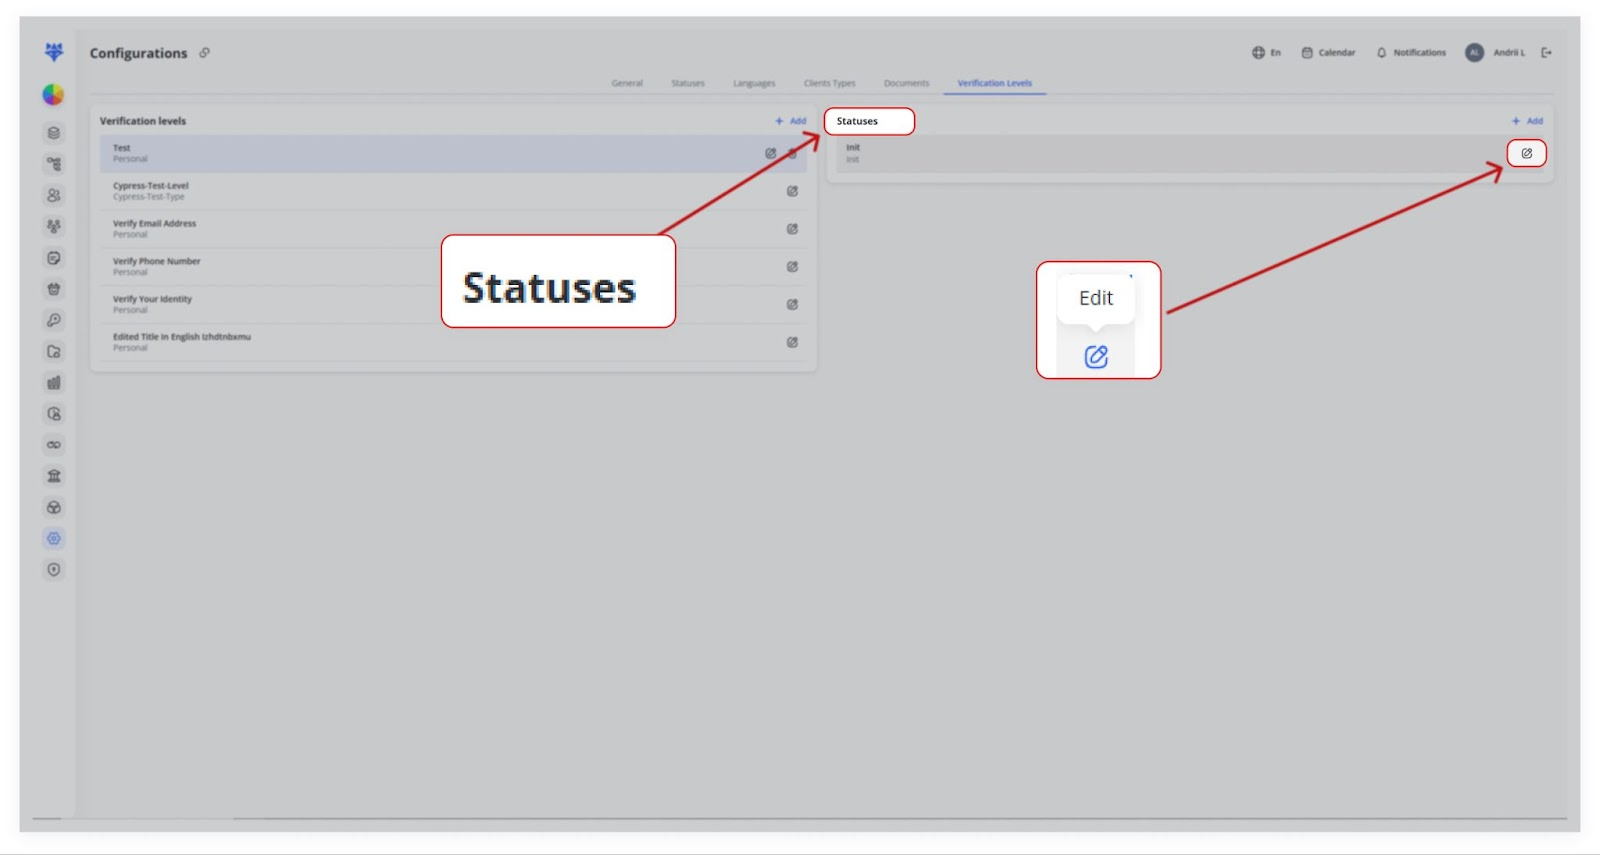
The screen splits into three panels. On the left, panelyou’ll showssee existingevery Verification levelsLevel defined in your system (e.g., Test,Test, Email,Email, Phone,Phone, Identity)Identity), each labeledtagged with aits associated client type (e.g.,for “Personal”example, Personal).
Creating or Editing a Verification Level
1. Add a New Level
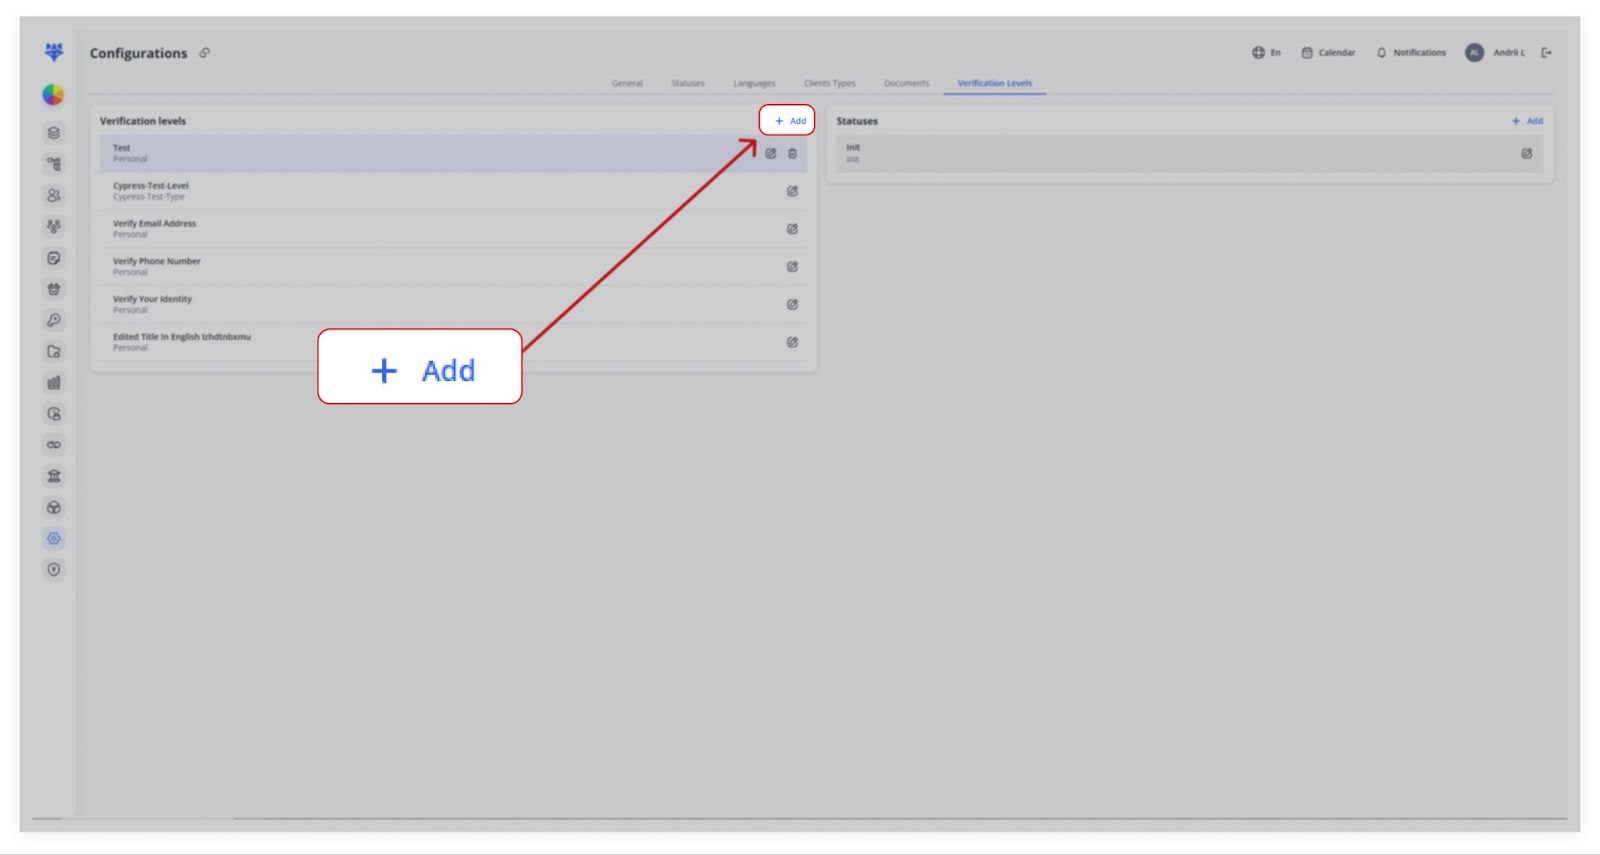
Click the “+ Add”Add button above the left panel.
AIn formthe titled “Add verification level” appears.modal that appears:
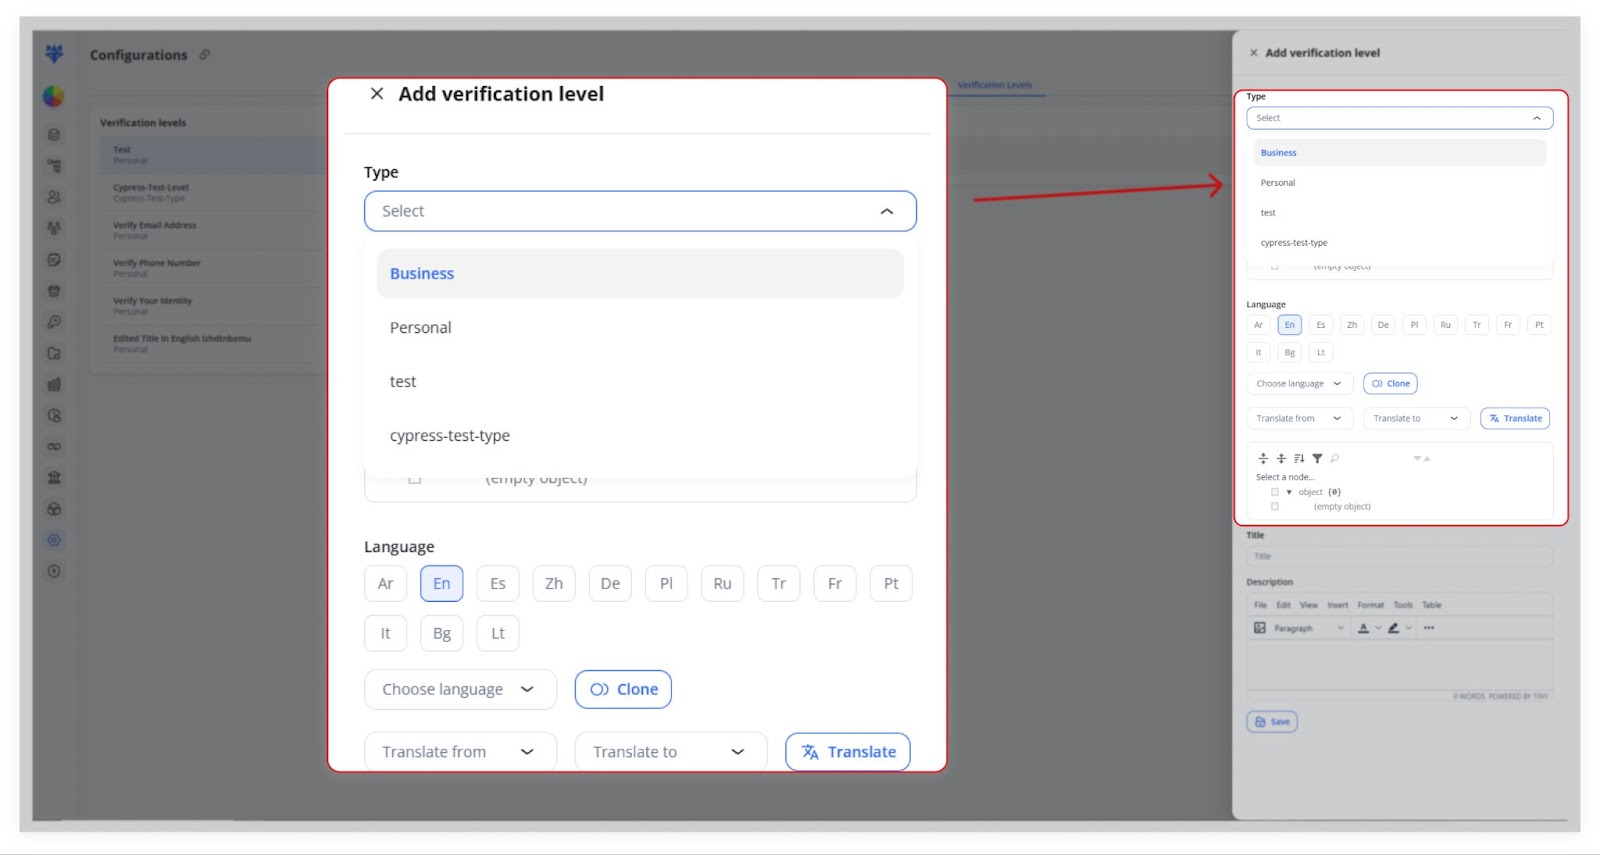
- Type:
SelectChoose the client type(e.g., Business or Personal) thatthisverificationlevel appliesto.to(Business, Personal, Test, etc.).
- Label / Name:
ProvideEnter a unique internal identifier (e.g.,“email,”email,“phone,”phone,“KYC step 1”kyc_step_1). - Title / Text: Provide the human-readable name displayed in the UI.
- Properties: (Optional) Map any custom JSON nodes or metadata for this flow.
- Language &
LanguageTranslations:OptionallyUseenterthecustomlanguagefieldsbuttons, Clone, ortranslations.Translate to localize.
2.Click Save. theYour Verificationnew Level
Onceimmediately saved,shows it appearsup in the list on the left panel.left.
3.2. EditingEdit an Existing Level
Hover over any level in the list and click its pencil icon.
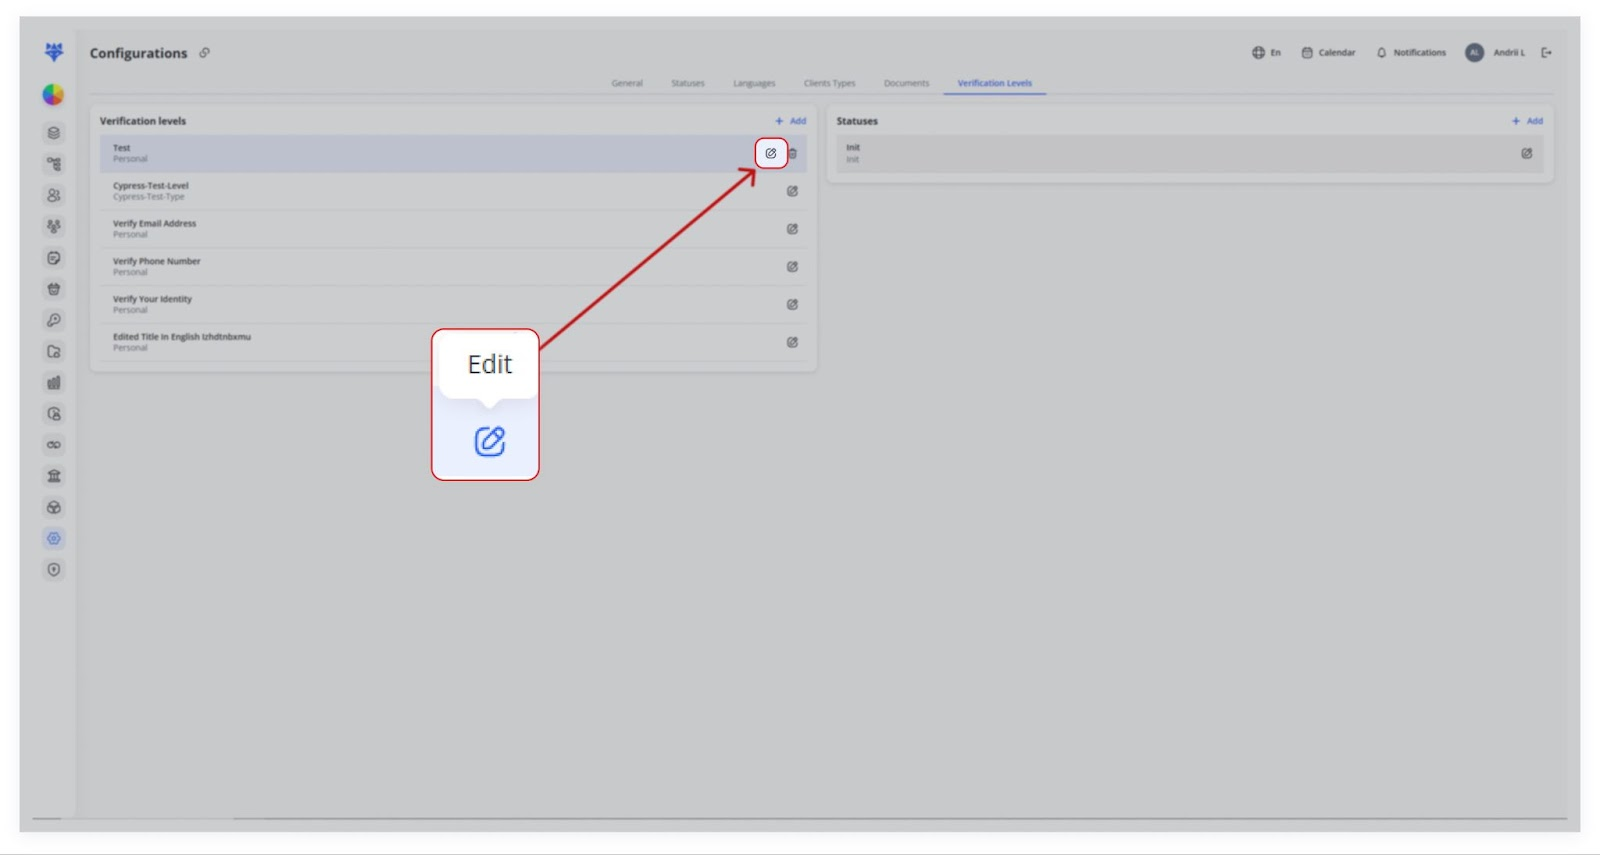
Click the pencil (Edit) icon to modifyModify its Name, Properties, or LanguageTranslations as needed.
Click Savesettings..
If a verification level is already in use by some clients, you cannot delete it—only edit.
Defining Statuses for Each Verification Level
Every verification level drives one or more Statuses (e.g., Init → Pending → Completed/Rejected). You configure these in the right-hand panel:
1. Statuses Panel (Right Side)
NextWith toa level selected on the verificationleft, levels,the you’llStatuses seepanel aon Statusesthe panel.right shows all statuses defined for that flow:
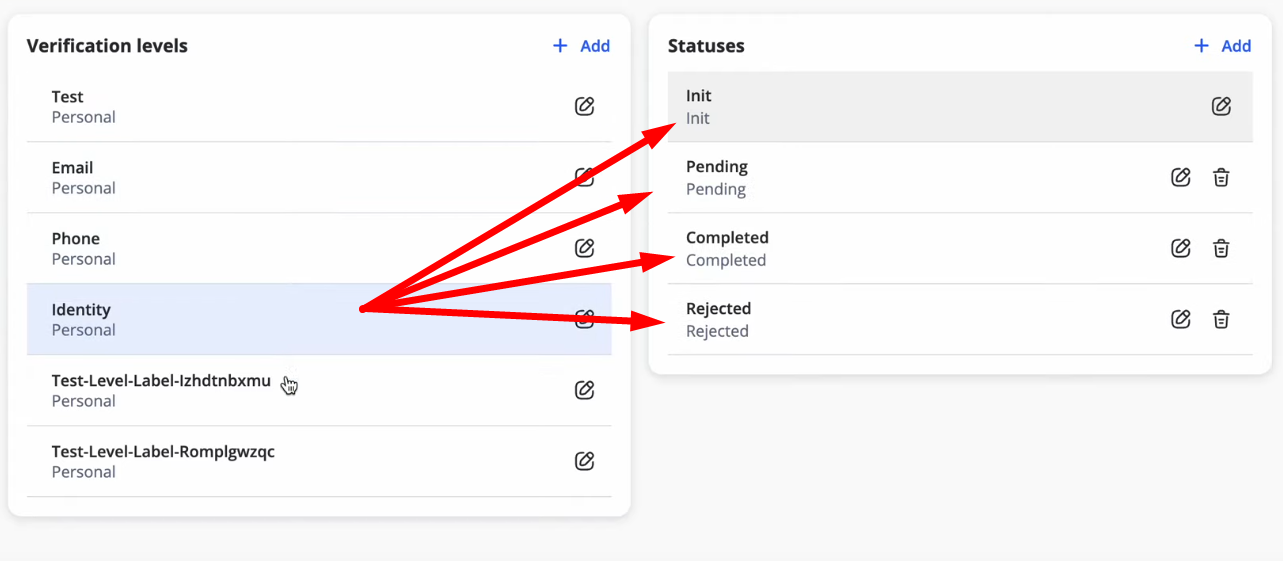 Typical statuses include:
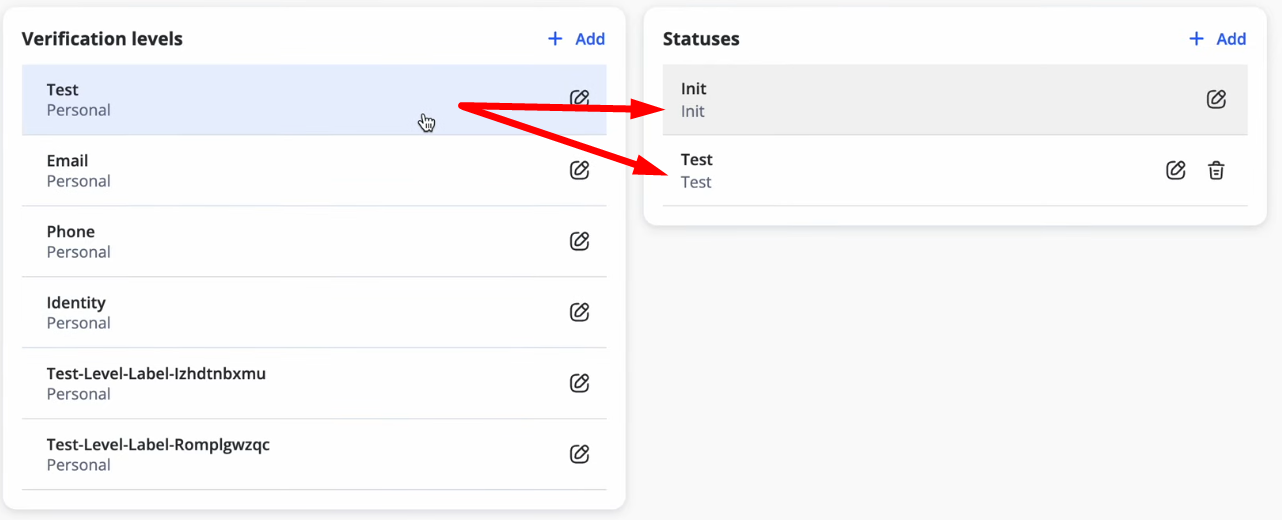
- Init: No verification started.
- Pending: Verification in progress.
- Completed: Verification passed.
- Rejected: Verification failed.
Each verification level can have its own set of statuses (e.g., Init, Pending, Completed, Rejected).statuses.
2. Add or Edit Status
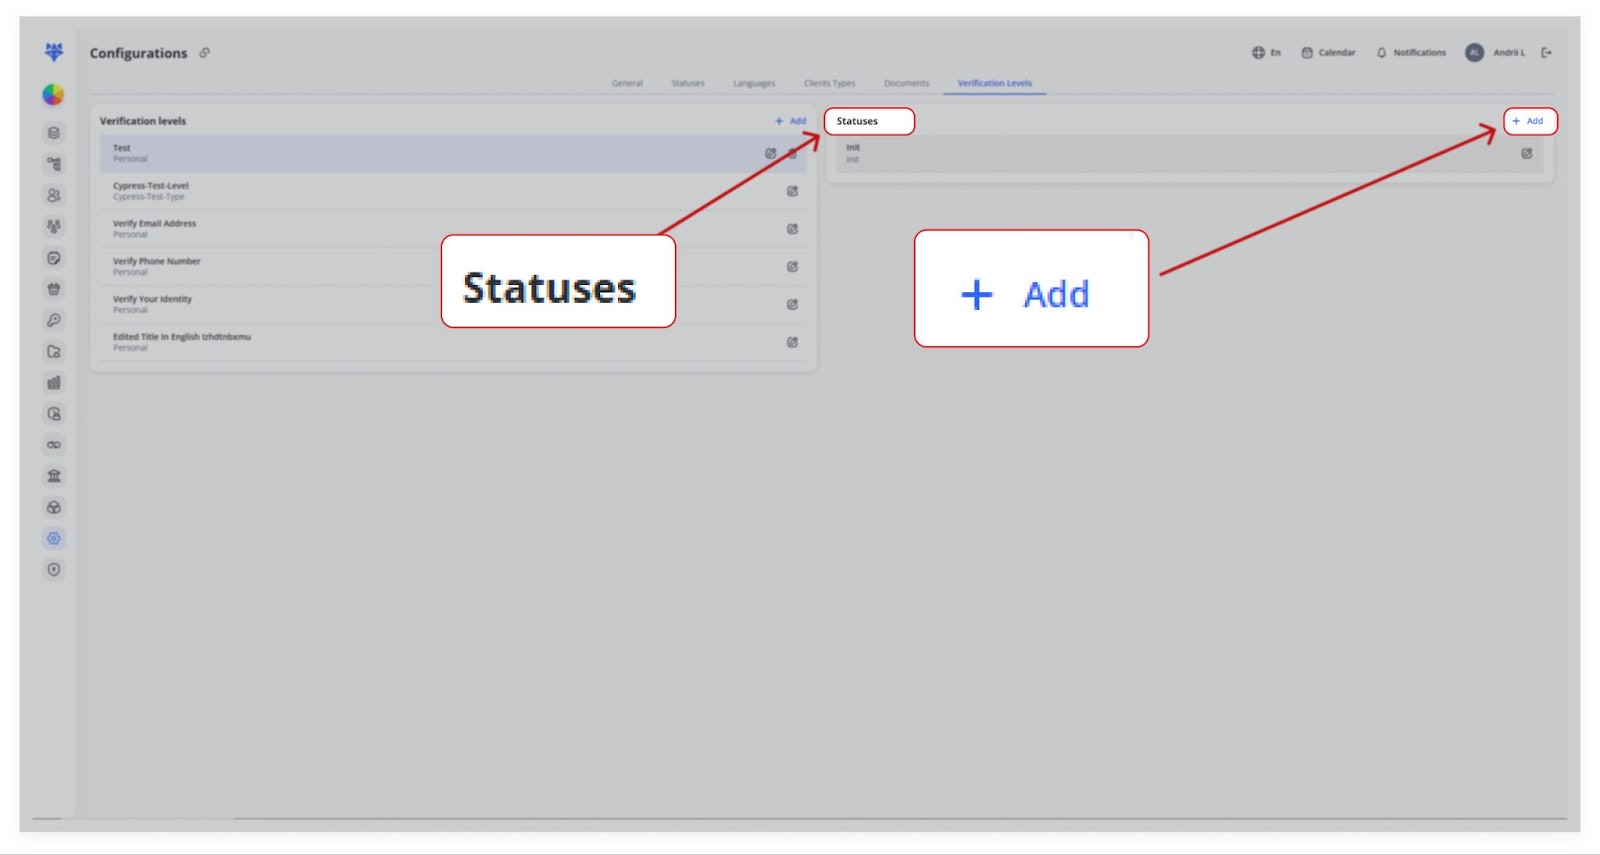
Click + Add in the top-right of the Statuses panelpanel.
In athe Add status modal:
- Label: Internal ID (e.g.,
pending). - Text: User-facing name (e.g., Pending).
- Properties: (Optional) Attach any JSON metadata nodes.
Click Save. The new status.
appears

Provide a Label (internal name) and Text (display name).
Save to add it toin the list.
3. Edit or Delete a Status
Use
- Edit: Hover over a status and click its pencil icon to
edit an existing statusrename or remap properties. - Delete: Click the trash
binbin—onlytoenableddelete it (ifit’snonotclients are currently inuse).that status.
How Verification Levels and Statuses Appear in Clients
1. Client Type Dependency
If you create a verification level for “Personal,” only Personal clients will see that level.
Similarly, levels for “Business” apply only to Business clients.
2. Edit a Client
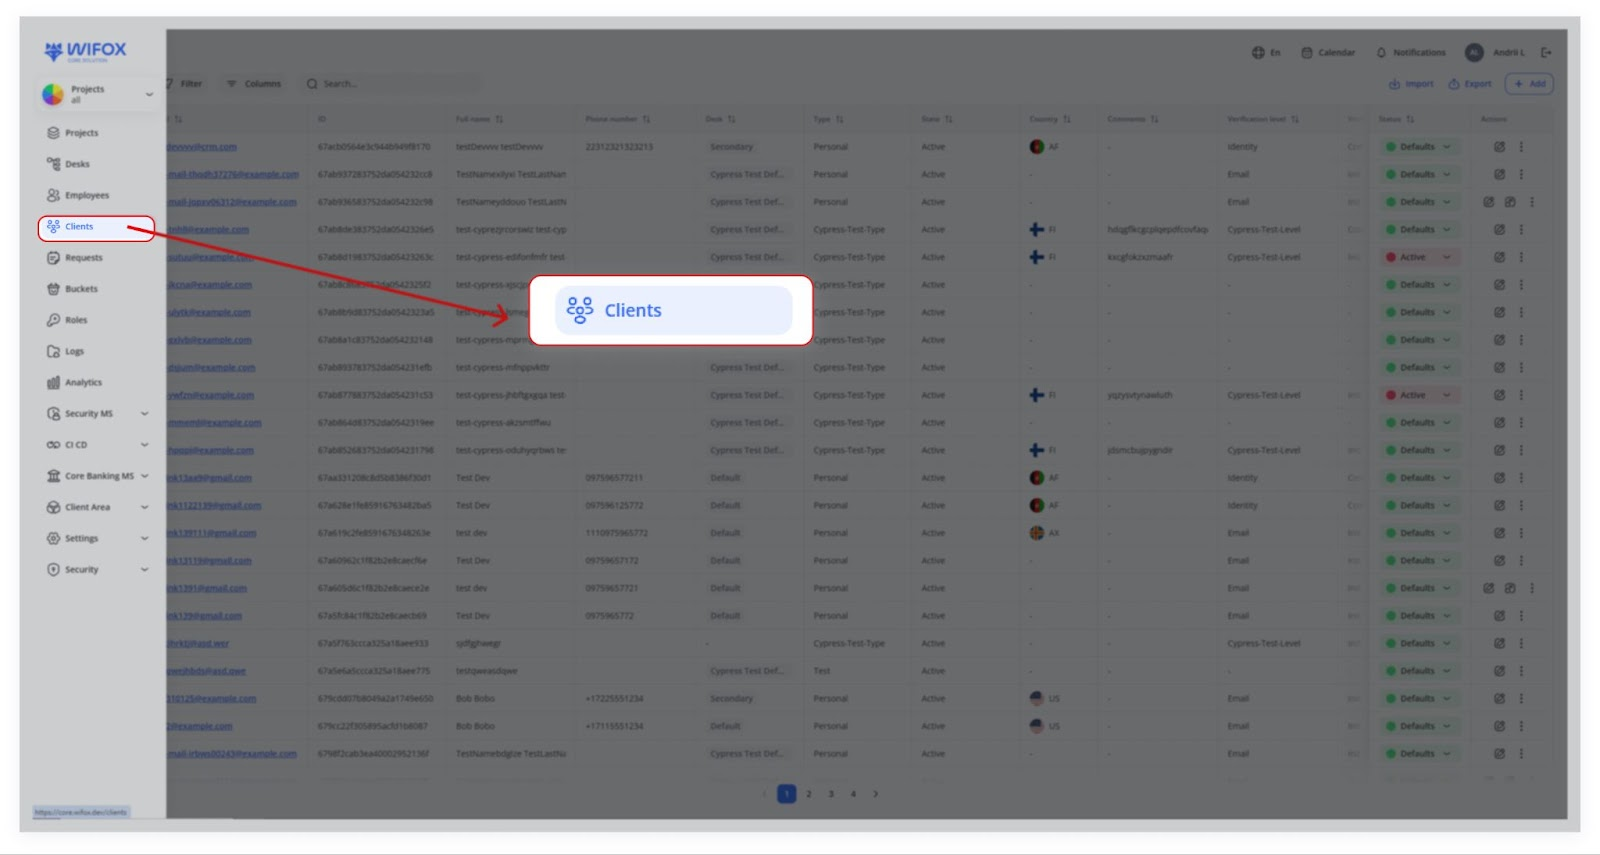
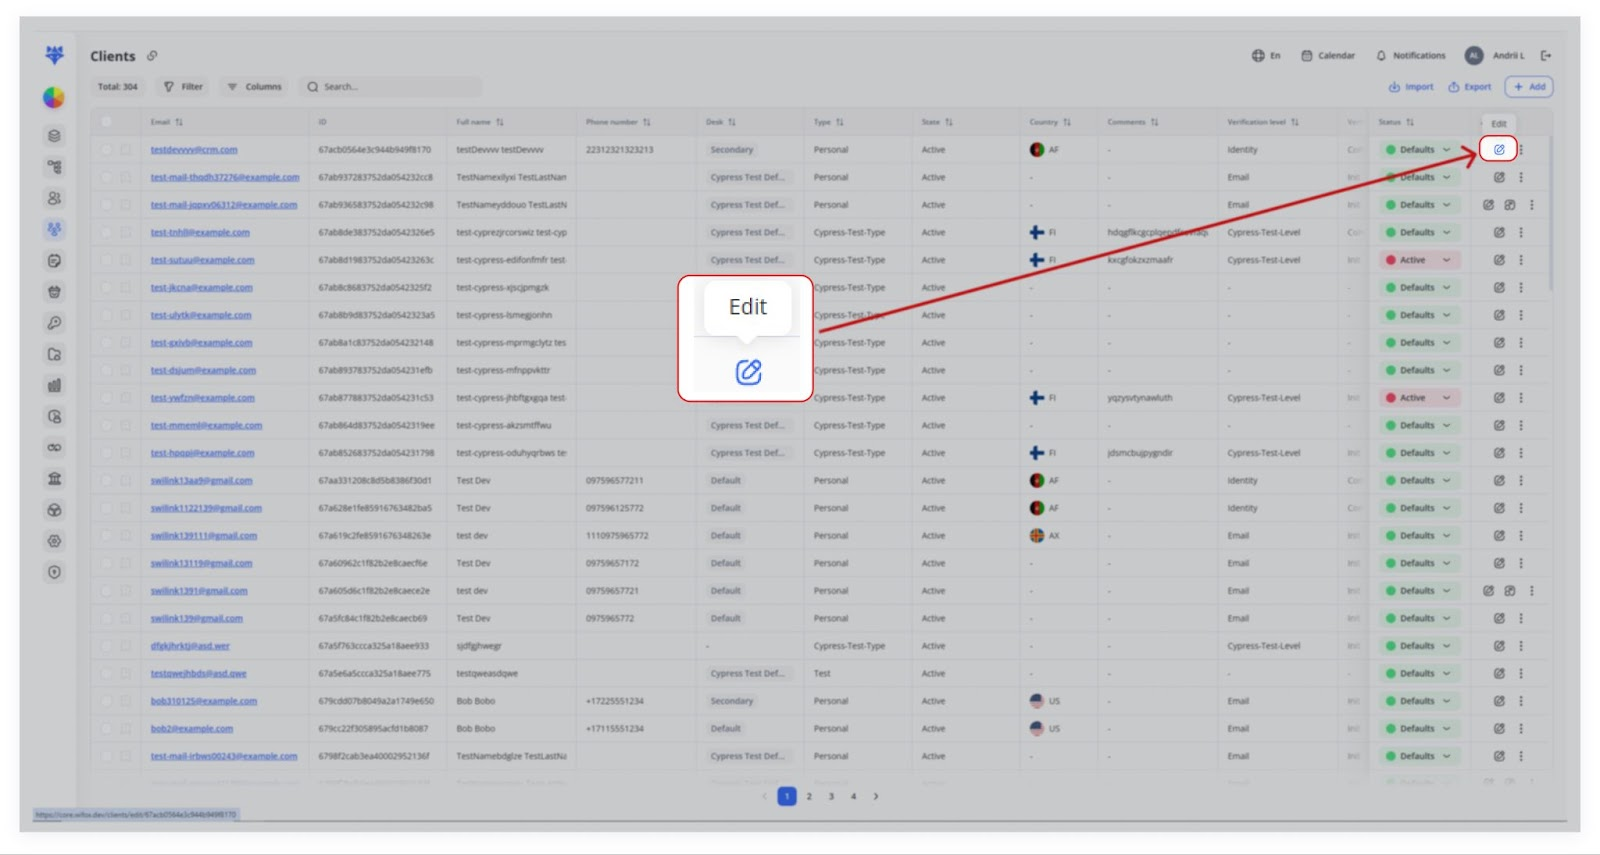
Go to Clients → Edit (pencil icon).
In the General section, you’ll see Verification level and Verification status dropdowns.
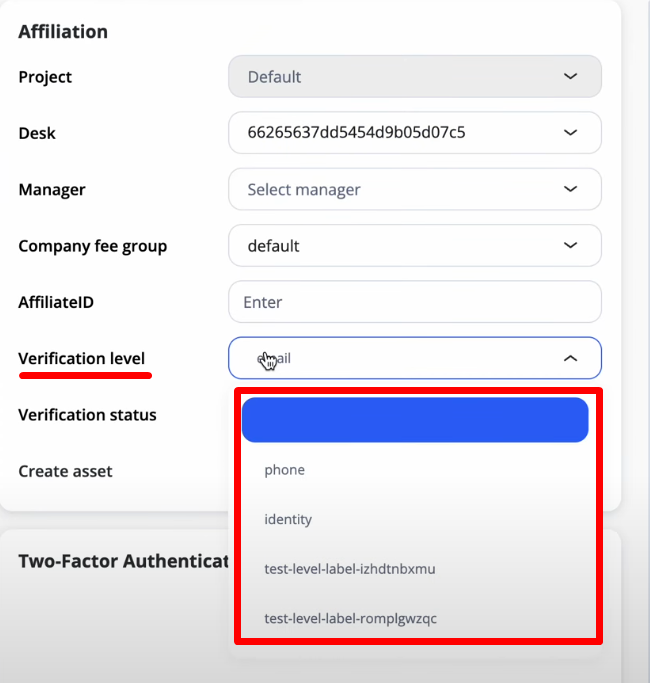
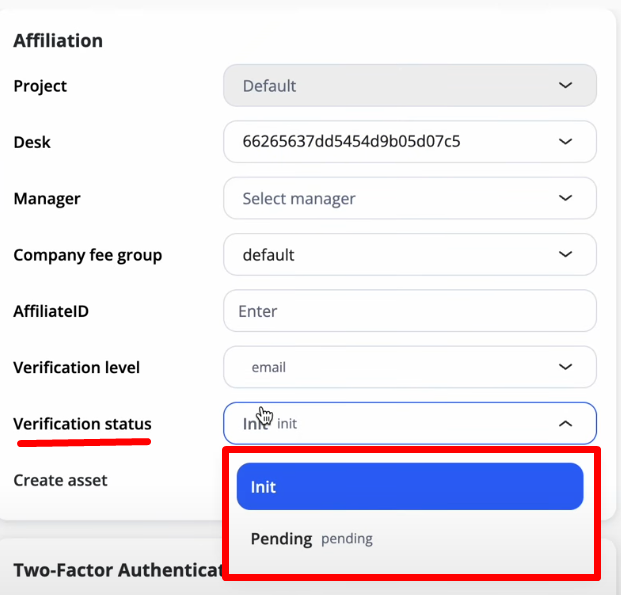
The dropdown options are pulled from the Configurations → Verification Levels you defined.
3. Cannot Delete in-Use Items
If a client is already assigned a certain verification level or status, you cannot remove it from the configuration.
You can rename or update the item, but full deletion is blocked to preserve data integrity.
Key Points to Remember
- Client Type Binding: Each verification level is tied to a specific client type (Personal or Business, etc.).
- Multiple Statuses per Level: You can define as many statuses as needed to reflect each step (e.g., init, pending, completed).
- No Deletion If In Use: Levels or statuses assigned to real clients can’t be removed.
- Properties & Language Fields: Allows storing custom data or translations for each level/status, enabling localized or extended flows.
Verification Levels in Configurations enable you to create structured, multi-step KYC (Know Your Customer) processes for each client type. By pairing these levels with custom statuses, you can tailor how a client progresses from “Init” to “Pending” to “Completed,” ensuring each user meets the compliance and verification standards required for their account.