
7. How to Deactivate an Employee
Deactivating an employee suspends their access without removing their record; this preserves audit history and any associations (tickets, notes, etc.) while preventing further logins or assignments. If you need to permanently remove someone, use use Delete instead—but note that deleted accounts cannot be restored.
Warning: Deleted employees cannot be restored.
Difference Between Deactivate vs. Delete
-
Deactivate
Account remains in the system (with all history intact)
User cannot log in, receive notifications, or be assigned to Projects/Desks
Ideal for long-term leaves or contractors between engagements
-
Delete
Permanently removes the user record and all associated data
Cannot be undone—use only when you’re sure the account is no longer needed
Step-by-Step Deactivation
Step 1. Open the Employees List
Step 2. Enter Edit Mode
-
In that employee’s row, click the ✏️ Edit icon in the Actions column (Step #2).
-
The Edit employee form appears, showing their current settings.
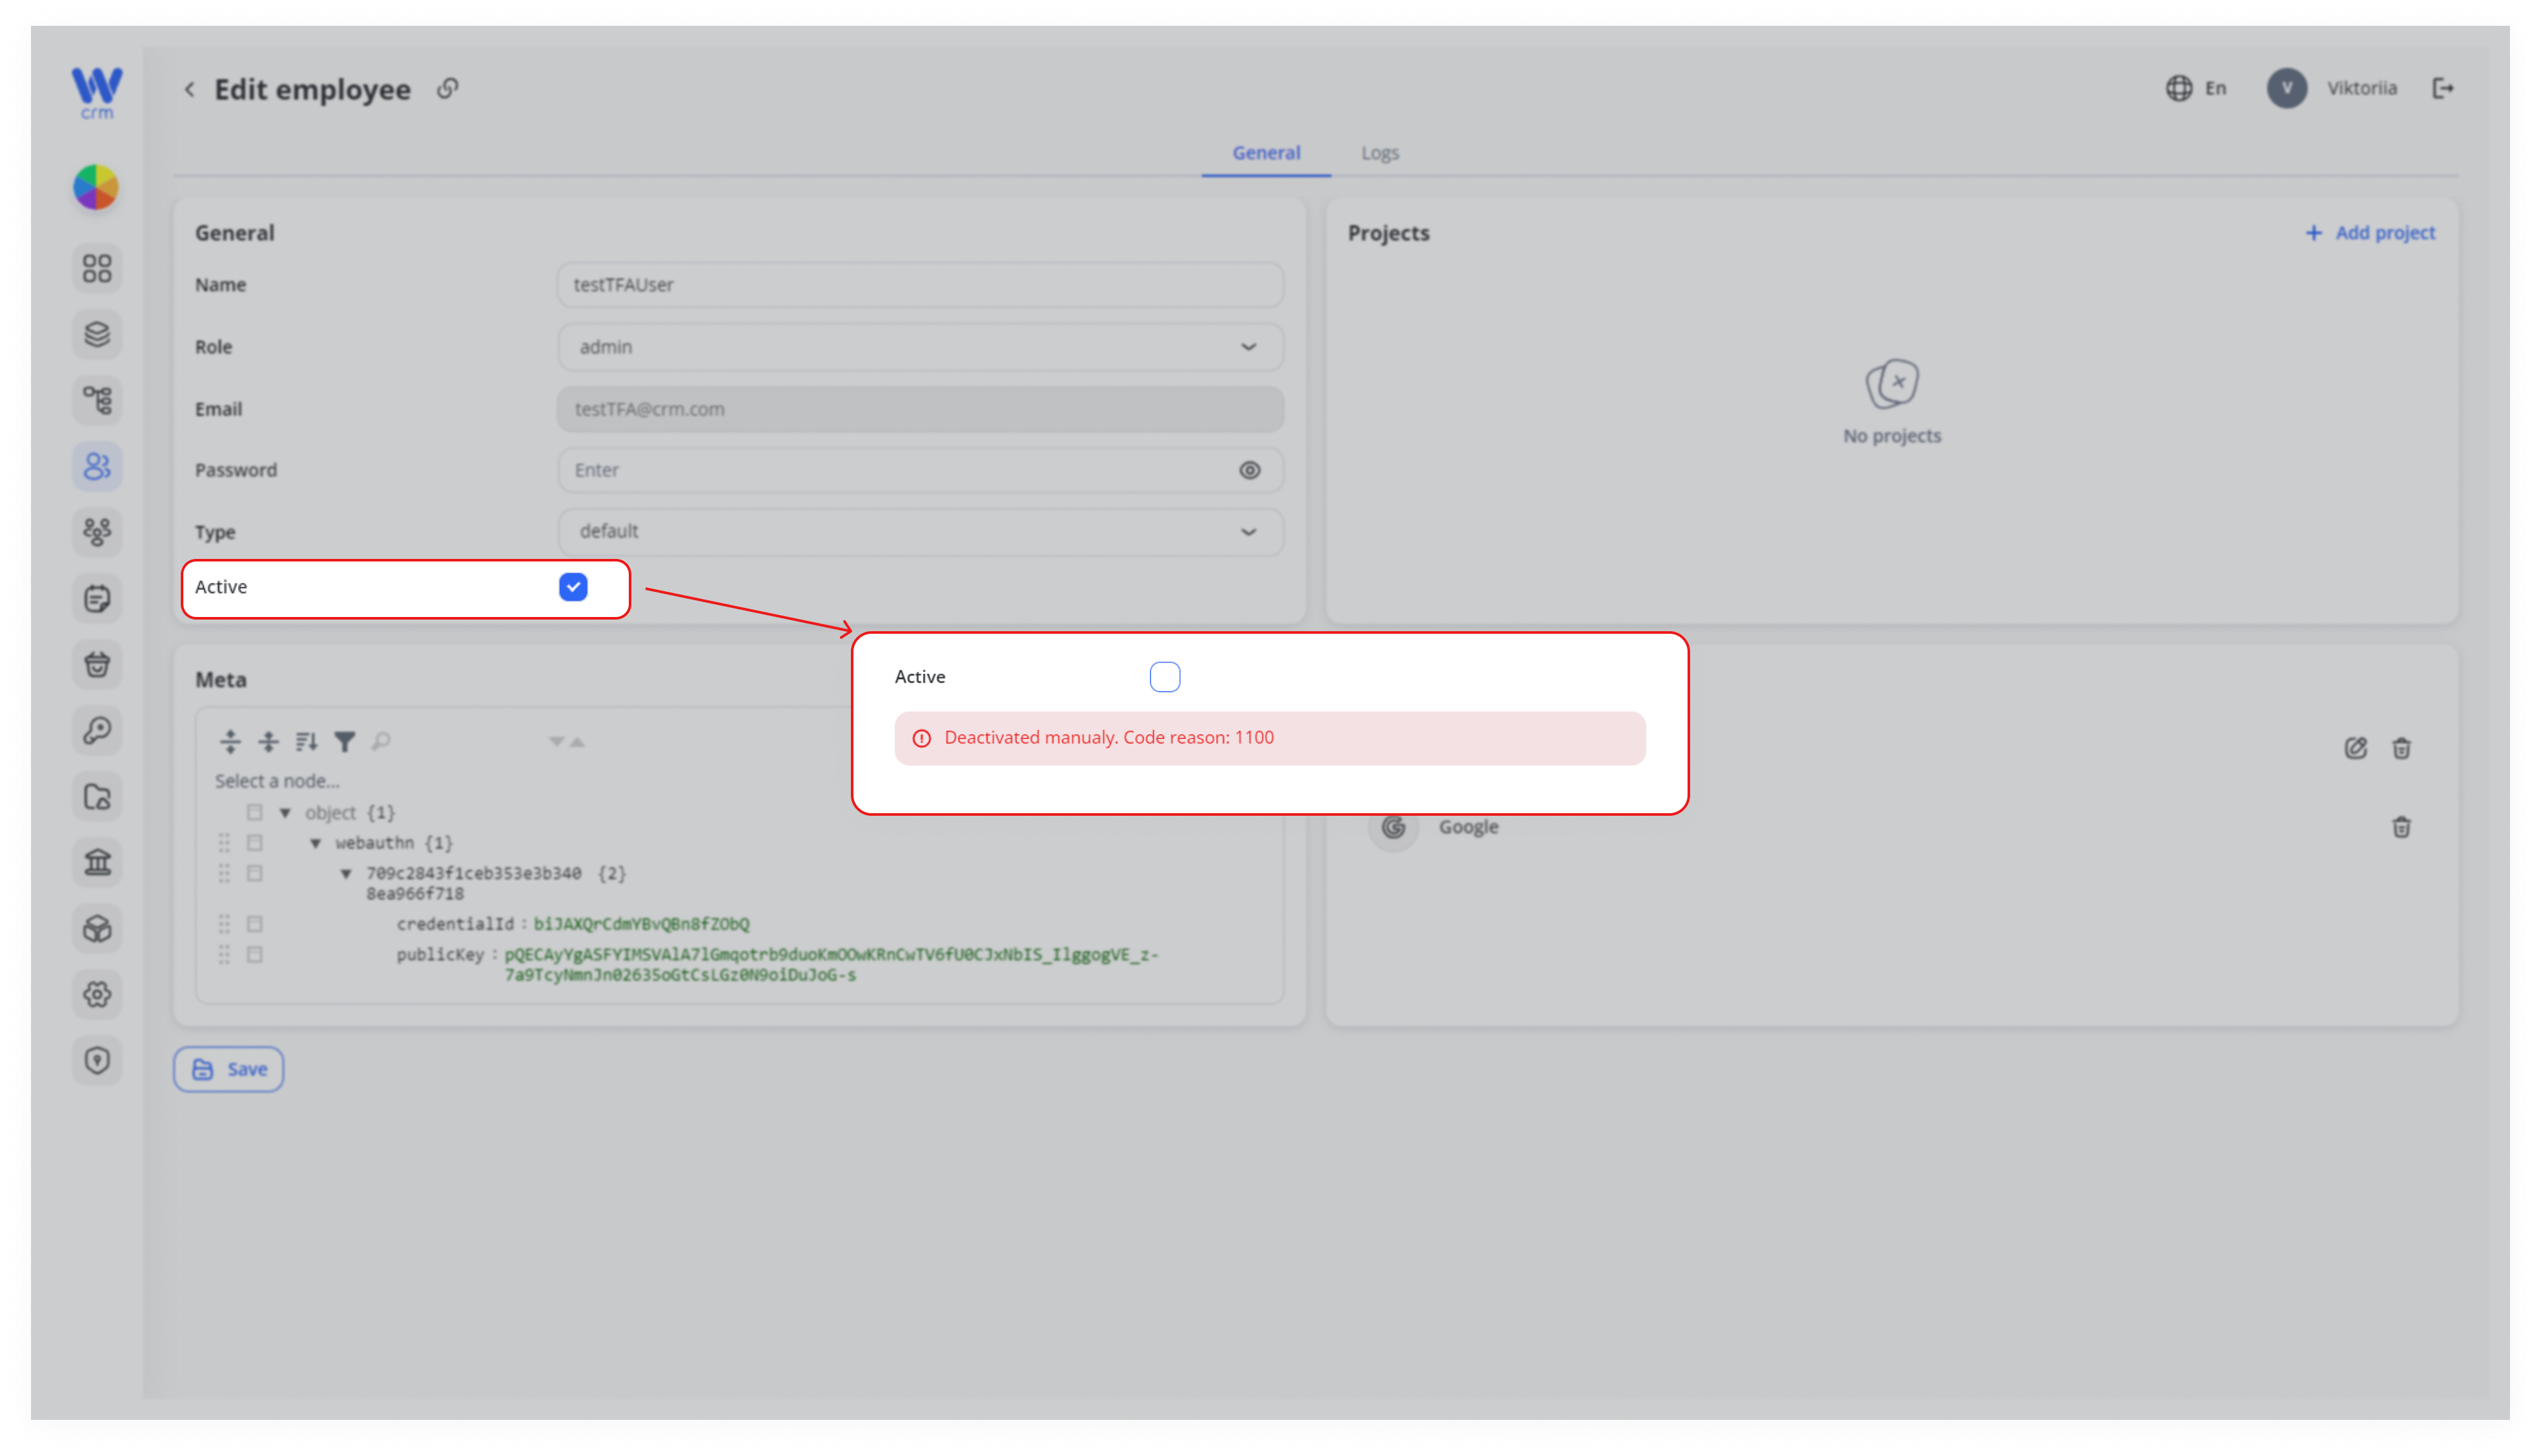
Step 3. Uncheck “Active”
-
Under the General section, find the Active checkbox (Step #3).
-
Click to remove the checkmark—this flag will switch to “Deactivated manually” and display a reason code.
Note: You may see a tooltip like “Deactivated manually. Code reason: 1100” indicating the change was performed by an administrator.
Step 4. Save Your Changes
-
Scroll to the bottom-left of the form and click Save (Step #4).
-
You’ll return to the Employees list; the deactivated user will no longer appear in active workflows or lookup lists.
What Happens Next?
-
The user’s Last login, Tickets, and Calendar events remain intact for reporting and audit.
-
Any open assignments (e.g., tickets, leads) will need re-assignment to active team members.
-
To reactivate later, simply edit their record again and re-check the Active box.
You cannot delete an employee directly from the Employees module. To delete an employee: