
7. How to Deactivate a Client
When deactivated, the client's account remains in the system but becomes inactive. Employees can still view deactivated clients, but cannot assign them to projects, desks, or other activities.
To deactivate a client:
-
1.OpenGothe Clients Module
-
Find Your Client
You can scroll, or use the Search… box / Filter drawer to locate them quickly.
-
Open the Edit Drawer
tab.
2. In the client’s row, click the ✏️ Edit icon under the Actions column.
This opens the Edit Client drawer on the right.
- Ensure You’re on the “General” Tab
Along the top of the drawer, click General if it isn’t already active.
-
Locate the “State” Control
In the top-right corner of the General pane, you’ll see a dropdown labeled State (see Image1.png).
-
Open the State Dropdown
drop-downlist,
Click the current value (e.g. “Active”) to expand the list of options.
-
DeactivatedSelect “Deactivated”:
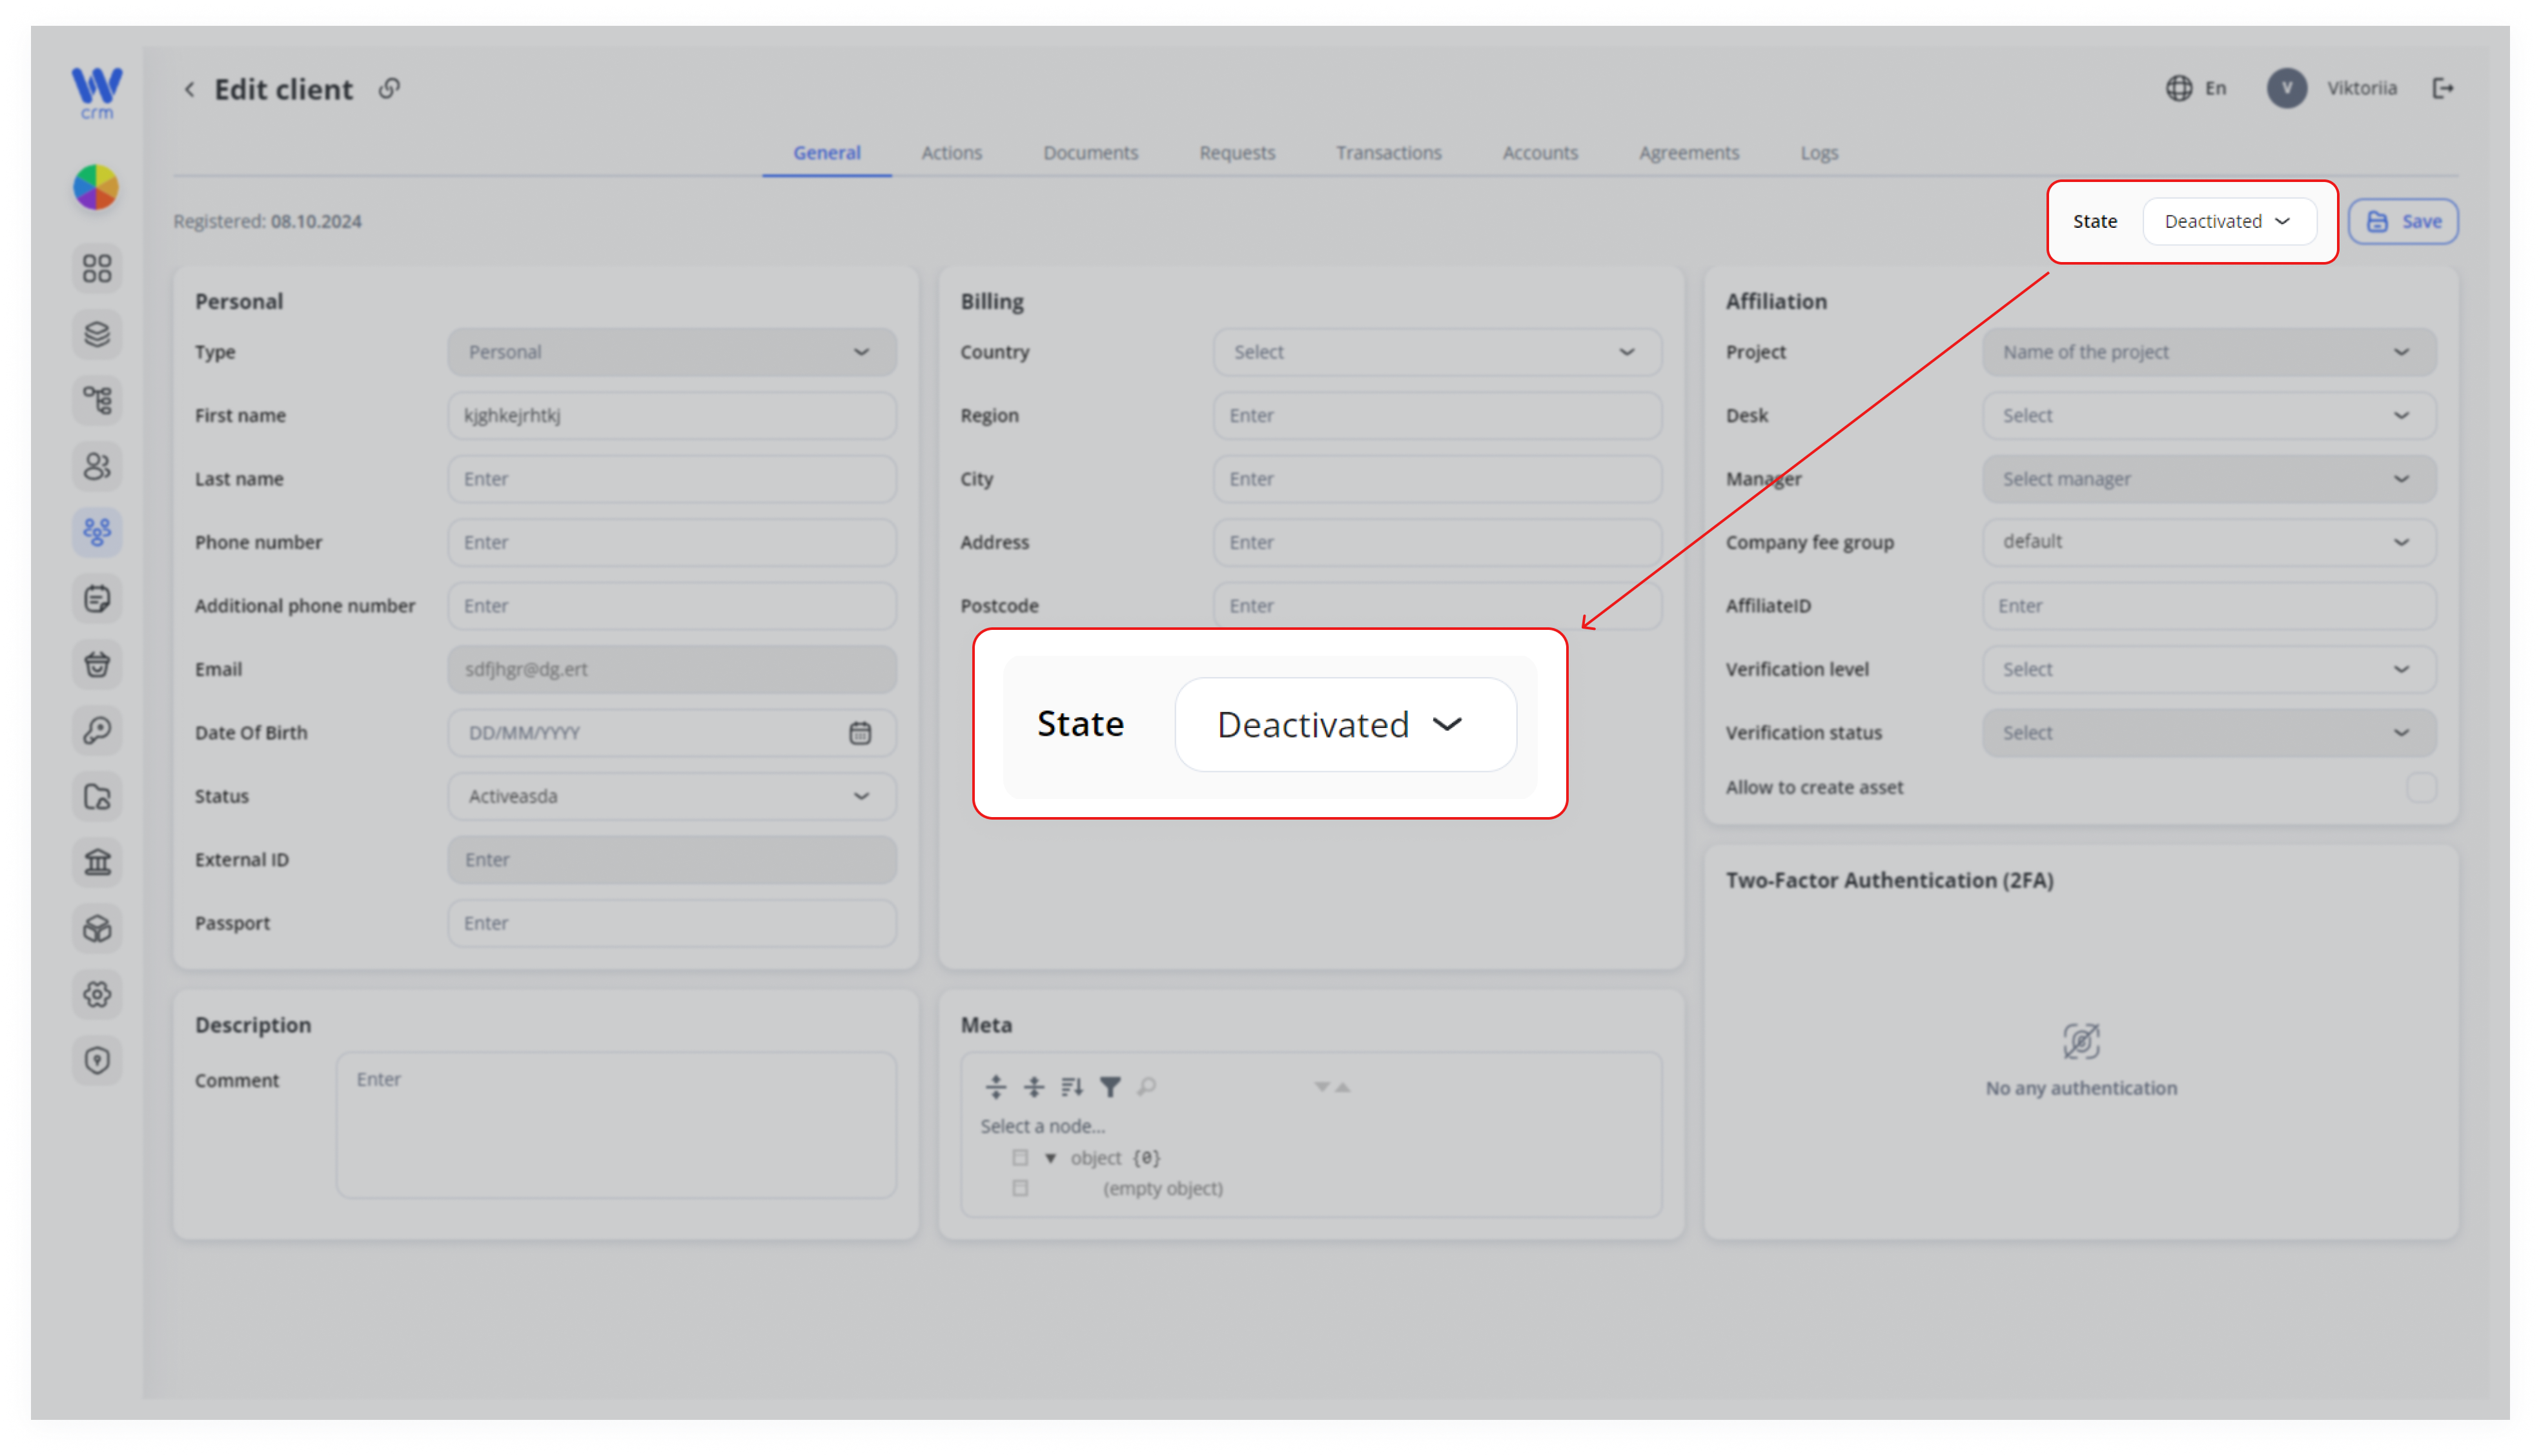
3.From the dropdown, choose Deactivated (see Image2.png).
Active → client can log in / be assigned.
Deactivated → client remains viewable but cannot be assigned to new work.
Suspended → (optional) locks the client out temporarily without full deactivation.
-
Save Your Changes
Click Save to(top-right applyof the changes.drawer).
A brief spinner may appear, then the drawer refreshes showing State: Deactivated.
-
Verify Deactivation
Back in the Clients list, the client’s State column will now read “Deactivated.”
They will no longer appear in assignment dropdowns, but their history remains for reporting and audit.
Pro Tip:
You can reactivate at any time by repeating these steps and selecting Active.
Use the Logs tab to see when and who changed the client’s state.