
5. Penetration Reports
Penetration testing (or “pen testing”) is the practice of simulating attacks on a system or application to uncover security weaknesses:
- Black Box: The tester has no prior knowledge of the system.
- White Box: The tester has detailed knowledge of the system.
- Gray Box: Some knowledge is provided, but not full.
Use Cases
- Black Box Testing
External testers find a login vulnerability. The team patches the issue and retests for confirmation.
- White Box Testing
Full system knowledge reveals code injection risks. Developers implement code fixes and resolve the report.
- Gray Box Testing
Limited access tests expose endpoint vulnerabilities. Engineers secure the endpoints and log retesting results.
- Retesting After Fixes
Vulnerabilities are fixed post-penetration test. Follow-up tests are conducted to ensure no further risks remain.
Pen testers document discovered vulnerabilities and exploitation paths. In the system, you’d log each test (or each portion of a test) as a Penetration Report, noting the Name and any steps or results in the Description. Security teams typically use it to confirm that known vulnerabilities are patched and no new ones have appeared.
Table View
| Column | Details |
|---|---|
| Name ⇅ | Title of the test (e.g. “Denial of Service,” “Open Redirect”). Clicking the link opens full details. |
| Description | One-line summary of what was tested or discovered. |
| Project | Link to the related project or environment. |
| Created at ⇅ | Date and time when the report was logged. |
| Actions | • ✏️ Edit |
There’s no built-in delete option for penetration reports—entries are archived by editing or by policy.
Adding a Penetration Report
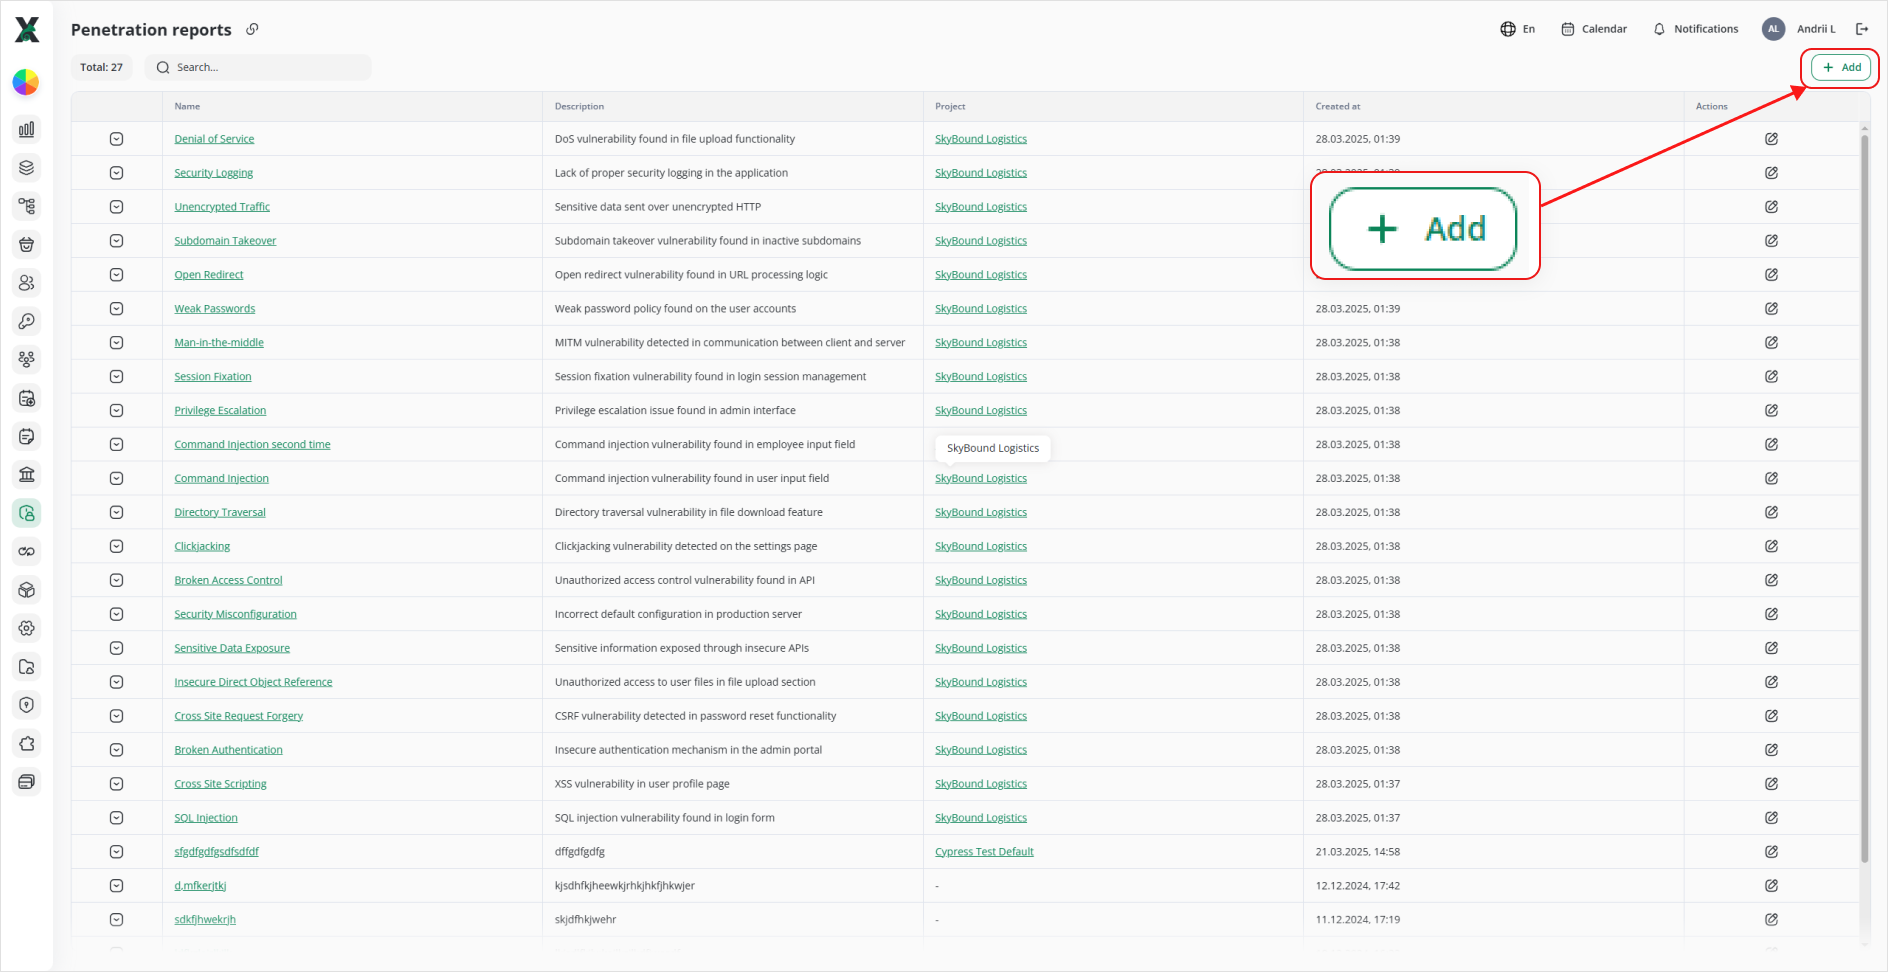
1. Click + Add.
2. In Add penetration report:
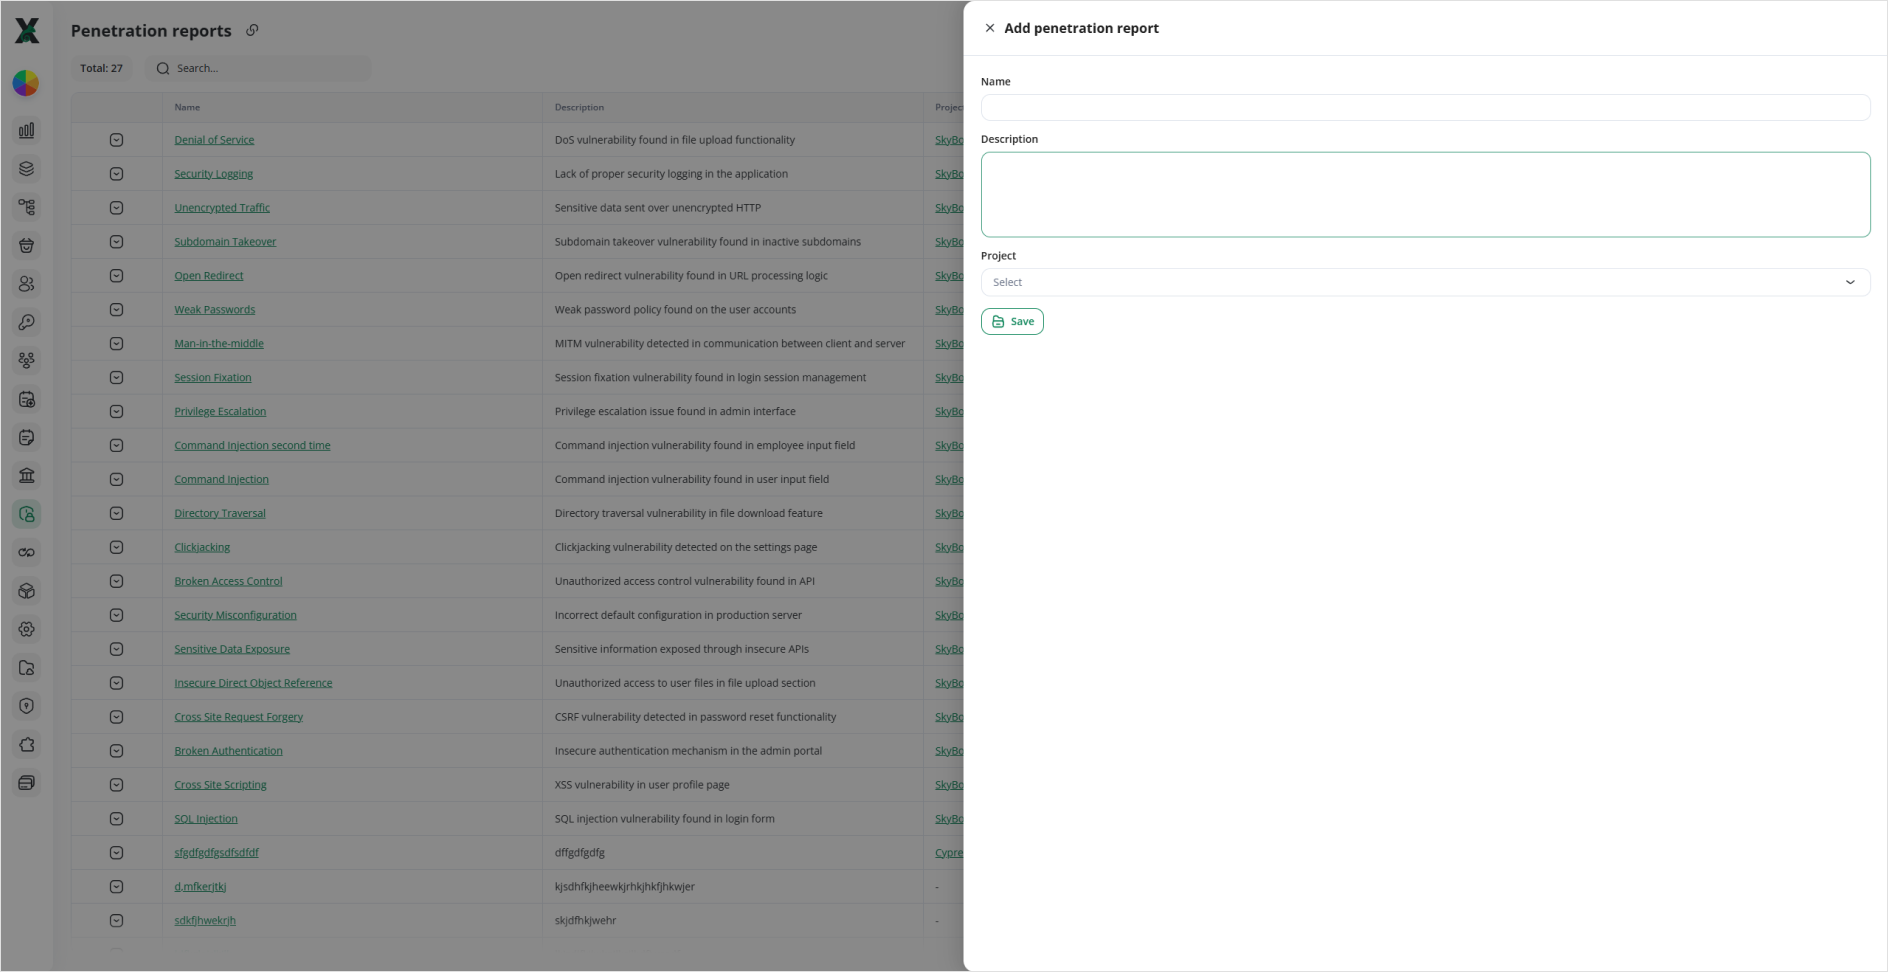
- Name: Enter a clear title for the engagement.
- Description: Summarize the scope and key findings.
- Project: Select the associated project.
3. Click Save. Your new report appears in the table.
Linking a Violation to a Penetration Report
To give full context on how a violation was uncovered during a pen test, you can now associate each Violation Report with an existing Penetration Report.
In the Violation Reports table, click + Add (or the ✏️ icon) to open the side-panel.
You’ll see a new Penetration Test dropdown field just below Project.
Click the dropdown and choose the relevant penetration report from the list.
Once selected, click Save.
A new Penetration Test column appears in your table view, showing the linked report as a click-through link.
In the table, click the Penetration Test link to jump directly to that report’s full details panel.
Why link them?
Traceability: See exactly which pen test uncovered the issue.
Context: Jump straight from a logged violation to the detailed penetration findings.
Audit: Maintain a clear chain of evidence for compliance reviews.
Editing a Penetration Report
Typical Workflow
1. Pen Test Execution
Security team or external vendor runs tests (e.g., vulnerability scans, manual exploitation, stress tests).
2. Report Logging
Each test campaign is logged with a Name and Description of findings (e.g., “SQL injection found in search endpoint”).
3. Review & Action
Security engineers review findings, tag them to development/ops teams, and track fixes.
Once remediated, tests may be rerun and the report updated to reflect the final status.