
5. How to Reassign a Client
The “Reassign” action lets you bulk‐update key client attributes—Desk, Manager, and Status—all at once. This is useful when, for example, you need to move several clients to a different desk or change their status en masse.
Use Cases
- Transferring Clients to a New Desk
Move multiple clients to a different desk after team restructuring by selecting them in the Clients tab, choosing the new desk from the dropdown, and saving the changes.
- Updating Client Status in Bulk
Change the status of several clients from "Pending" to "Active" after onboarding by selecting all relevant clients, updating their status in the dropdown, and applying the changes.
- Reassigning Clients to a New Manager
Reassign a portfolio of clients to a new manager by selecting the clients under the previous manager, choosing the new manager, and saving the reassignment.
To quickly reassign the clients:
All selected clients must be in the same project before you can reassign them (e.g., you can’t reassign a group of clients if some belong to Project A and others to Project B).
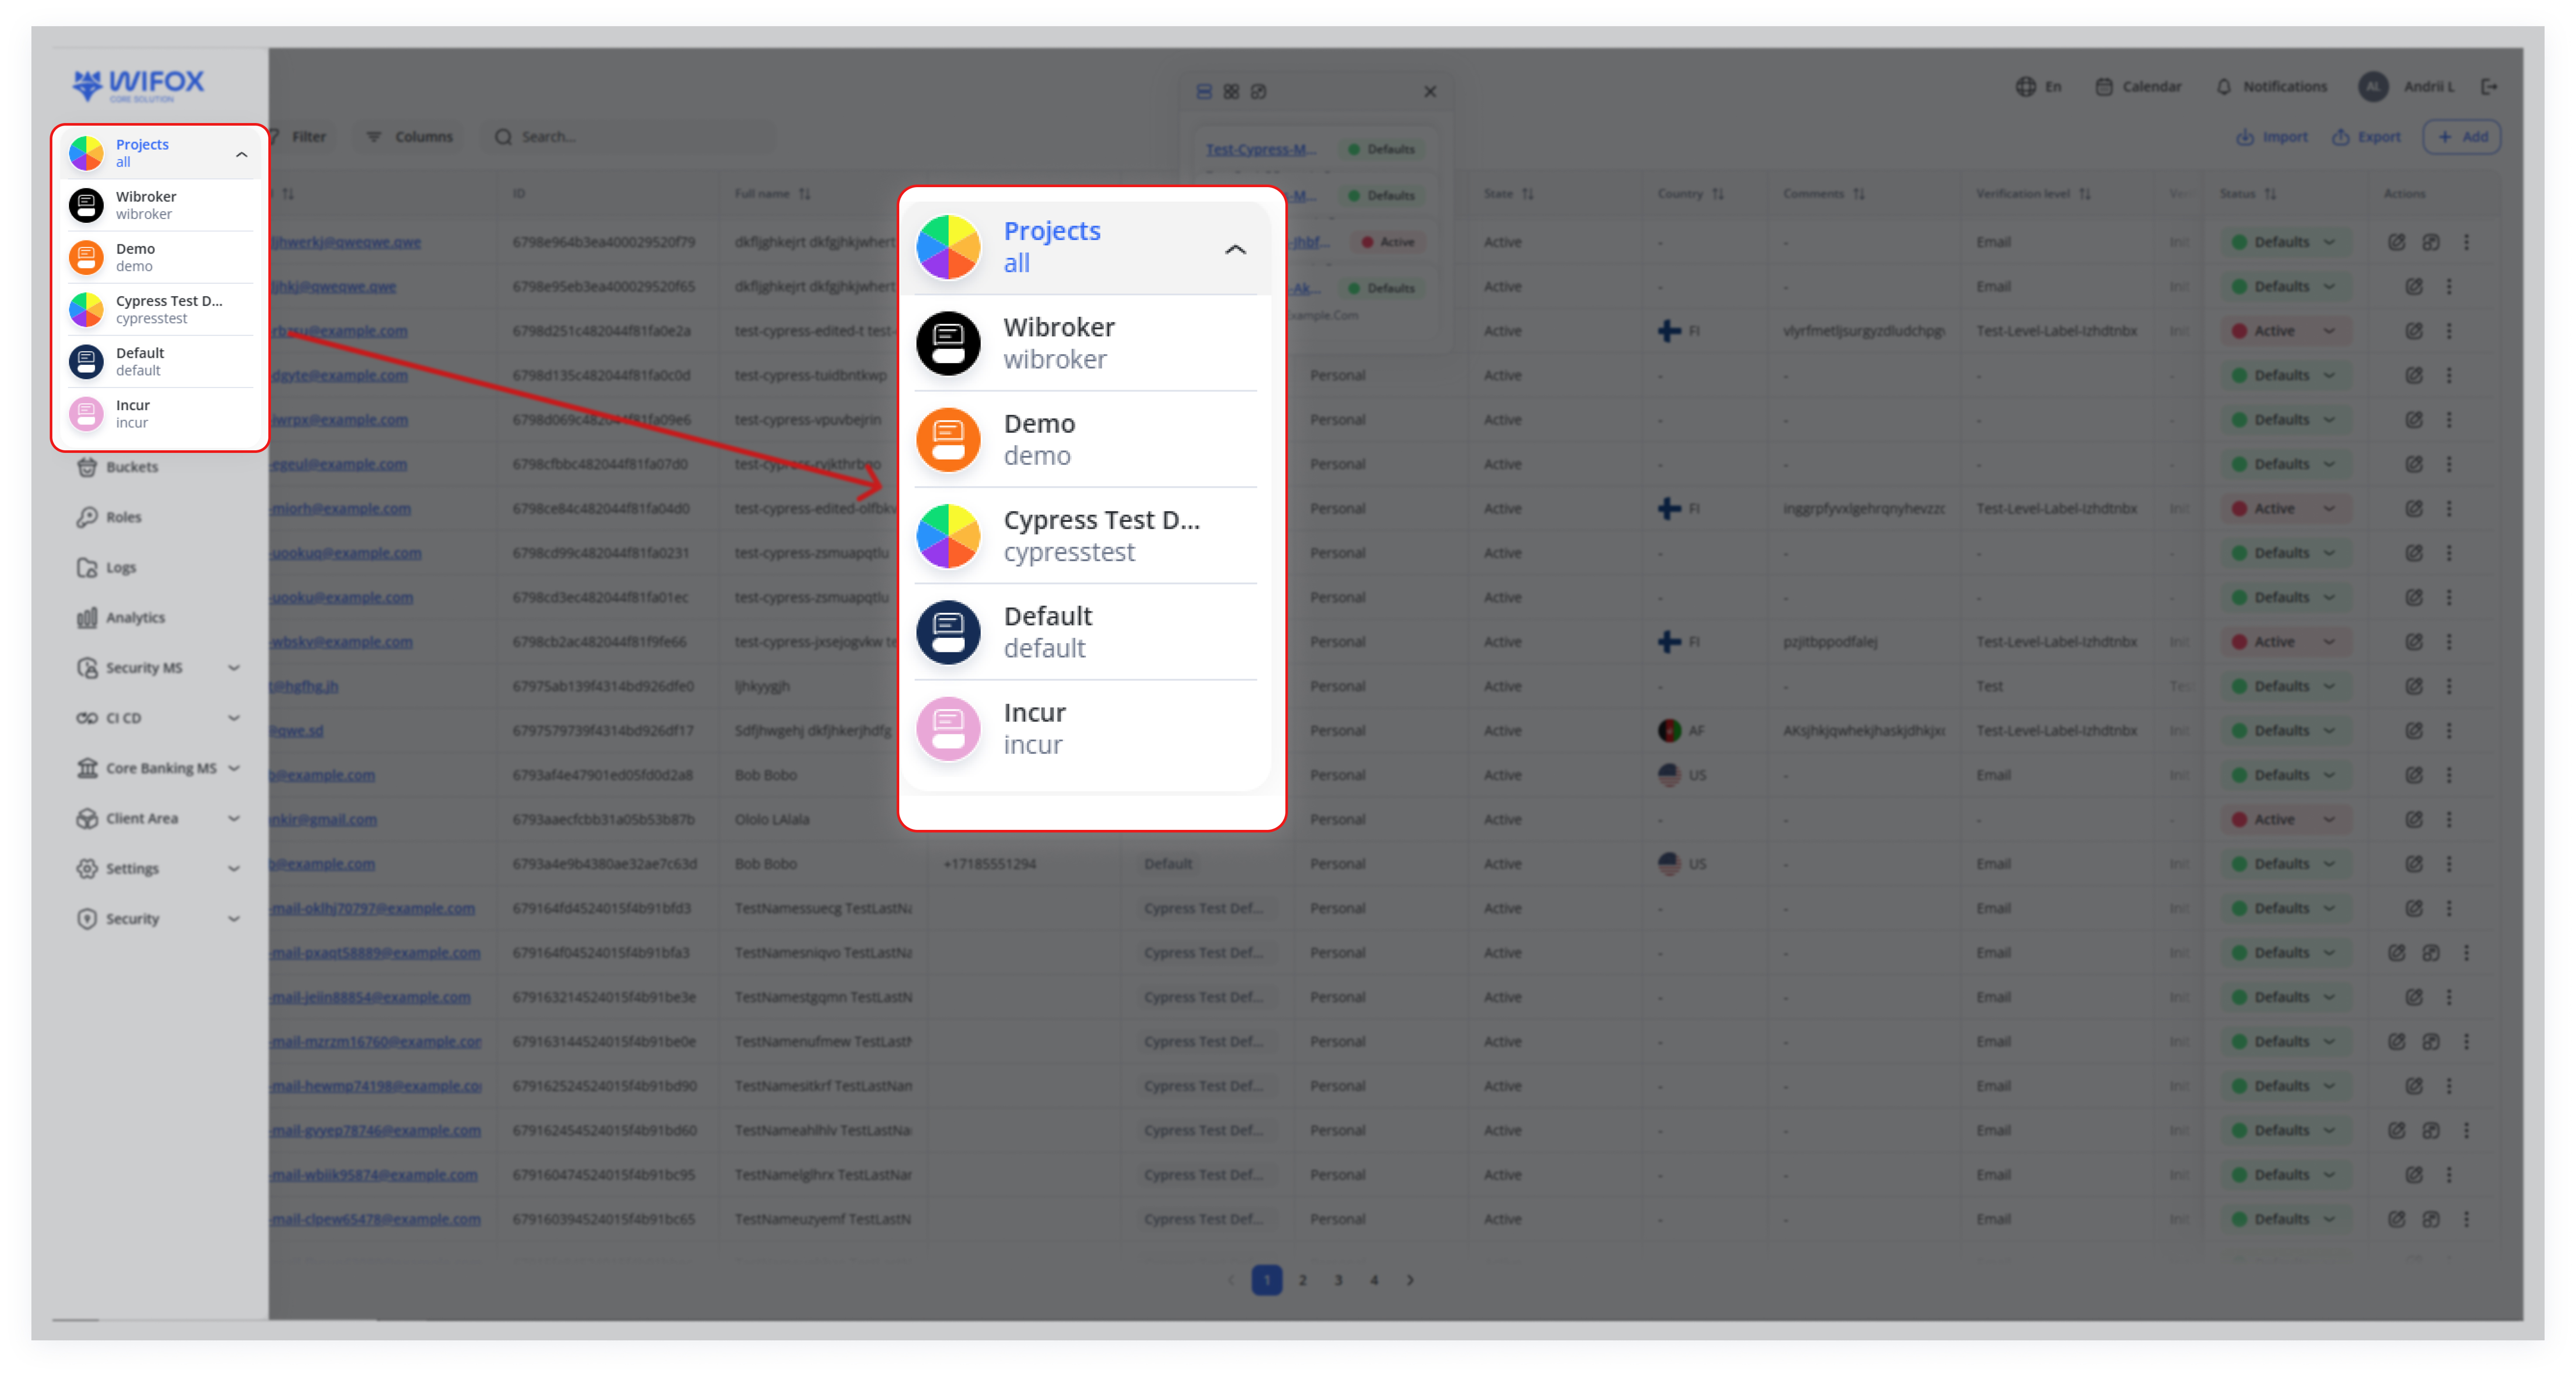
If you need to work with a different project, switch projects in the left‐hand menu first.
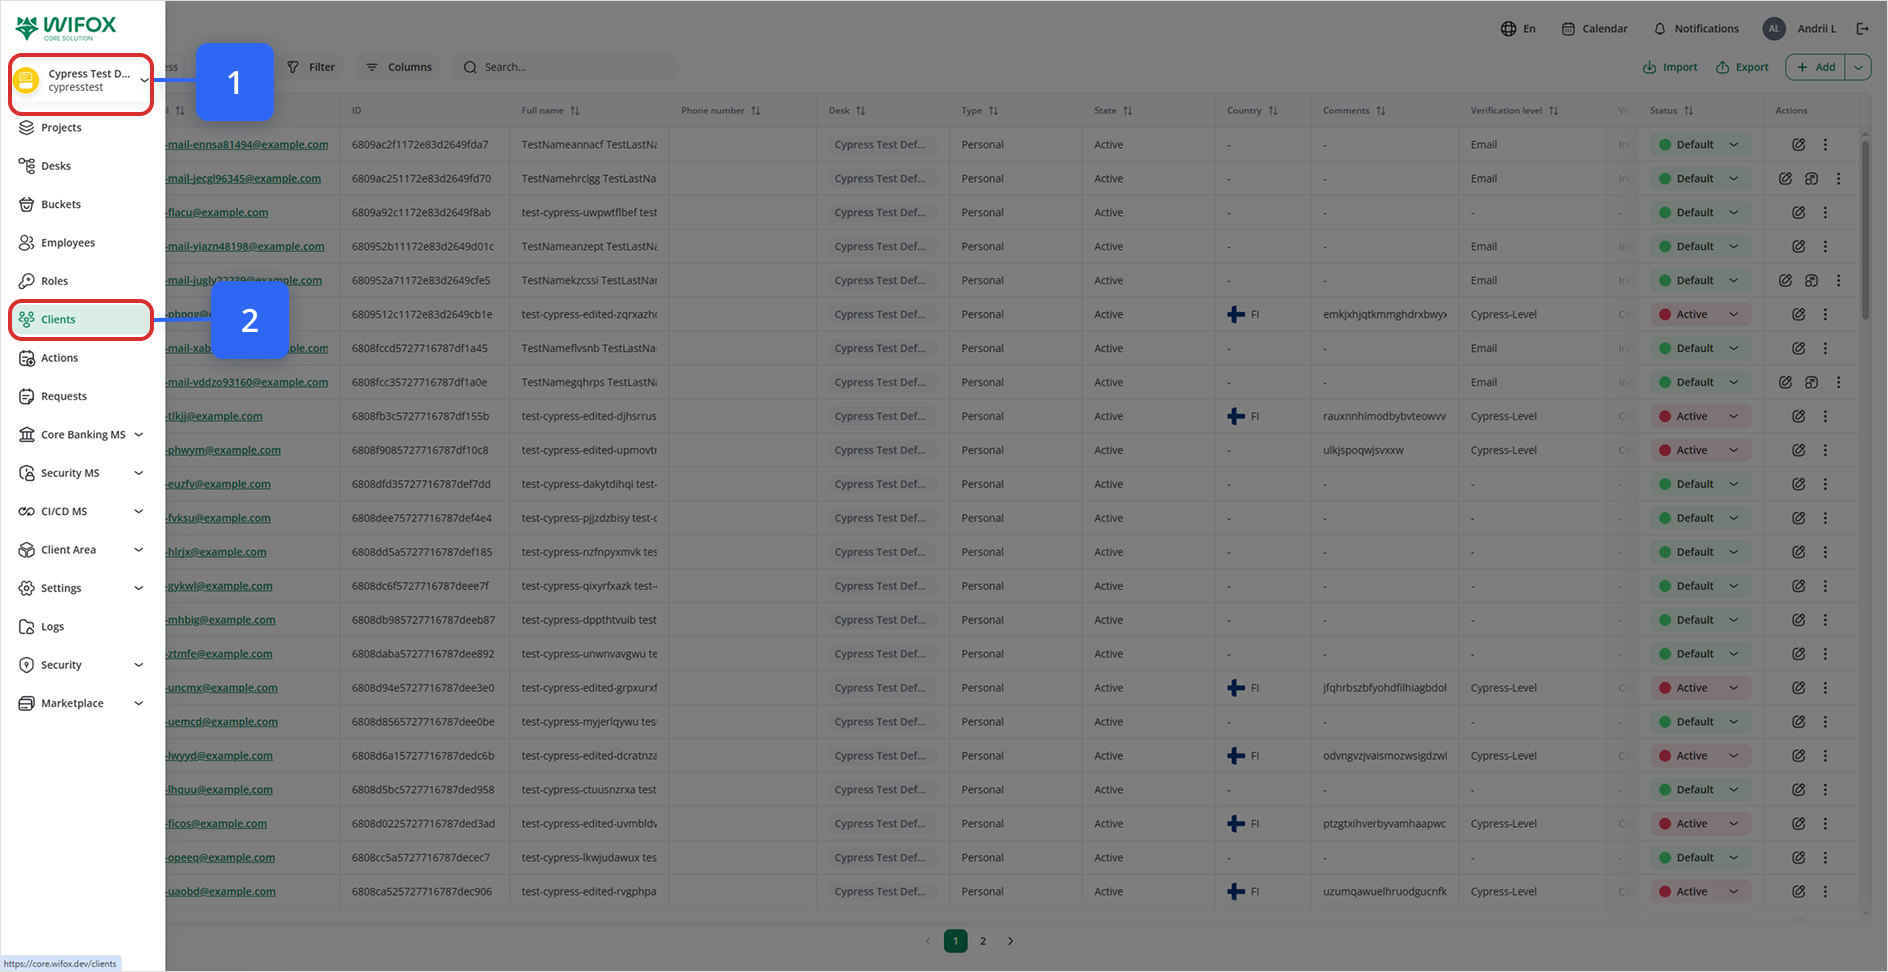
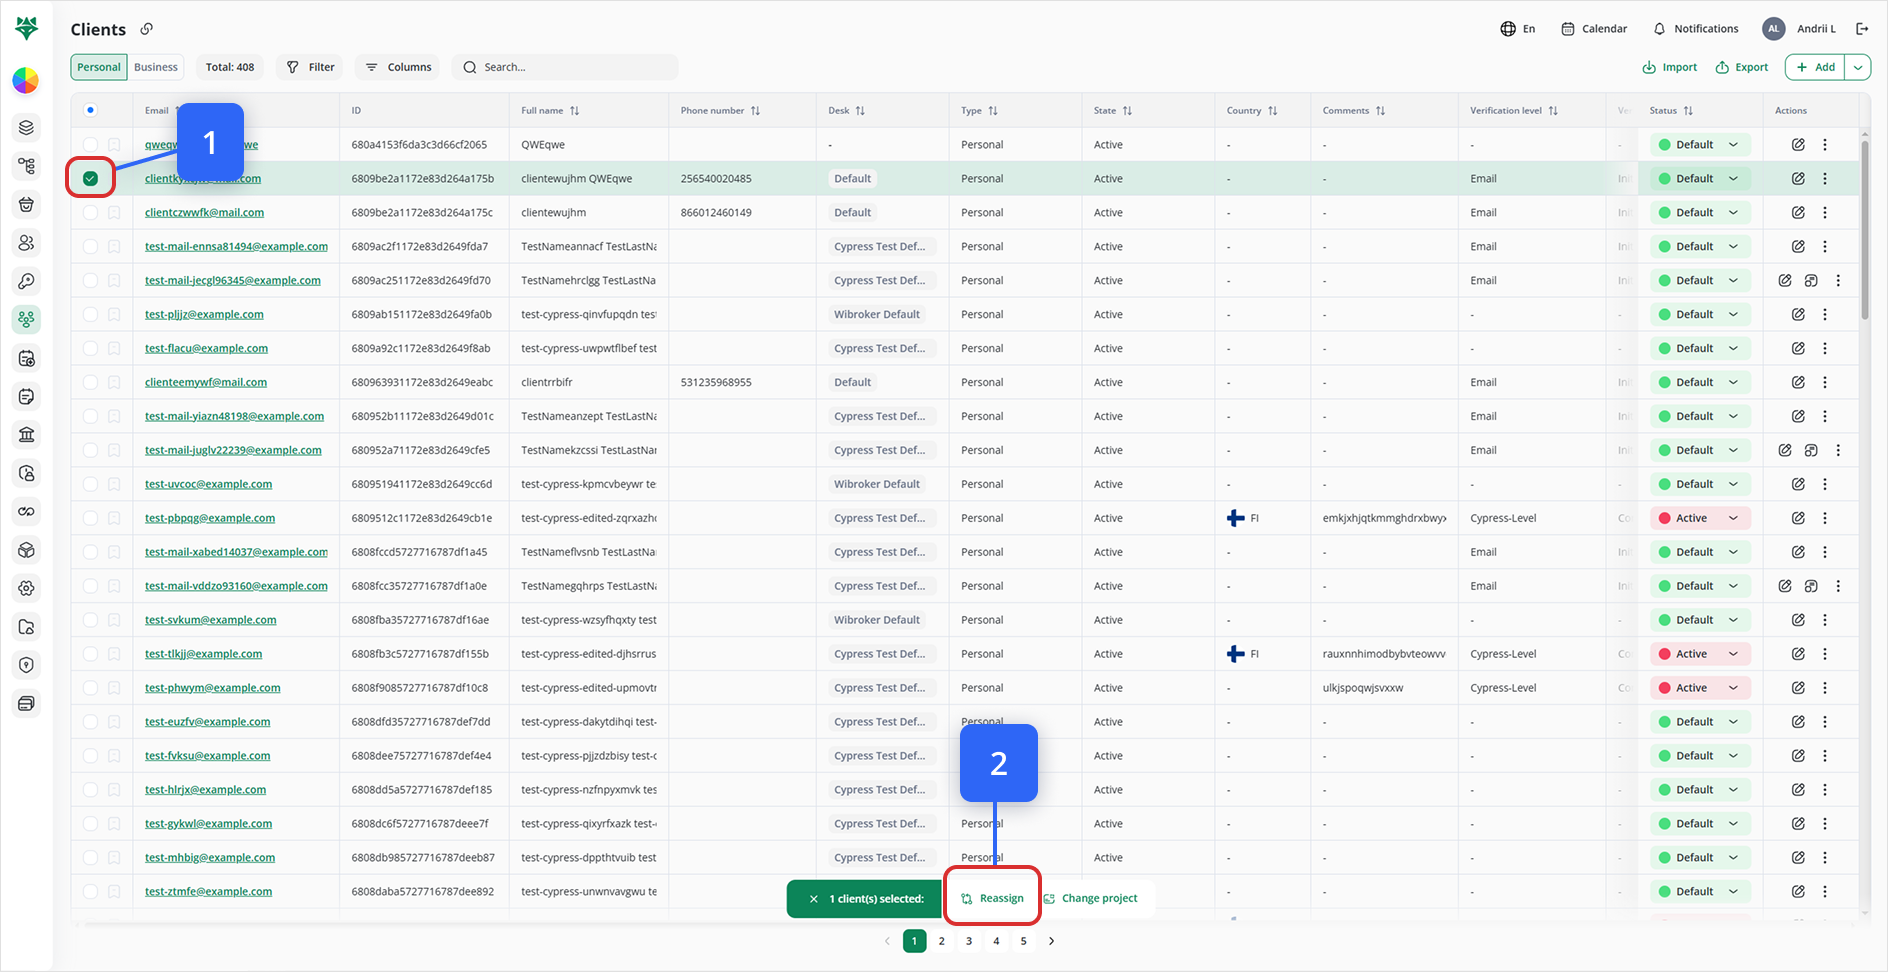
1. Check the box next to the client’s email to select one or more clients.
-
Individually: Click the checkbox next to each client’s email (Look #1).
-
Page-wide: Use the very top-left checkbox to select all clients on the current page.
-
A green bar appears at the bottom: “X client(s) selected”.
2. Click on the Reassign button.
After selecting the clients you wish to update, click the Reassign button at the bottom bar (Look at #2 on the image above).
3. Select a new desk and/or status from the drop-down list.
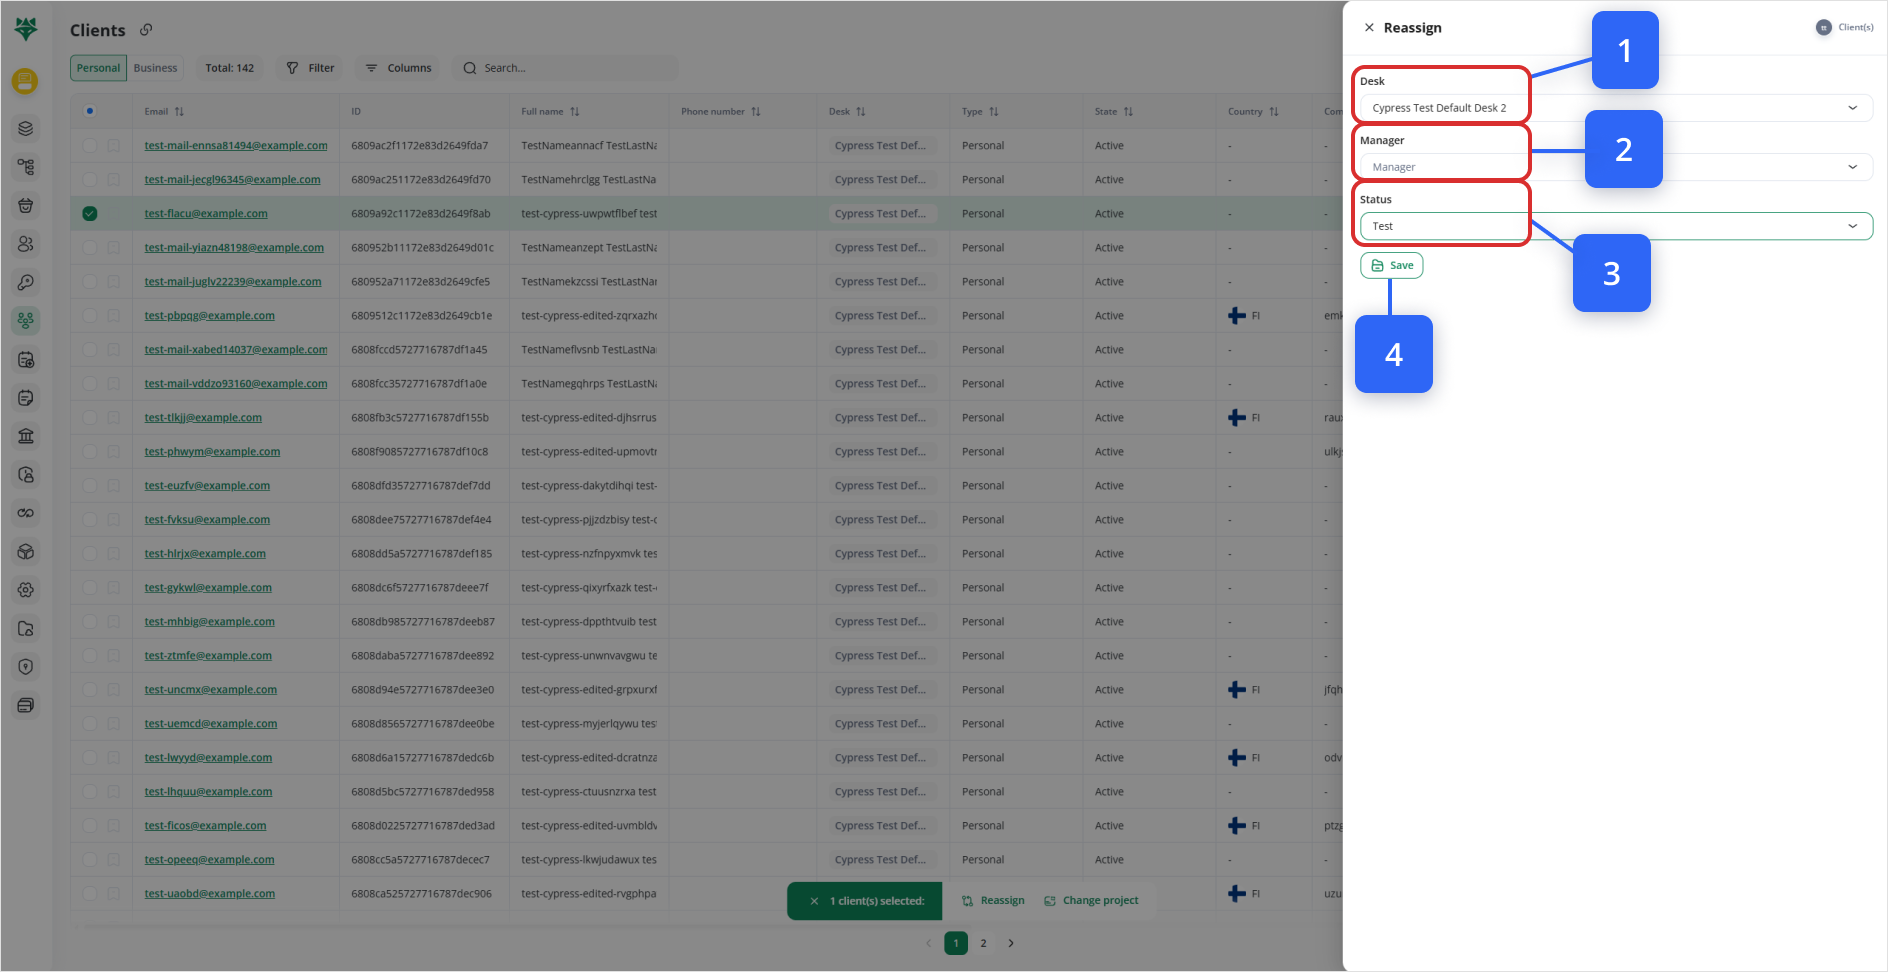
A “Reassign” panel (or modal) opens.
-
Desk → select the new desk for these clients (Step #1).
-
Manager → choose the internal user who will now own them (Step #2).
-
Status → set their account state (e.g. Active, Pending, Suspended) (Step #3).
(All three fields are optional—you can update just one or all three.)
Update the Status.
4. Click Save to apply the changes.
Once you’ve set the desired Desk, Manager, and/or Status, click Save (Step 4).
All selected clients are immediately updated with your new settings.
5. Page‐by‐Page Selection
“Select All” only applies to the current visible page (1).
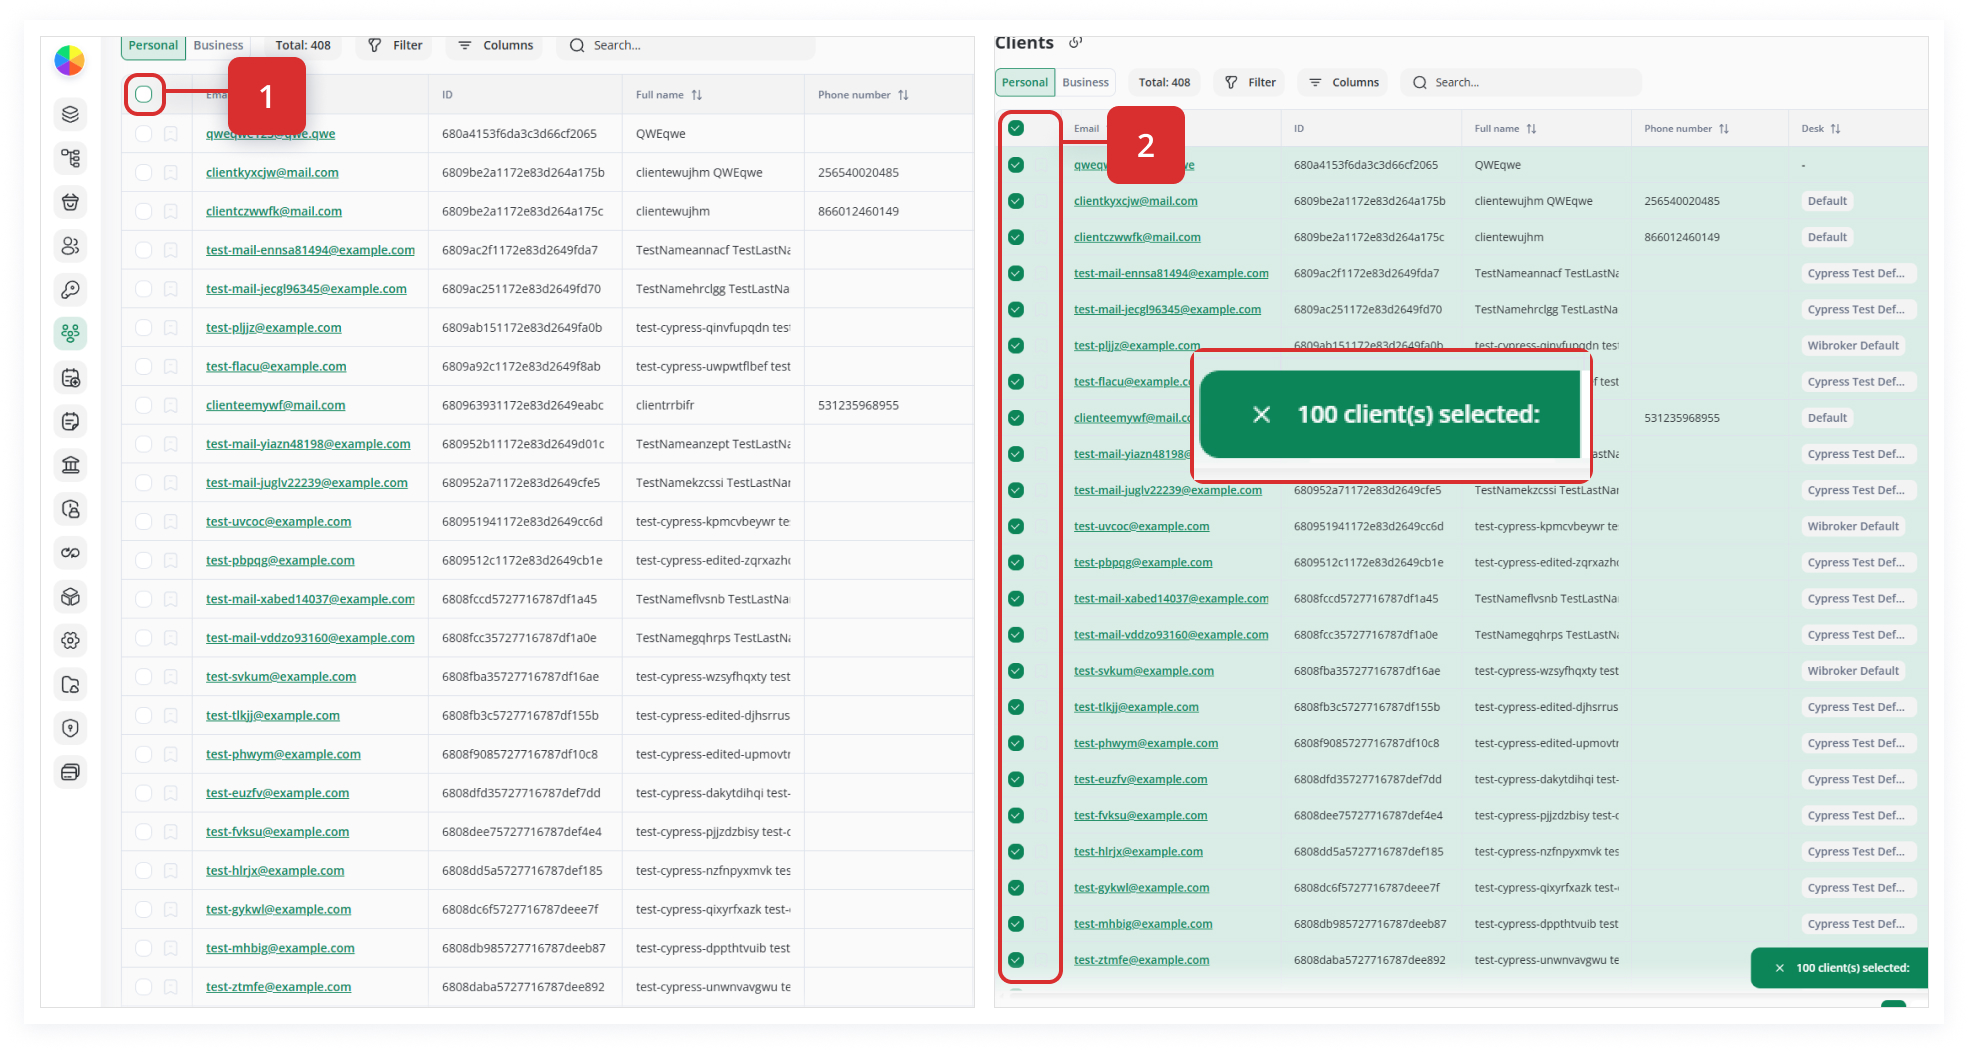
If you have multiple pages of clients to reassign, repeat the selection and reassign steps on each page as needed.
Troubleshooting & Tips
-
Mixed-project error: If you select clients from different projects, you’ll see an error. Simply switch to the correct project (Interface 36.png) and retry.
-
Pro Tip: After selecting, press Esc to collapse the drawer if you need to adjust your selection without losing your place.
-
Audit: All Reassign actions are logged in the Logs tab of each client record for compliance.