
5. How to Manage Texts
The Texts section is where you handle longer content blocks—like notification bodies, modal descriptions, or legal disclaimers—that may require multiple fields (Title, Description, custom Properties) per language.
Edit an Existing Text
1. To translate lengthy elements (e.g., notifications), navigate to Client Area > Texts. You will find a list of all the available texts in the system.
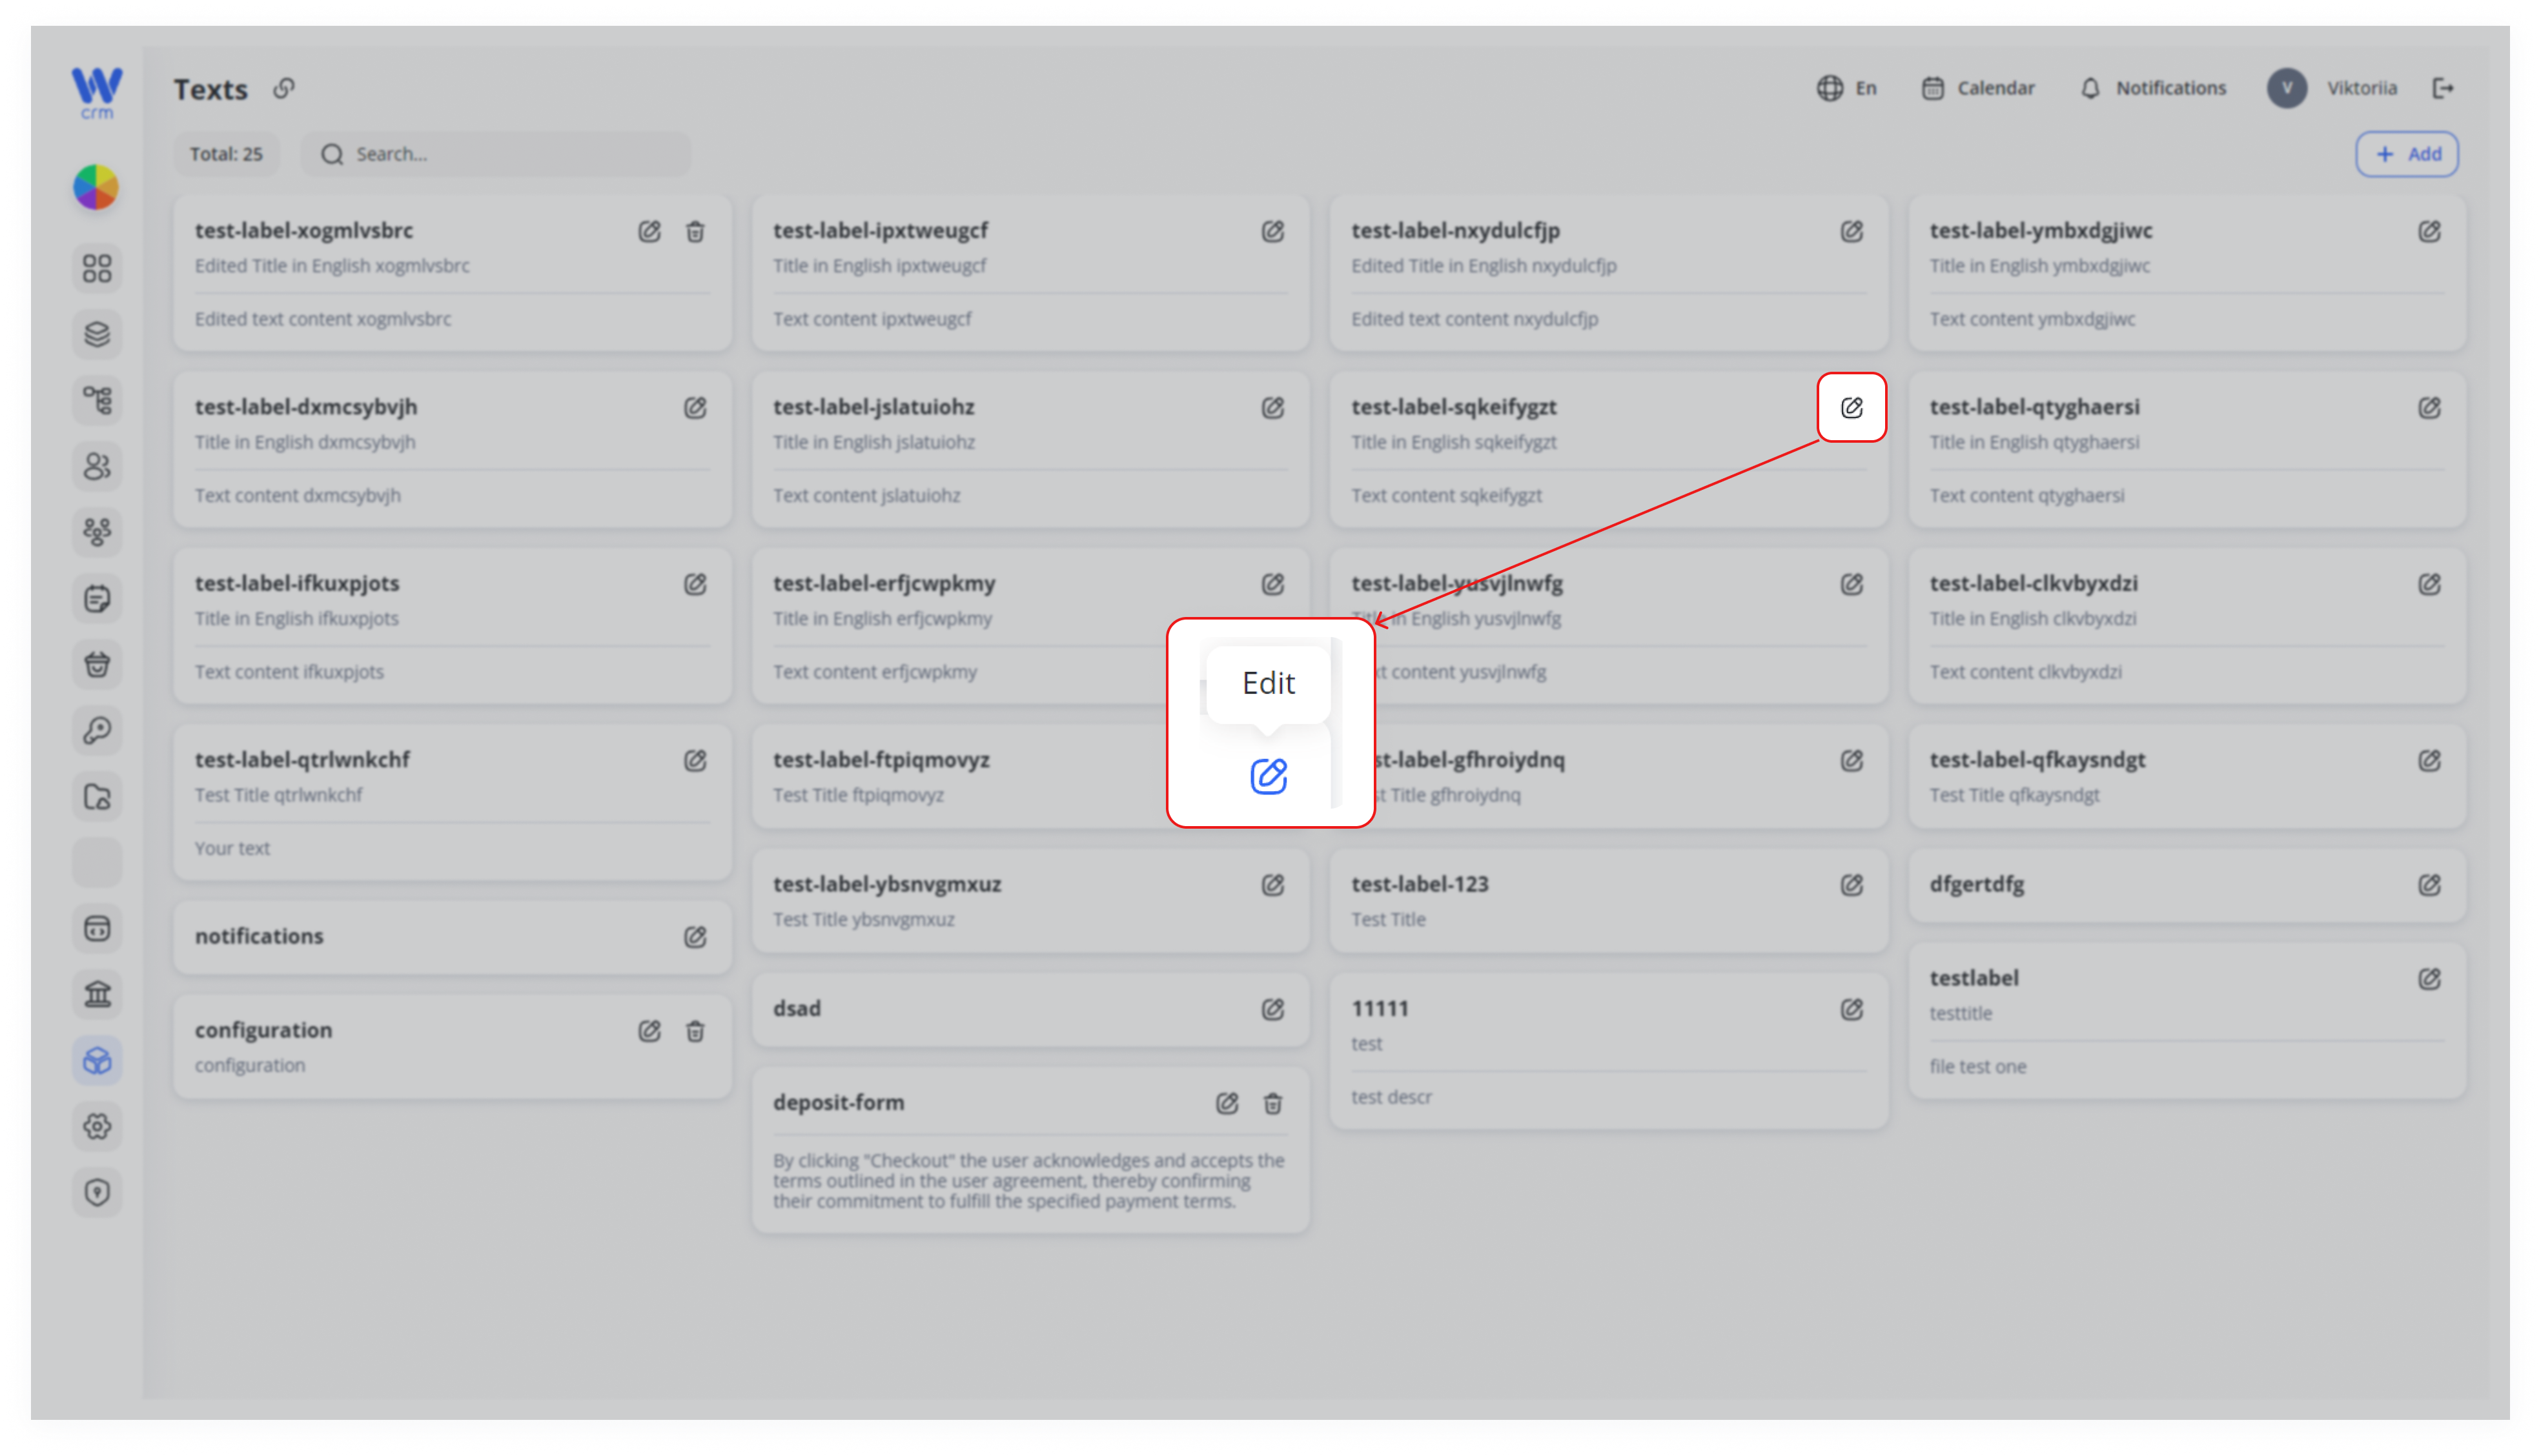
2. Click the ✏️ Edit icon on the card you want to modify.
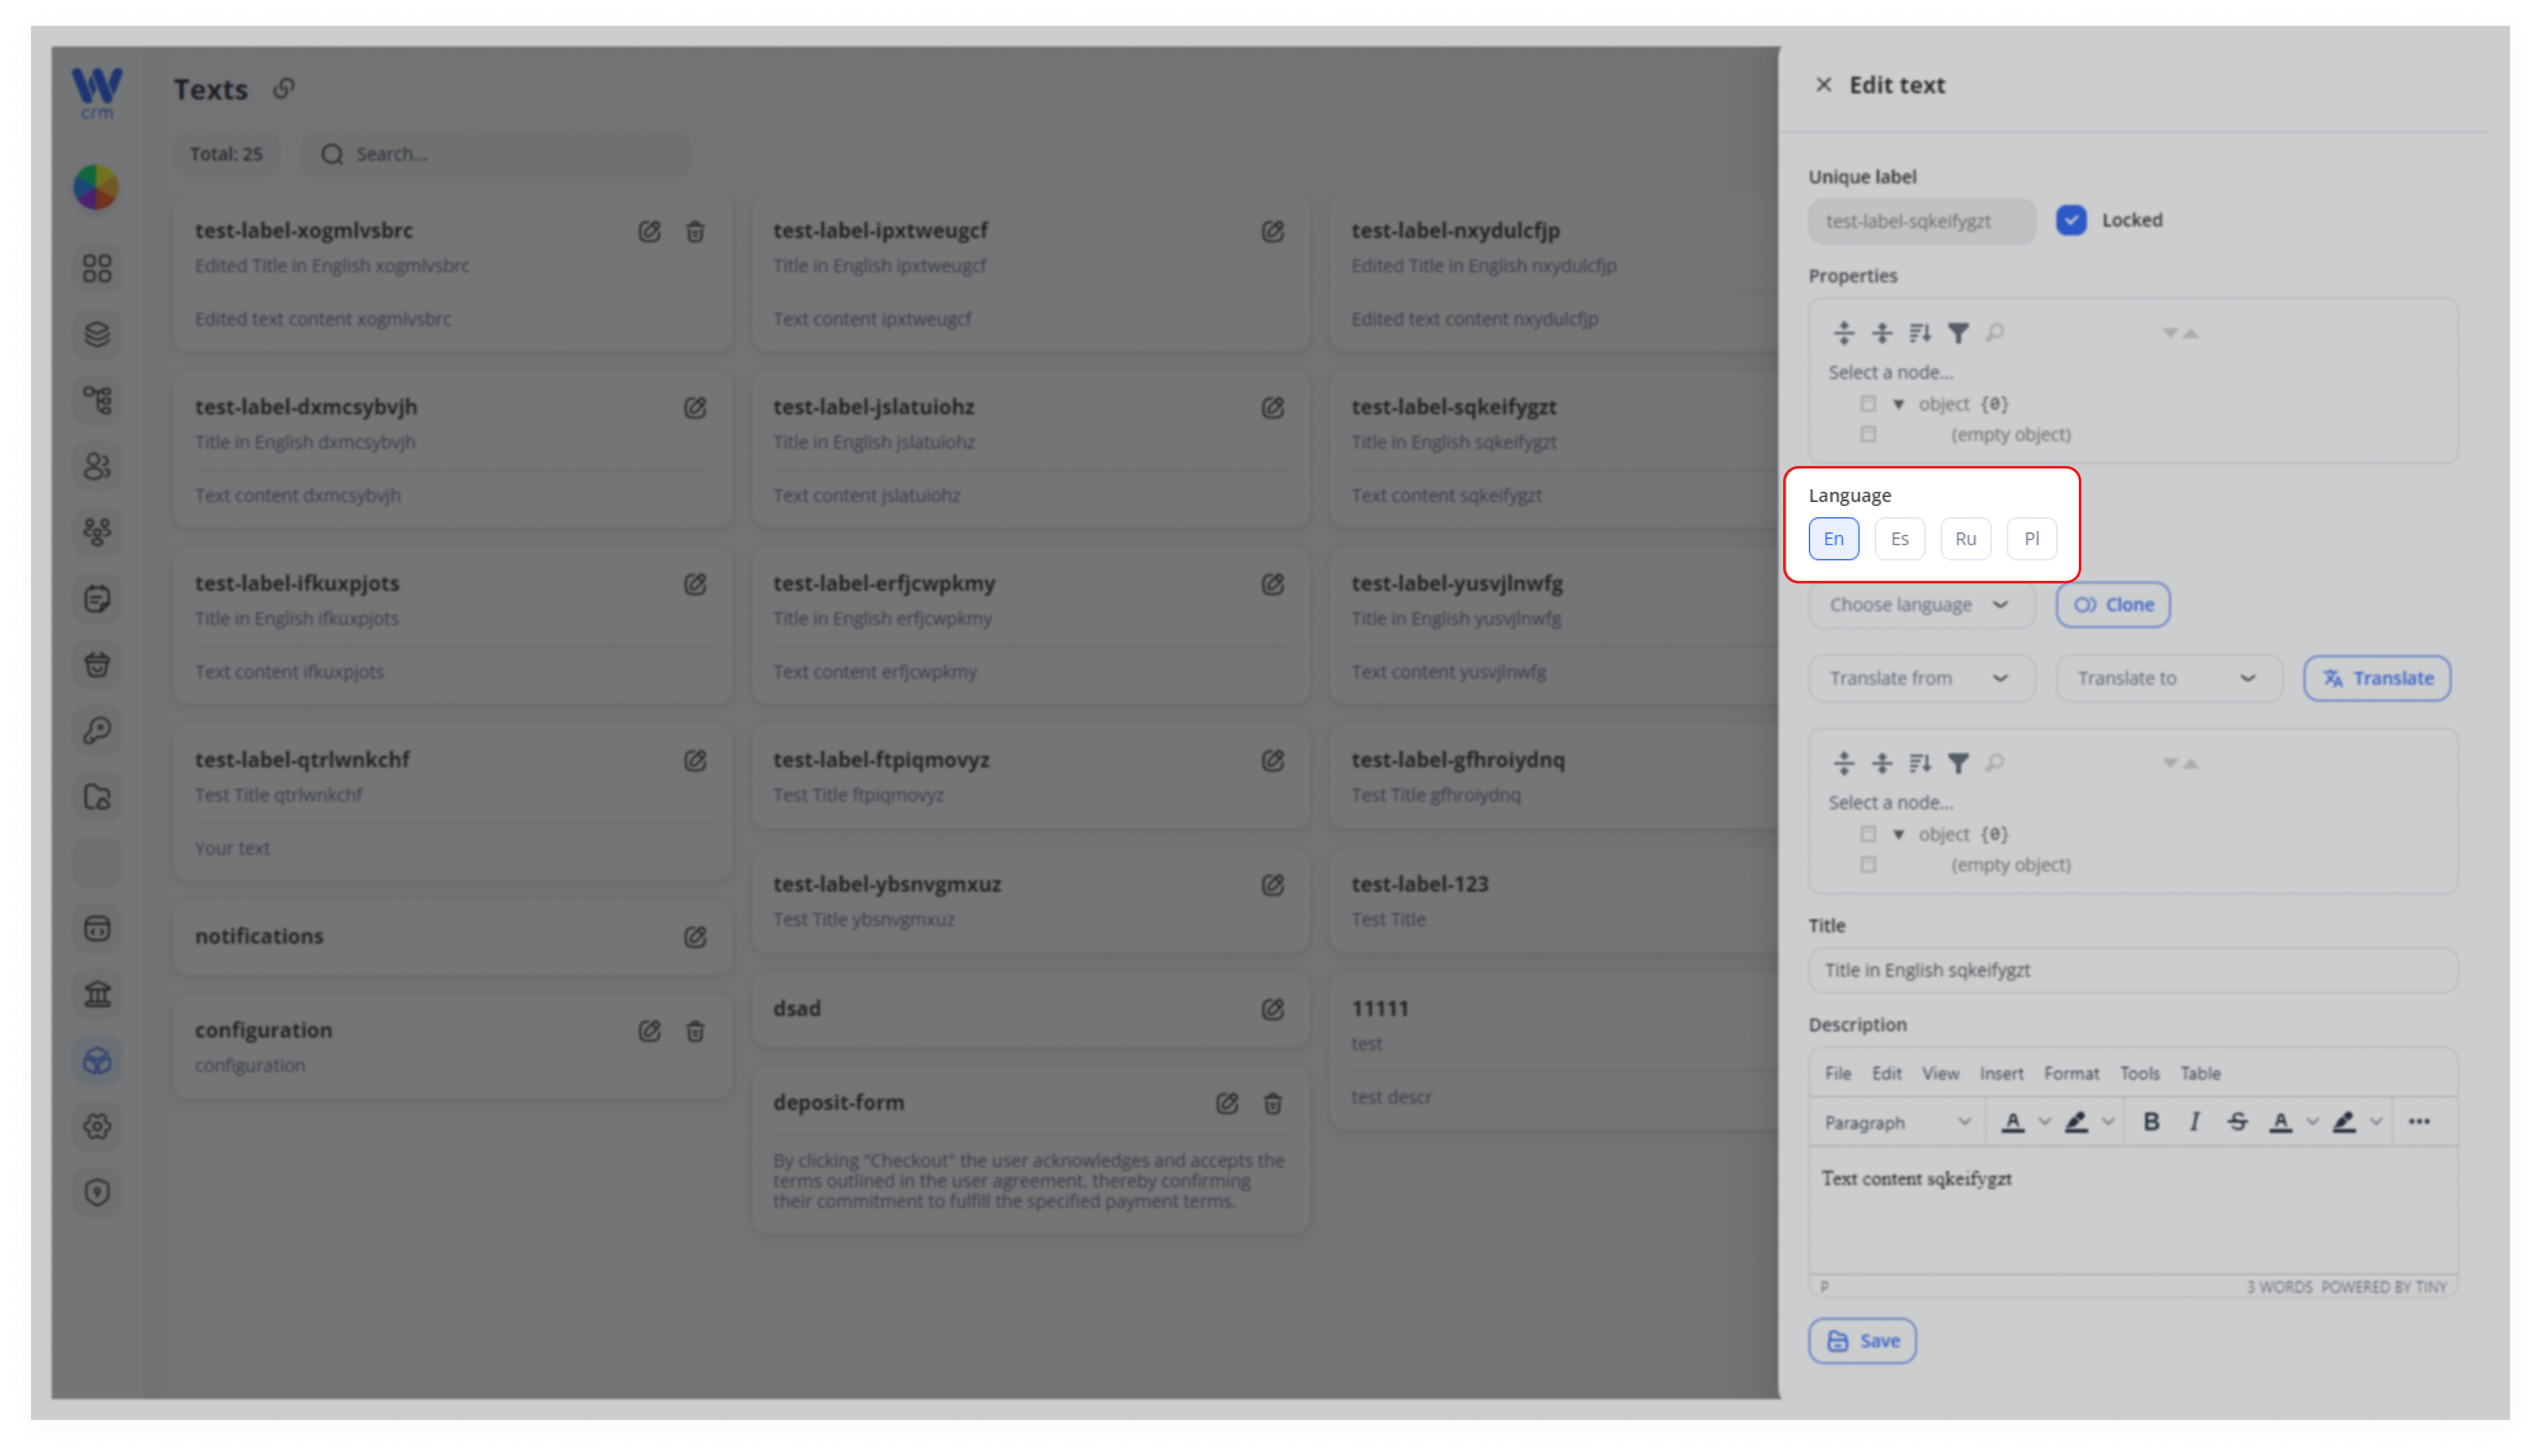
3. Select your target language in the drawer’s Language selector
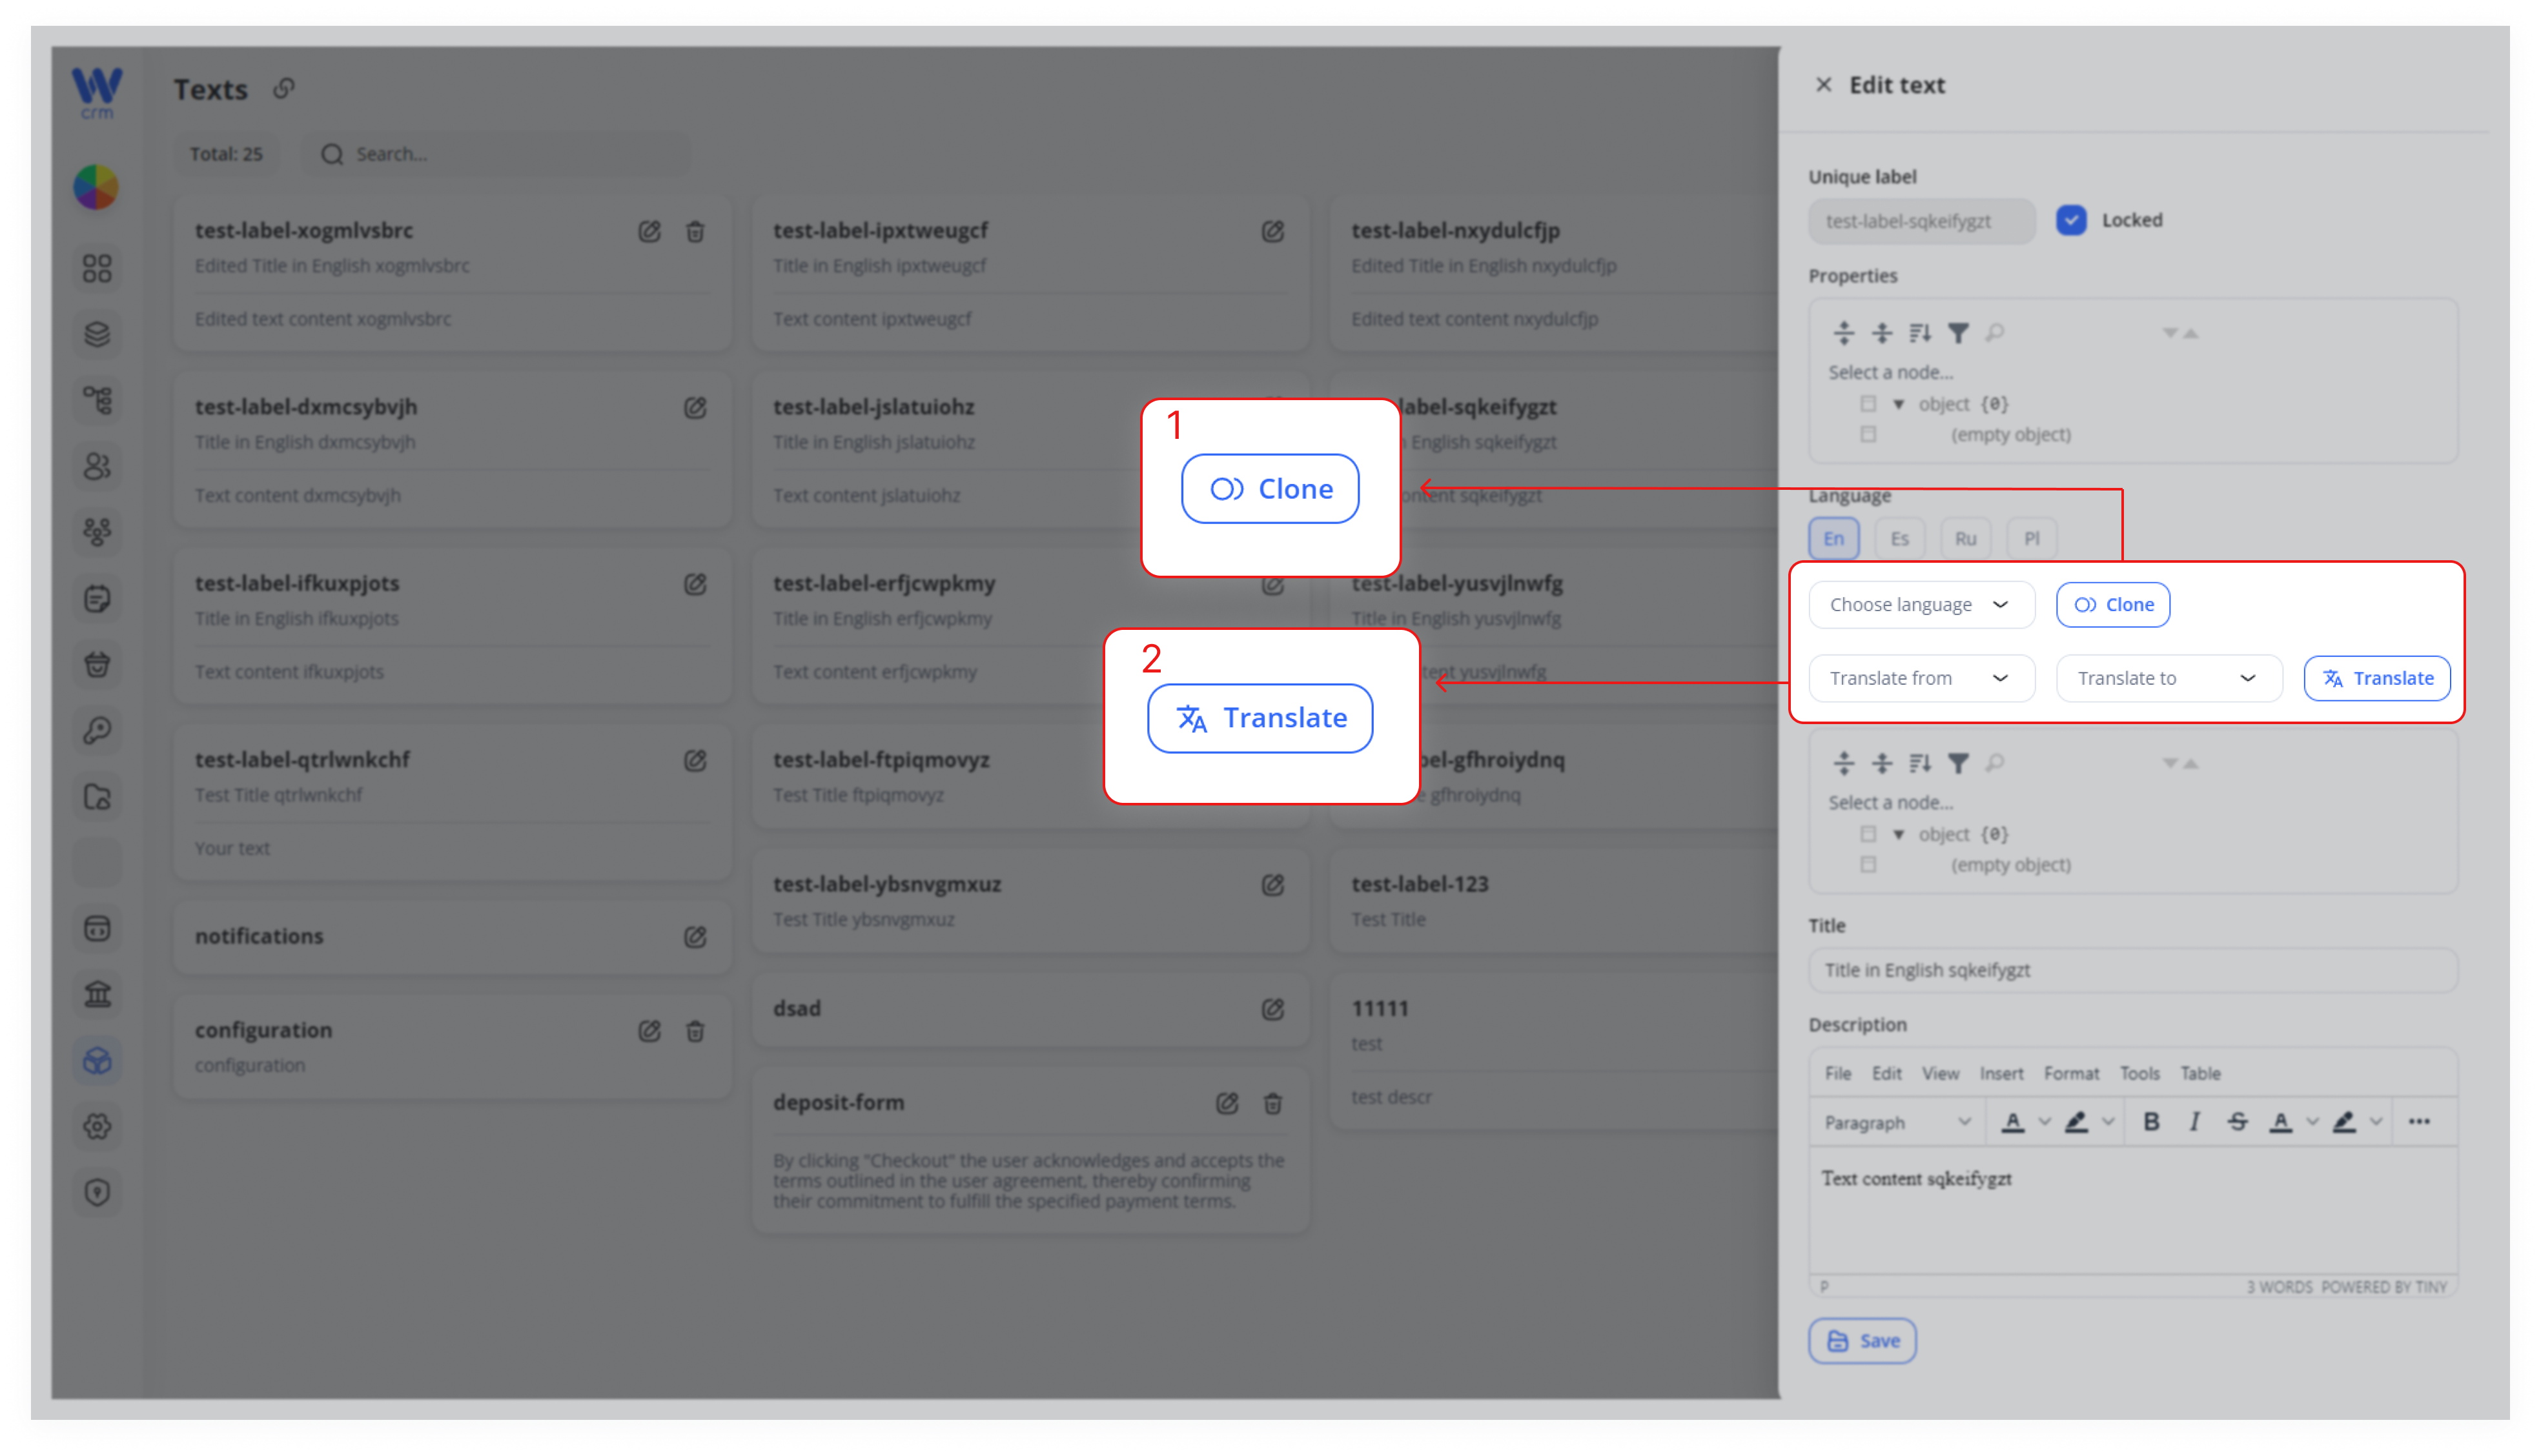
4. Clone existingtranslation contentfrom (optional)
If you want to copy the source-language (e.g. English) fields as a starting point, choose it from the “Choose language”Select” dropdown and click Clone.
5. Auto-translateIntegrations with AIOpenAI (optional)
ToSelect Translate to translate programmatically, select Translate from and Translate to languages,programmatically, then click TranslateIntegration and choose OpenAI. Review and tweak any awkward phrasing afterward.
6. Update fields
- Title: A concise headline or name for this text block.
- Description: Rich-text body (you can format, insert links, tables, etc.).
- Properties: Any custom JSON nodes or metadata your UI may consume.
7. Save your changes. The card will immediately reflect the updated Title/Description for that language
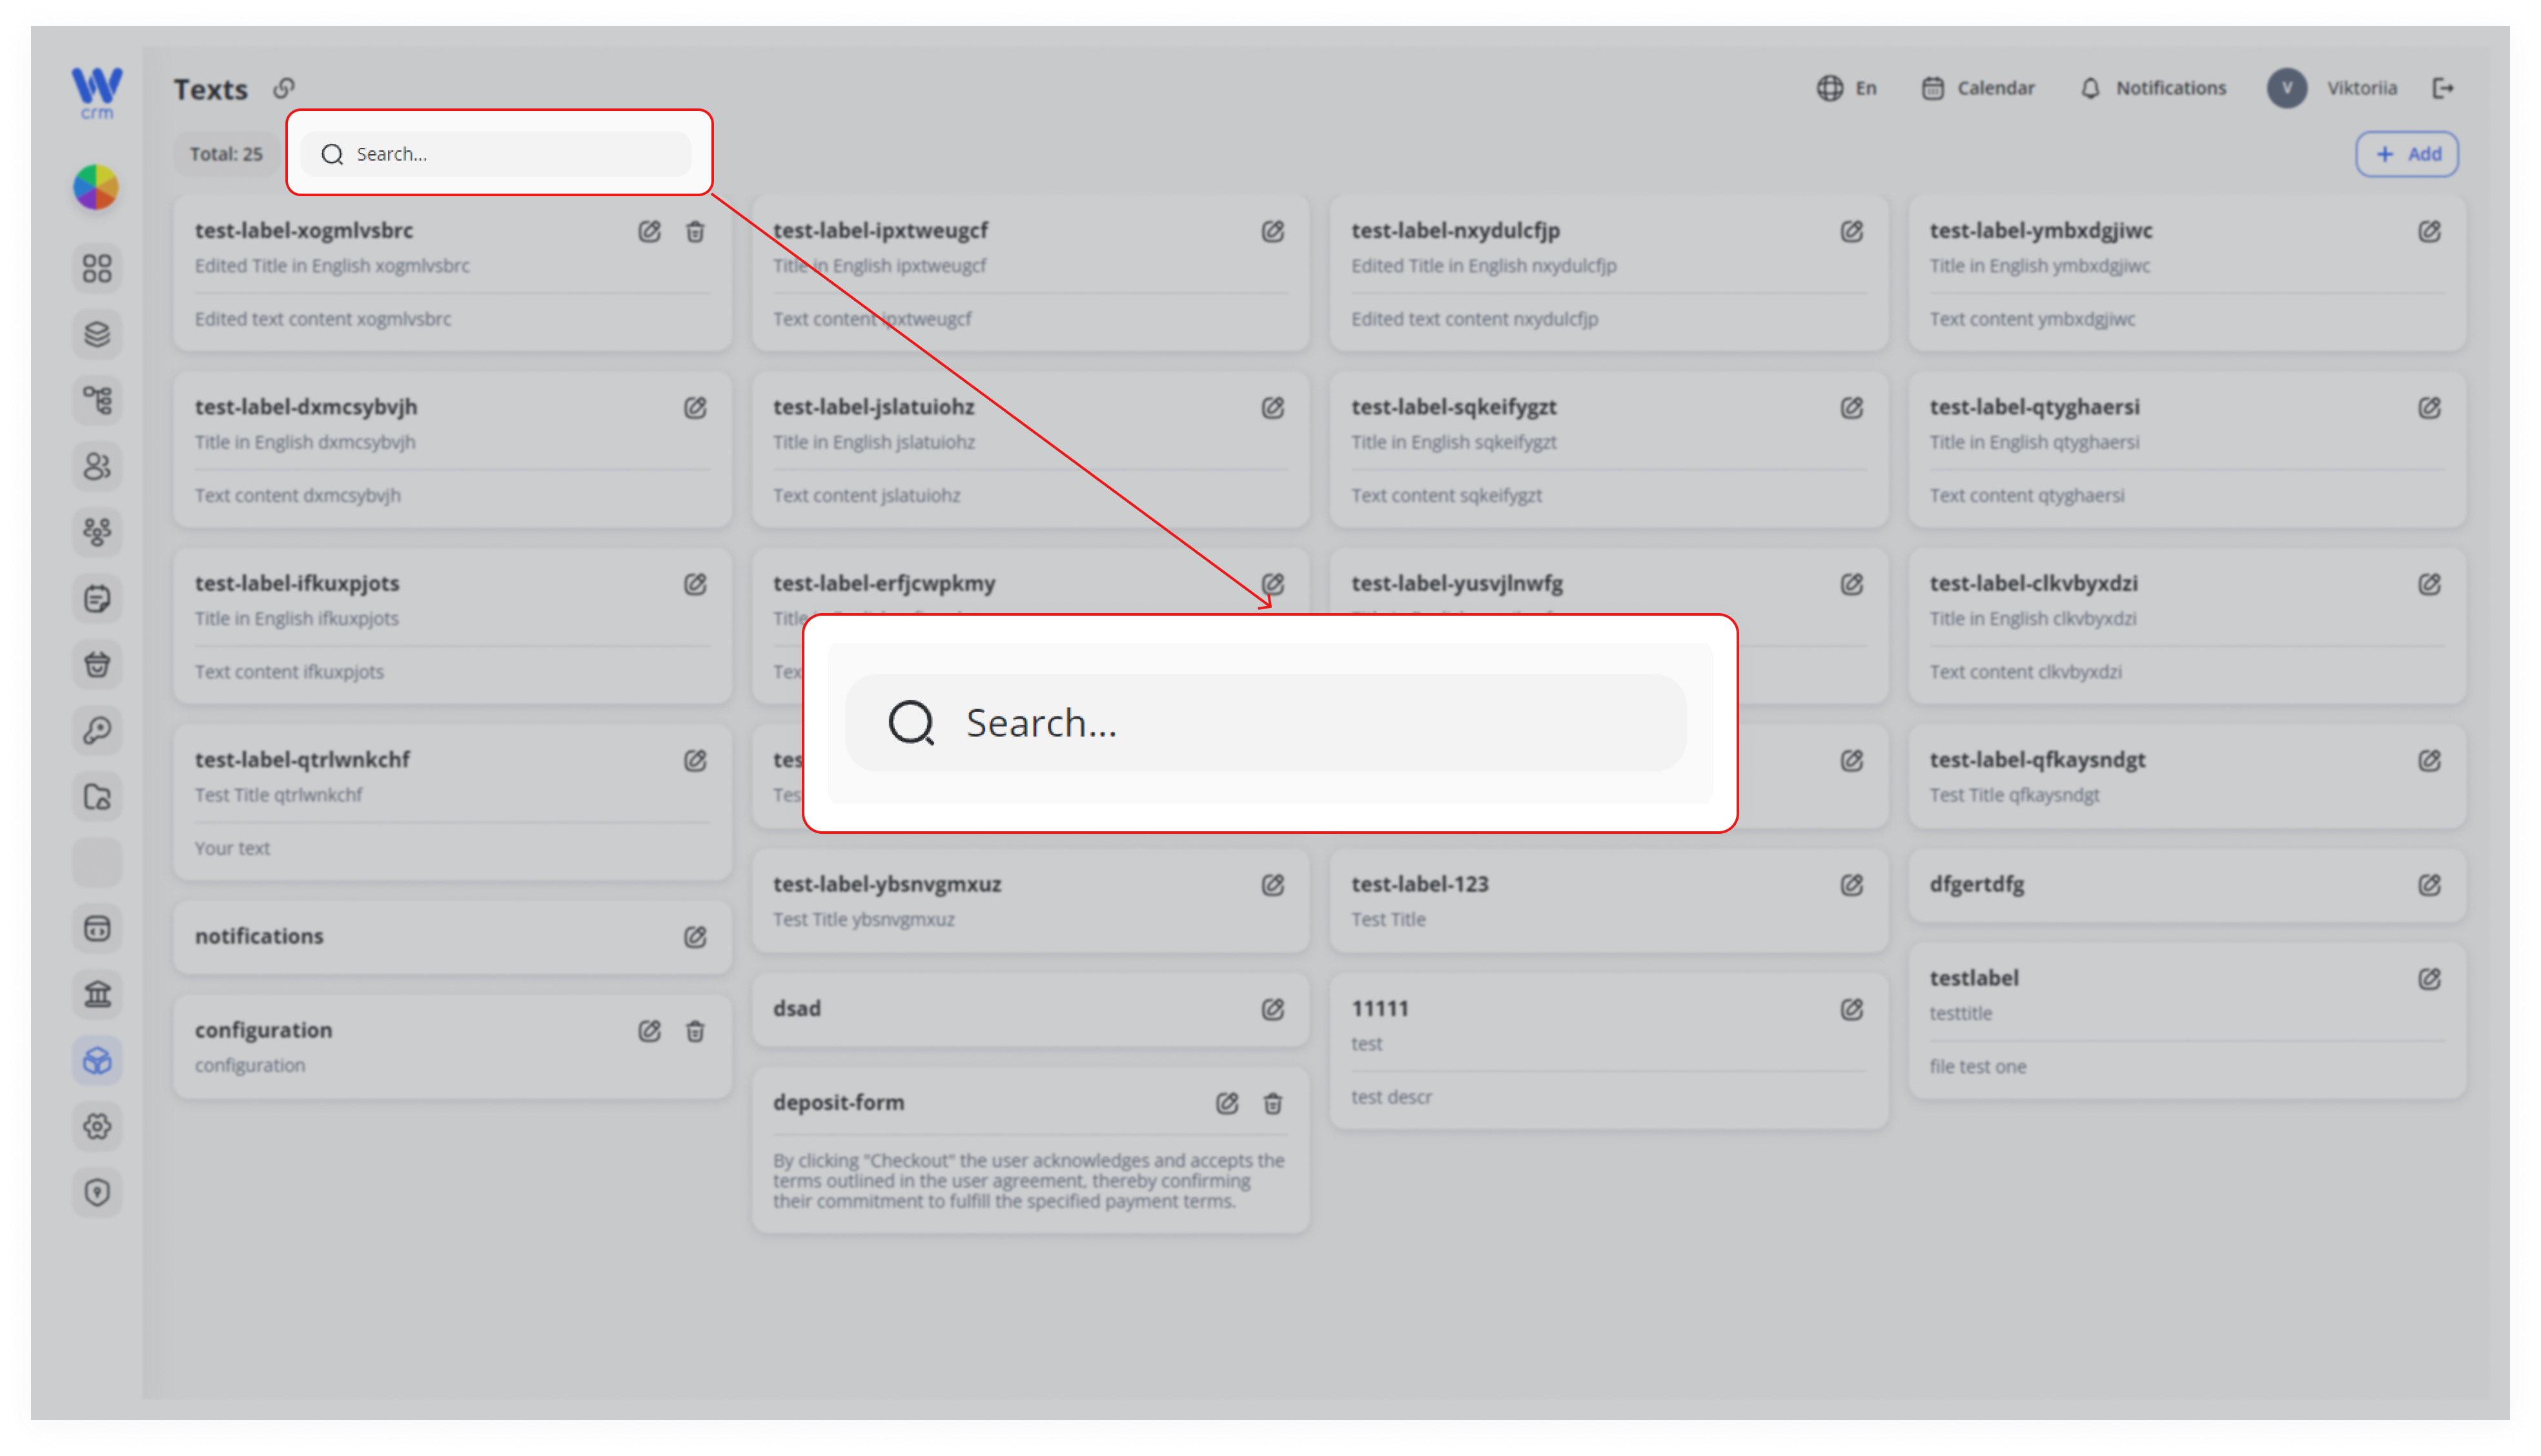
Search for a text
- Filter by label or content: Type part of a Unique label, Title, or Description into the Search… field above the cards to narrow down the list.
Add a new text and its translations
Developer note: Before end users can see this text in the UI, your front-end code must reference the new Unique label.
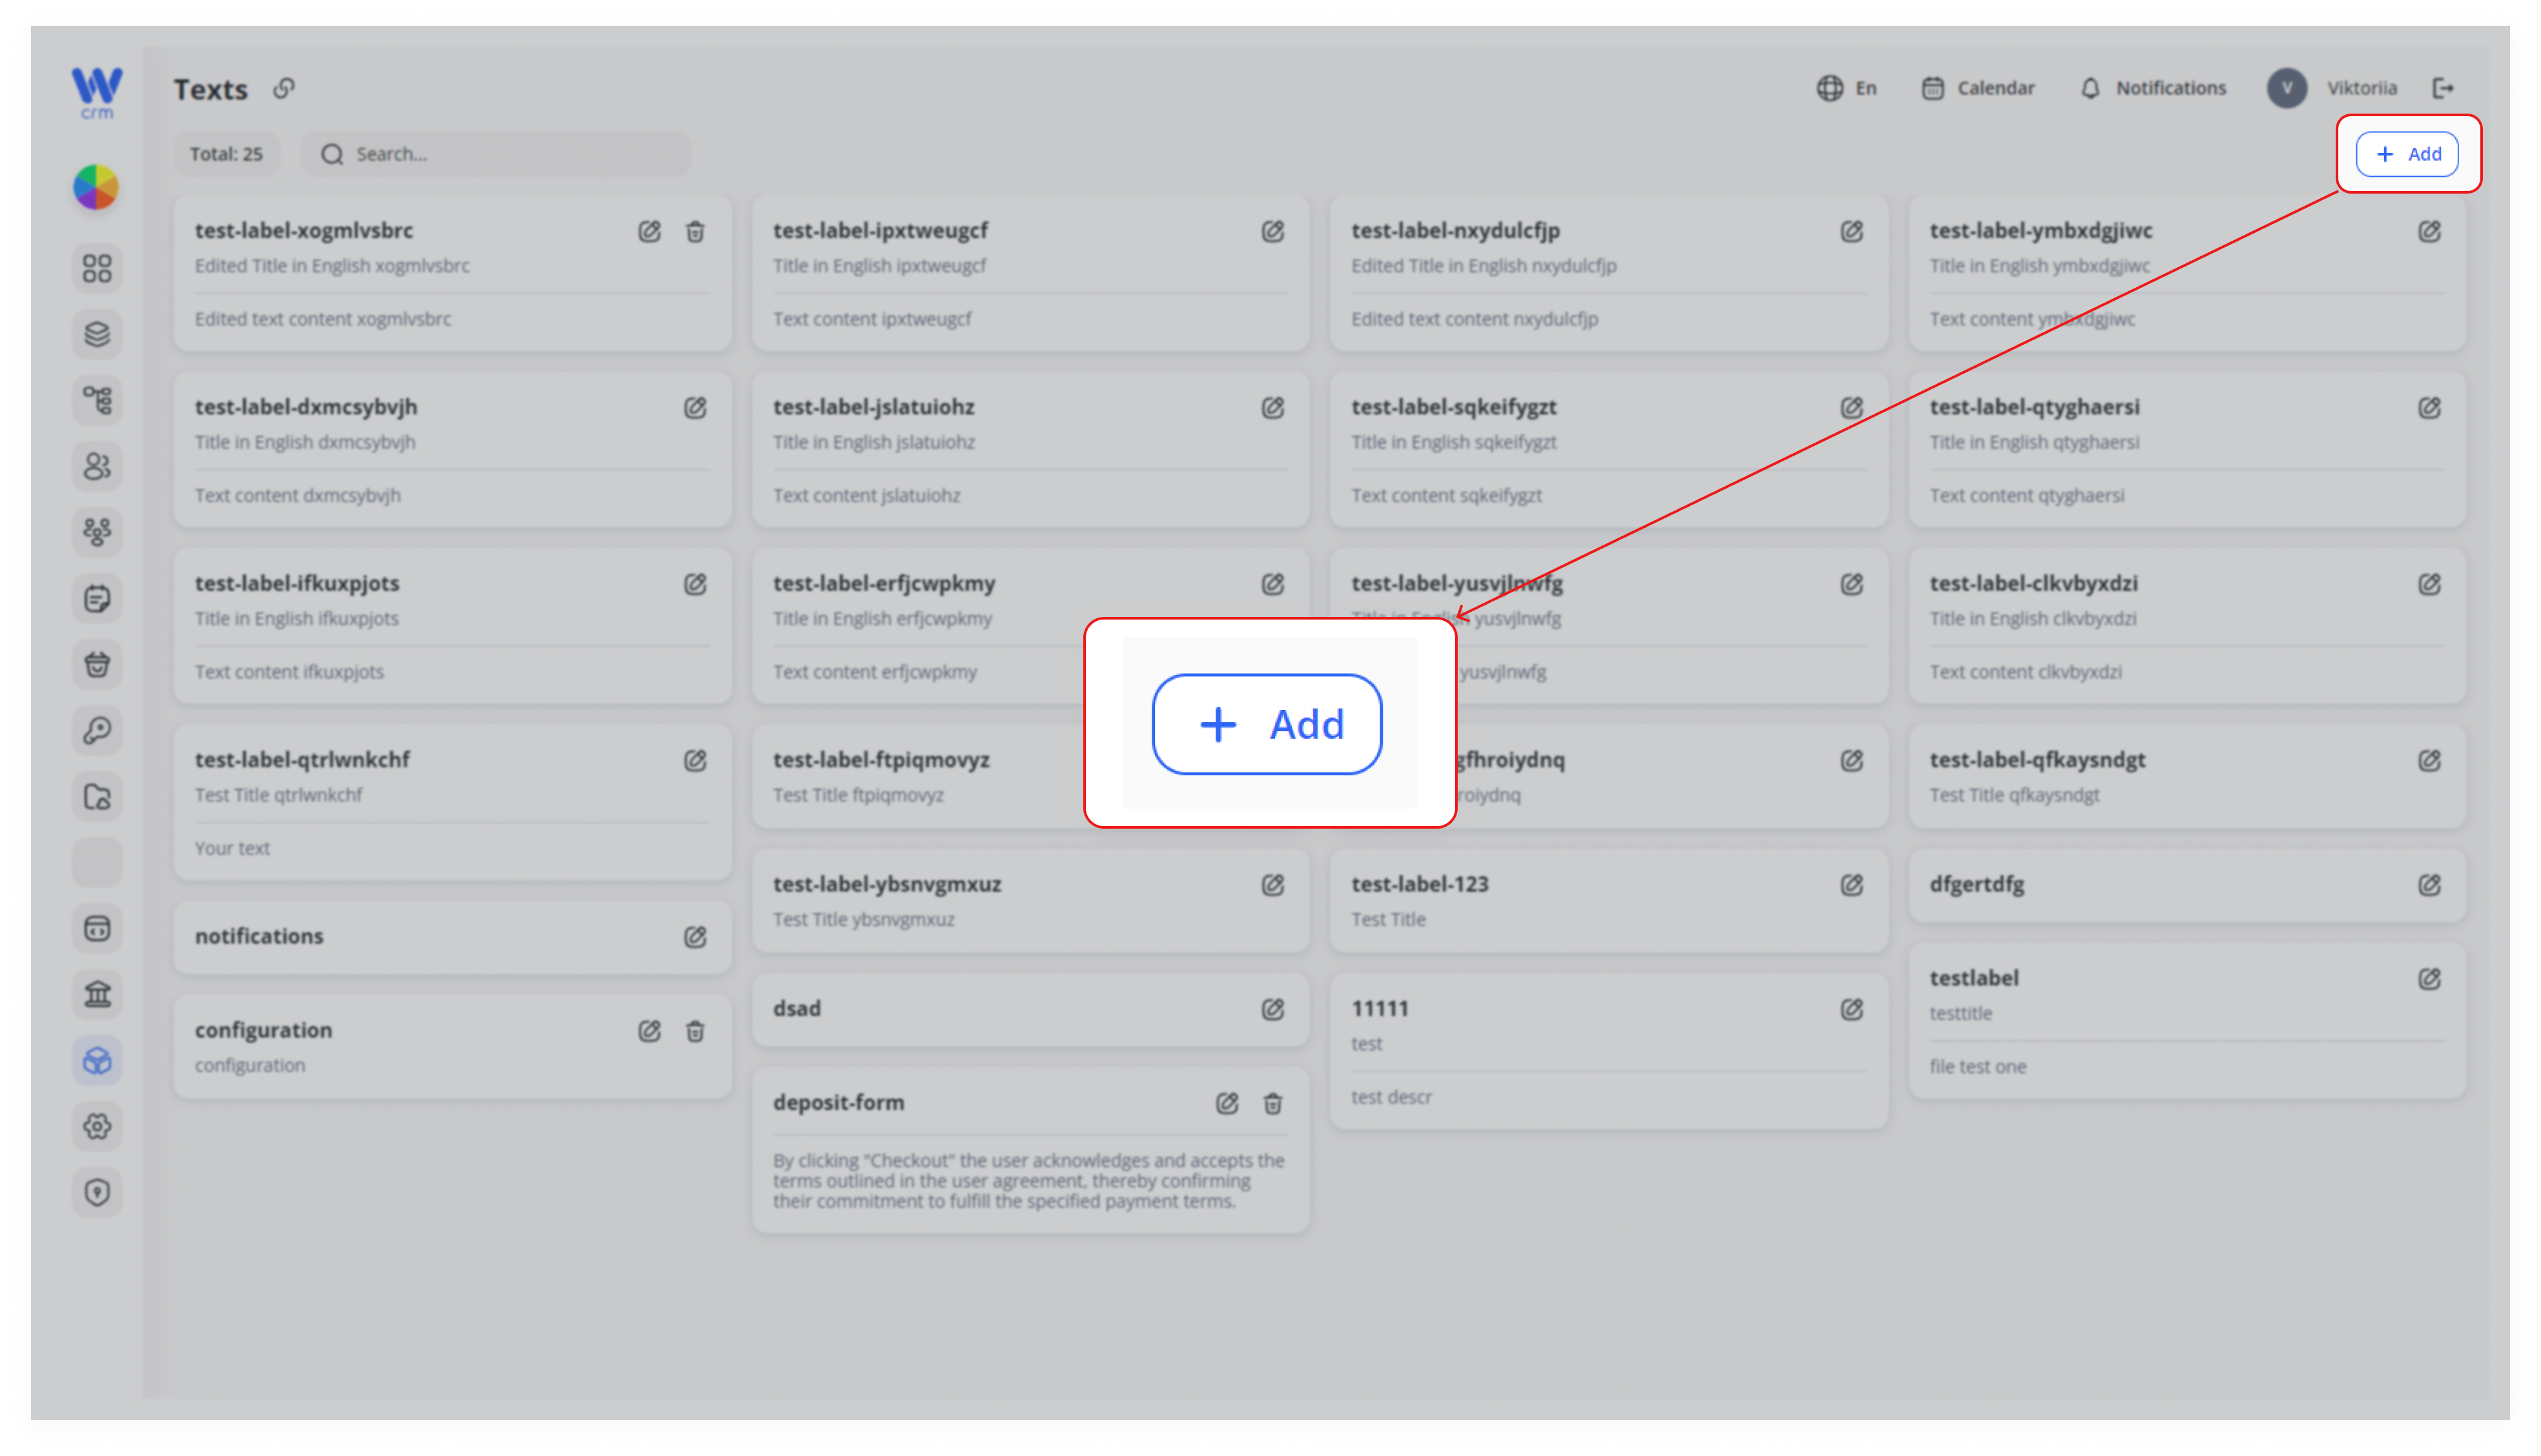
1. Click on the Add Text button in the upper right corner.
2. Define the Unique label
Enter a machine-friendly identifier (e.g. deposit.termsNotice) and toggle Locked if you want to prevent accidental deletion.
3. Configure Properties (optional)
If your UI reads structured metadata, fill in any JSON nodes here.
4. Select Language and Fill Content
-
Click the language tabs (En, Es, Ru, Pl) to switch between locales.
-
For each, enter Title and Description.
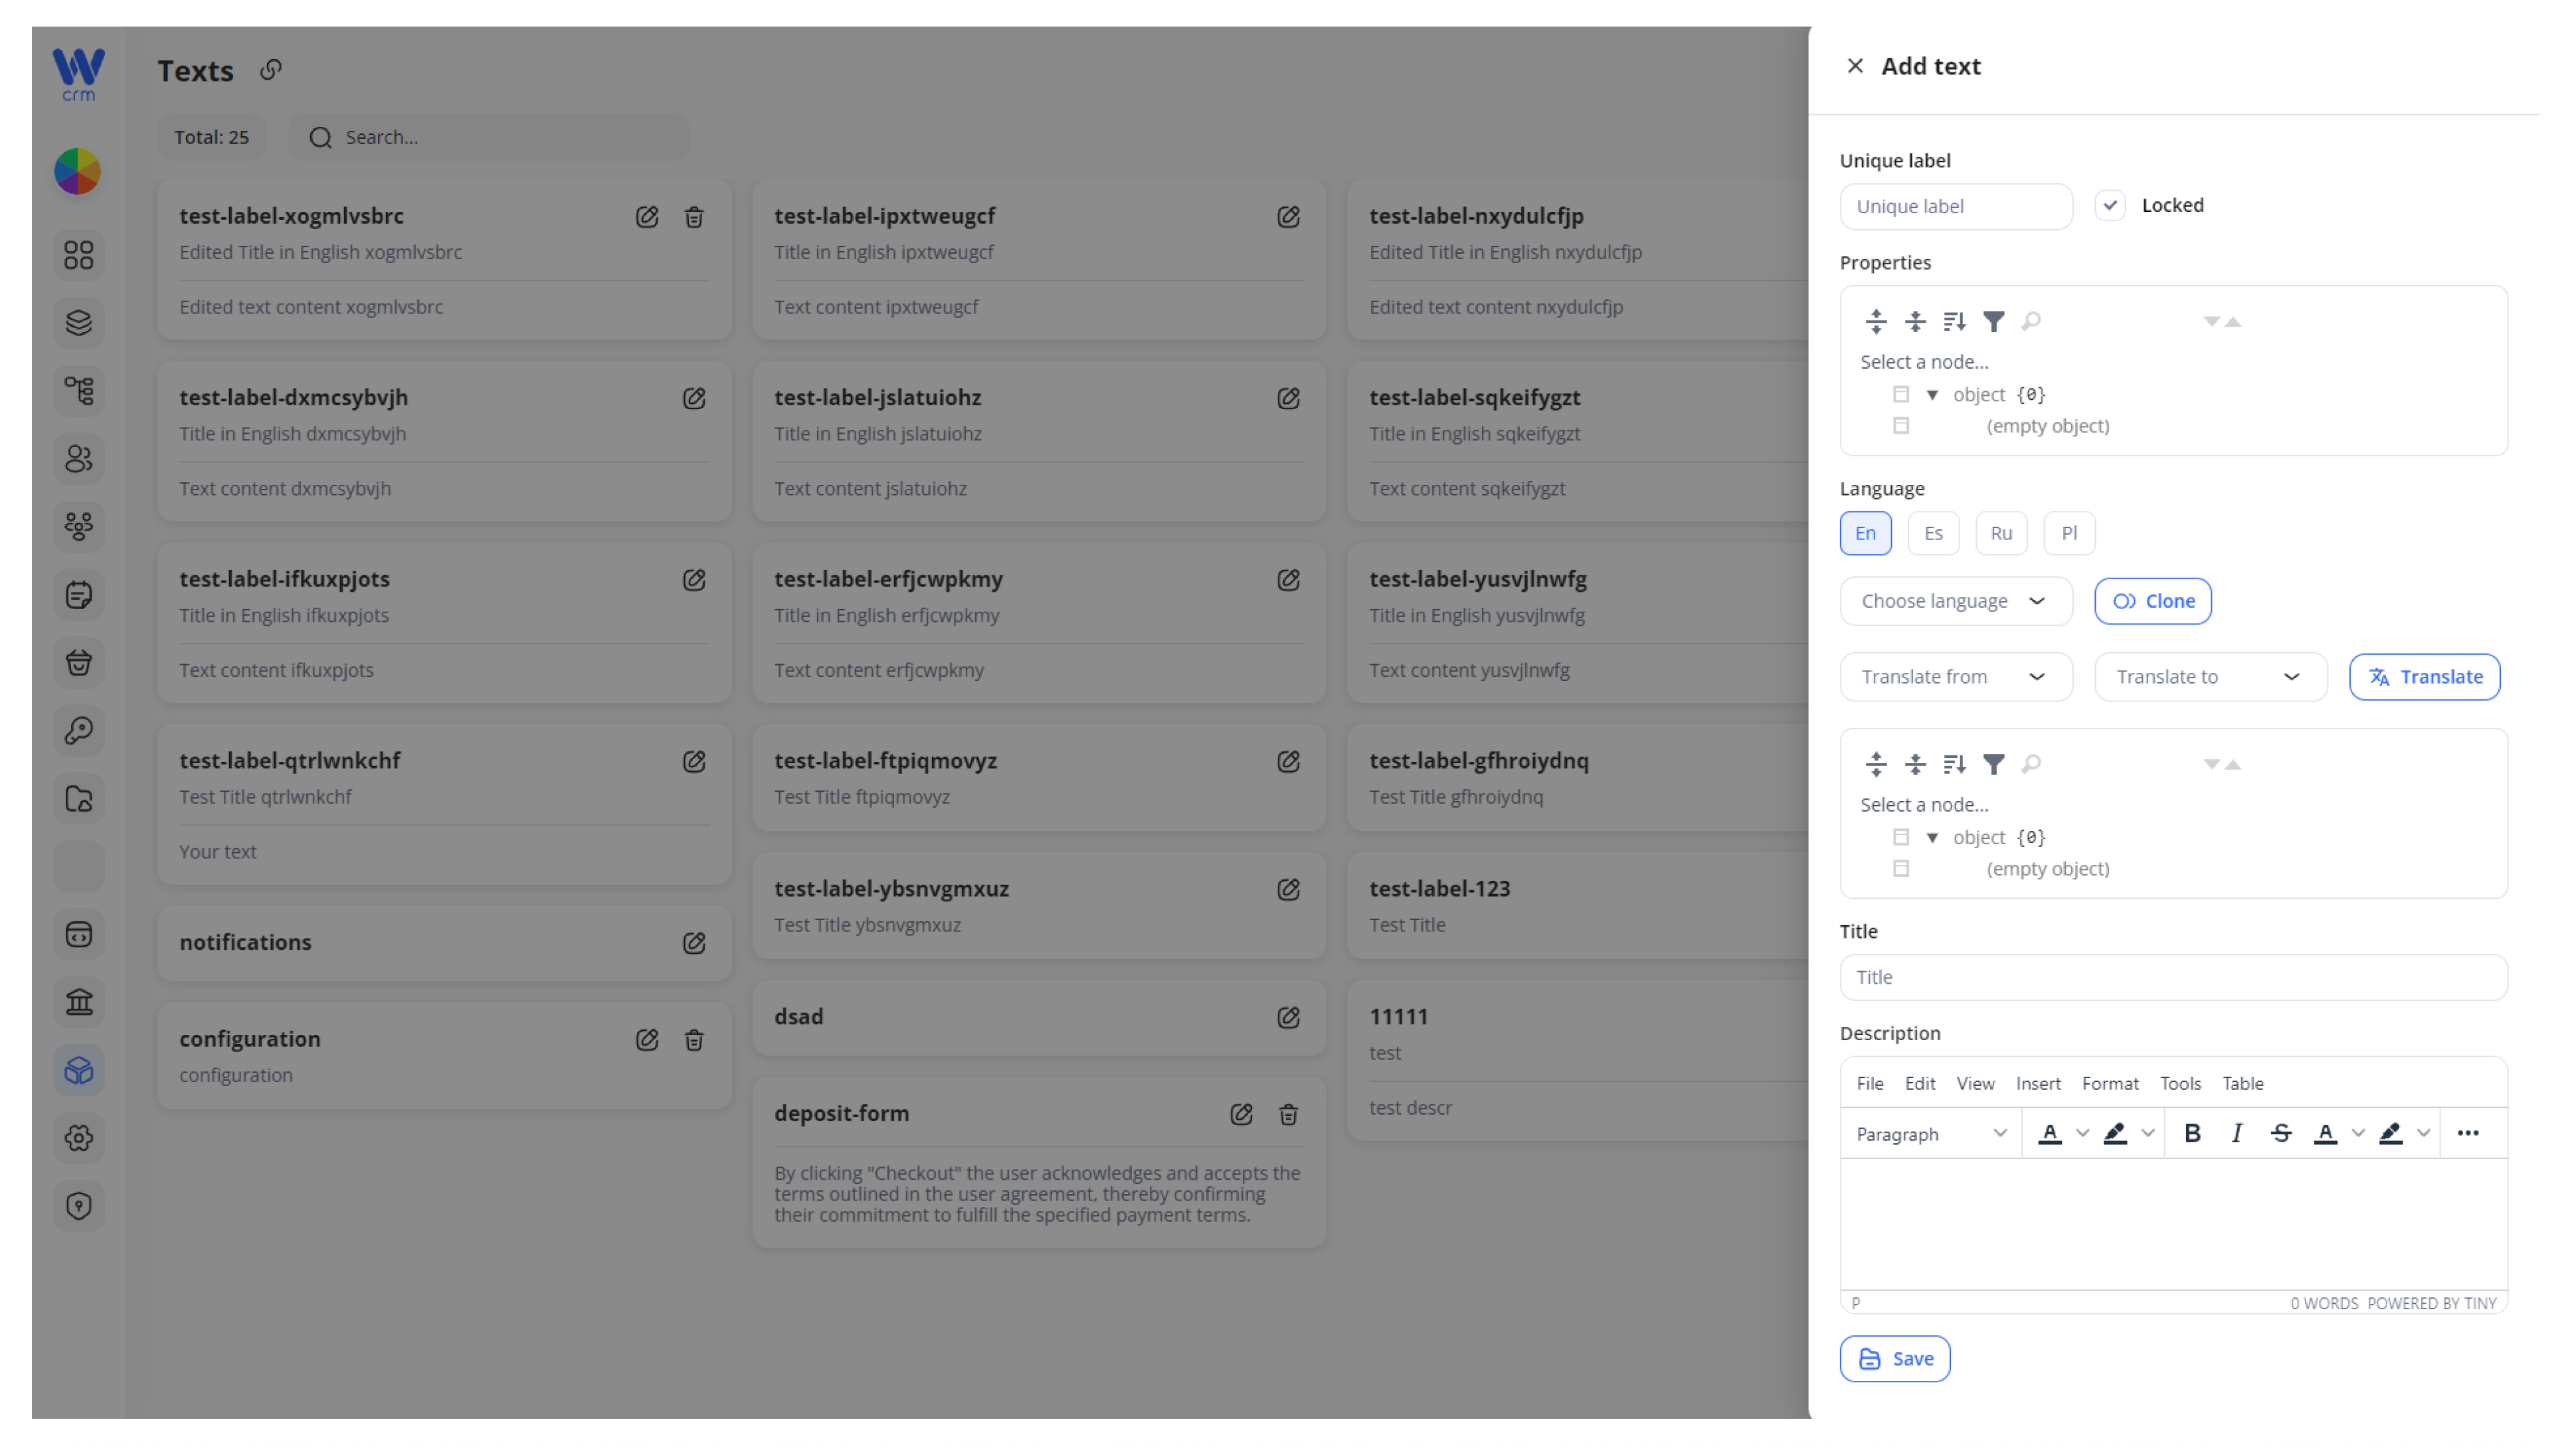
5. Save to add the new card to the grid
By default, new texts are created as Locked—they cannot be deleted. To unlock a text:
1. Go to the text editing tab.
2. Uncheck the Locked checkbox.
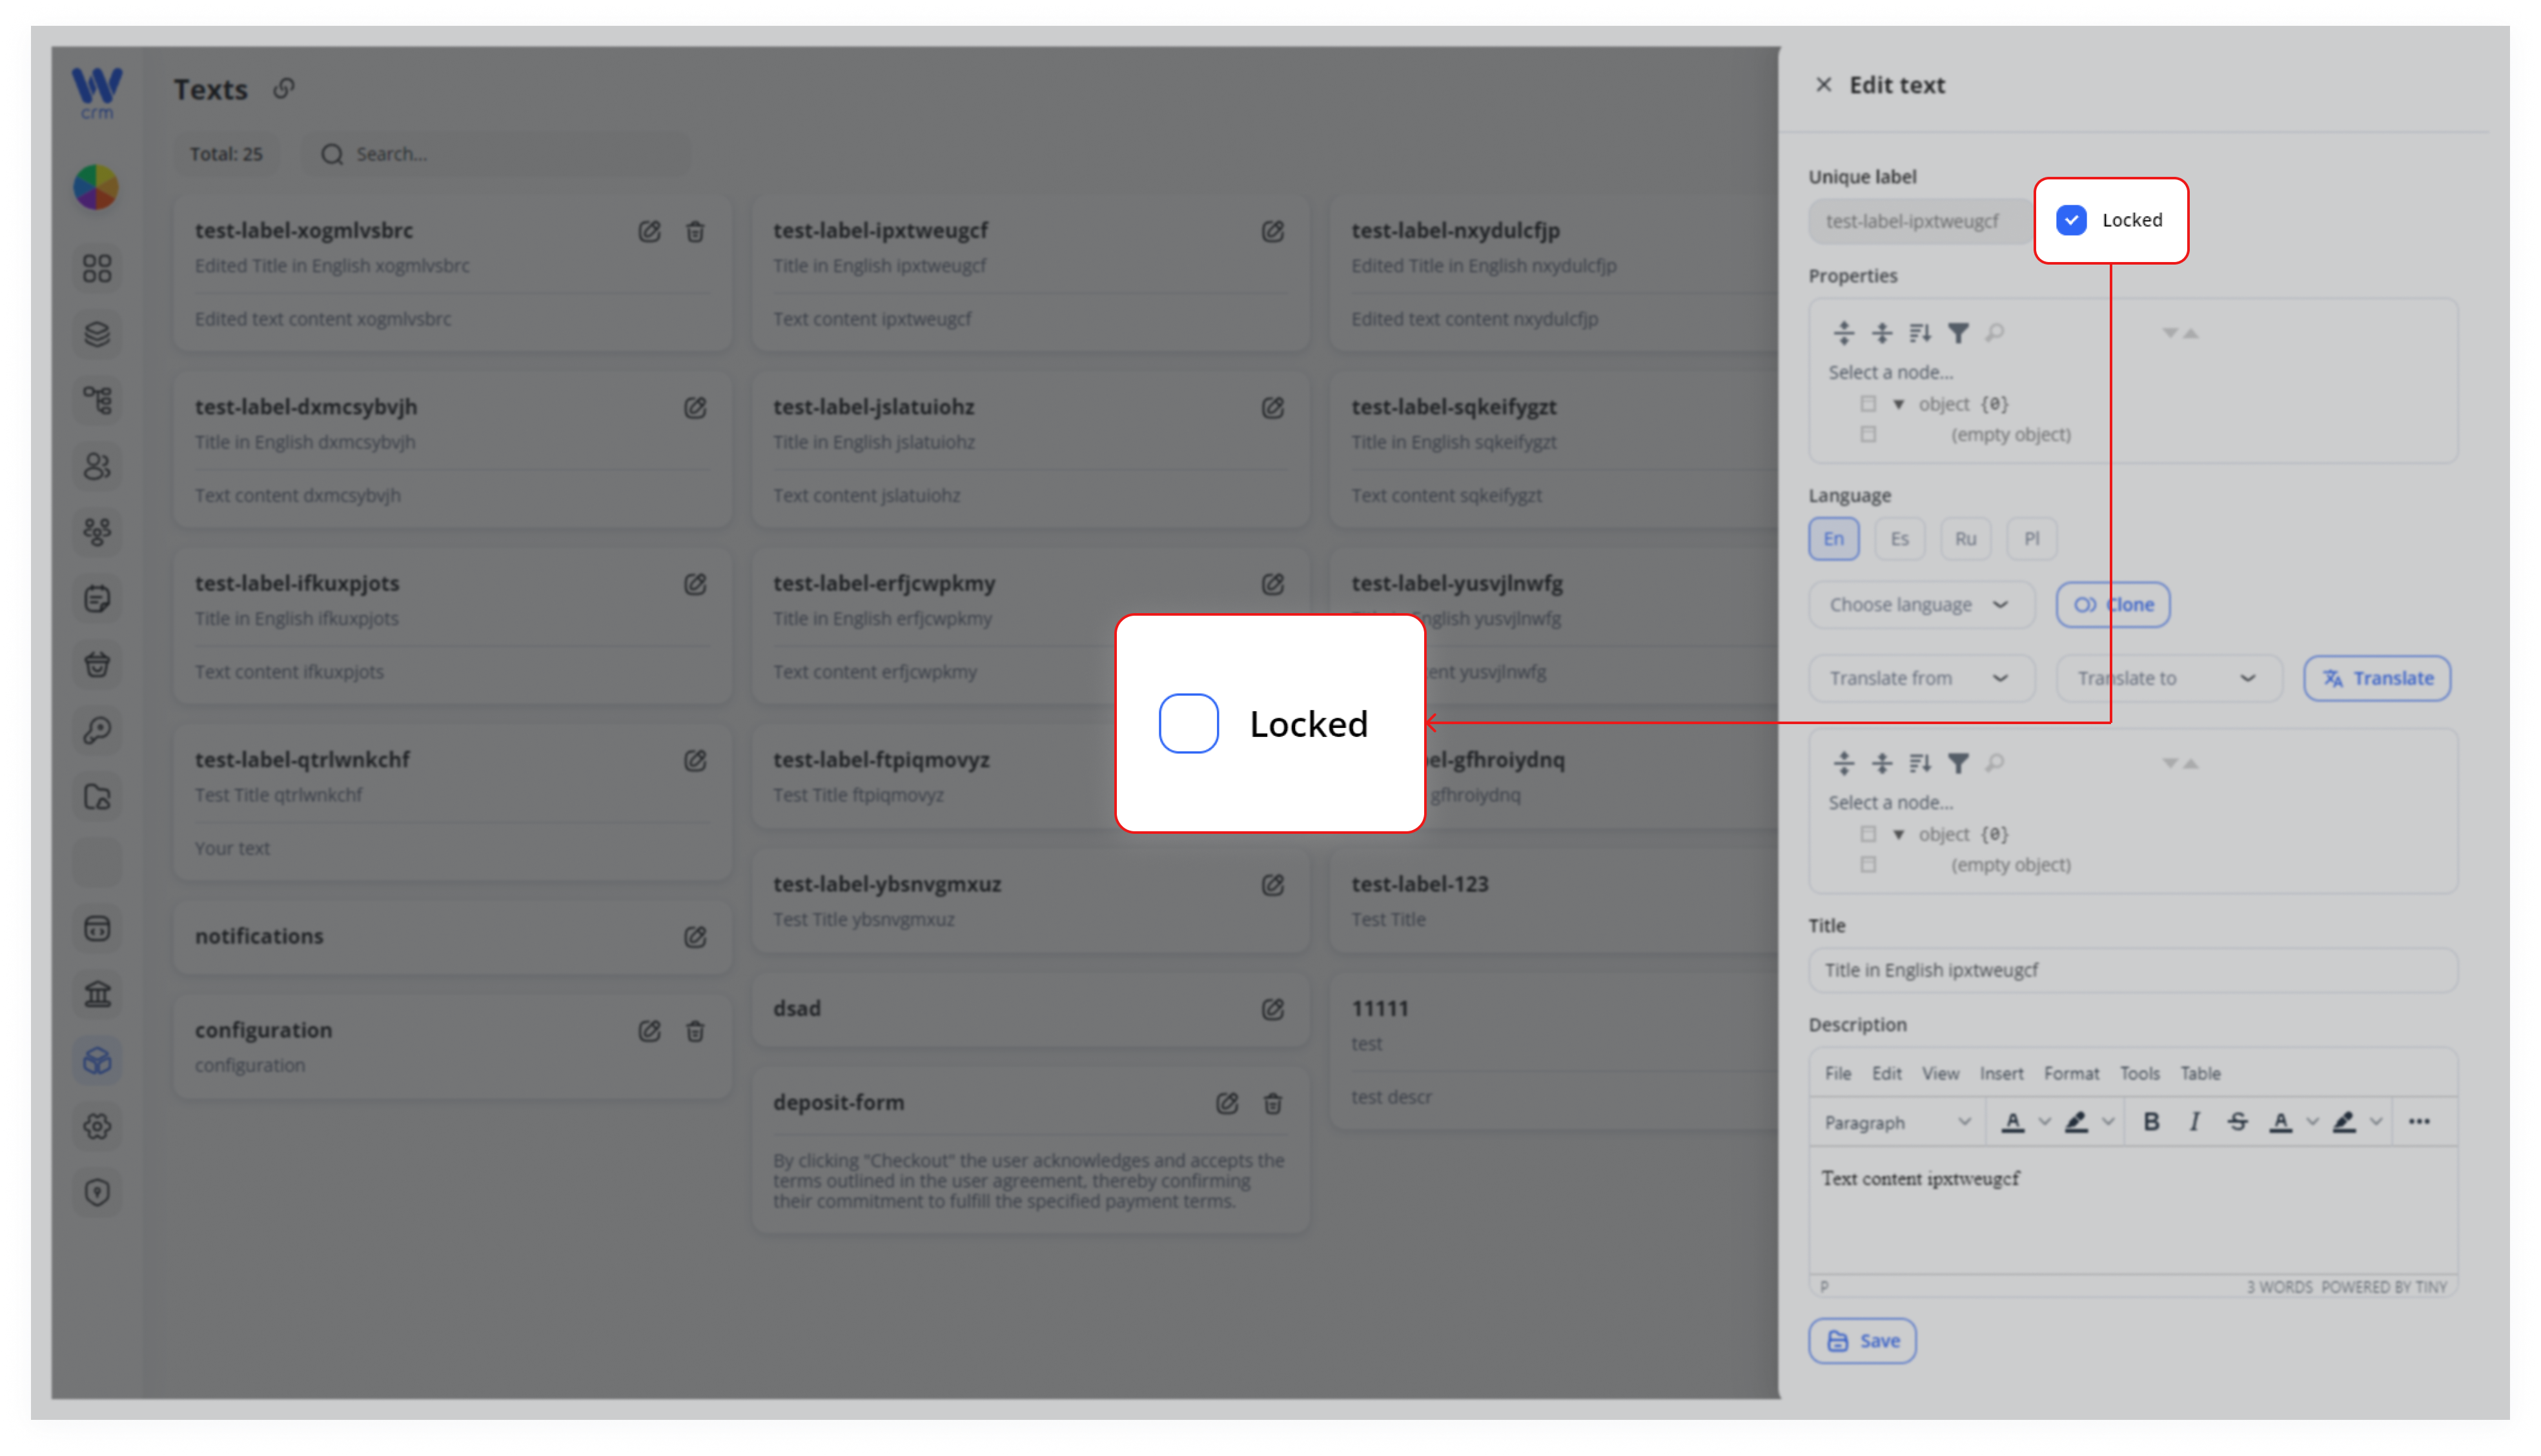
3. Click Save.
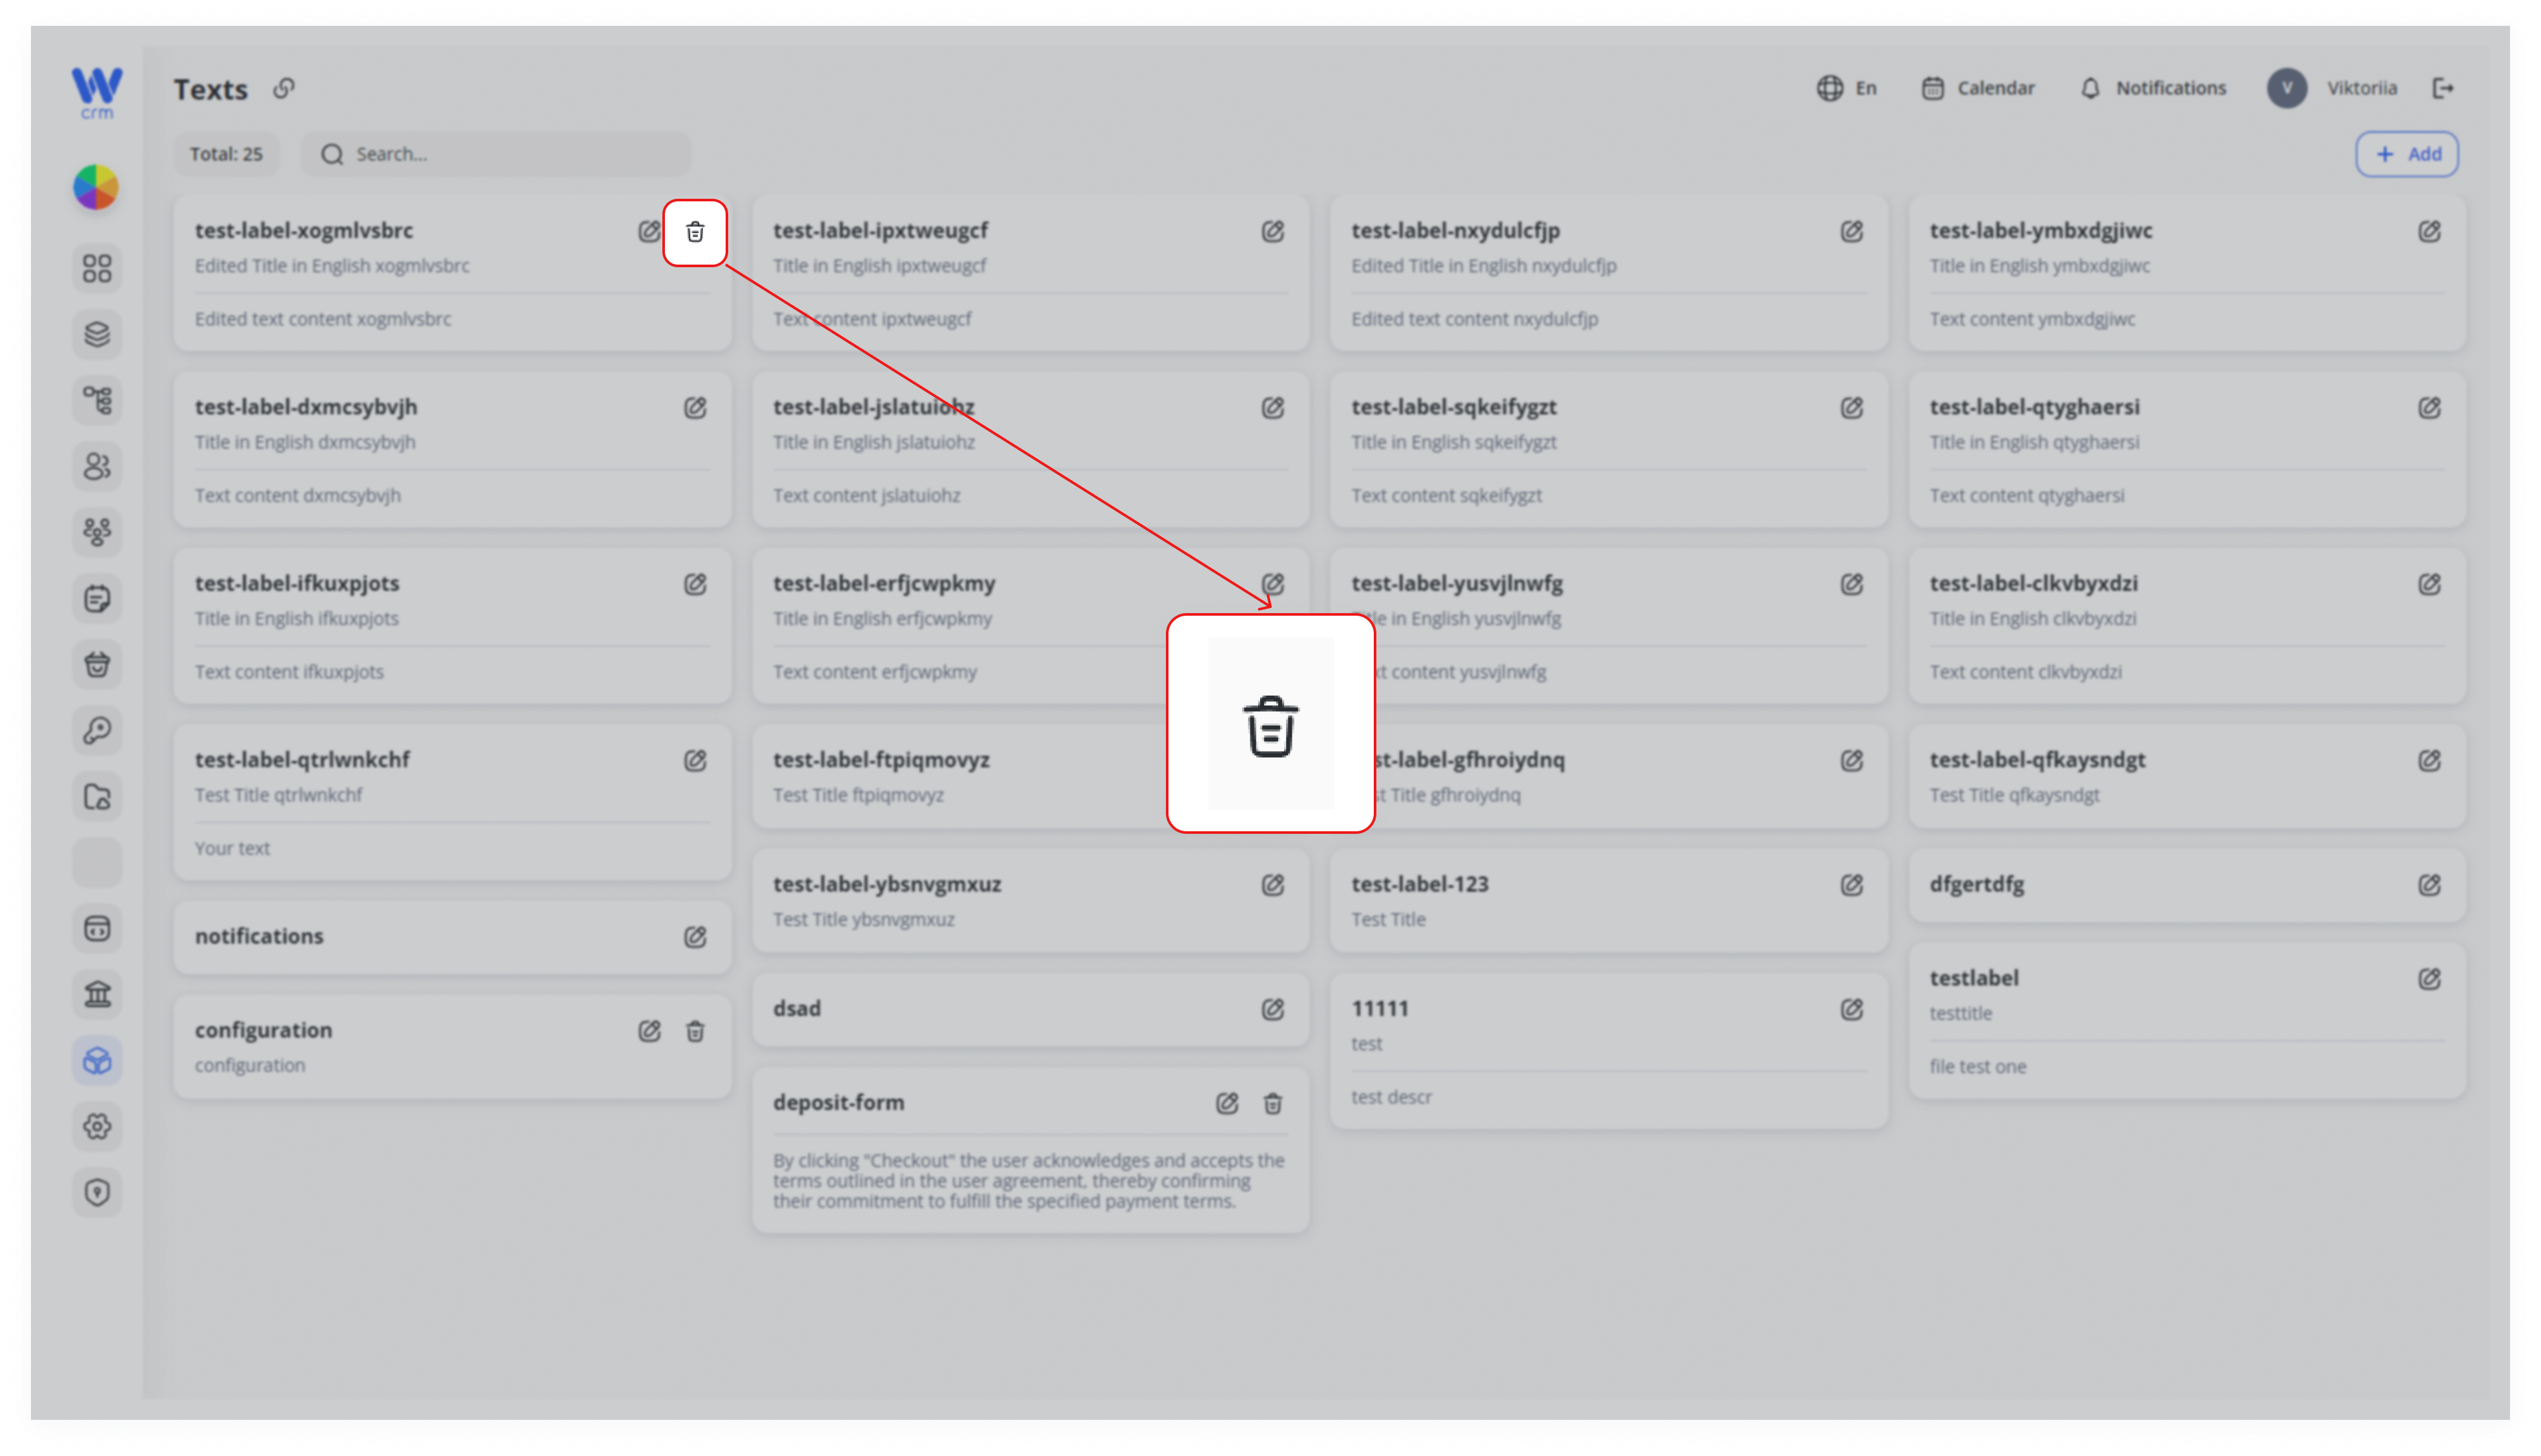
To delete text
1. Make sure it is not locked.
2. Click the 🗑️ Delete icon on the unlocked card and confirm the prompt.
Best Practices & Tips
-
Consistent Labeling
Group related texts under a common prefix (e.g.notification.email.*,modal.confirmation.*) for easier searching and organization. -
Lock Critical Texts
Keep frequently used or legal-critical messages locked to avoid accidental deletion. -
Use Clone for Speed
Cloning from your default locale saves time and ensures you don’t forget fields. -
Review AI Translations
Always proof AI-generated translations for tone, context, and placeholders. -
Coordinate with Developers
Ensure any new labels are wired into your UI code—otherwise, the text won’t show up even though it exists here.
With these steps and tips, you can keep your long-form UI content fully localized, well-organized, and under strict change control—ensuring a consistent experience across all languages and regions.