
4. How to Edit an Employee
InEditing thean Editemployee window,lets you can:keep your team’s access, credentials, and schedules up to date as roles evolve or people move between teams. Use this guide whenever you need to:
-
ChangePromotetheorname,demoterole,someoneemail,(changeandtheirpasswordRoleoforthe employee.Type) -
AssignCorrecttheaemployeemisspelled name -
Rotate or reset a user’s password
-
Scope their data access to new
projectsProjectsandordesks.Desks -
Deactivate an account when someone leaves
-
Schedule shifts or meetings on their Calendar
1. Open the Employees listList
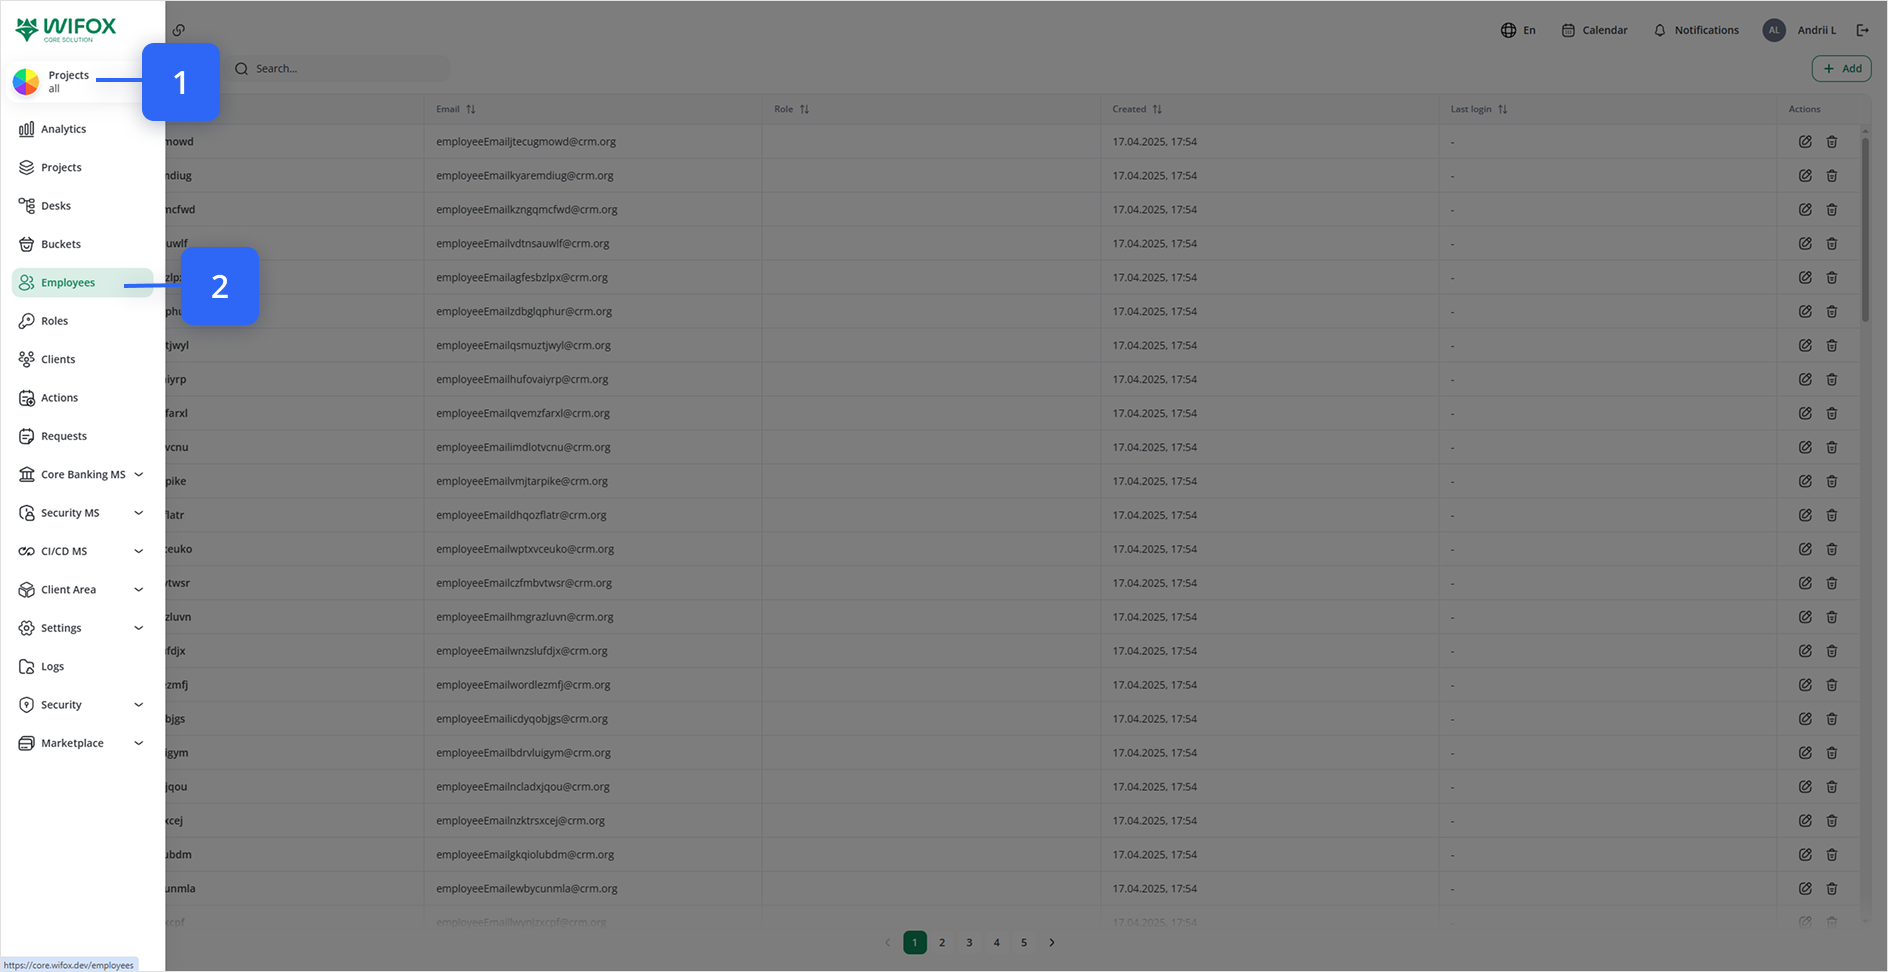
Click Employees in the left-hand navigation.
2. Click Edit
Tip: Use the Filter button or Search… box to quickly locate the person you need. You can also click any column
ofheader (Name, Role, Created, Last login) to sort theemployee’list.
2. Enter Edit Mode
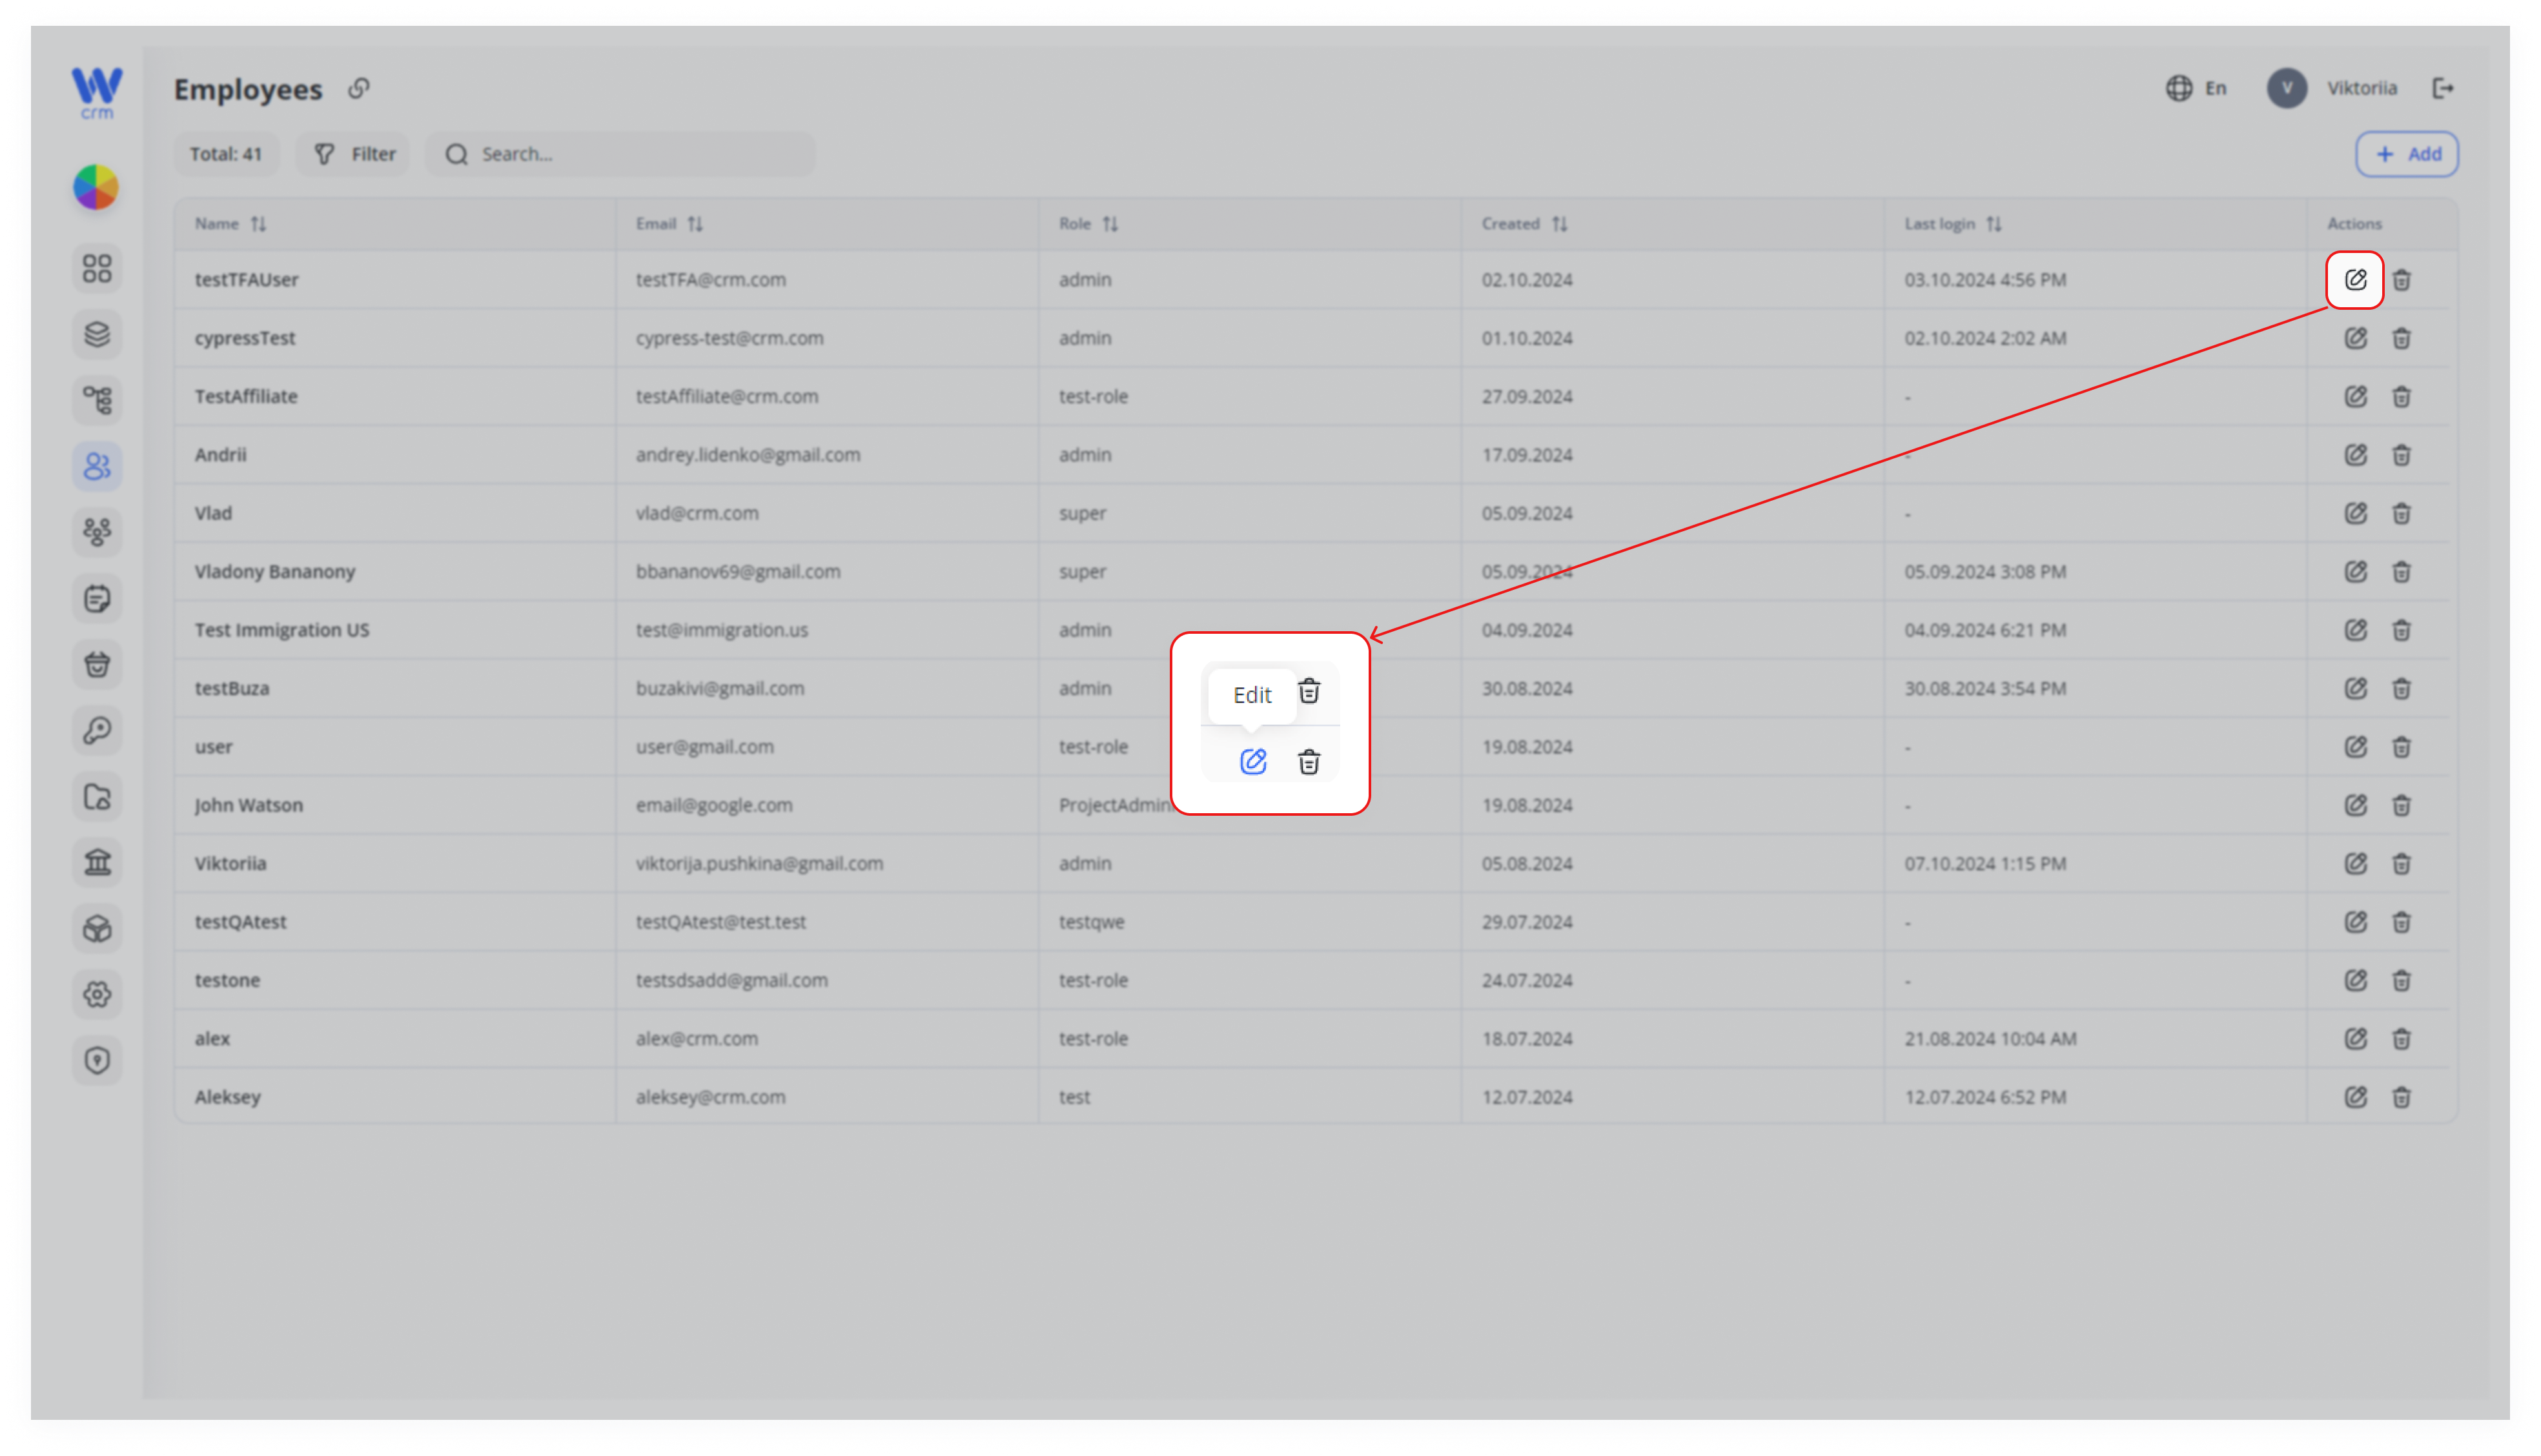
In the desired user’s row, click the ✏️ Edit icon in the Actions column.
The Edit icon.
3. Modify General Details
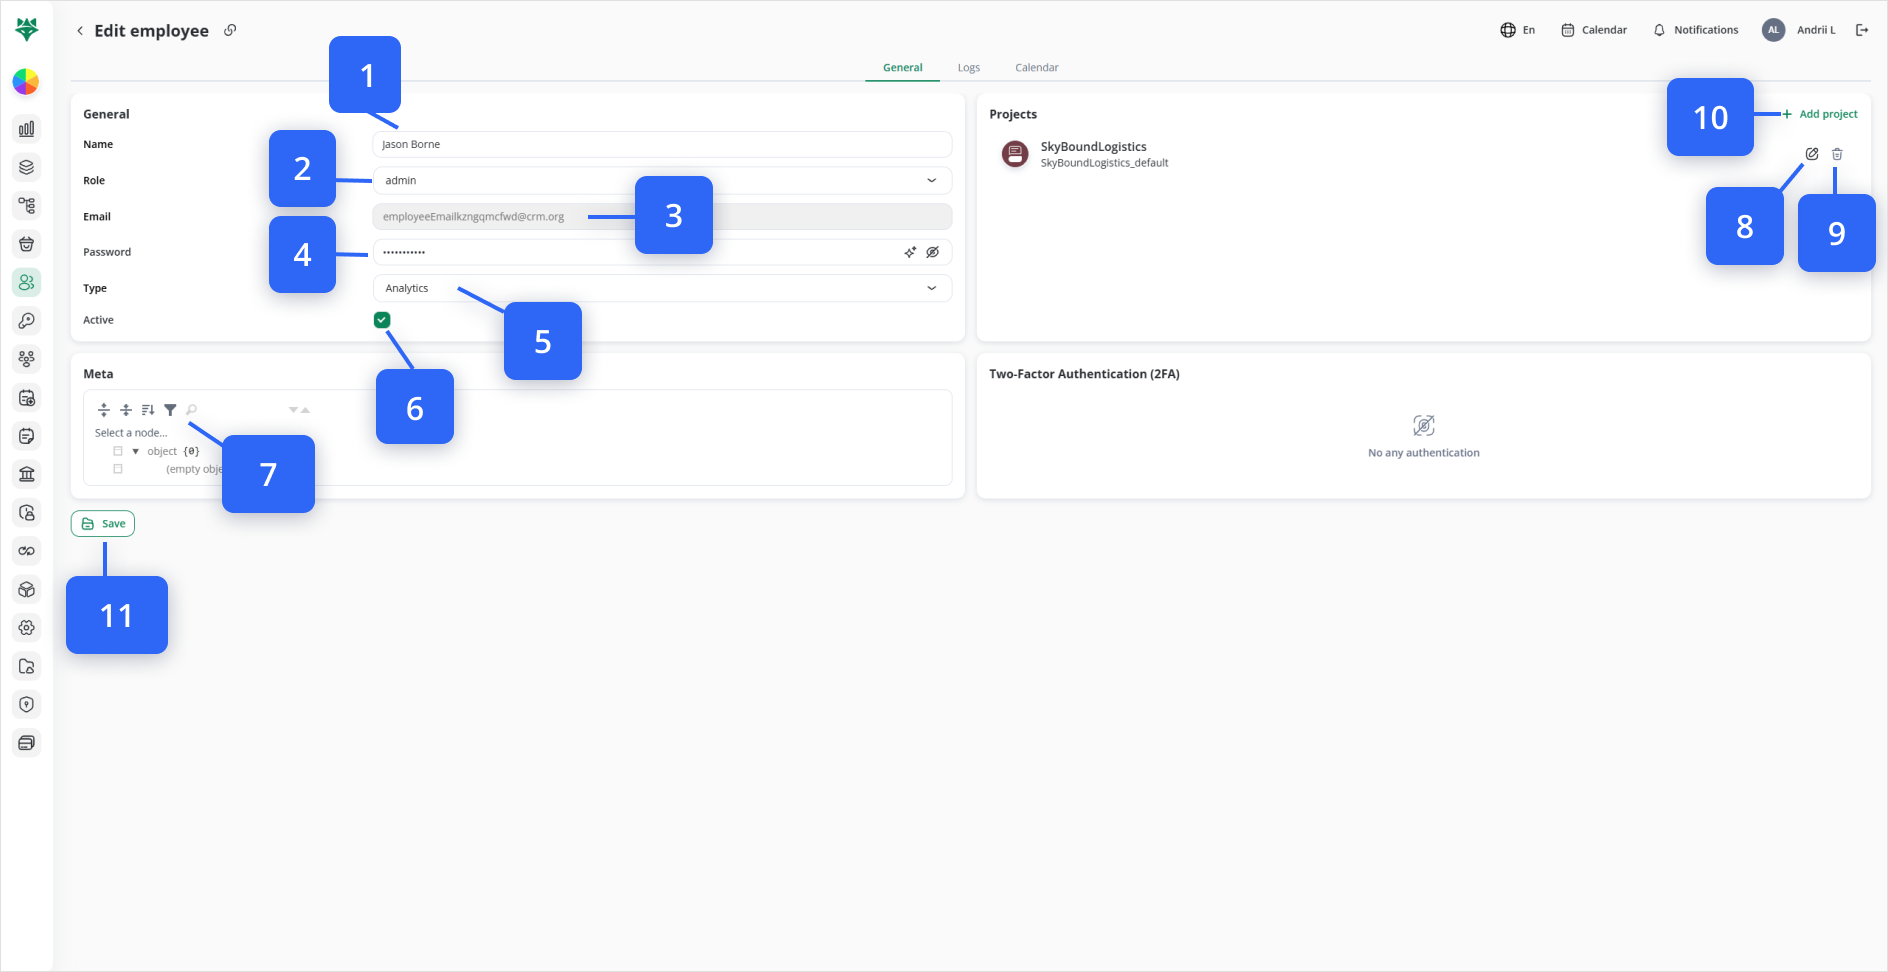
Under the General header on the left, adjust any of these fields:
-
Name (
1)Step #1):
Updatethetheir display name as it appears on dashboards, records, and notifications.
Example: Change “Jon Smith” → “Jonathan Smith” if they prefer their fullnamelegal name. -
Role (
2)Step #2):Choose
Select a new system role (Admin, Viewer, ProjectAdmin, etc.) to grant or revoke high-level permissions.
Roles are defined in the Roles module and take effect immediately. -
Email (
3):(Read-read-only)shows(Stepthe#3):
Shows their loginaddressaddress. To change it, submit a request to your system administrator. -
Password (
4)Step #4):
Enter a newpassword—orpasswordclick(≥8 chars, uppercase, lowercase, digit, special).-
✨
toGenerategenerateicon:oneauto-create a secure password. -
👁️ Toggle icon: show/hide entry for verification.
-
-
Type (
5)Step #5):Select
Choose anewbusiness category (Manager, Sales,etc.)Support, Analytics) used for reporting and default workflows. -
Active (
6)Step #6):
Toggleon/offon (✅) toactivateenable ordeactivateoffthe(❌)accountto disable logins without losing audit history.
4. (Optional) Update Metadata (Step #7)
UseIn the Meta panel, use the tree picker to addapply custom tags—such as Region, Business Unit, or changeSkill any customSet.
These tags (Lookpower atadvanced #7filtering, onpermission thescopes, image).and automation rules across WBCS.
5. Assign Projects & Desks
InAn employee’s data access is controlled by Project → Desk assignments in the Projectsright-hand panel you’ll see any projects already assigned to this employee, each with:panel:
-
Edit an existing Project assignment (Step #8)
-
Locate the Project card.
-
Click its ✏️ Edit icon
—toclickopen the drawer. -
Check or uncheck specific Desks to
adjustfine-tunewhichaccess.Desks -
can access within that projectClick
(LookSaveat #8 onin theimage)drawer.
they -
-
Remove a Project entirely (Step #9)
-
Click the 🗑️ Delete icon
— click to remove the project assignment entirely(Look at #9on theimage)Project card to revoke all access to that Project and its Desks.
-
-
To addAdd a newprojectProjectassignment:(Step #10)-
Click + Add project
(Lookat#10theontop of theimage).panel. Inthe drawer, selectSelect one or more
ProjectProjectsentries.from the dropdown.-
(Optional)
UnderRestrictDesks, pickto specificdesk(s)Deskstoiflimitthetheiruser’saccess.Role is “View Own.” -
Click Save in the drawer to confirm.
-
Example:
Assign Alice to “Acme USA” (Sales, Support Desks) and to “Acme Canada” (Sales only) by adding each Project and selecting the appropriate Desks.
Bob, with a “GlobalViewer” Role, automatically sees all Projects and needs no explicit assignments.
6. Save Your Changes (Step #11)
ClickAfter updating any General fields, Metadata, or Project assignments, click Save at the bottom-left of the Editform. employeeAll formedits (Lookapply at #11 on the image).immediately.
Note: You cannot remove projects to which an employee has already been assigned. Instead, go to the Projects tab and remove specific members from the project.
7. View and& Manage the Employee’s Calendar
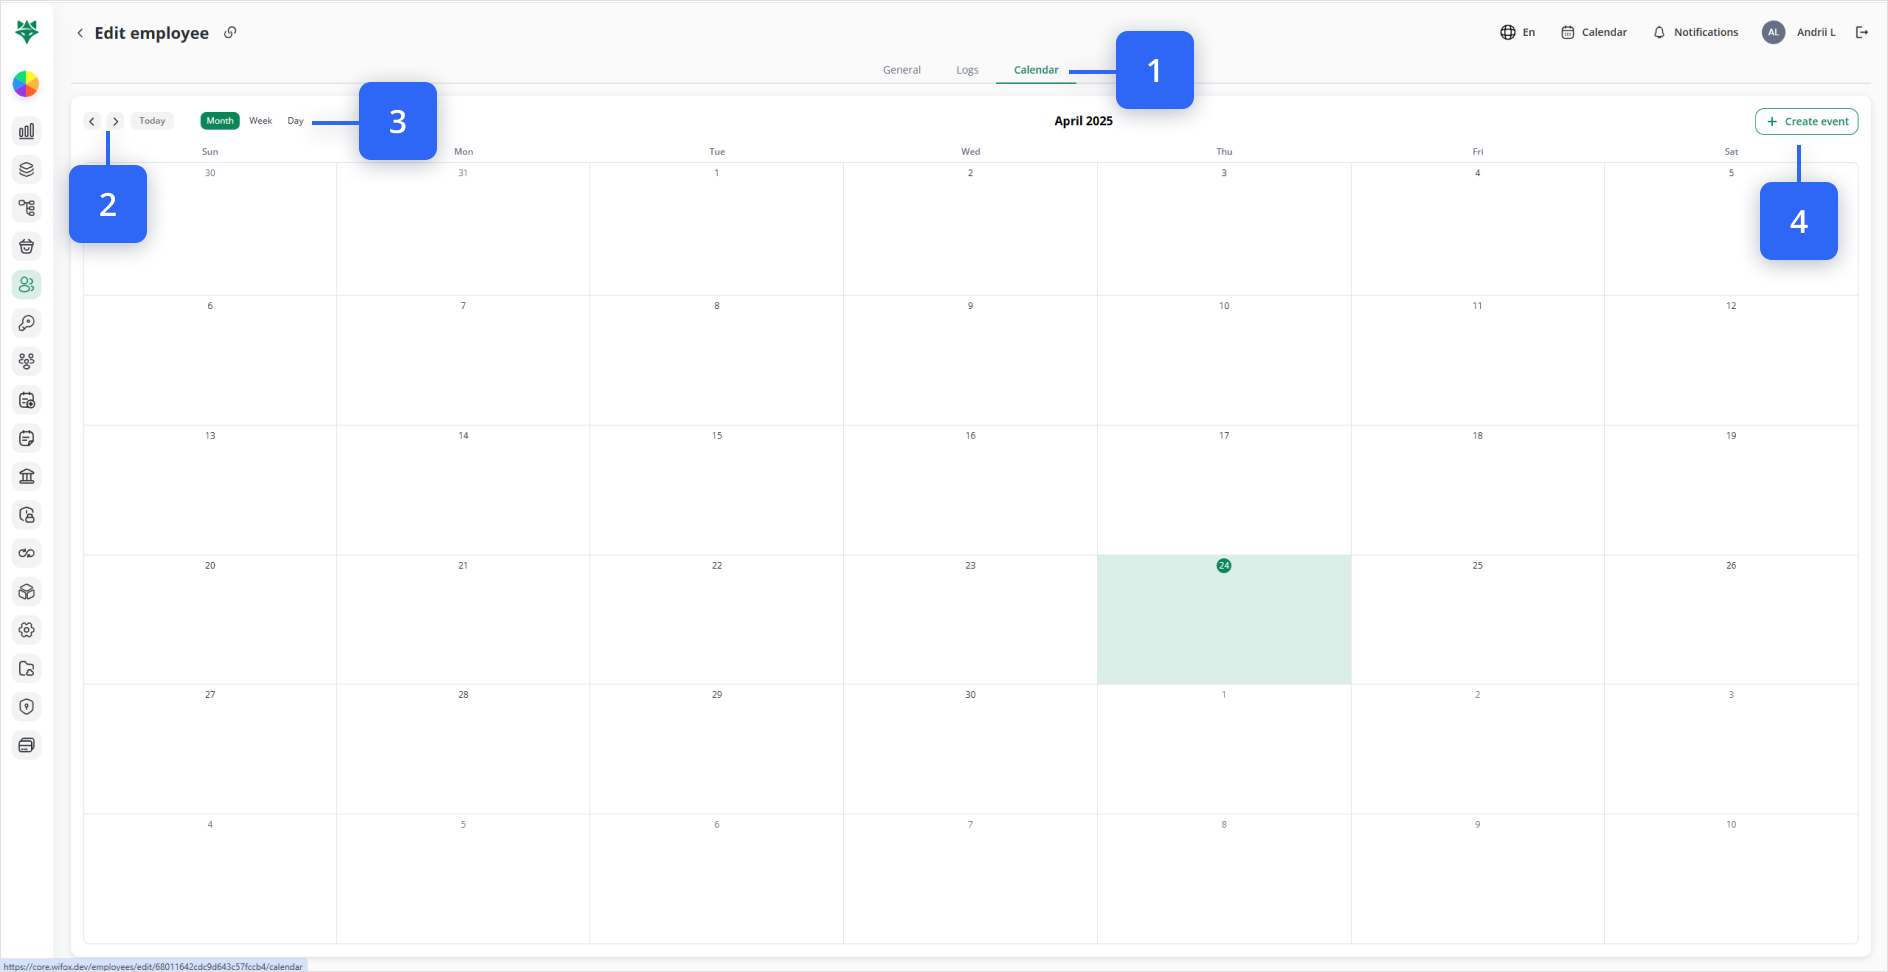
InTo schedule shifts, meetings, or time off:
-
Click the
EditCalendaremployeetabscreen, clickat theCalendartoptabof the Edit Employee screen (1)Step #1). -
UseNavigate dates with the ‹ › arrows or the Today buttonto(Stepnavigate between dates (2)#2). -
Switch
viewsbetweenwithMonth,Month, Week,Week, or Dayat the topviews (3)Step #3). -
StepToClickadd a new appointment or shift, click+ Create eventin the top-right(4).Fill#4)outto open the eventdetailsform—enter(title, date/time,description)description, then save.
By following these steps, you’ll ensure each employee’s details, access permissions, and save.schedules remain accurate and up to date in Wifox Business Core Solution.