
4. How to Edit an Employee
In the Edit window, you can:
-
Change the name, role, email, and password of the employee.
-
Assign the employee to new projects and desks.
1. Open the Employees list
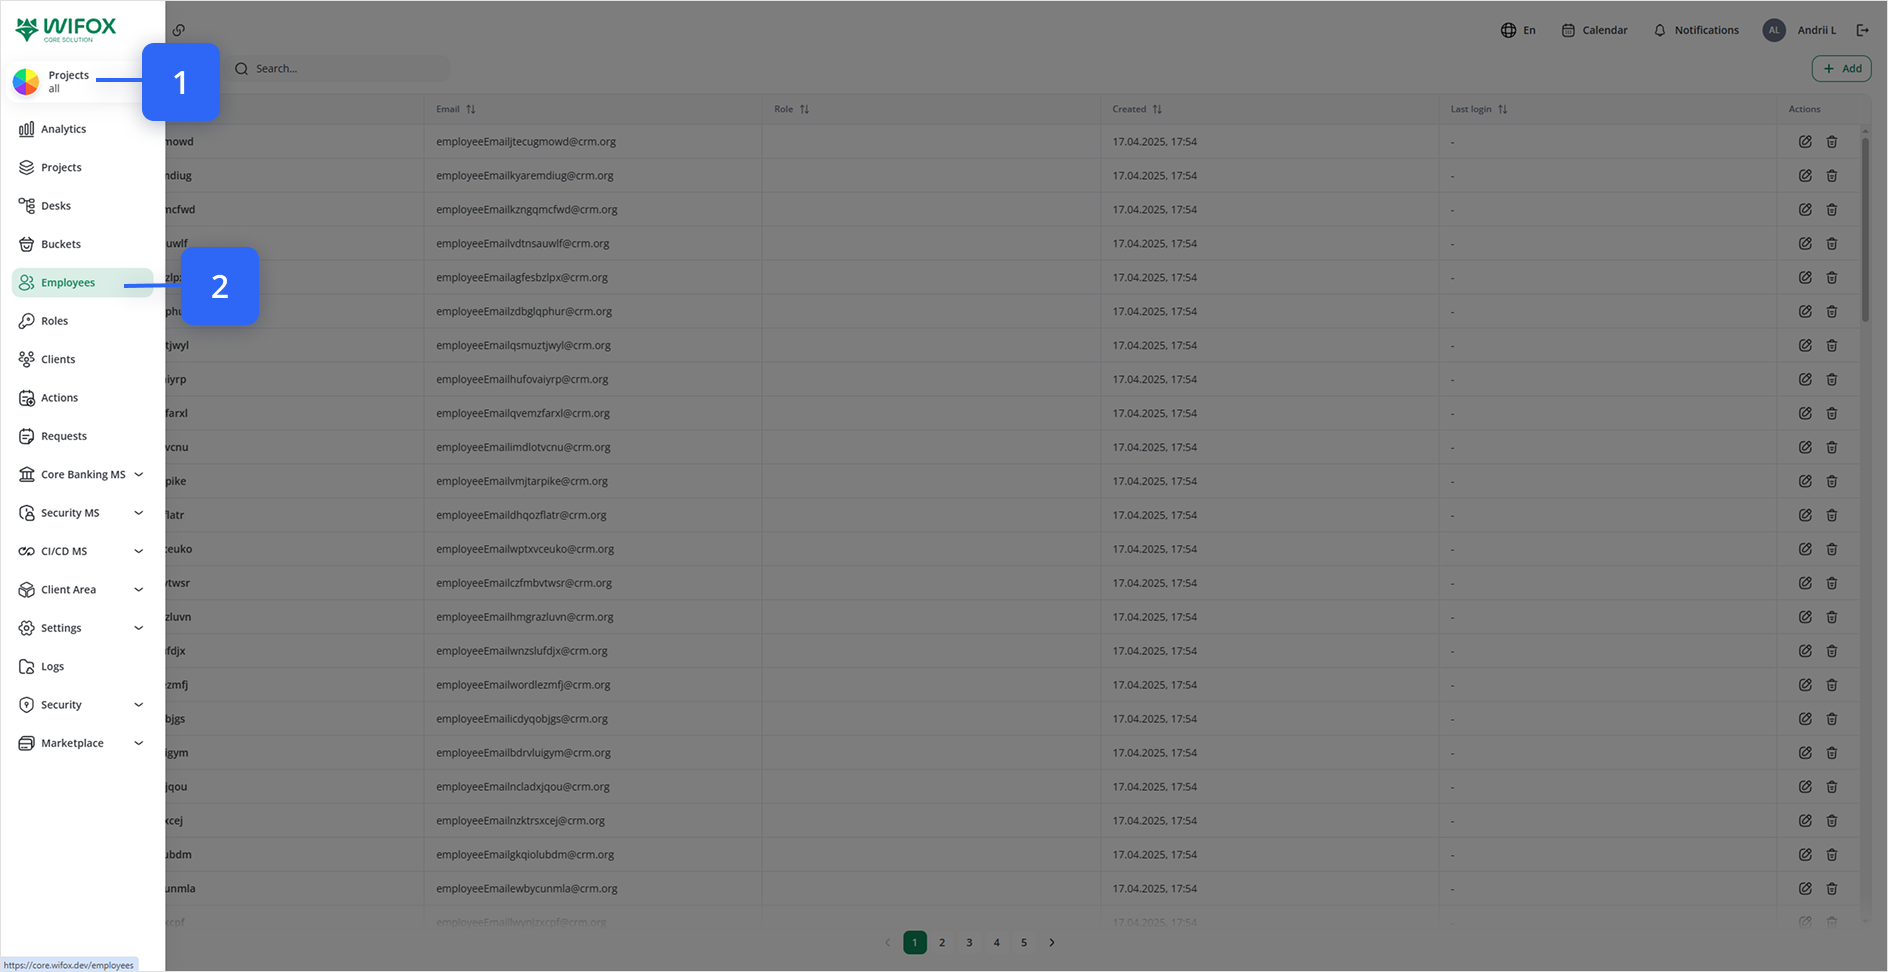
Click Employees in the left-hand navigation.
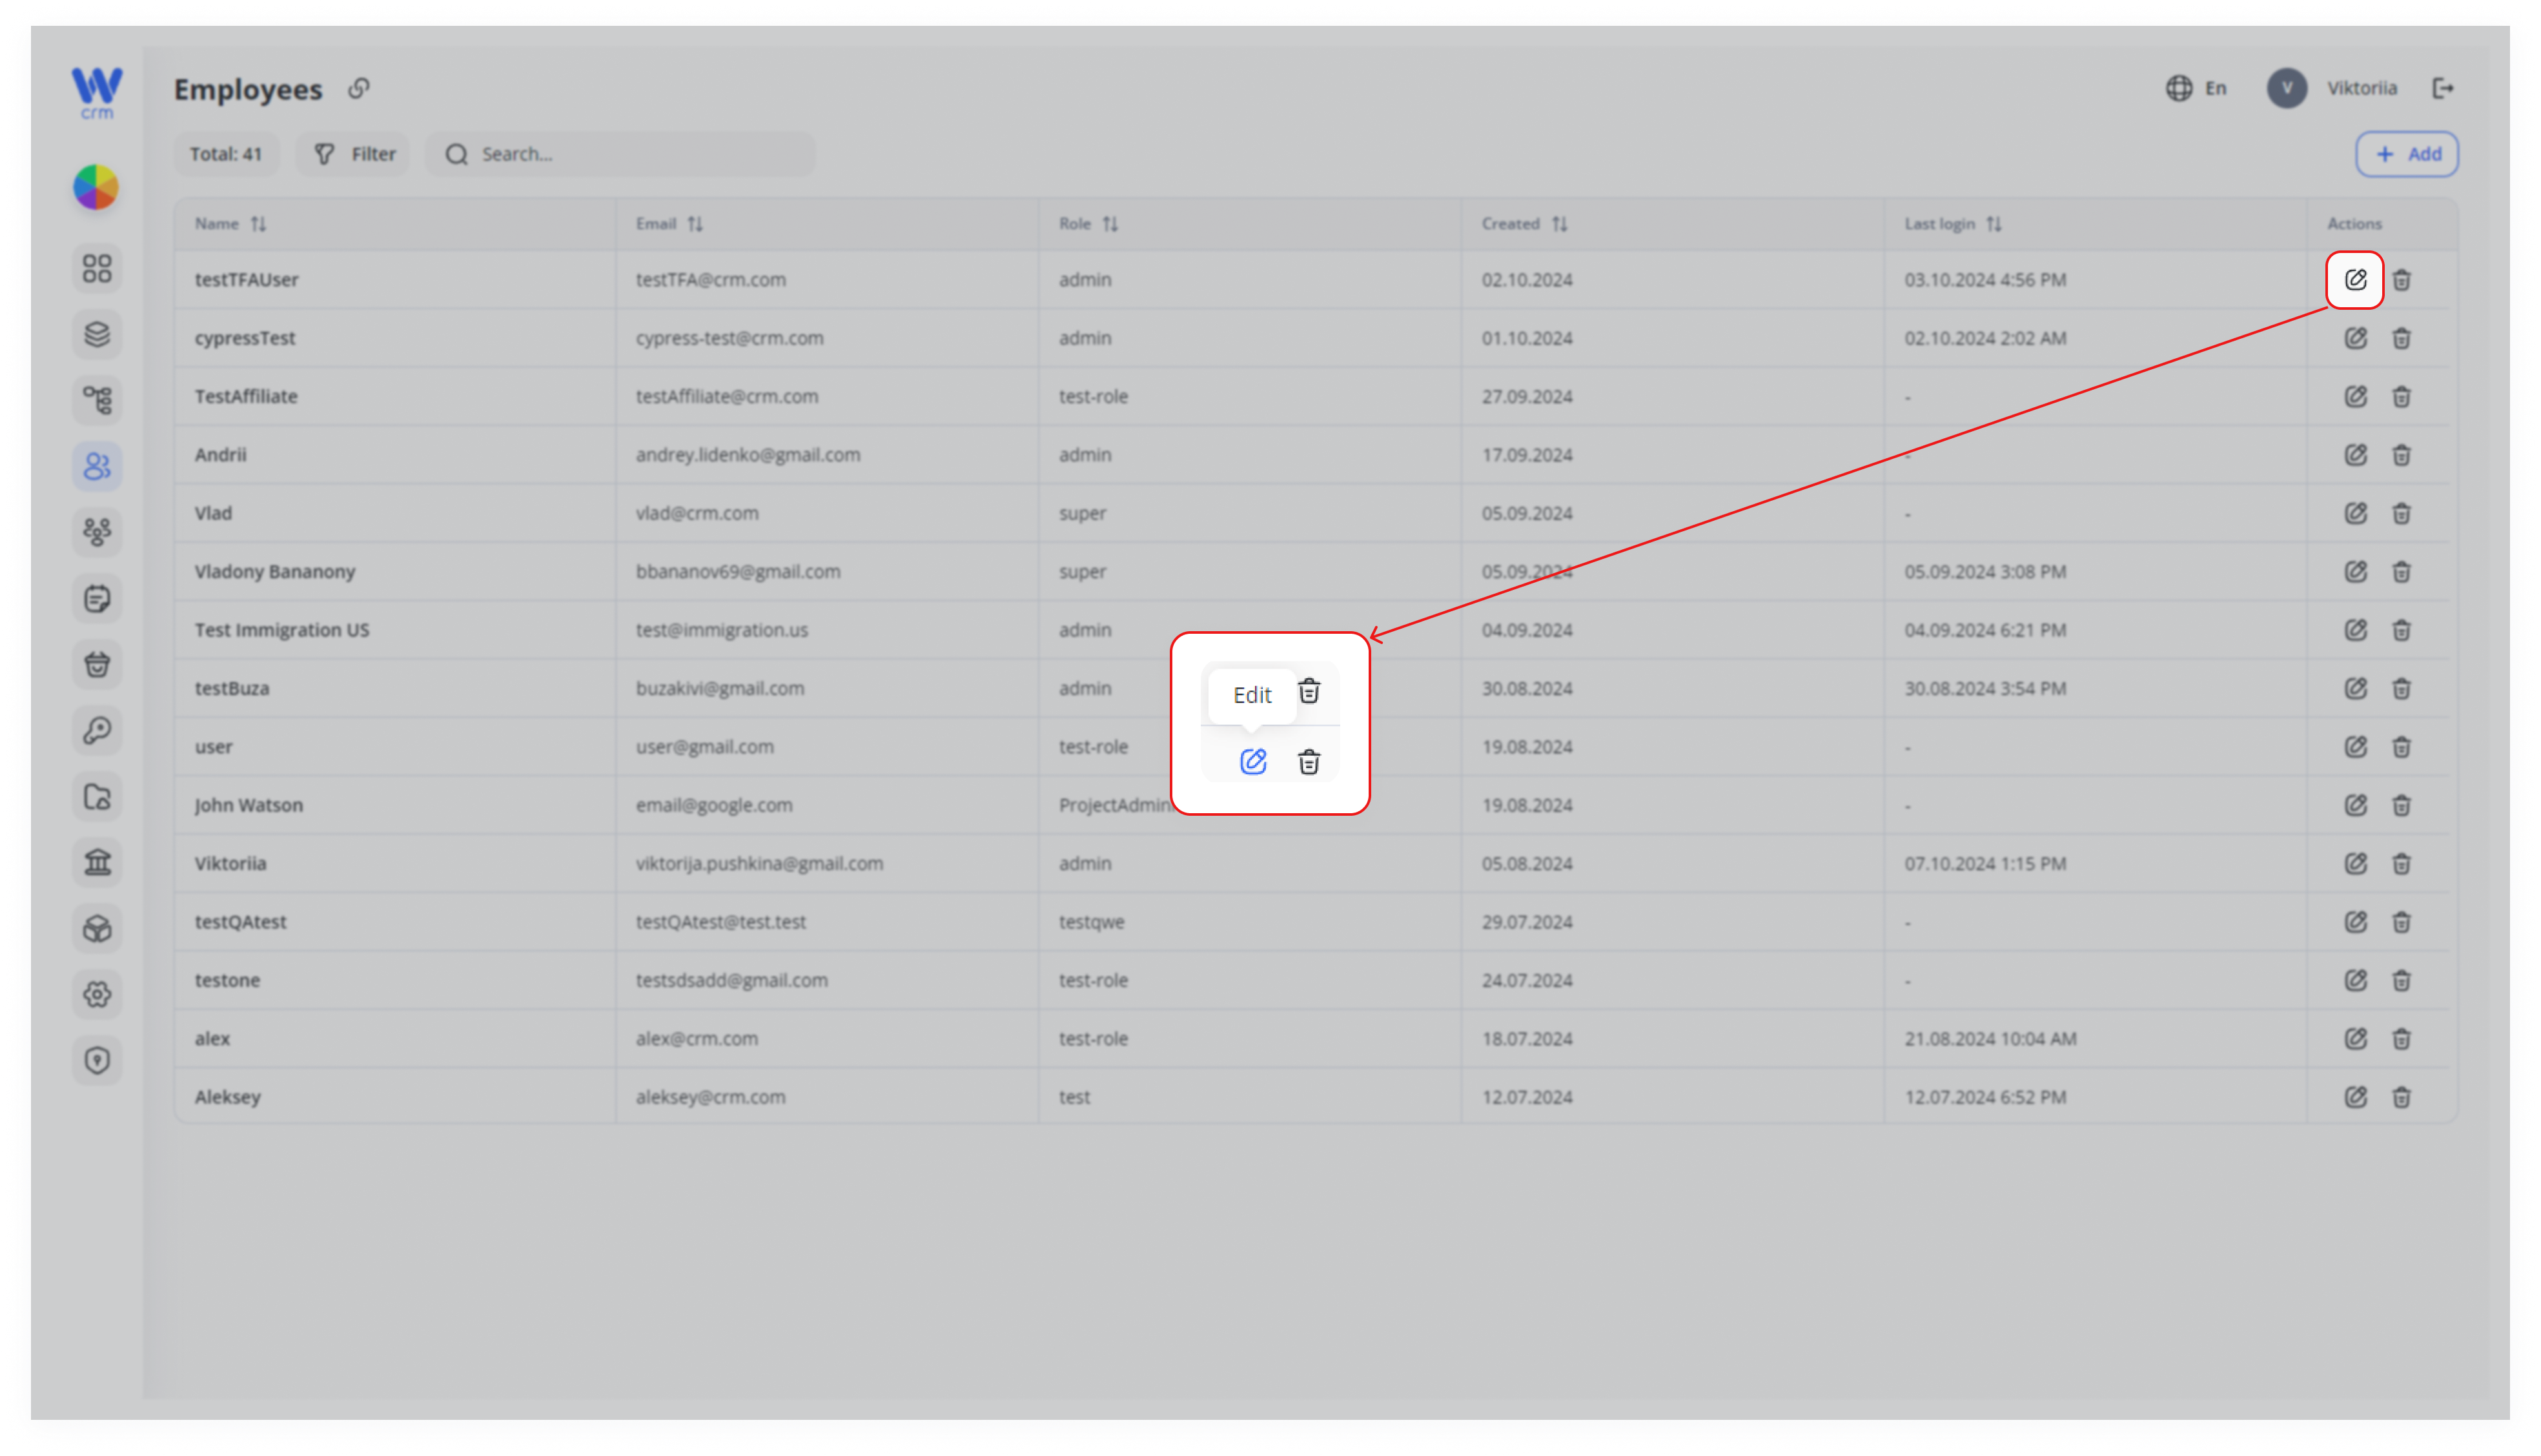
2. Click Edit
In the Actions column of the employee’s row, click the ✏️ Edit icon.
3. Modify General Details
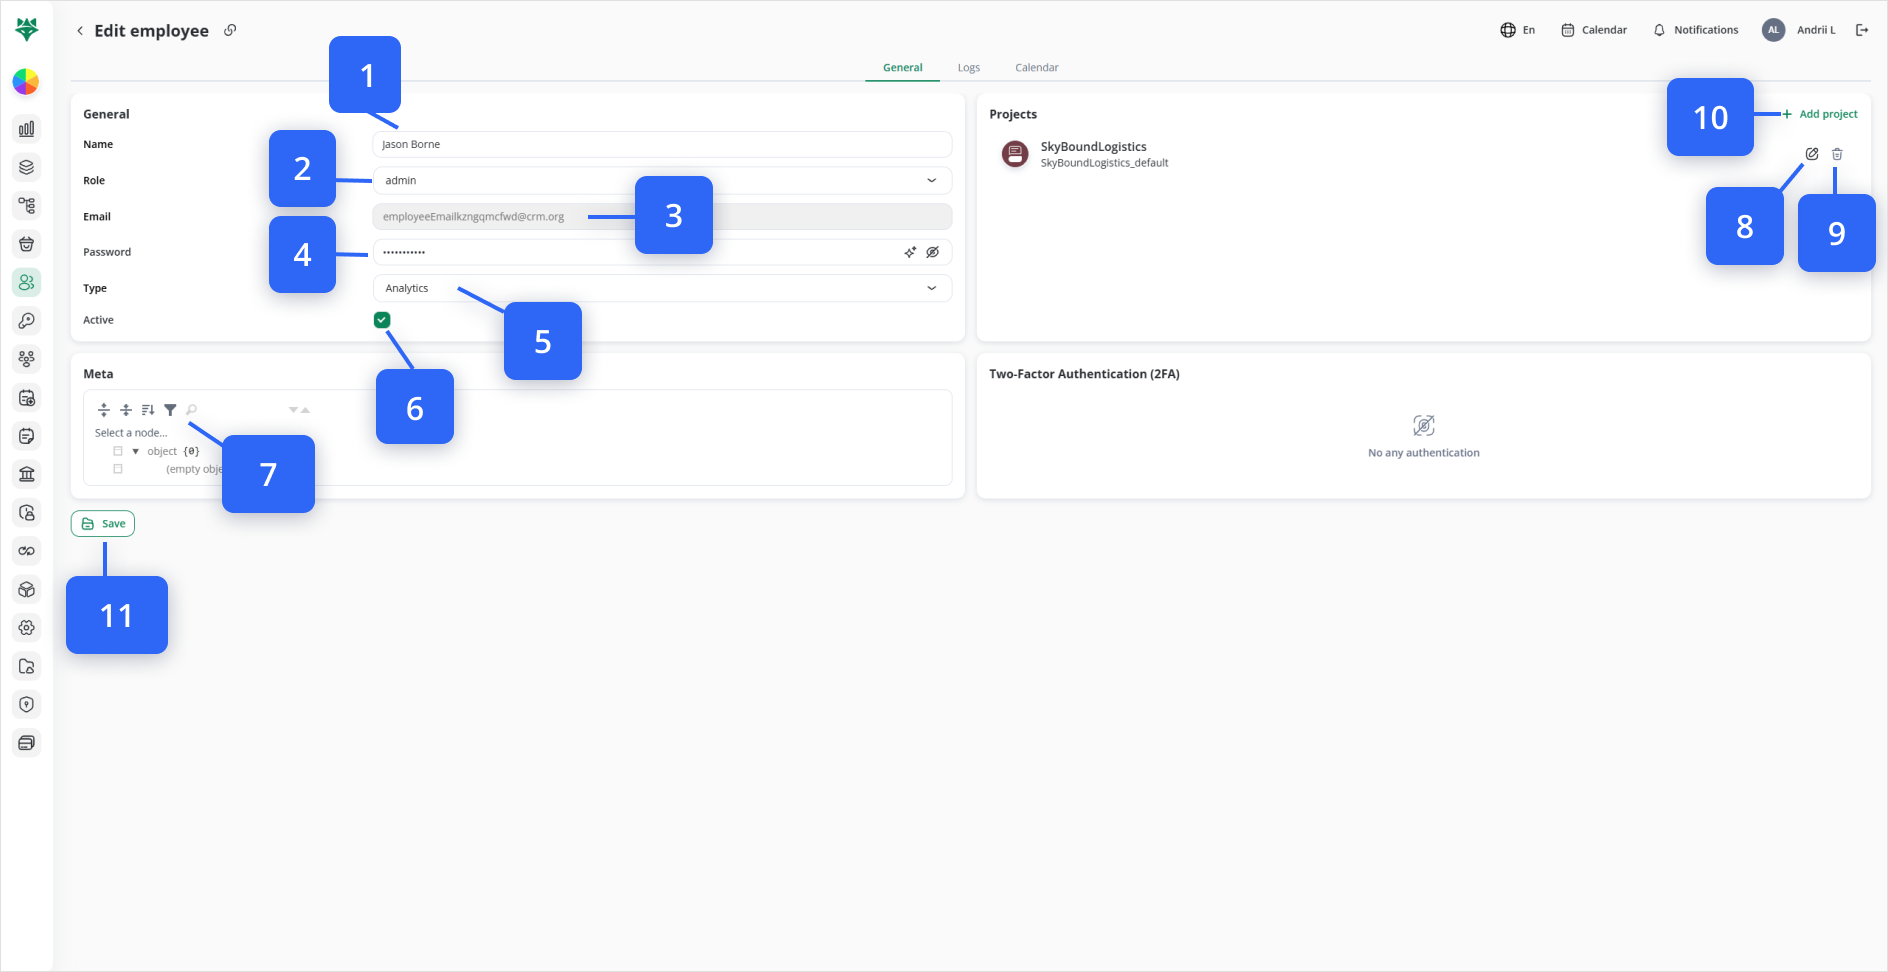
- Name (1): Update the full name
- Role (2): Choose a new system role
- Email (3): (Read-only) shows the login address
- Password (4): Enter a new password—or click ✨ to generate one
- Type (5): Select a new category (Manager, Sales, etc.)
- Active (6): Toggle on/off to activate or deactivate the account
4. (Optional) Update Metadata
Use the Meta tree picker to add or change any custom tags (Look at #7 on the image).
5. Assign Projects & Desks
In the Projects panel you’ll see any projects already assigned to this employee, each with:
✏️ Edit icon — click to adjust which Desks they can access within that project (Look at #8 on the image)
🗑️ Delete icon — click to remove the project assignment entirely (Look at #9 on the image)
To add a new project assignment:
- Click + Add project (Look at #10 on the image).
- In the drawer, select one or more Project entries.
- (Optional) Under Desks, pick specific desk(s) to limit their access.
- Click Save in the drawer to confirm.
6. Save Your Changes
Click Save at the bottom-left of the Edit employee form (Look at #11 on the image).
Note: You cannot remove projects to which an employee has already been assigned. Instead, go to the Projects tab and remove specific members from the project.
7. View and Manage the Employee’s Calendar
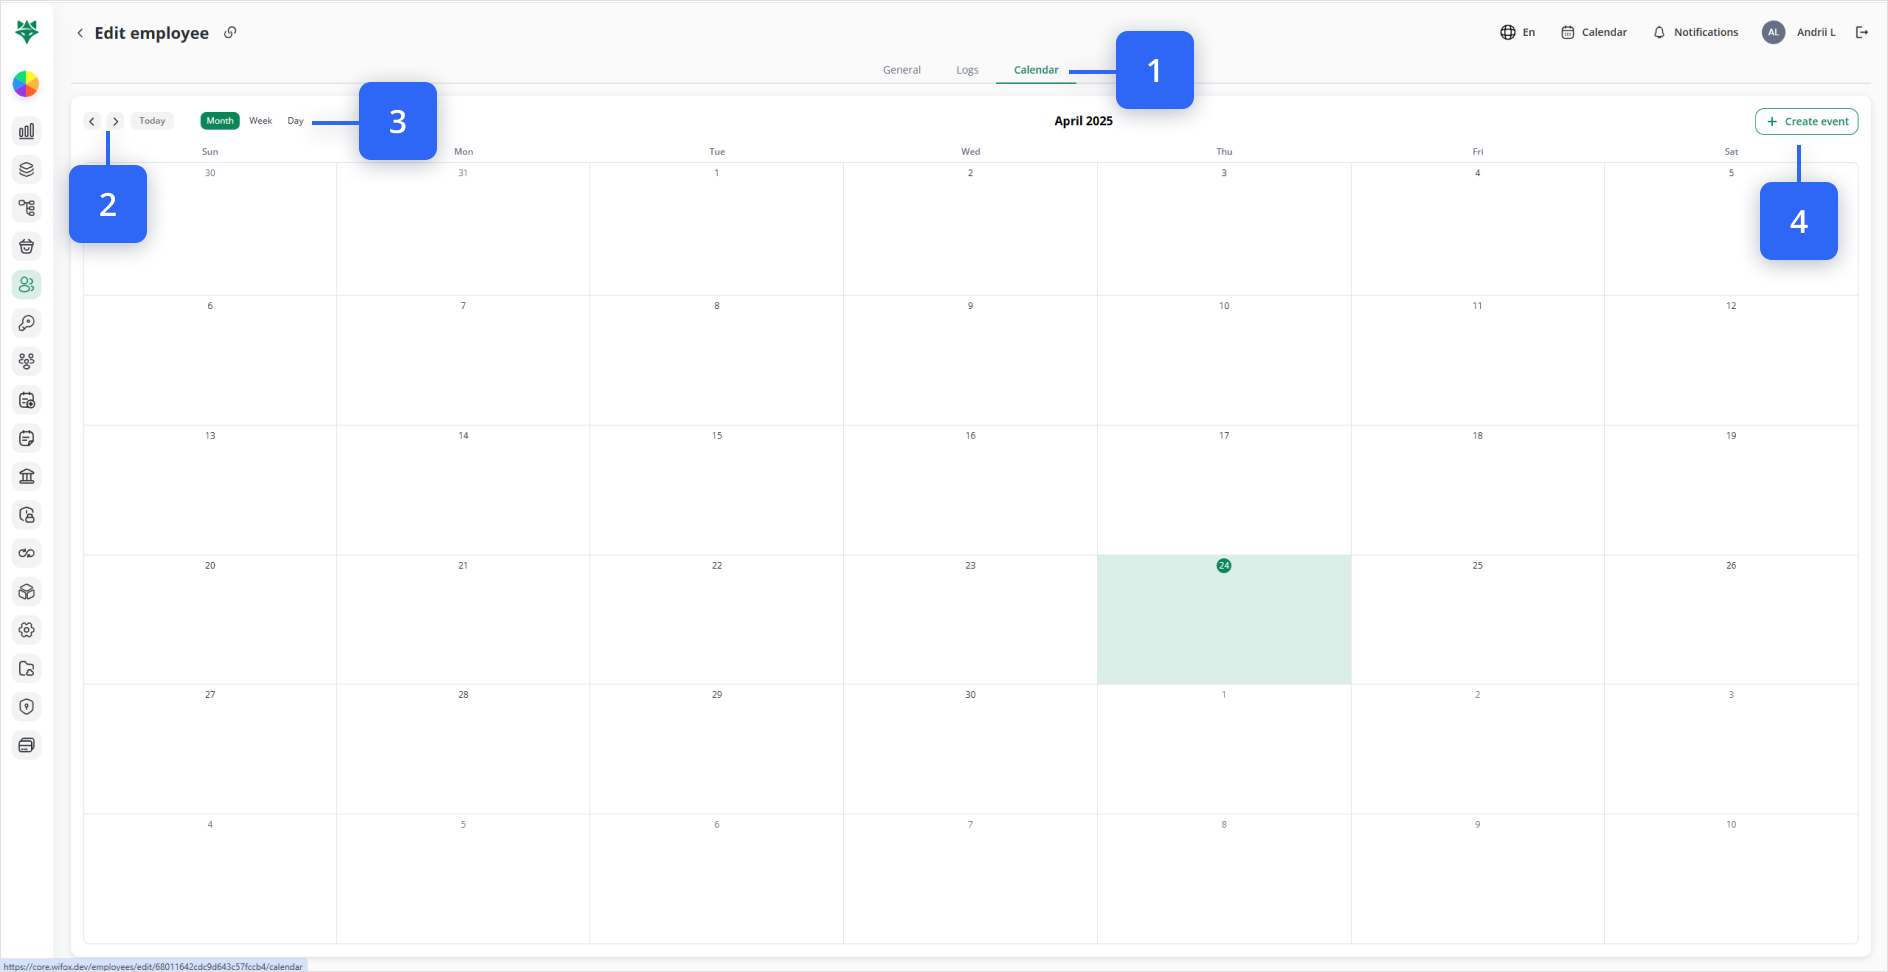
In the Edit employee screen, click the Calendar tab (1).
Use the ‹ › arrows or Today button to navigate between dates (2).
Switch views with Month, Week, or Day at the top (3).
To add a new appointment or shift, click + Create event in the top-right (4).
Fill out the event details (title, date/time, description) and save.