
4. How to Edit an Employee
In the Edit window, you can:
-
Change the name, role, email, and password of the employee.
-
Assign the employee to new projects and desks.
1. Open the Employees list
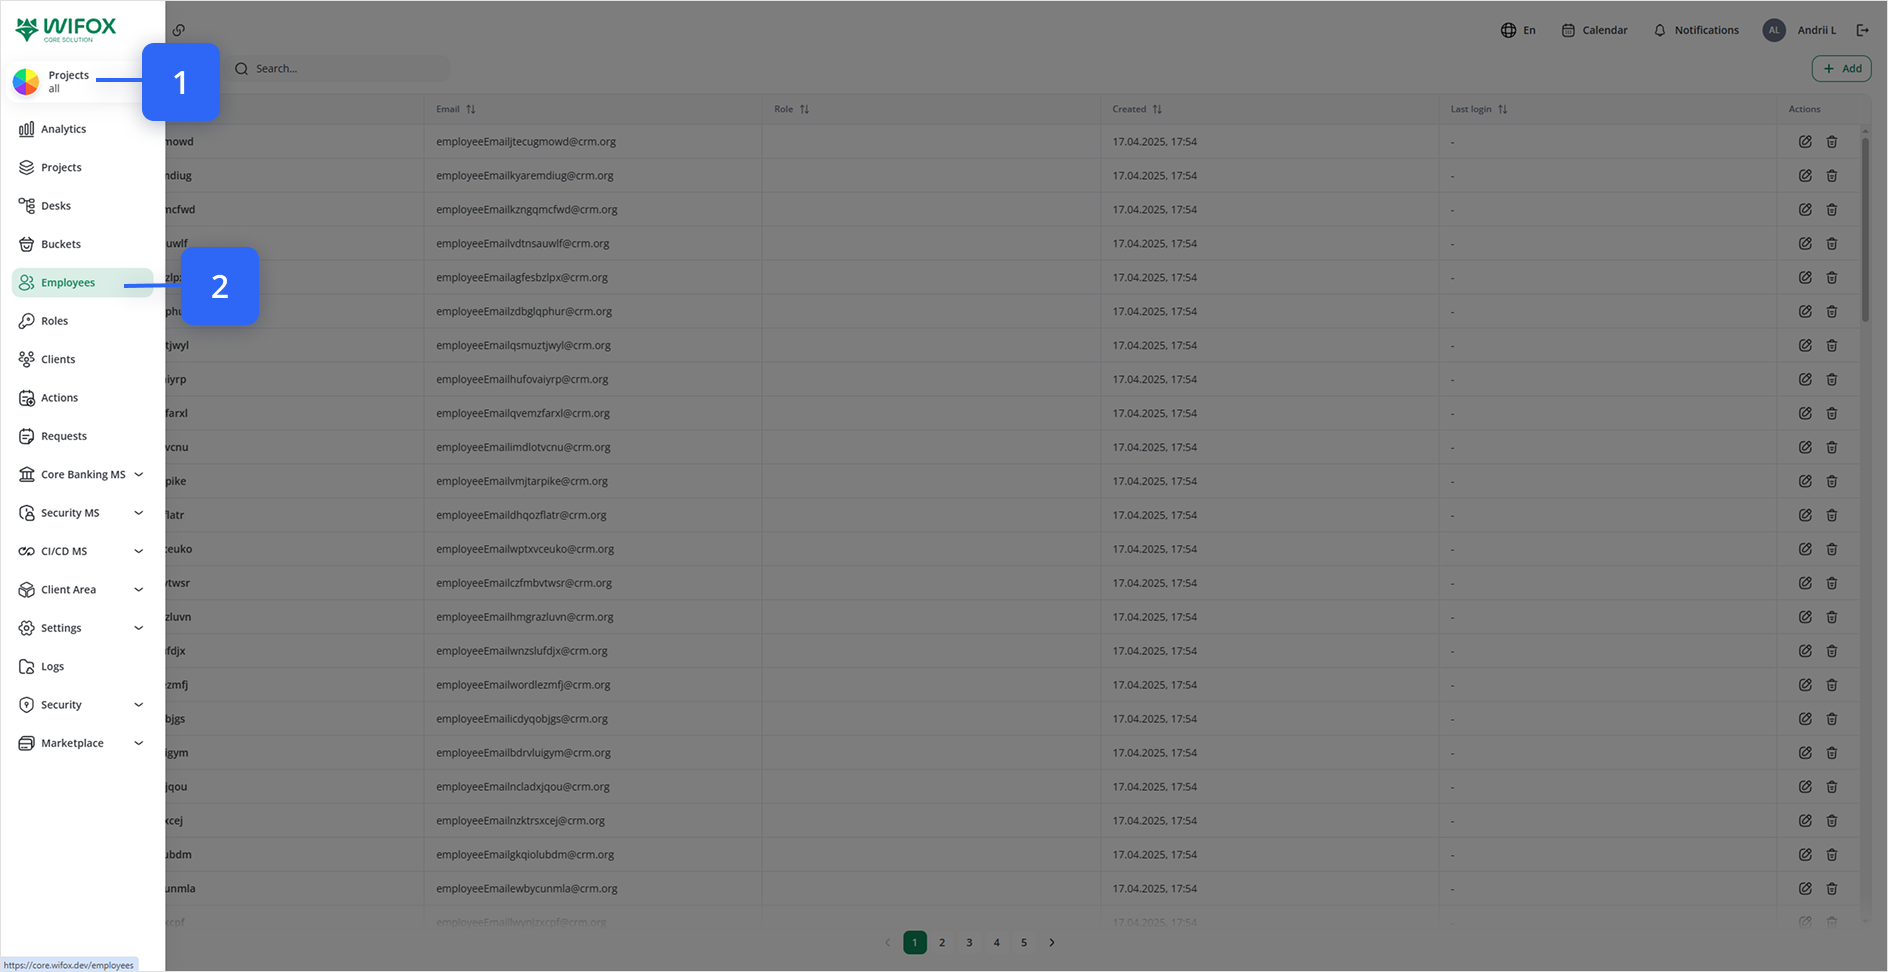
Click Employees in the left-hand navigation.
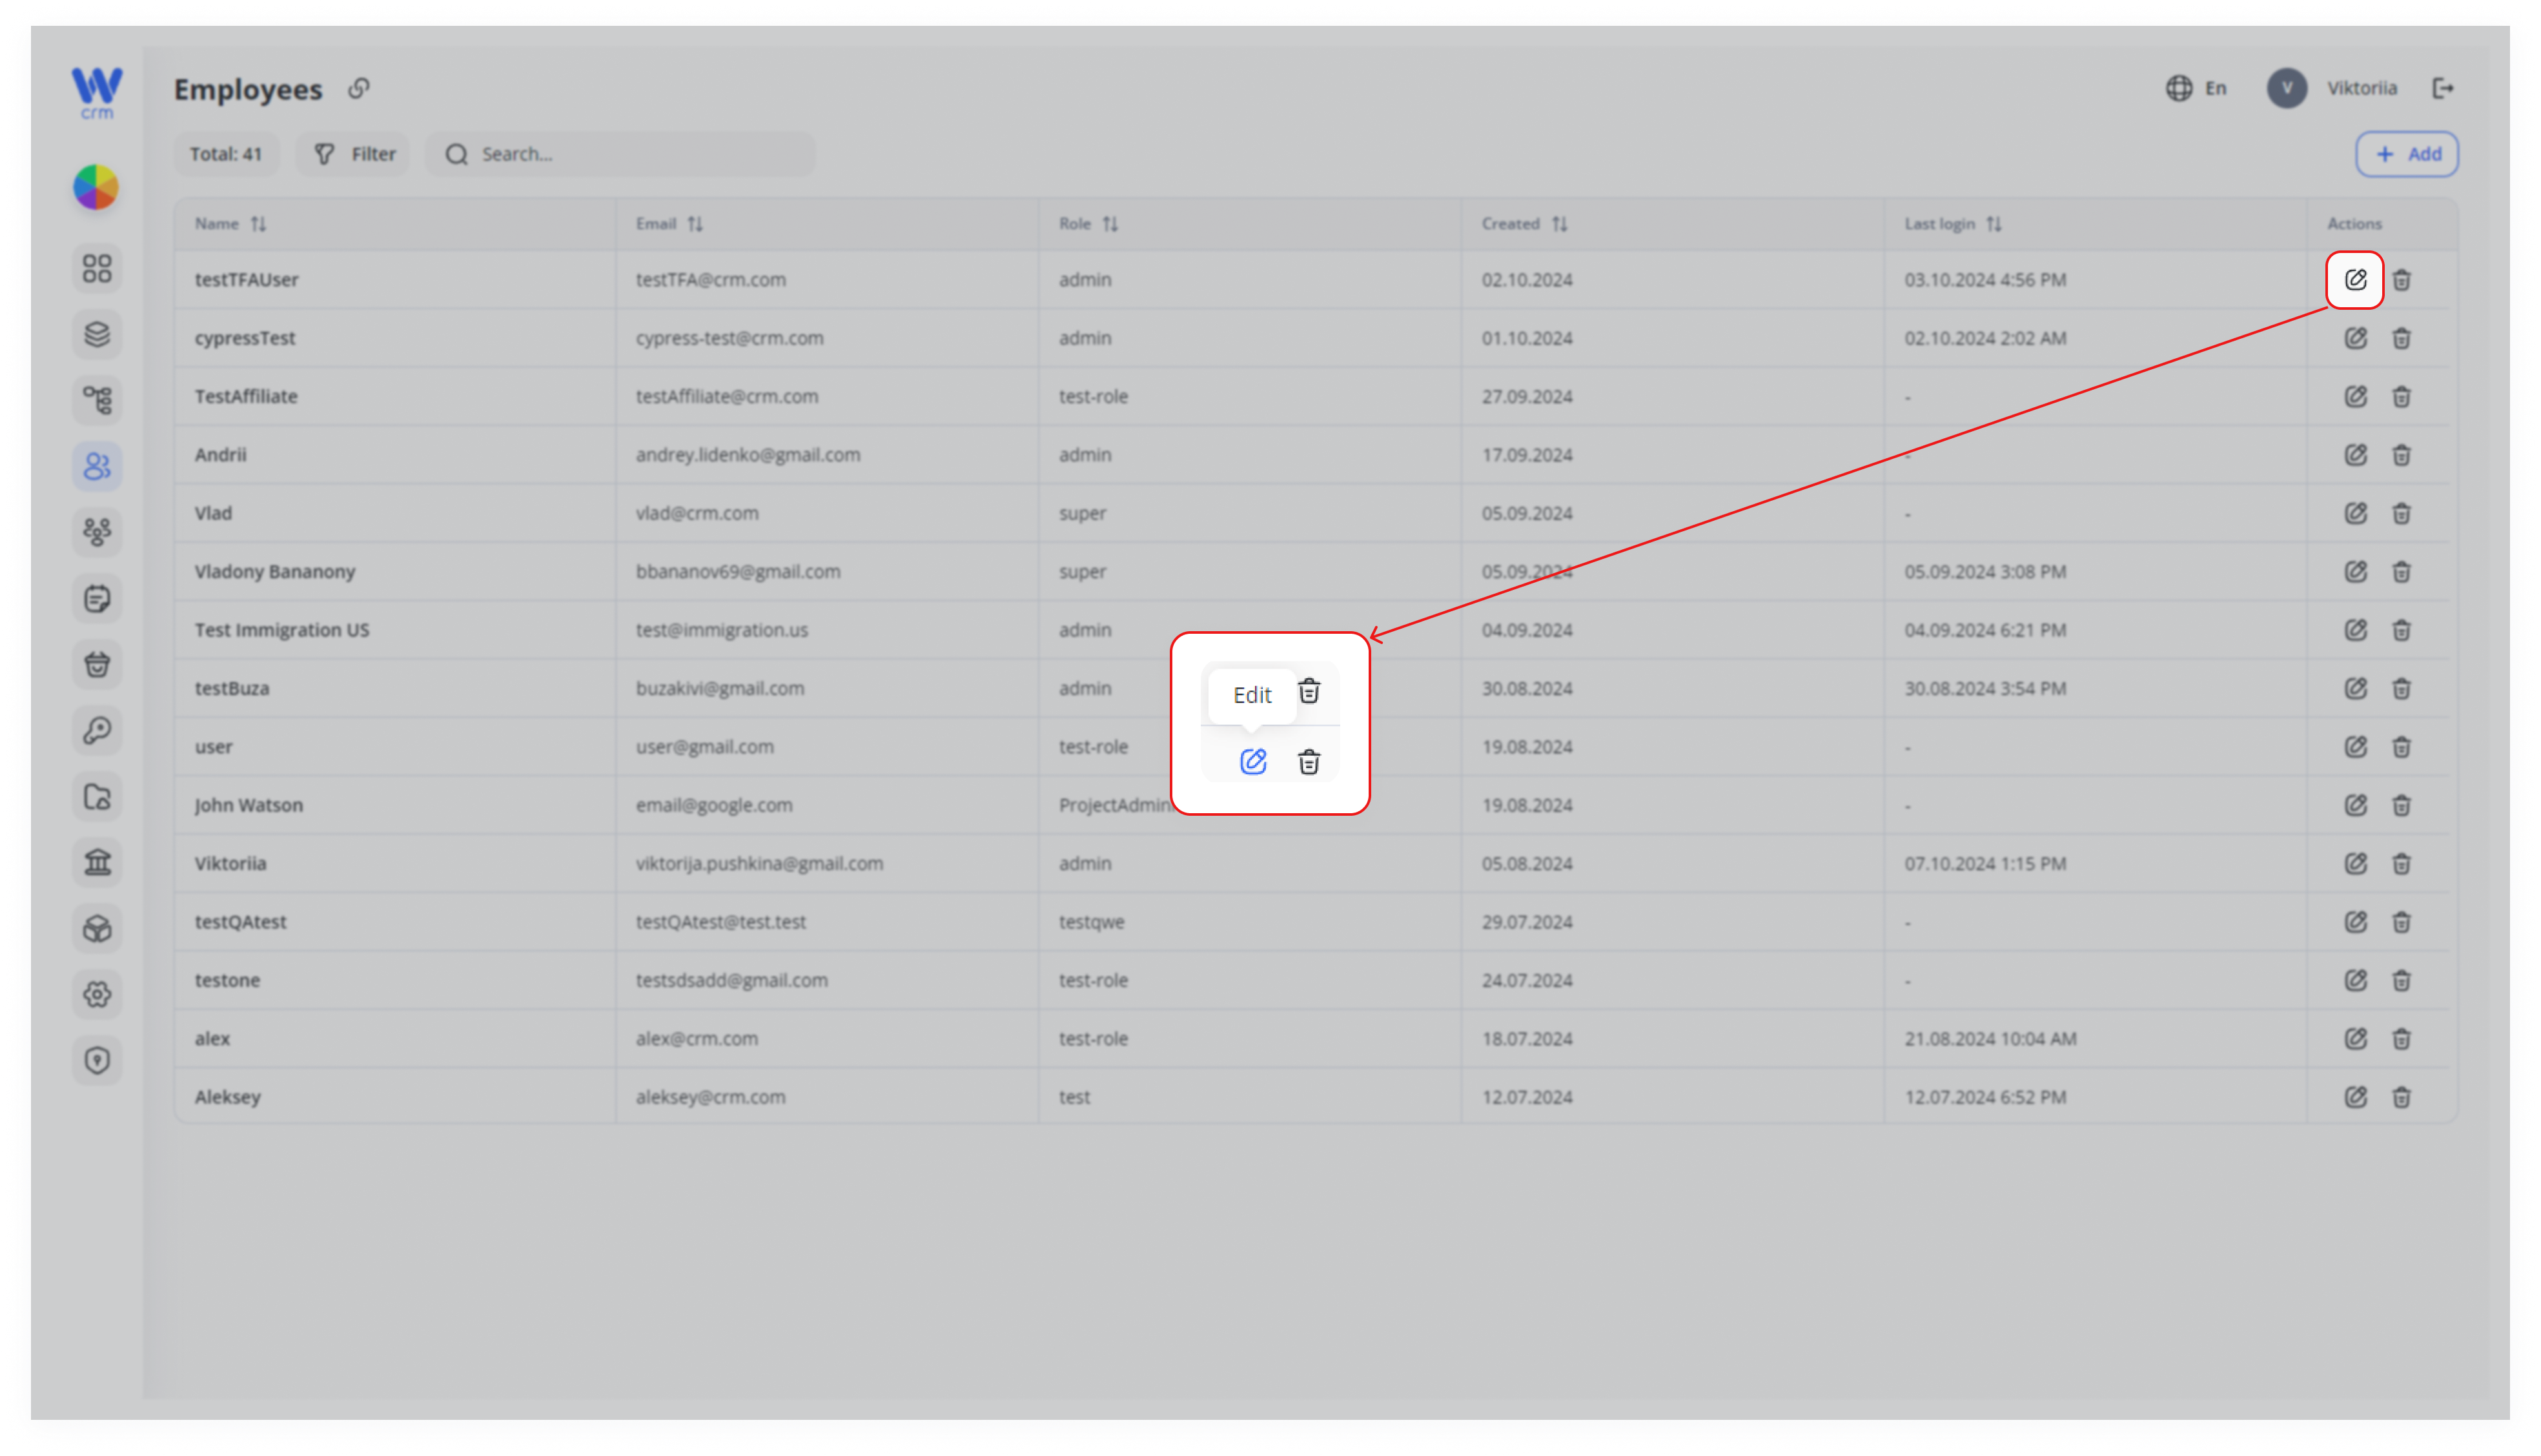
2. Click Edit
In the Actions column of the employee’s row, click the ✏️ Edit icon.
3. Modify General Details
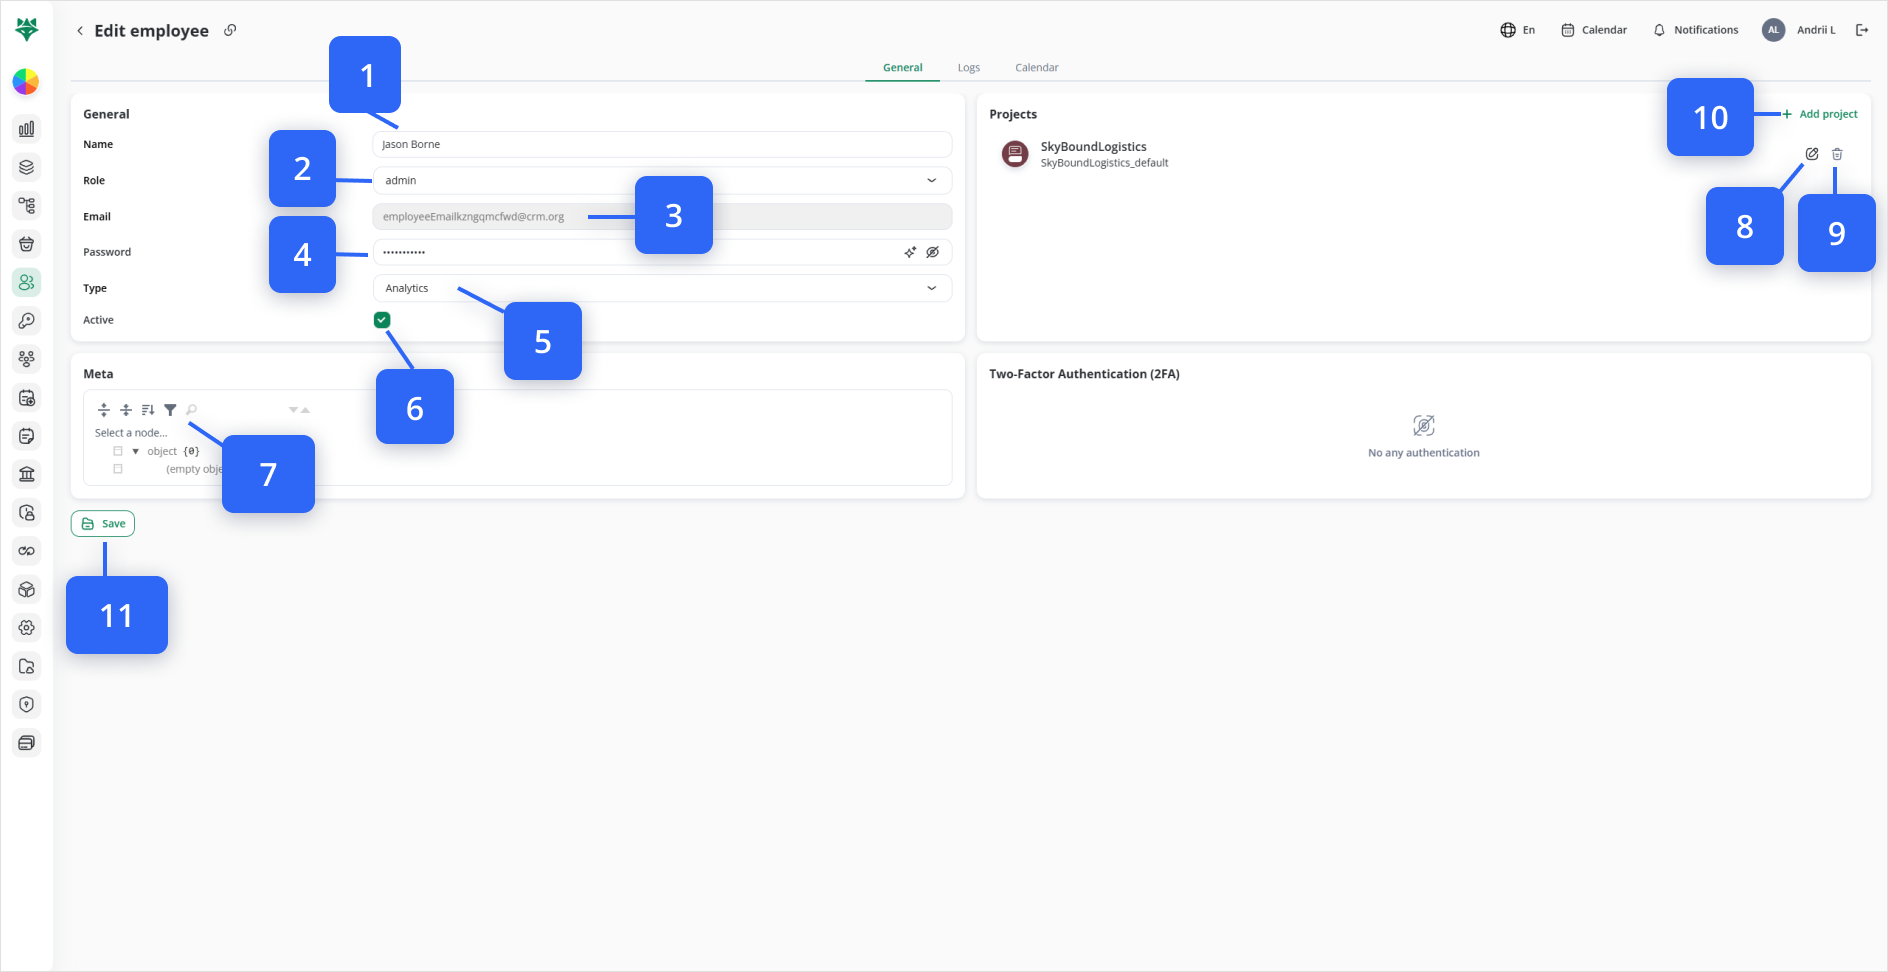
- Name (1): Update the full name
- Role (2): Choose a new system role
- Email (3): (Read-only) shows the login address
- Password (4): Enter a new password—or click ✨ to generate one
- Type (5): Select a new category (Manager, Sales, etc.)
- Active (6): Toggle on/off to activate or deactivate the account
4. (Optional) Update Metadata
Use the Meta tree picker to add or change any custom tags (Look at #7 on the image).
5. Assign Projects & Desks
In the Projects panel you’ll see any projects already assigned to this employee, each with:
✏️ Edit icon — click to adjust which Desks they can access within that project (Look at #8 on the image)
🗑️ Delete icon — click to remove the project assignment entirely (Look at #9 on the image)
To add a new project assignment:
- Click + Add project (Look at #10 on the image).
- In the drawer, select one or more Project entries.
- (Optional) Under Desks, pick specific desk(s) to limit their access.
- Click Save in the drawer to confirm.
6. View and Manage the Employee’s Calendar
In the Edit employee screen, click the Calendar tab.
Use the ‹ › arrows or Today button to navigate between dates.
Switch views with Month, Week, or Day at the top.
To add a new appointment or shift, click + Create event in the top-right.
Fill out the event details (title, date/time, description) and save.
7. Save Your Changes
Click Save at the bottom-left of the Edit employee form (Look at #11 on the image).
Note: You cannot remove projects to which an employee has already been assigned. Instead, go to the Projects tab and remove specific members from the project.