
4. How to Edit and Delete a Project
Once a Project has been created, you can modify its settings, reassign it within your organizational hierarchy, manage membership, or remove it entirely. Follow the steps below to keep your Projects up to date or to delete one when it’s no longer needed.
1. Open the Projects List
2. Enter Edit Mode
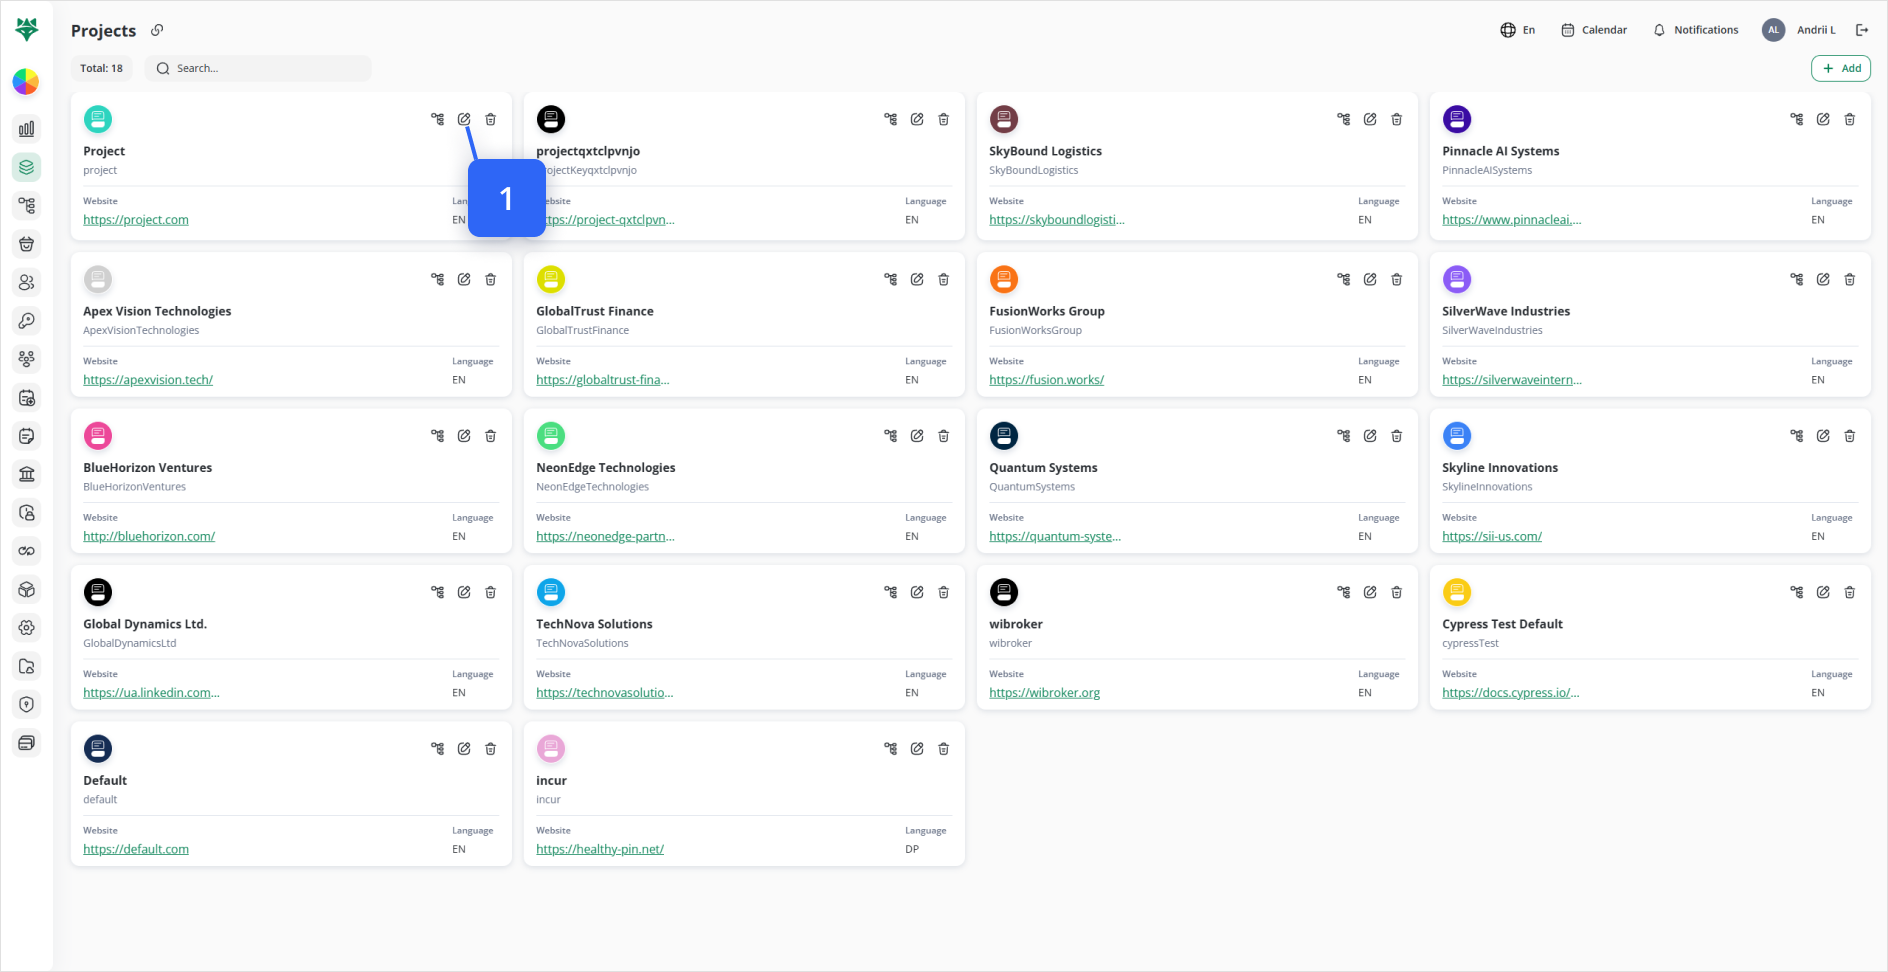
Locate the card for the Project you wish to change. Click the Edit (✏️) icon (Step #1) in the top-right corner of that card. This opens the Edit Project form pre-populated with the current settings.
3. Update General Settings
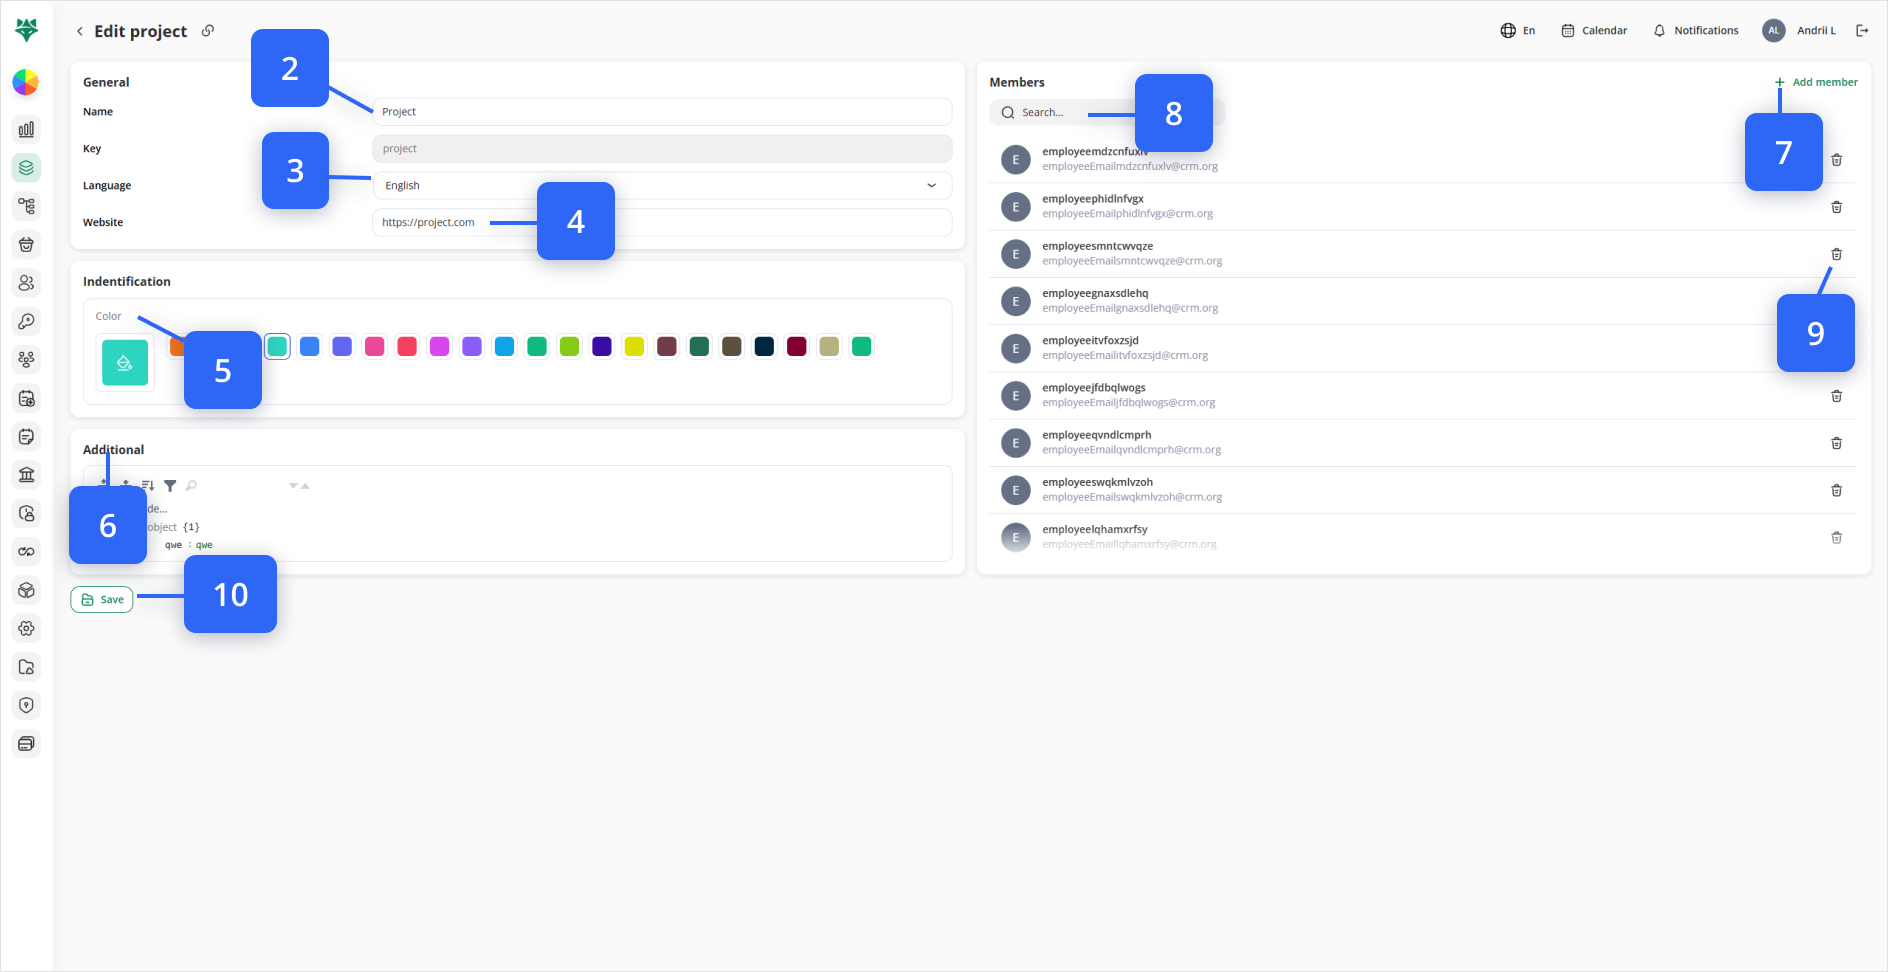
Within the General section (top-left of the form), make any of the following changes:
-
Name (Step #2)
– Change the human-readable title of the project. -
Key (Step #3)
– Note: The Key field is read-only after creation and cannot be changed. -
Language (Step #3)
– Select a new default locale from the dropdown. -
Website (Step #4)
– Update or add the project’s public URL.
4. Change Visual Identification
In the Identification panel (below General on the left):
-
Click the current color swatch (Step #5).
-
Pick a new color or icon from the palette.
-
The new selection will instantly highlight this project throughout the UI.
5. Reassign Additional Tags
Under the Additional header (below Identification):
-
Use the tree picker to check or uncheck any Regions, Business Units, or custom taxonomy nodes (Step #6).
-
This adjusts how the project is grouped for filtering, reporting, and permission scopes.
6. Manage Project Membership
On the right side of the page, the Members panel lists all Employees currently assigned to this project:
-
Add a Member (Step #7)
– Click + Add member to open a searchable dropdown of your company’s employees. Select one or more to assign them here. -
Search Members (Step #8)
– Filter the existing member list by typing a name or email. To add a new user to this list, go to the Employees tab. -
Remove a Member (Step #9)
– Click the trash icon next to any employee to remove their project access.
7. Apply Your Changes
Once you’ve made all necessary edits:
-
Click Save (Step #10) in the bottom-left corner.
-
The form will close, and you’ll return to the Projects list with all updates applied immediately.
How to Delete a Project
You may remove any non-default Project when it is no longer needed. Note: The system’s Default Project cannot be deleted.
-
Locate the Project
On the Projects tab, find the card of the Project you wish to delete. -
Click the Delete Icon
In the top-right corner of that Project card, click the 🗑️ (trash) icon. -
Confirm Deletion
A confirmation prompt will appear. Review the warning and click Confirm to proceed.
Note: you can delete the project’s member only after you’ve deleted them from the desk they have been assigned to. Read more about Desks here.
You now know how to edit key attributes, reassign tags and members, and remove Projects within WBCS. Keeping your Projects accurately configured ensures that users see only the data they need, and that your organization’s hierarchy and permissions remain consistent.