
4. How to Edit a Project
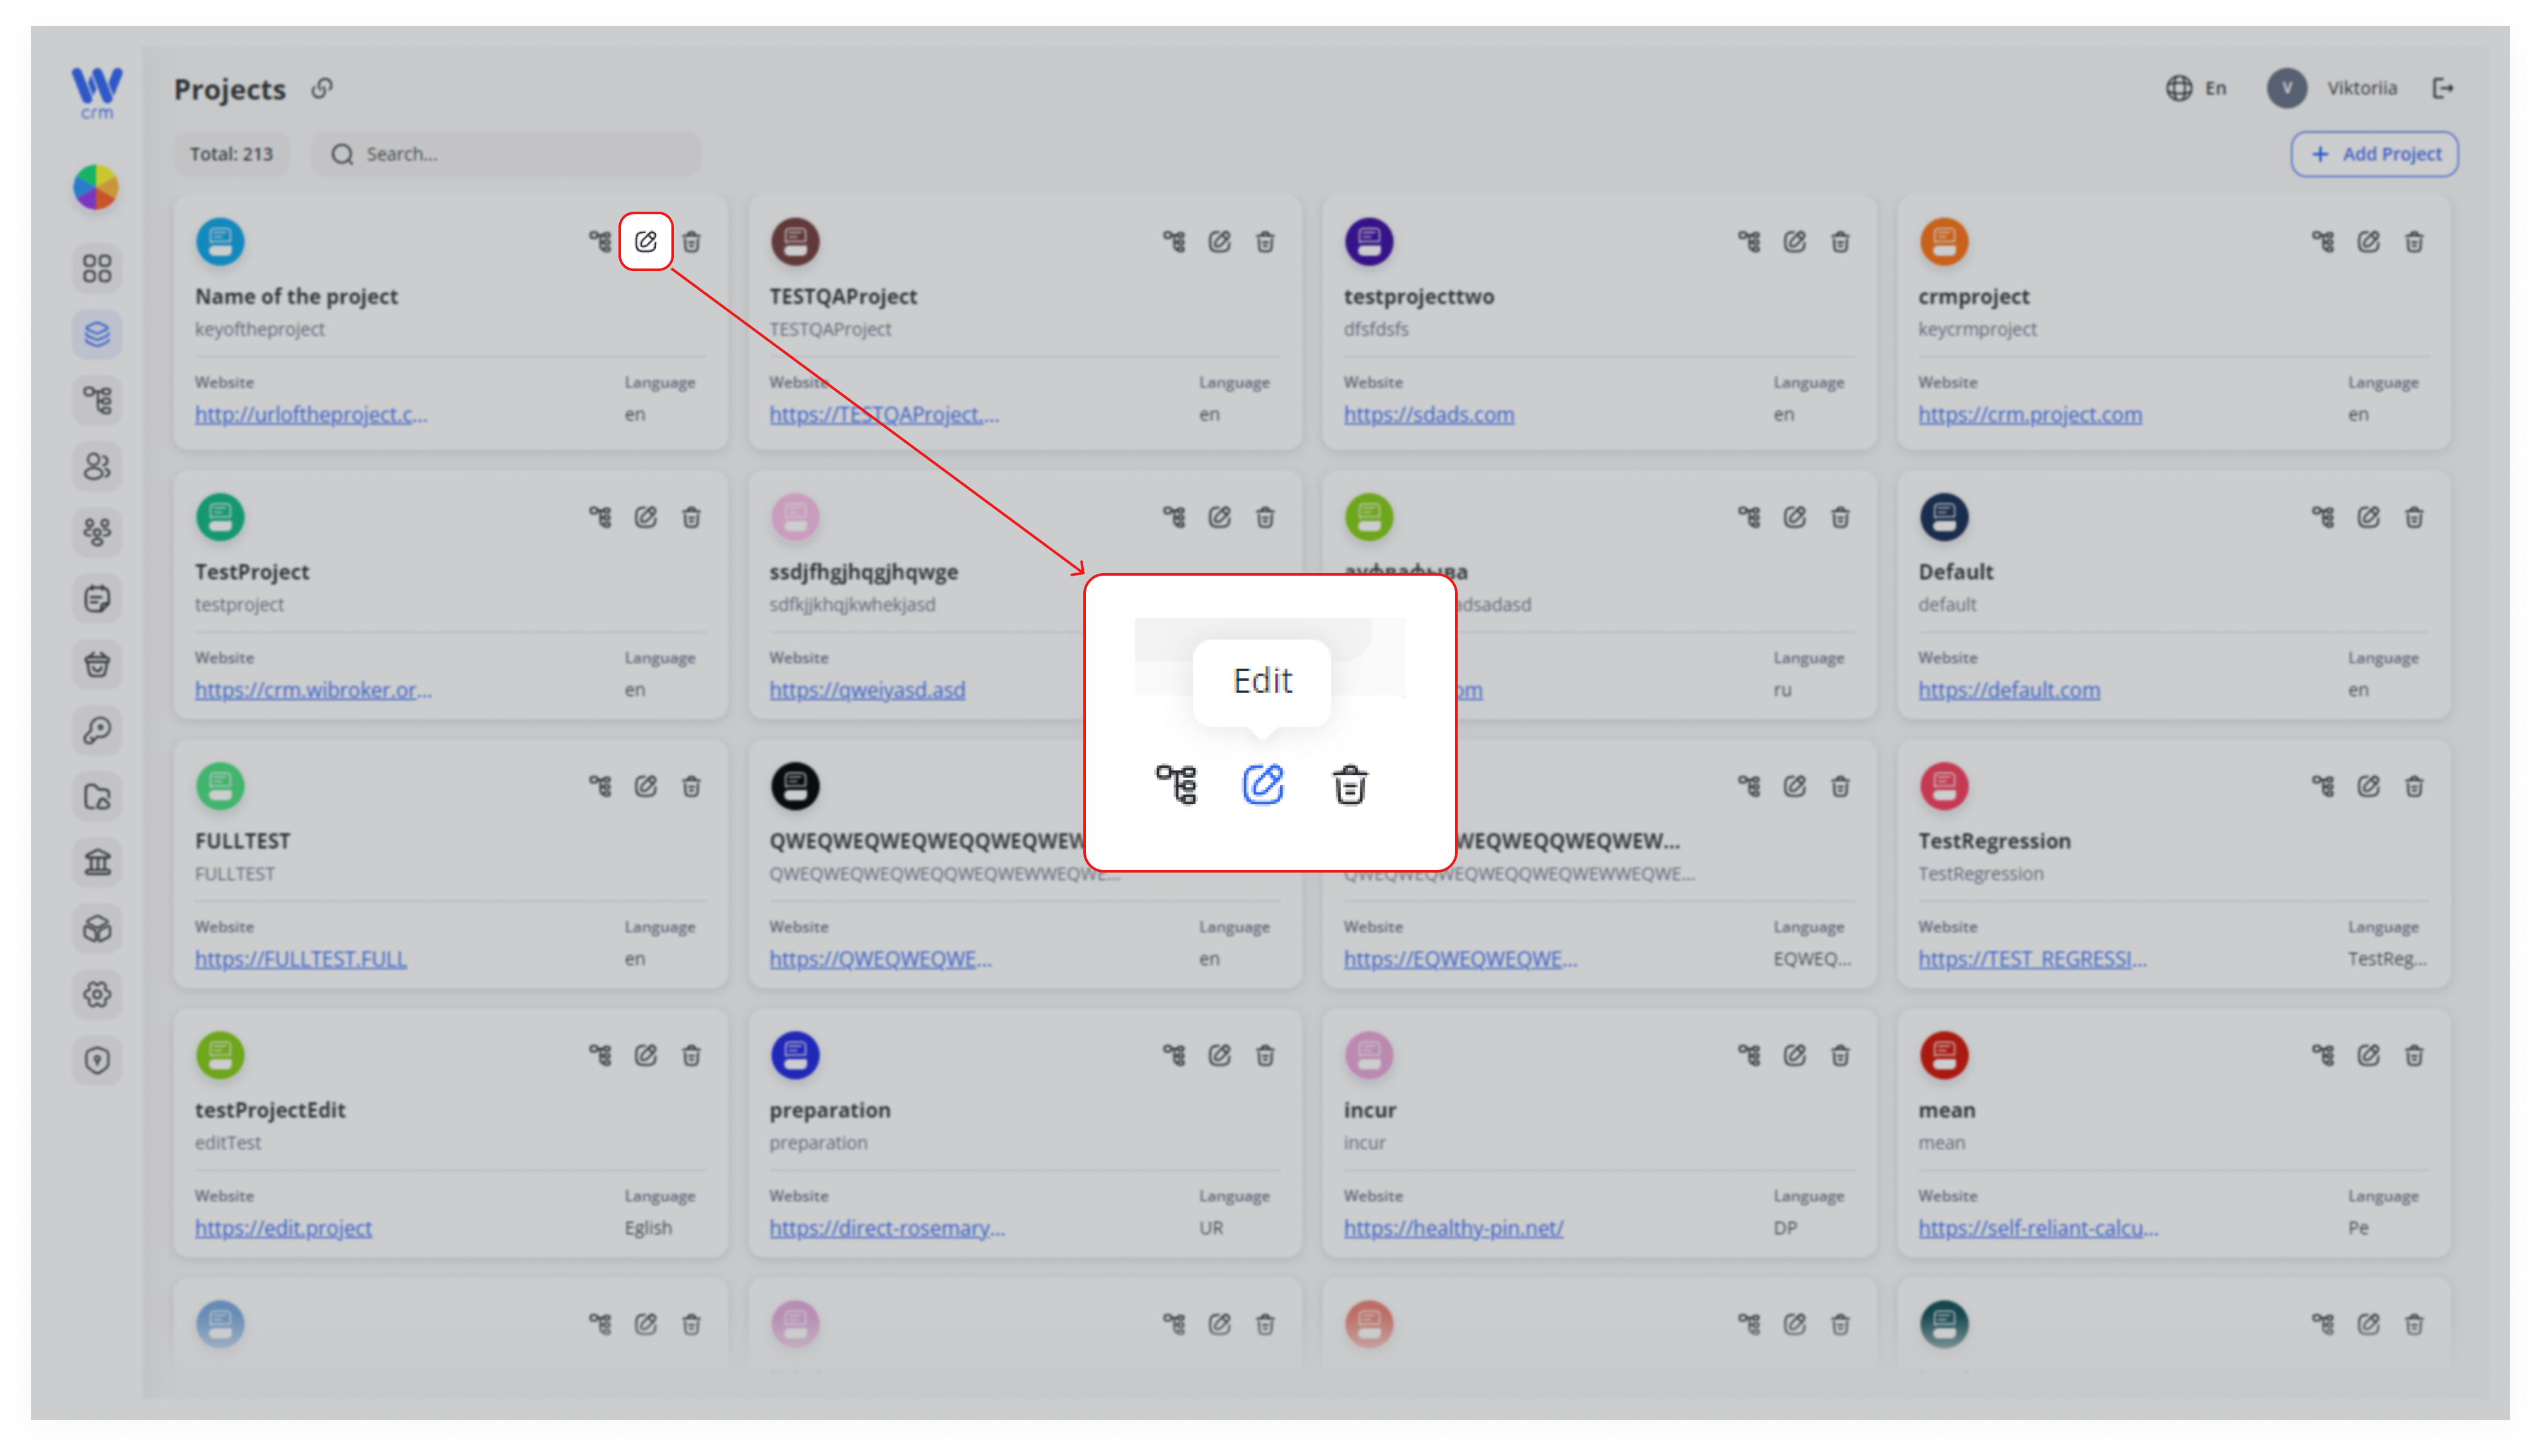
After creating a Project, the editing window will open automatically. To open the edit window from the Projects tab, click on the edit icon in the upper right corner of the specific Project window:
In the Edit window, you can:
Change the name, language and website of the project.Add or delete members of the project.
To add a new member to the project:
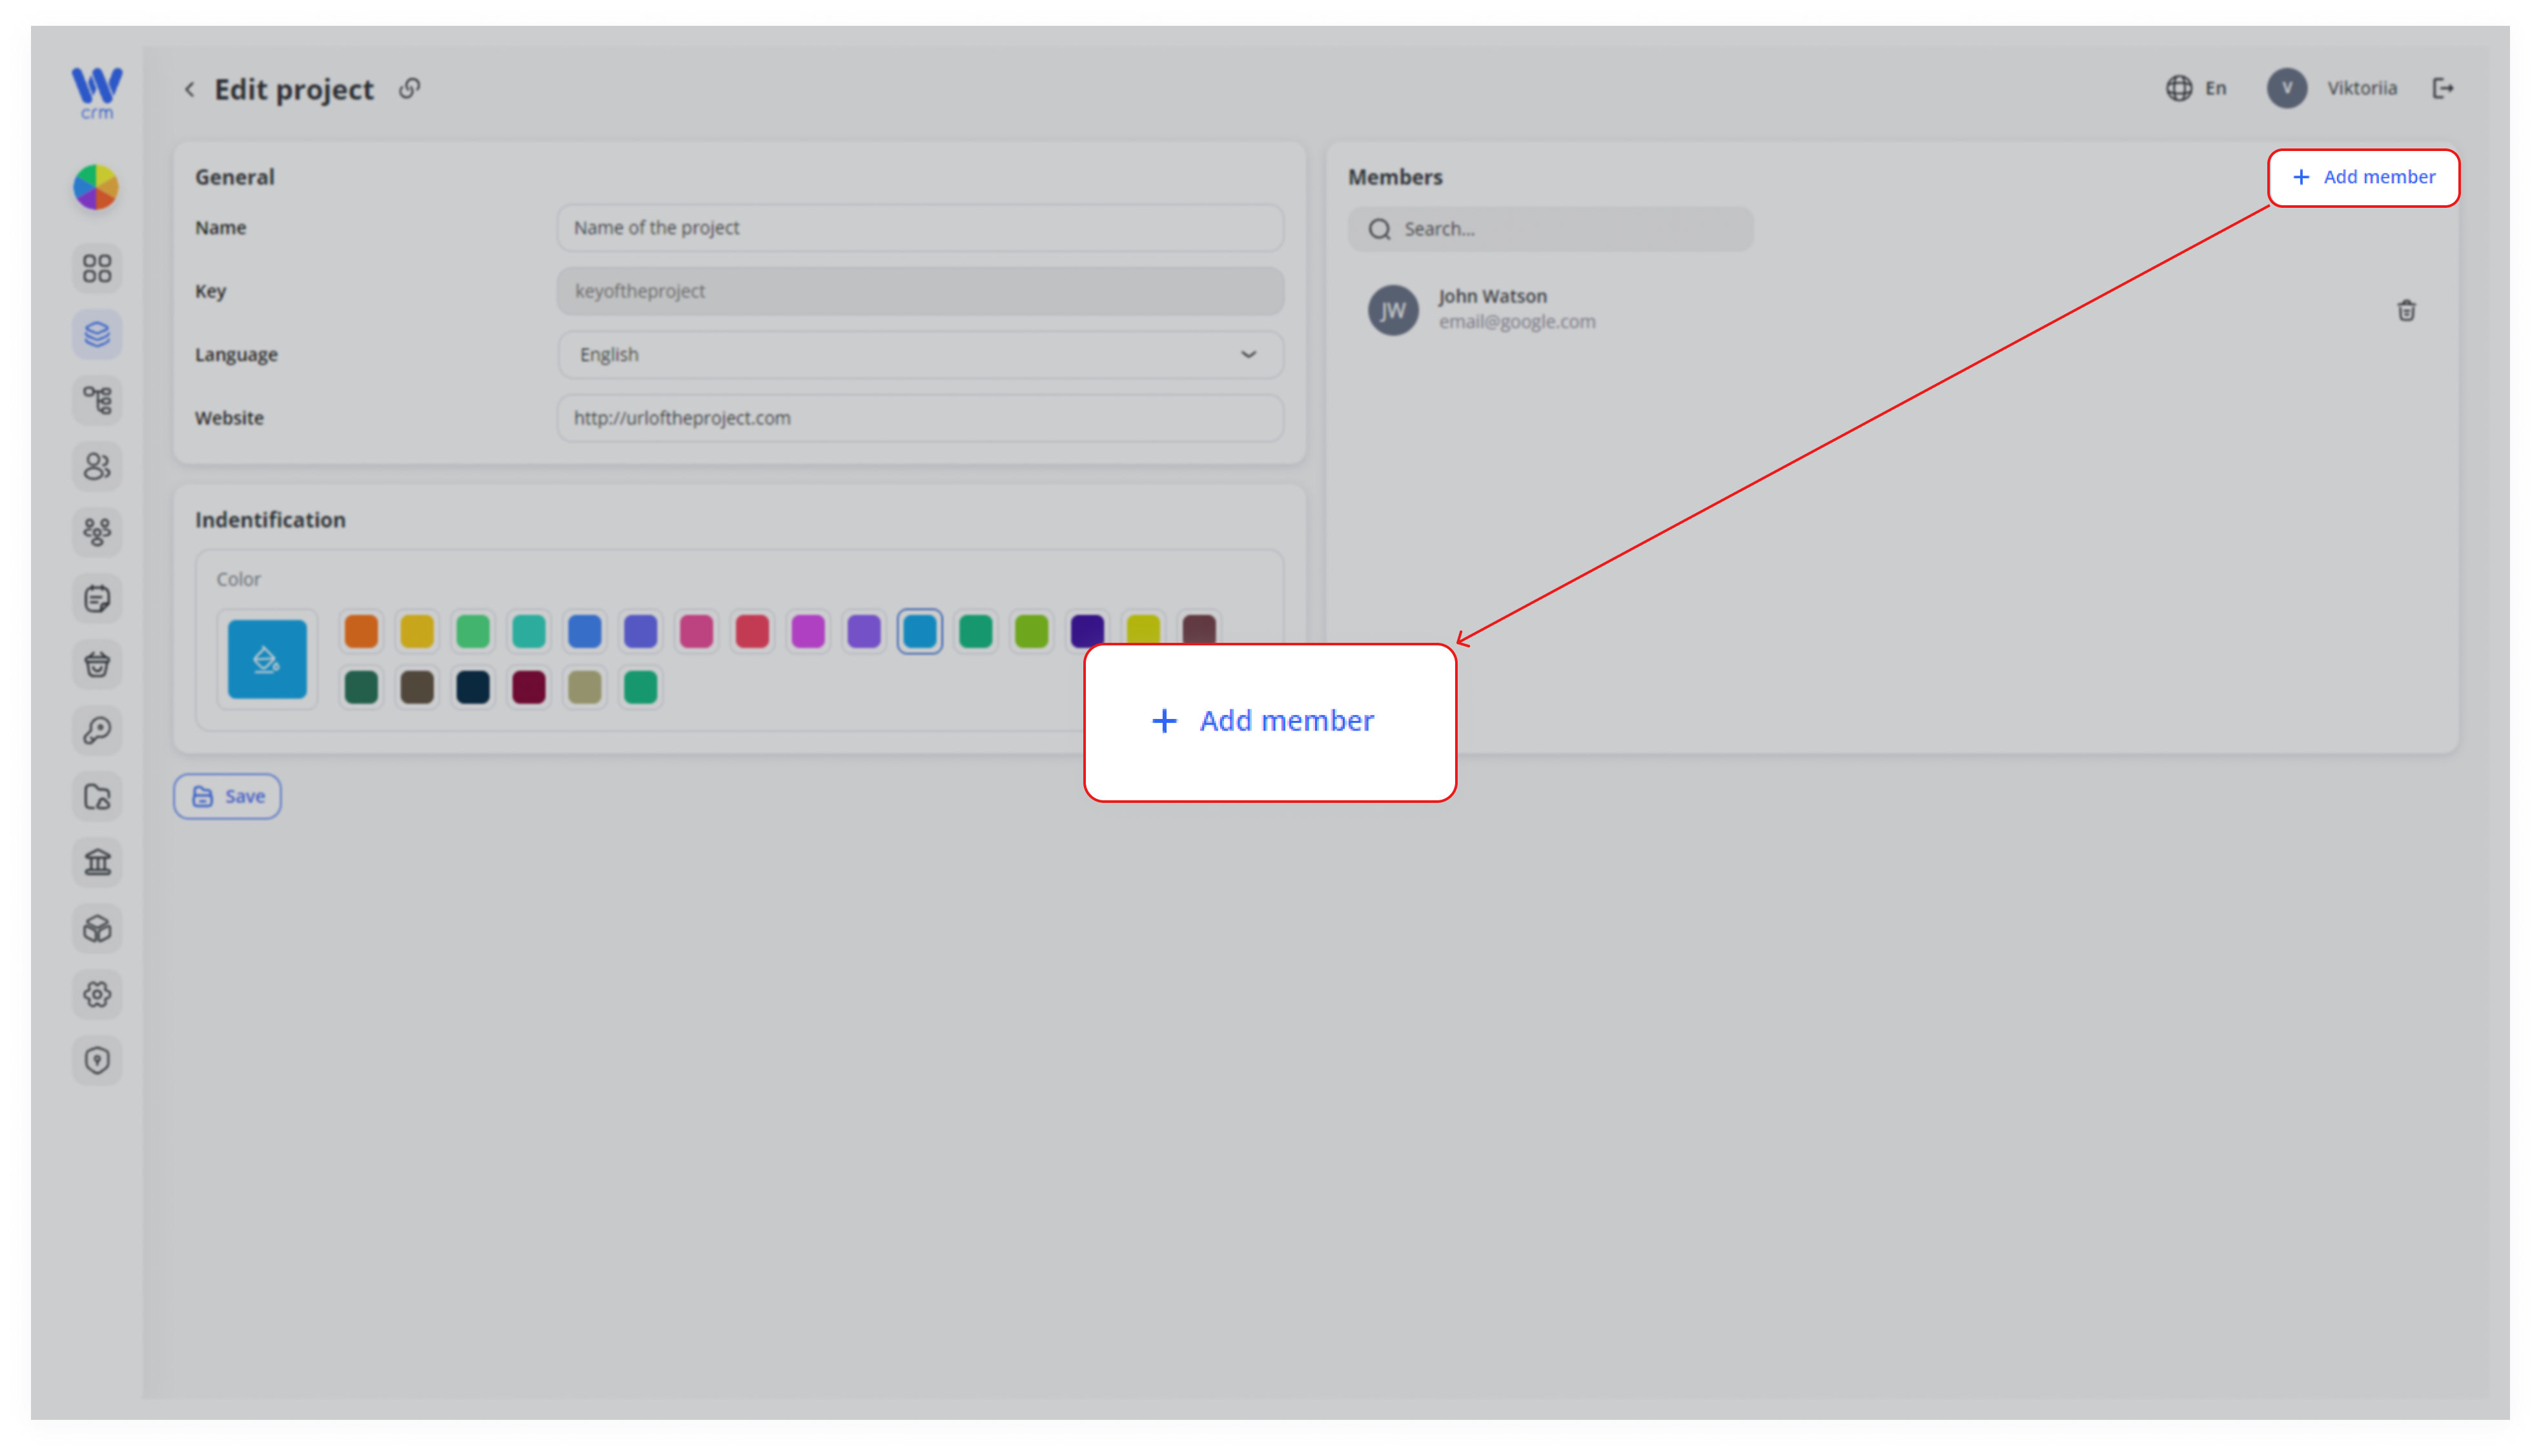
1. Click on the Add member button in the right top corner of the tab:
2. Choose a member from the list. You can use Search to find a user via email. The list consists of the employees, you have added before. To add a new user to this list, go to the Employees tab.
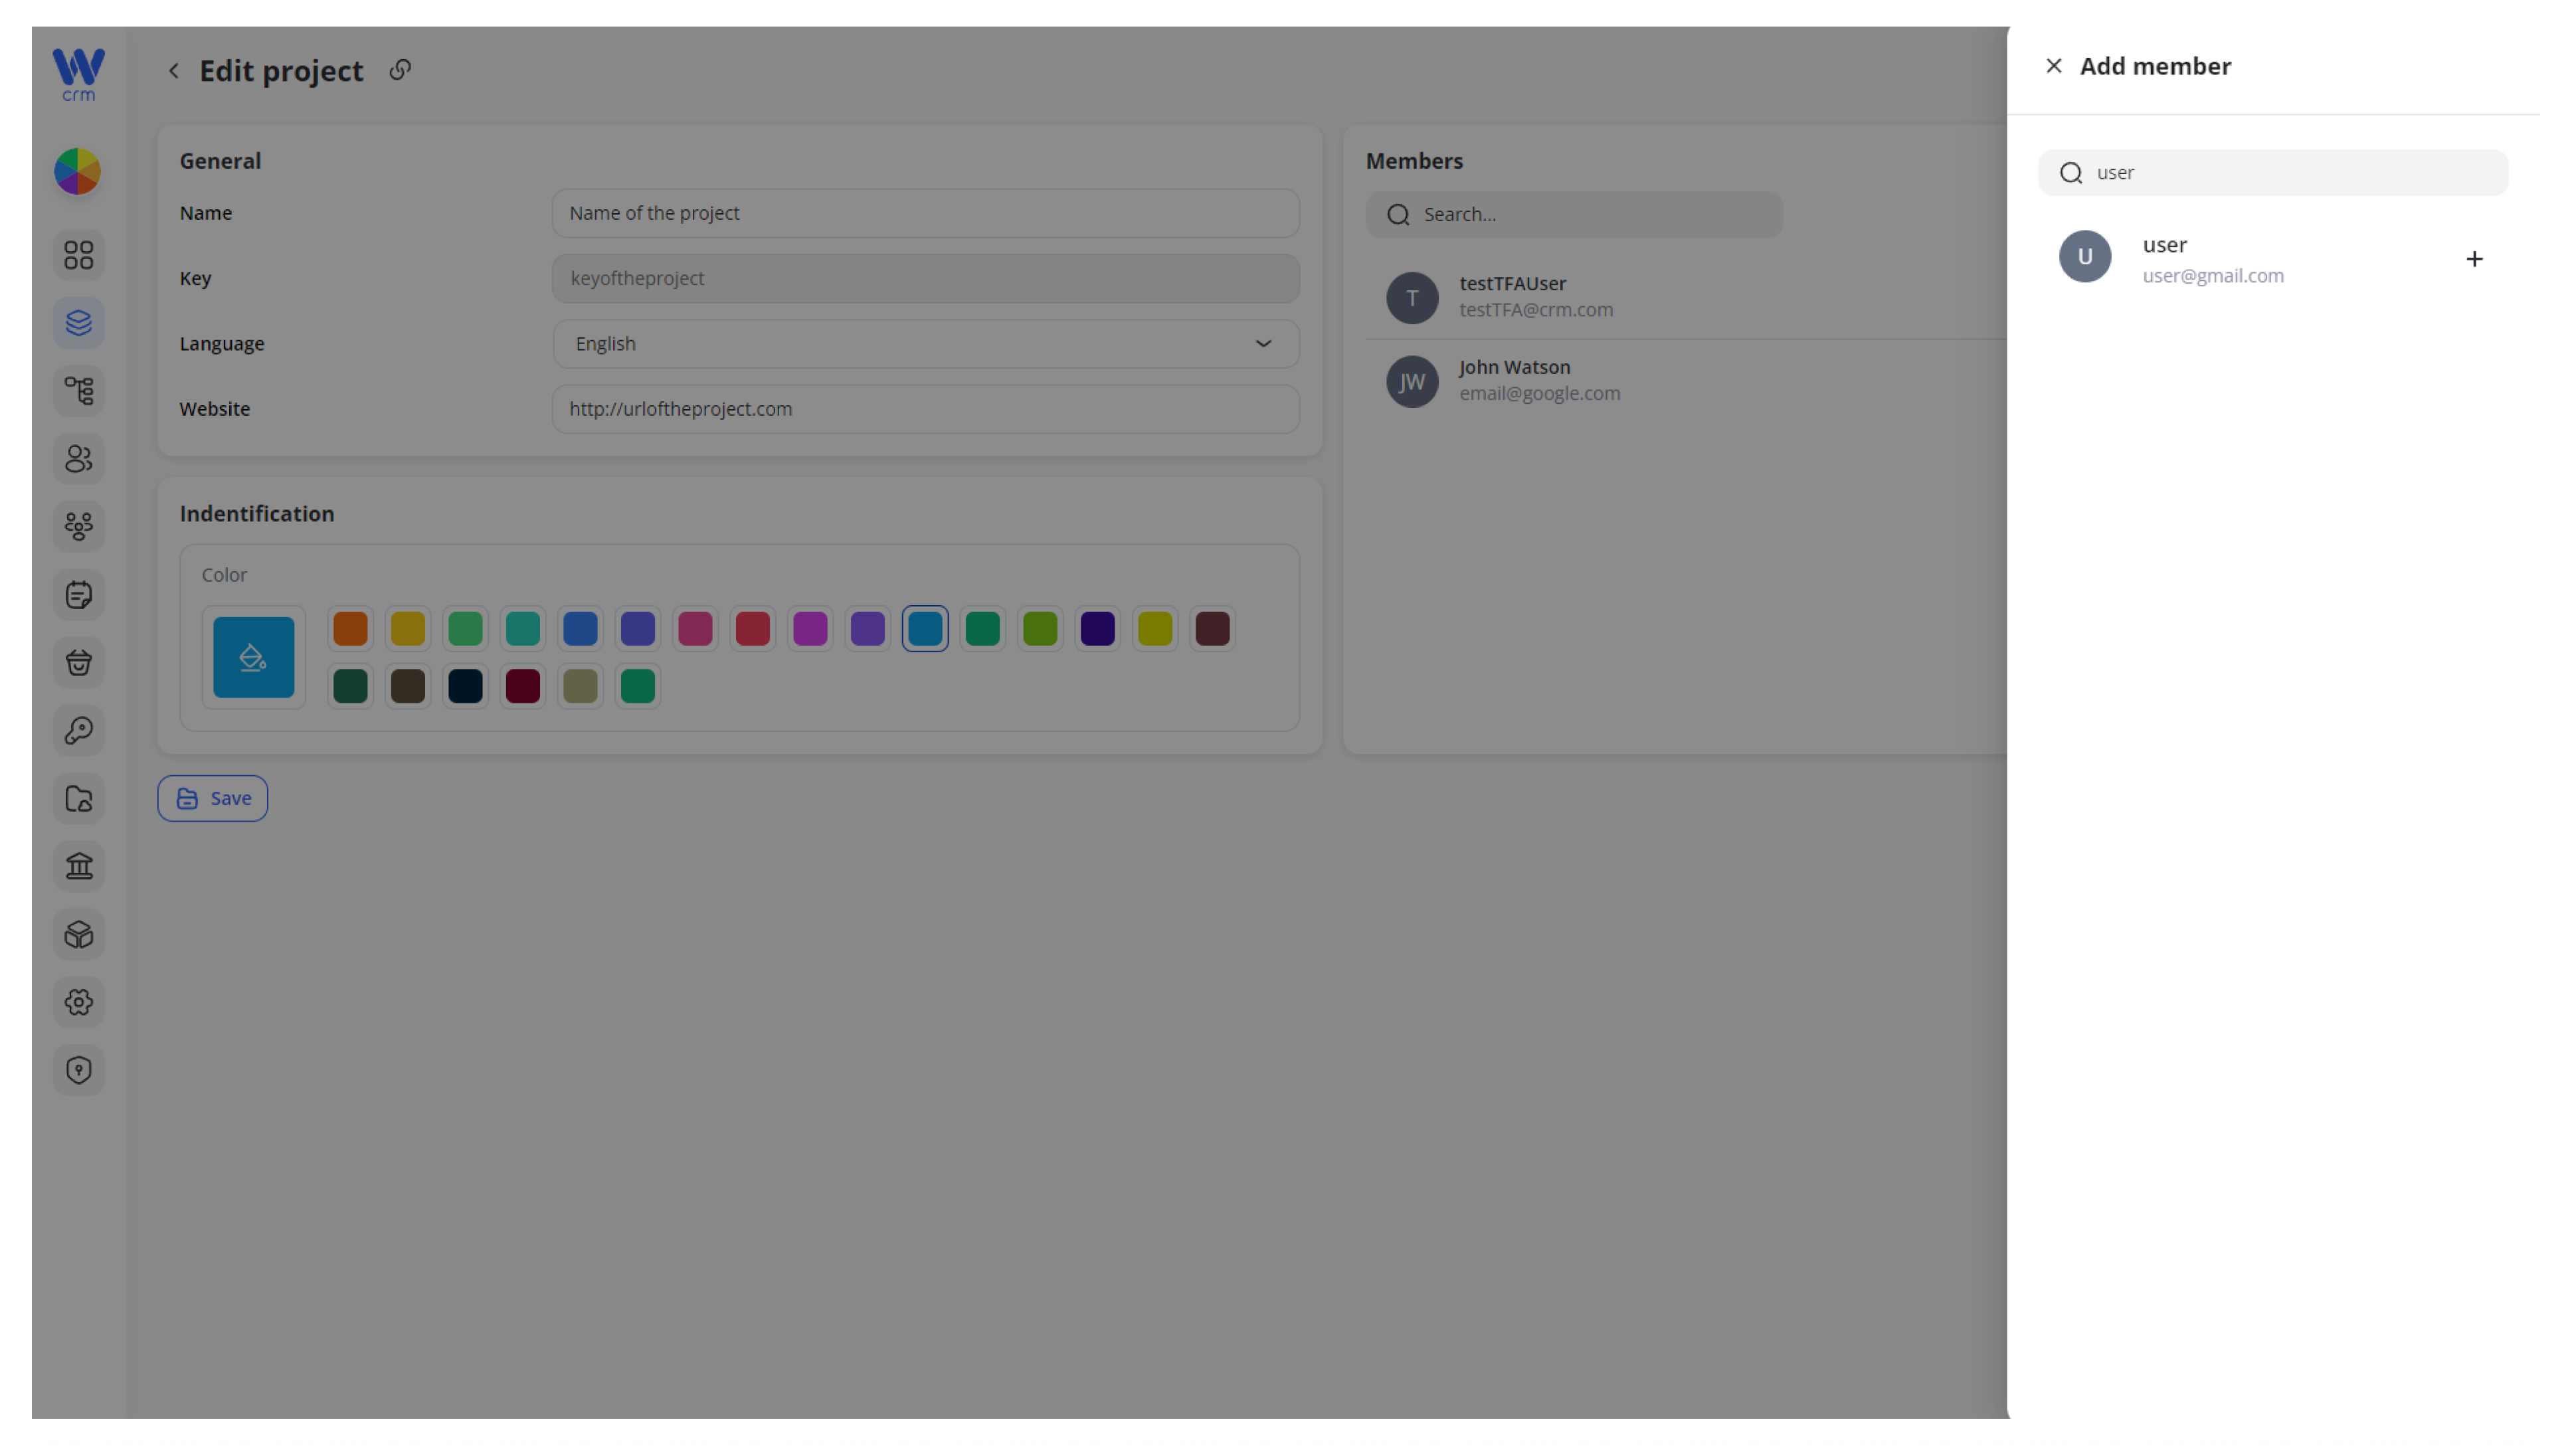
3. Click the plus sign next to the user’s name.
To delete a member:
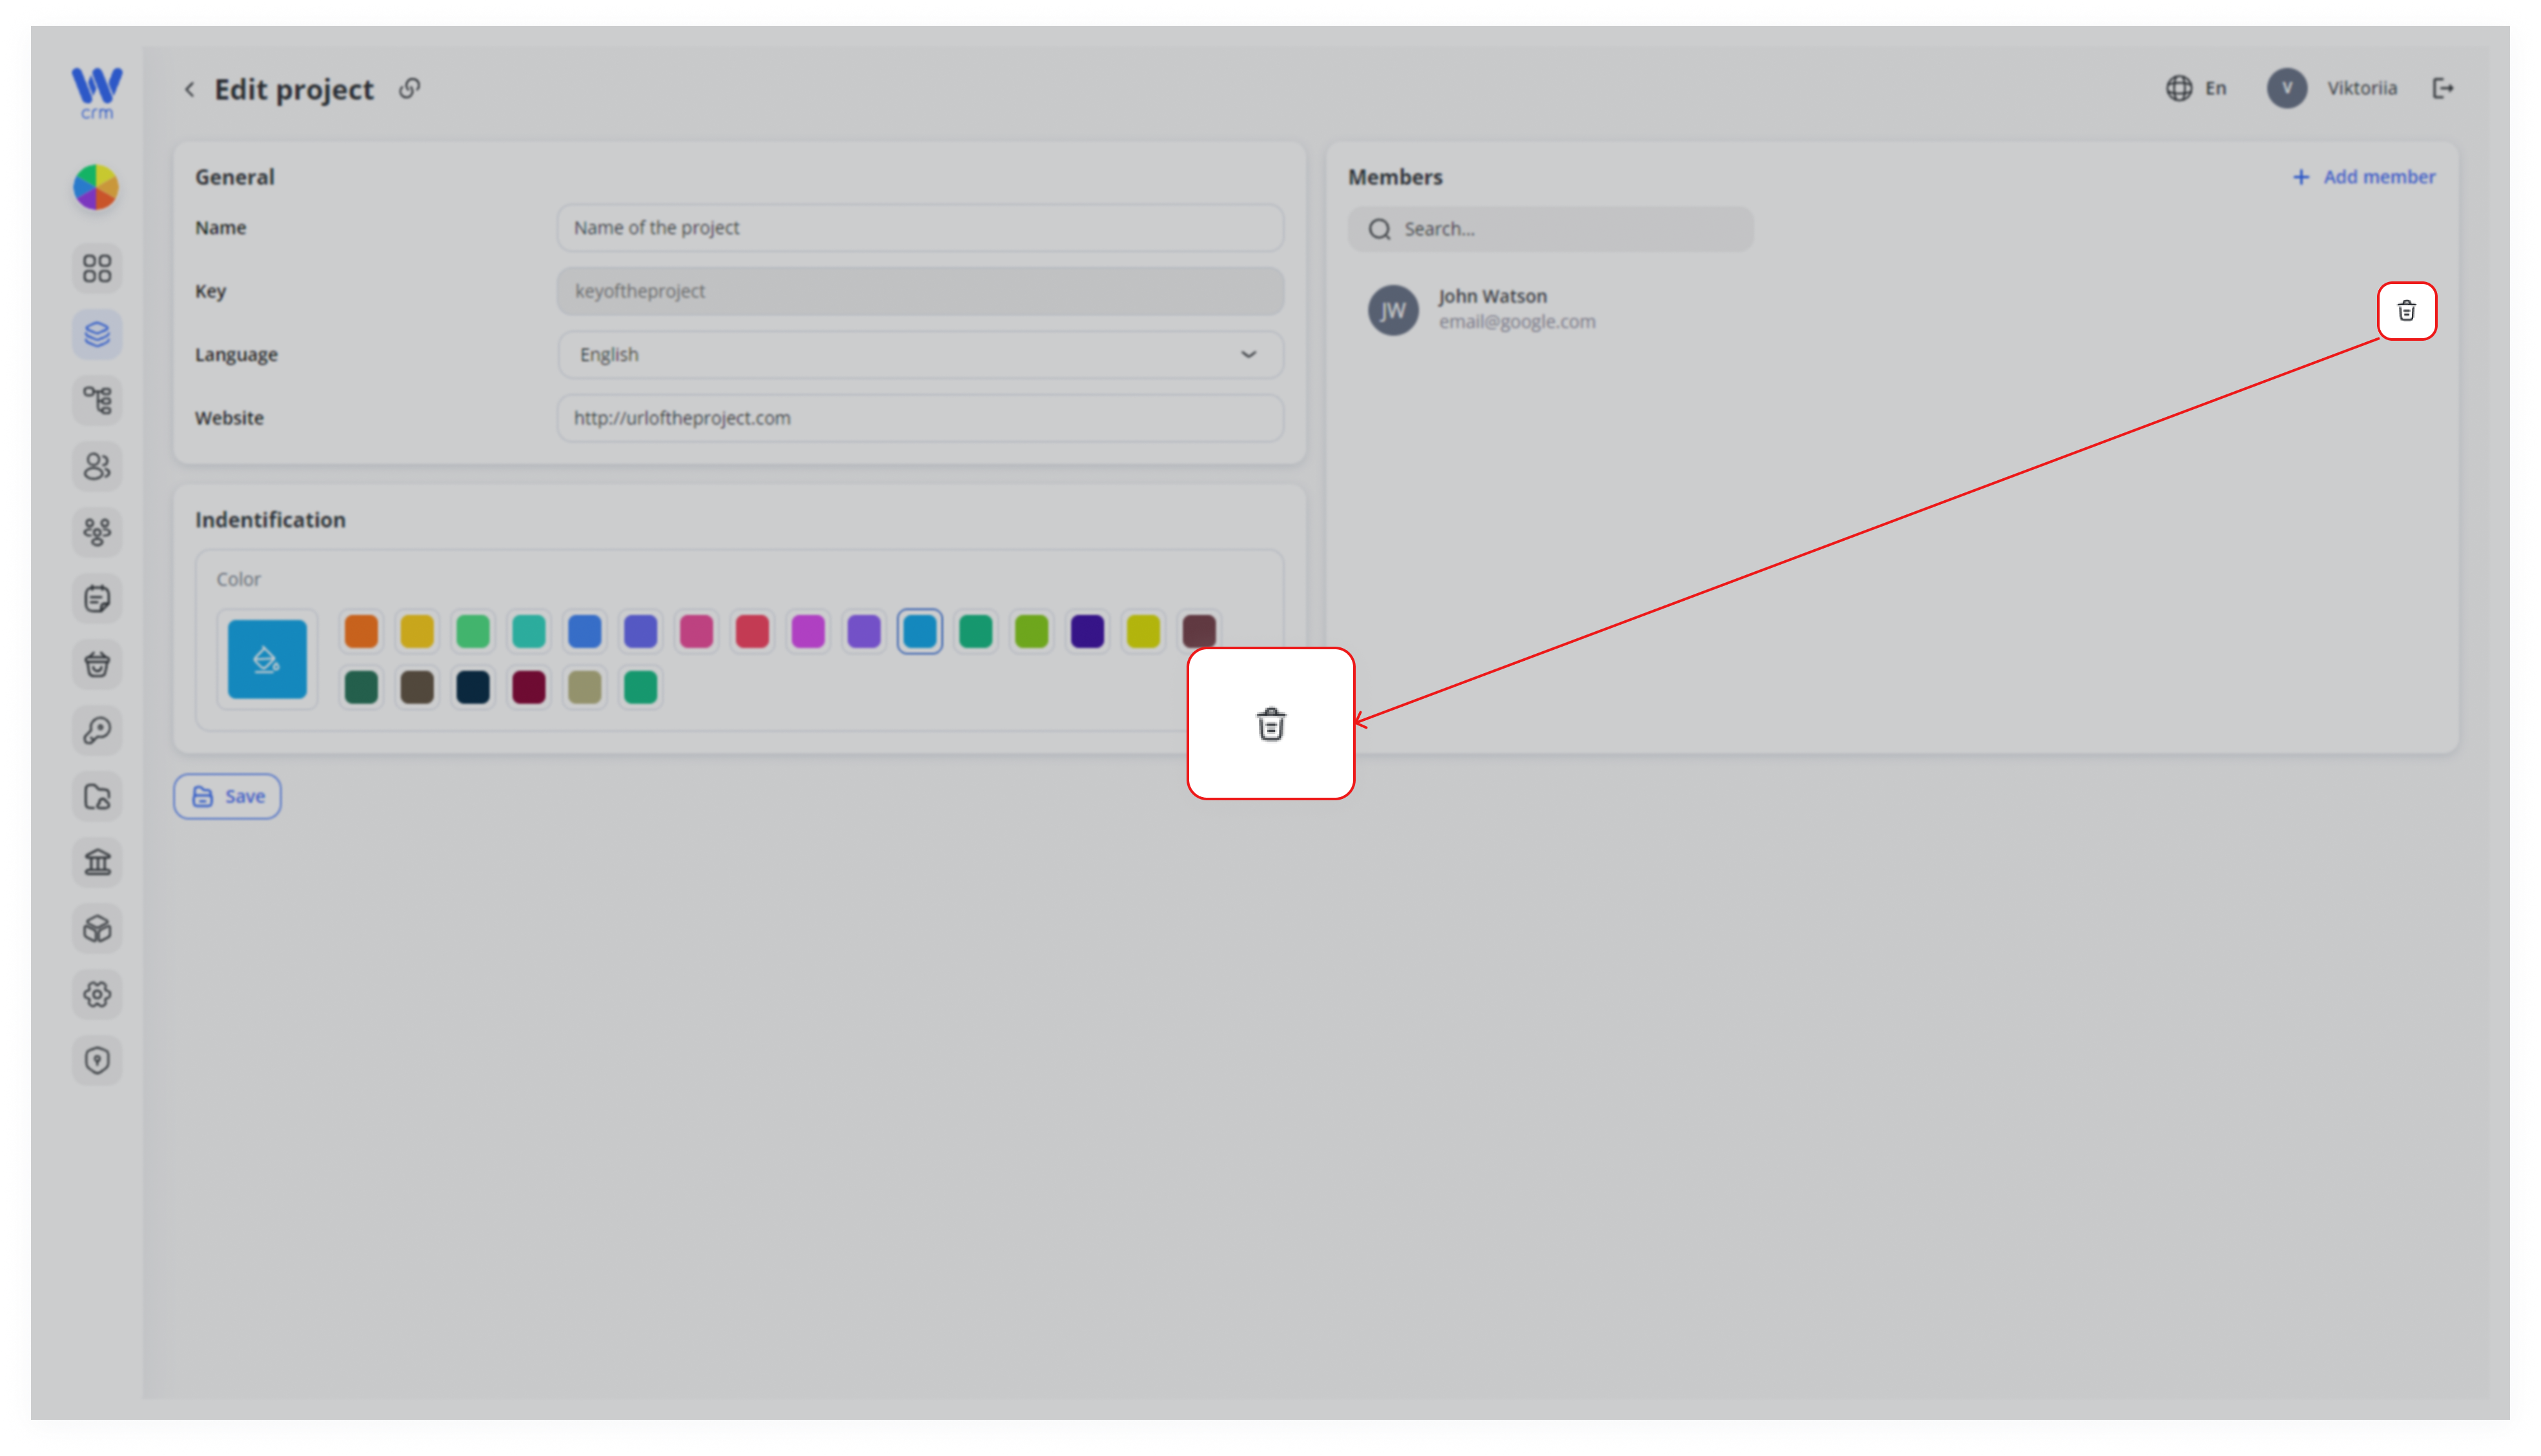
Click the delete icon next to the member’s name:
1. Open the Edit window (Step #1)
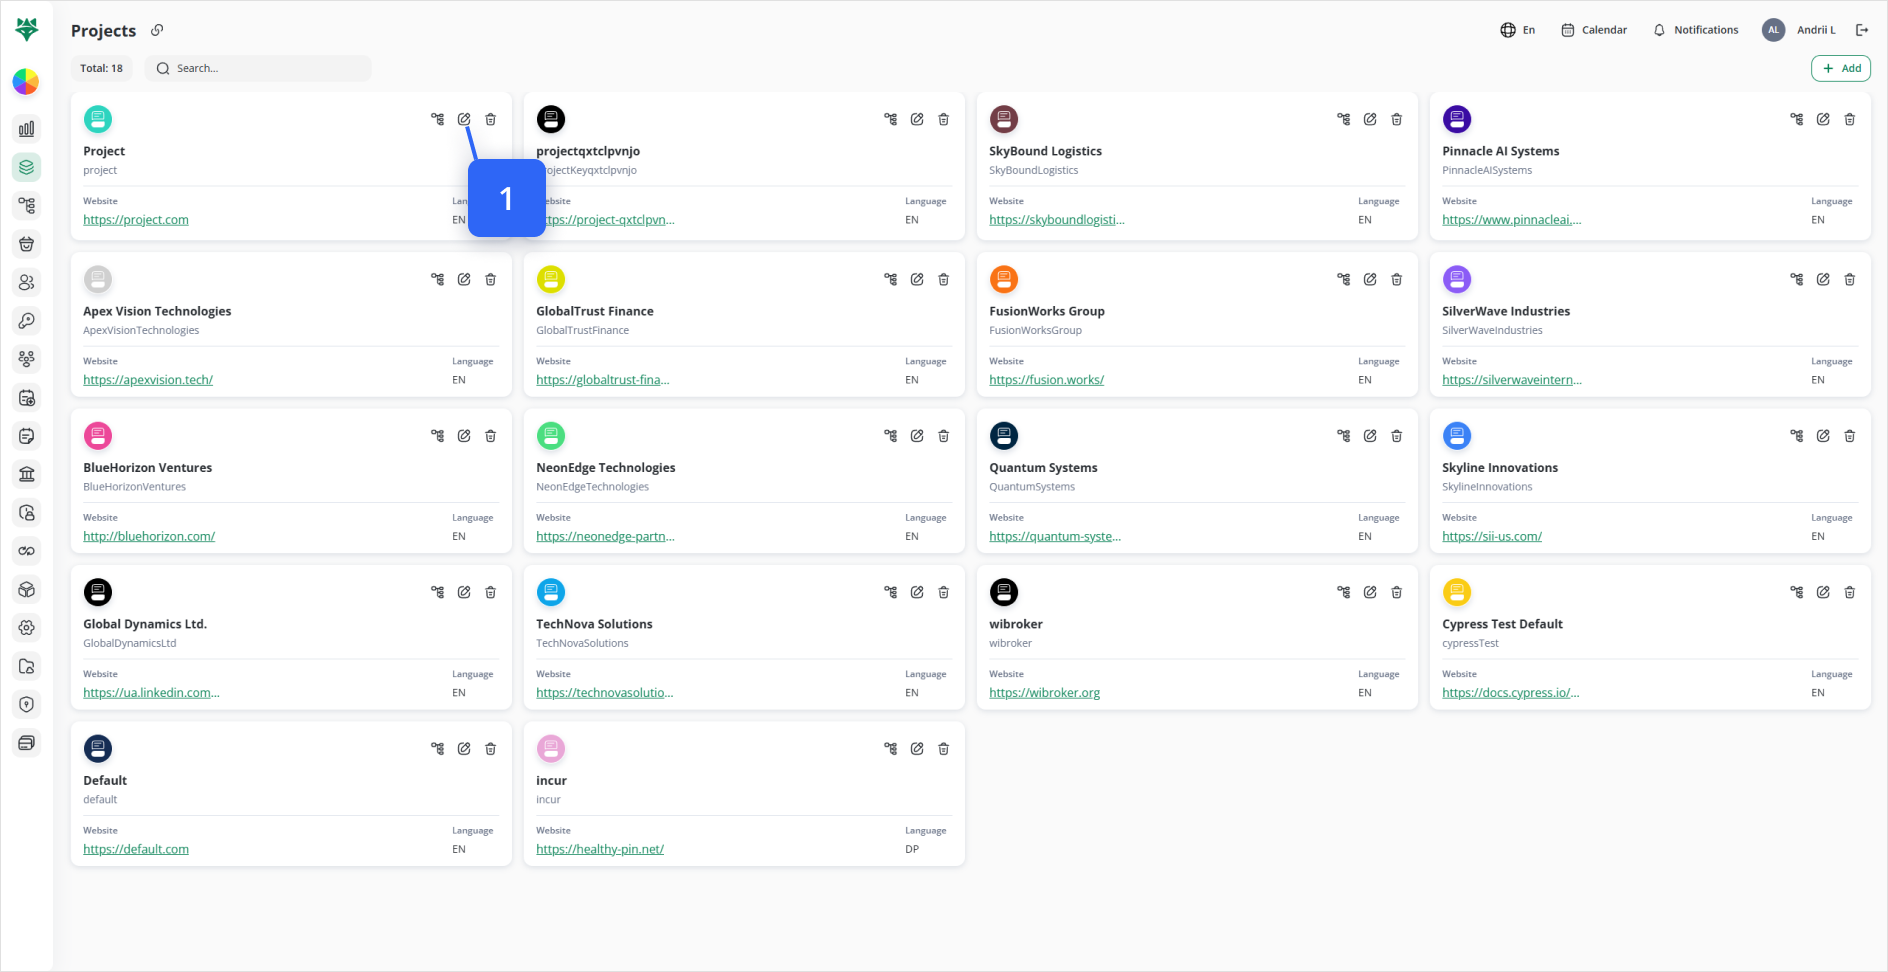
On the Projects tab, locate the project card you want to change. The little pencil ✏️ Edit icon sits in the top-right corner of that card.
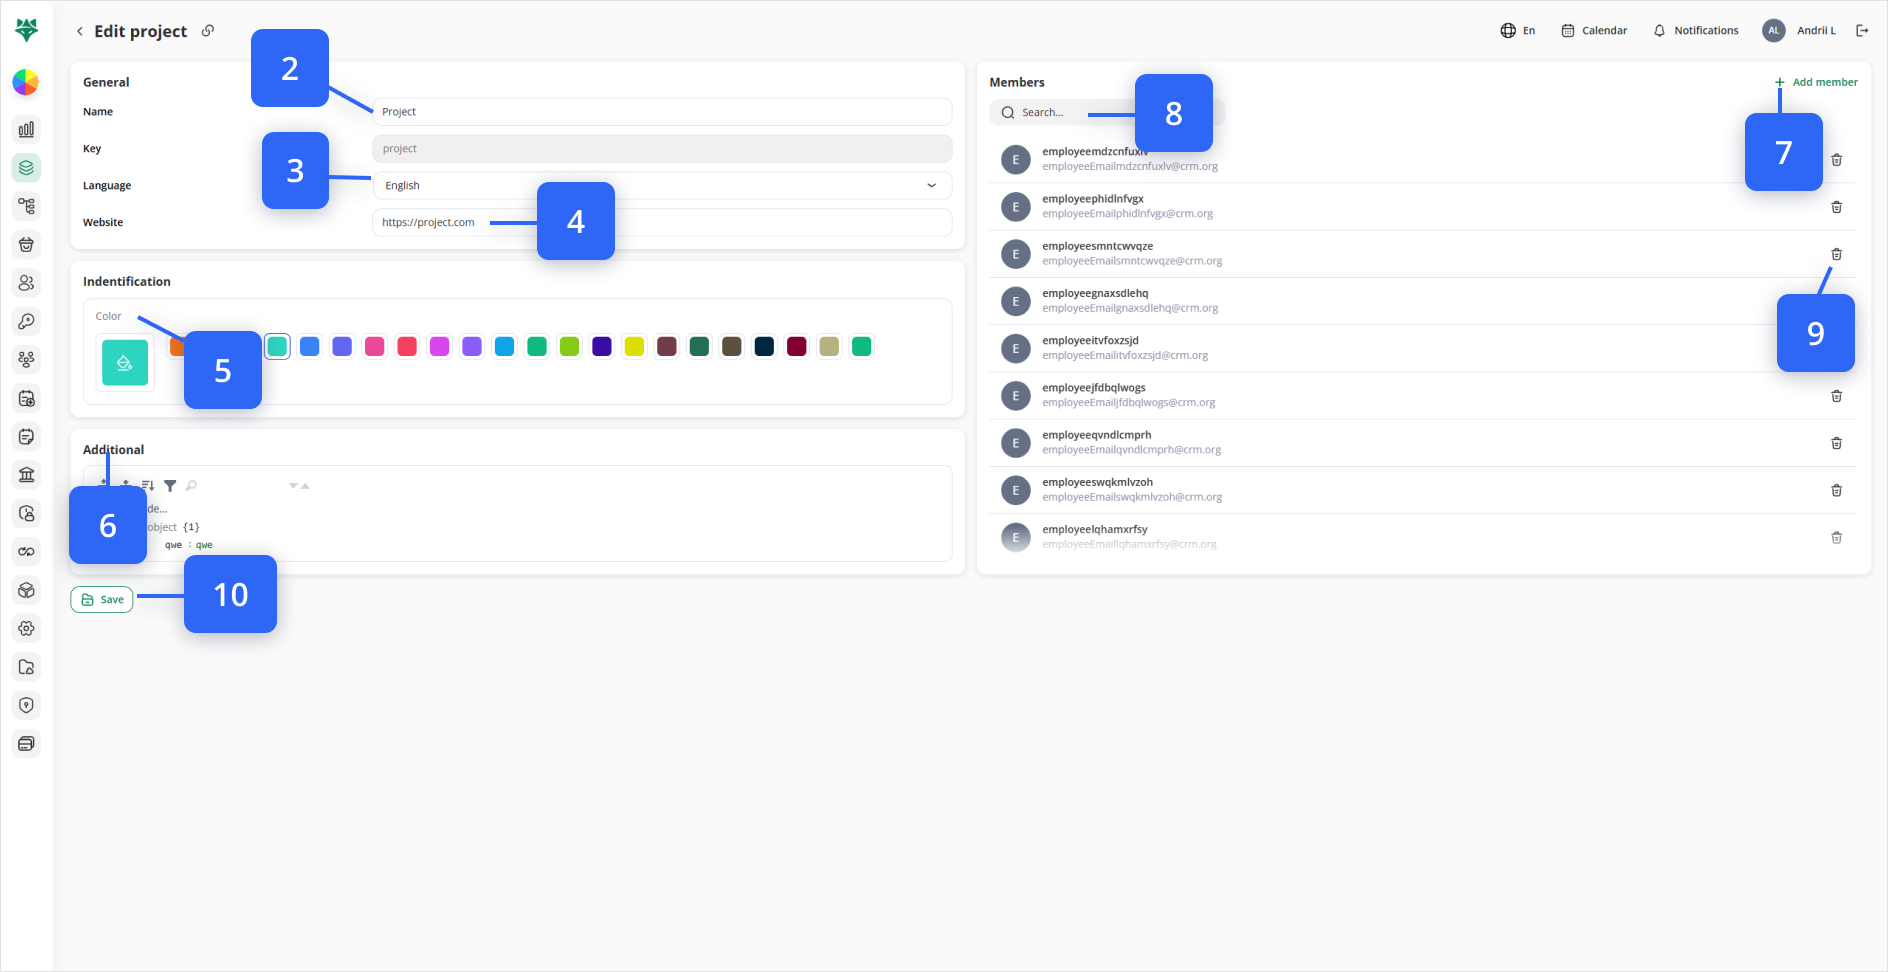
2. Name (Step #2)
In the edit form, under the General header at the top-left of the page, the very first text field.
3. Language (Step #3)
Still in the General section, immediately below the Name field.
4. Website (Step #4)
Beneath the Language dropdown, as the third field in General.
5. Change Color/Icon (Step #5)
In the Identification panel, directly below General on the left side of the form. Click the current swatch to open the palette.
6. Adjust Additional settings (Step #6)
Underneath Identification is the Additional tree picker—use it to reassign regions, business units, or tags.
7. Add member (Step #7)
In the Members panel on the right half of the page. The + Add member button sits in that panel’s top-right corner.
8. Search members (Step #8)
Just below the “Members” title, the search input filters your existing employee list by name or email. The list consists of the employees, you have added before. To add a new user to this list, go to the Employees tab.
9. Remove member (Step #9)
Also in the Members list, click the little 🗑️ icon on the far right of any existing member.
10. Save your changes (Step #10)
At the bottom-left of the form, the green Save button applies all edits immediately.
Note: you can delete the project’s member only after you’ve deleted them from the desk they have been assigned to. Read more about Desks here.