
4. How to Edit a Desk
In Wifox Business Core Solution (WBCS), Desks are the logical work-areas—departments, offices, or channels—within each Project. After you create a Desk, you can fine-tune its settings, manage which Employees belong there, or delete it when it’s no longer needed. Follow the detailed instructions below.
After creating a desk, the editing window will open automatically.
In the Edit window, you can:
Change the name of the desk.
Add or delete members of the desk.
Why You Might Edit a Desk
Reflect a team change: Your “Support Queue” Desk might become “Customer Success” after your support model evolves.
Reassign personnel: When an employee moves from Sales to Retention, you remove him/her from the Sales Desk and add to Retention.
Audit access: Periodic reviews ensure only active, authorized staff remain on critical teams.
Before You Begin
Only Desks you’ve manually added can be deleted; every Project retains its one Default Desk.
To add someone here, they must already exist in the parent Project (see Projects → Employees).
Step 1. Open the Desks Module
In your left-hand menu, click Desks.
You will see a card for each Desk, organized by Project.
Step 2. Enter Edit Mode
Hover your mouse over the Desk you need to change.
A small pencil icon appears in its top-right corner—click it to open the edit panel.
Tip: If you don’t see the icon, ensure you have the “manage own” or higher permissions on that Desk.
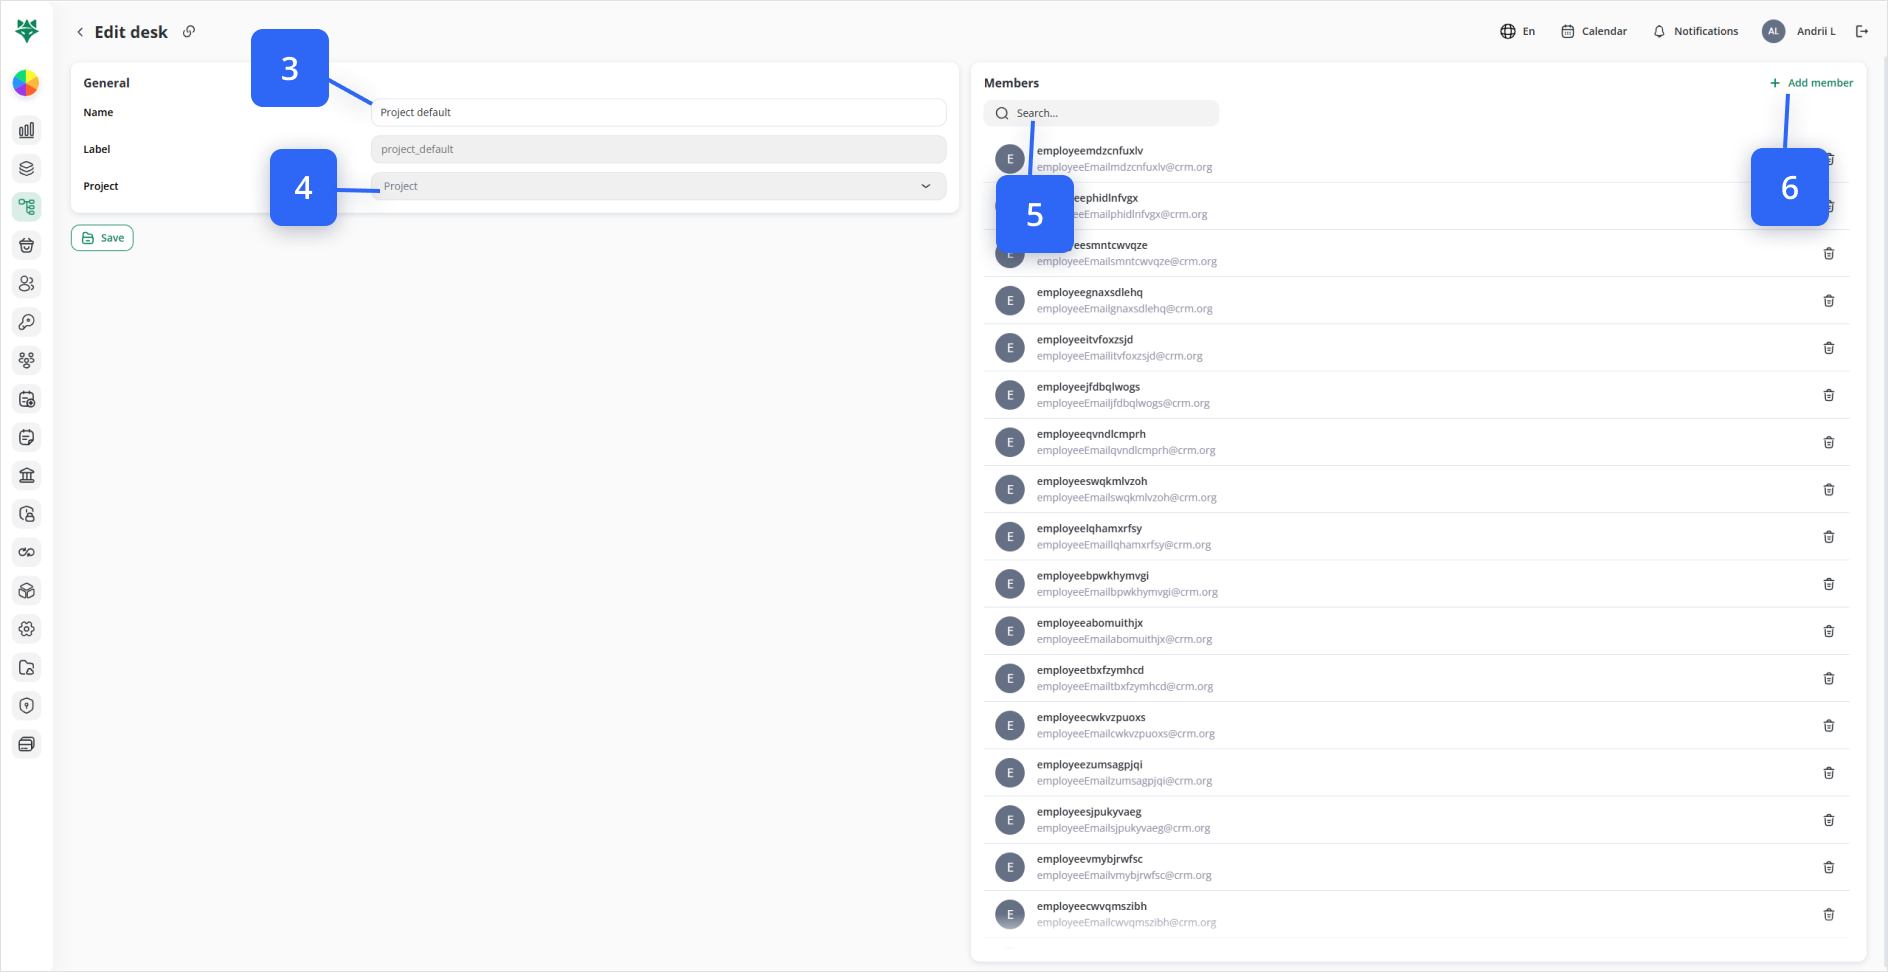
Step 3. Rename the Desk
In the edit form’s General section, locate the Name field.
Replace the existing text with your new Desk name.
Example: Change “Support Queue” → “Customer Success.”
This new label will appear everywhere—lists, dropdowns, reports.
Step 4. Verify the Project
Directly beneath the Name, the Project dropdown shows where this Desk lives.
This value is read-only: you cannot move a Desk to another Project.
If you need a Desk in a different Project: create a new Desk there instead.
Note: The list consists of members who are included in the connected project. To add a new user to this list, go to the Projects tab and add the member to the relevant project.
Step 5. Filter Existing Members
On the right, the Members panel lists current Desk members.
Use the Search box at its top to type any employee’s name or email.
The list instantly narrows to matching entries—ideal for large teams.
Step 6. Add New Members
Click the + Add member button in the Members panel.
A slide-out appears showing every Employee in the parent Project.
Example: If you’re editing the “Retention” Desk in “Acme USA,” you’ll see all “Acme USA” staff.
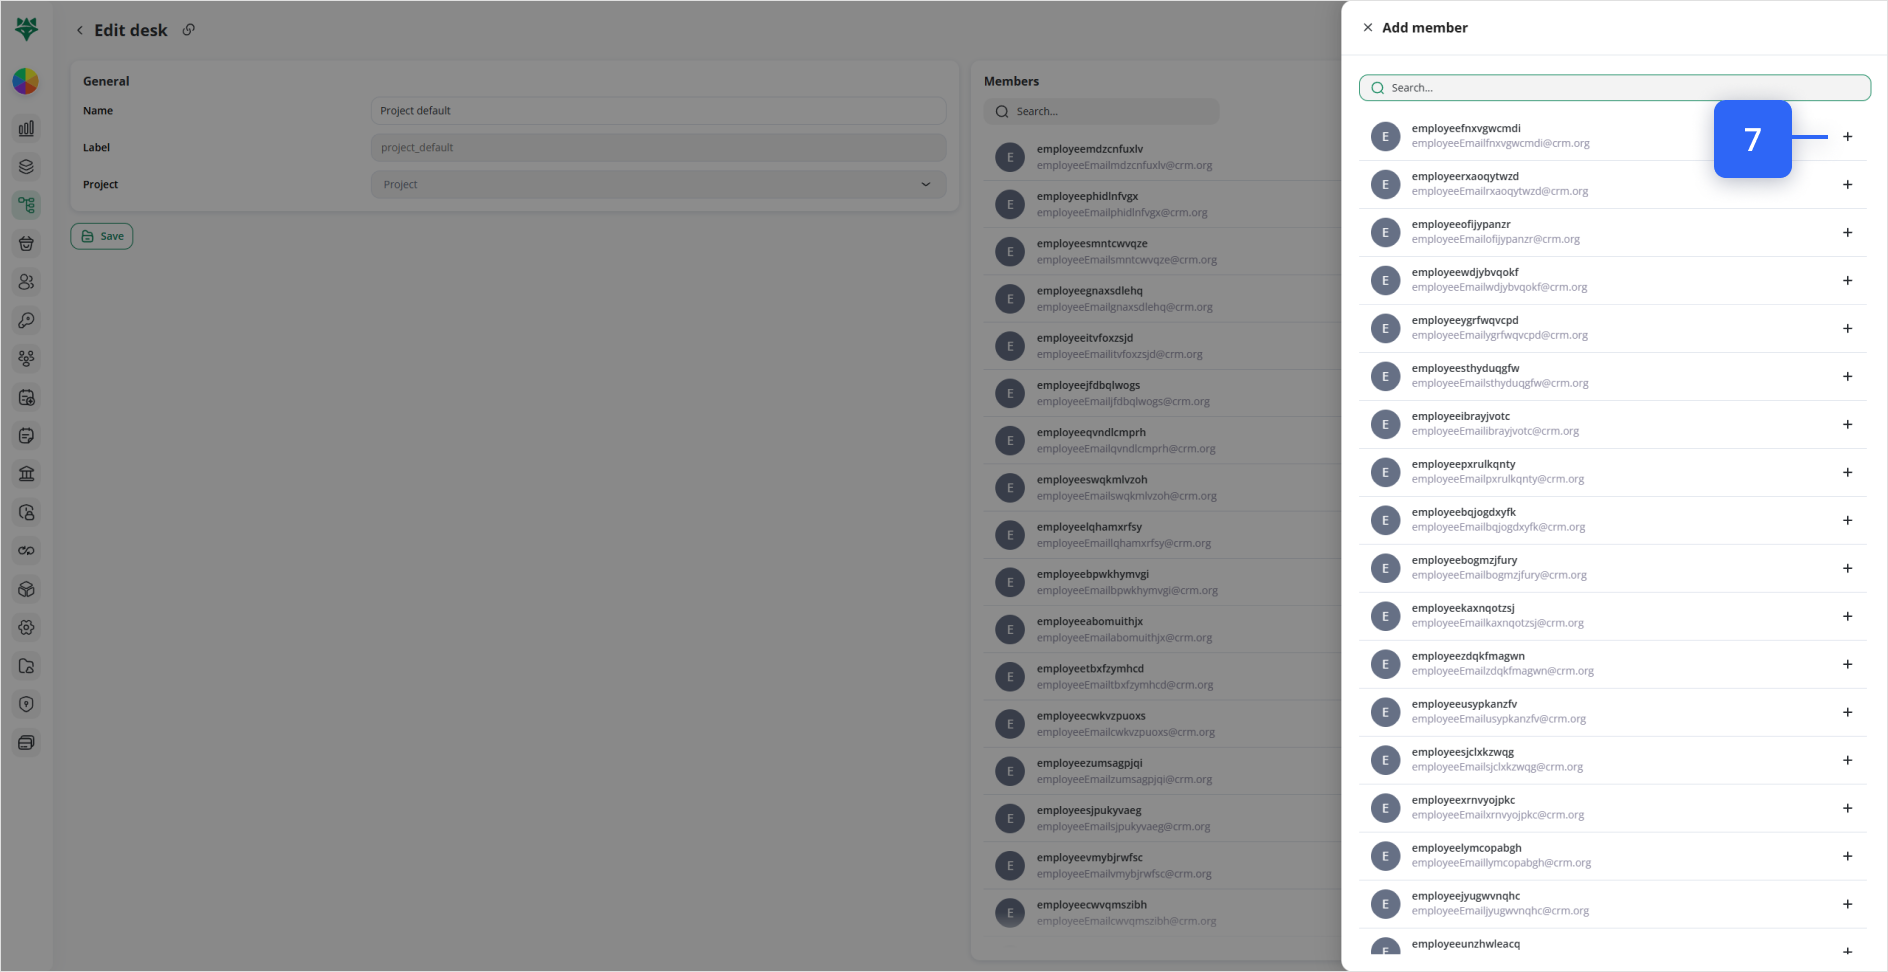
Step 7. Grant Access
In that slide-out, click the ➕ icon next to any Employee to add them.
They immediately appear in the Members list and gain access.
Practical note: New members can now see all Clients, Requests, and Actions tied to this Desk.
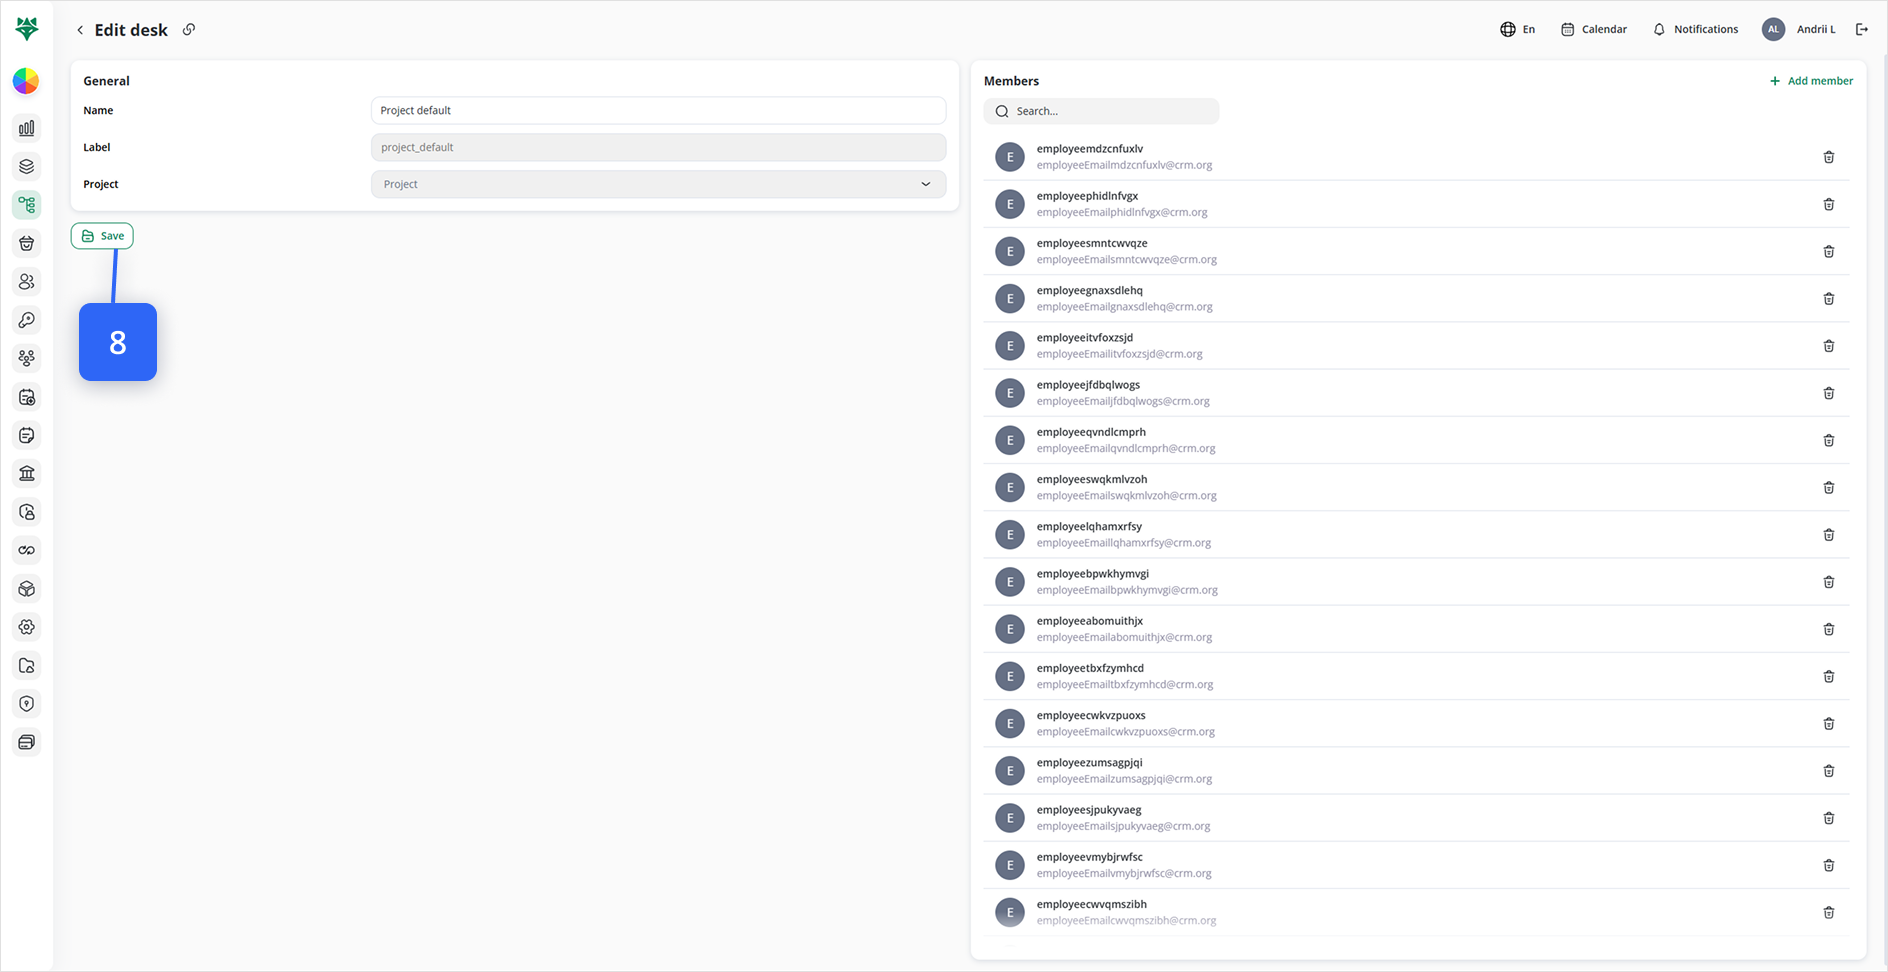
Step 8. Save Your Changes
After renaming and member adjustments, click Save at the bottom-left.
All edits apply instantly: teammates can refresh and see the new Desk name or membership.
Confirmation: You’ll see a brief “Changes saved” banner.
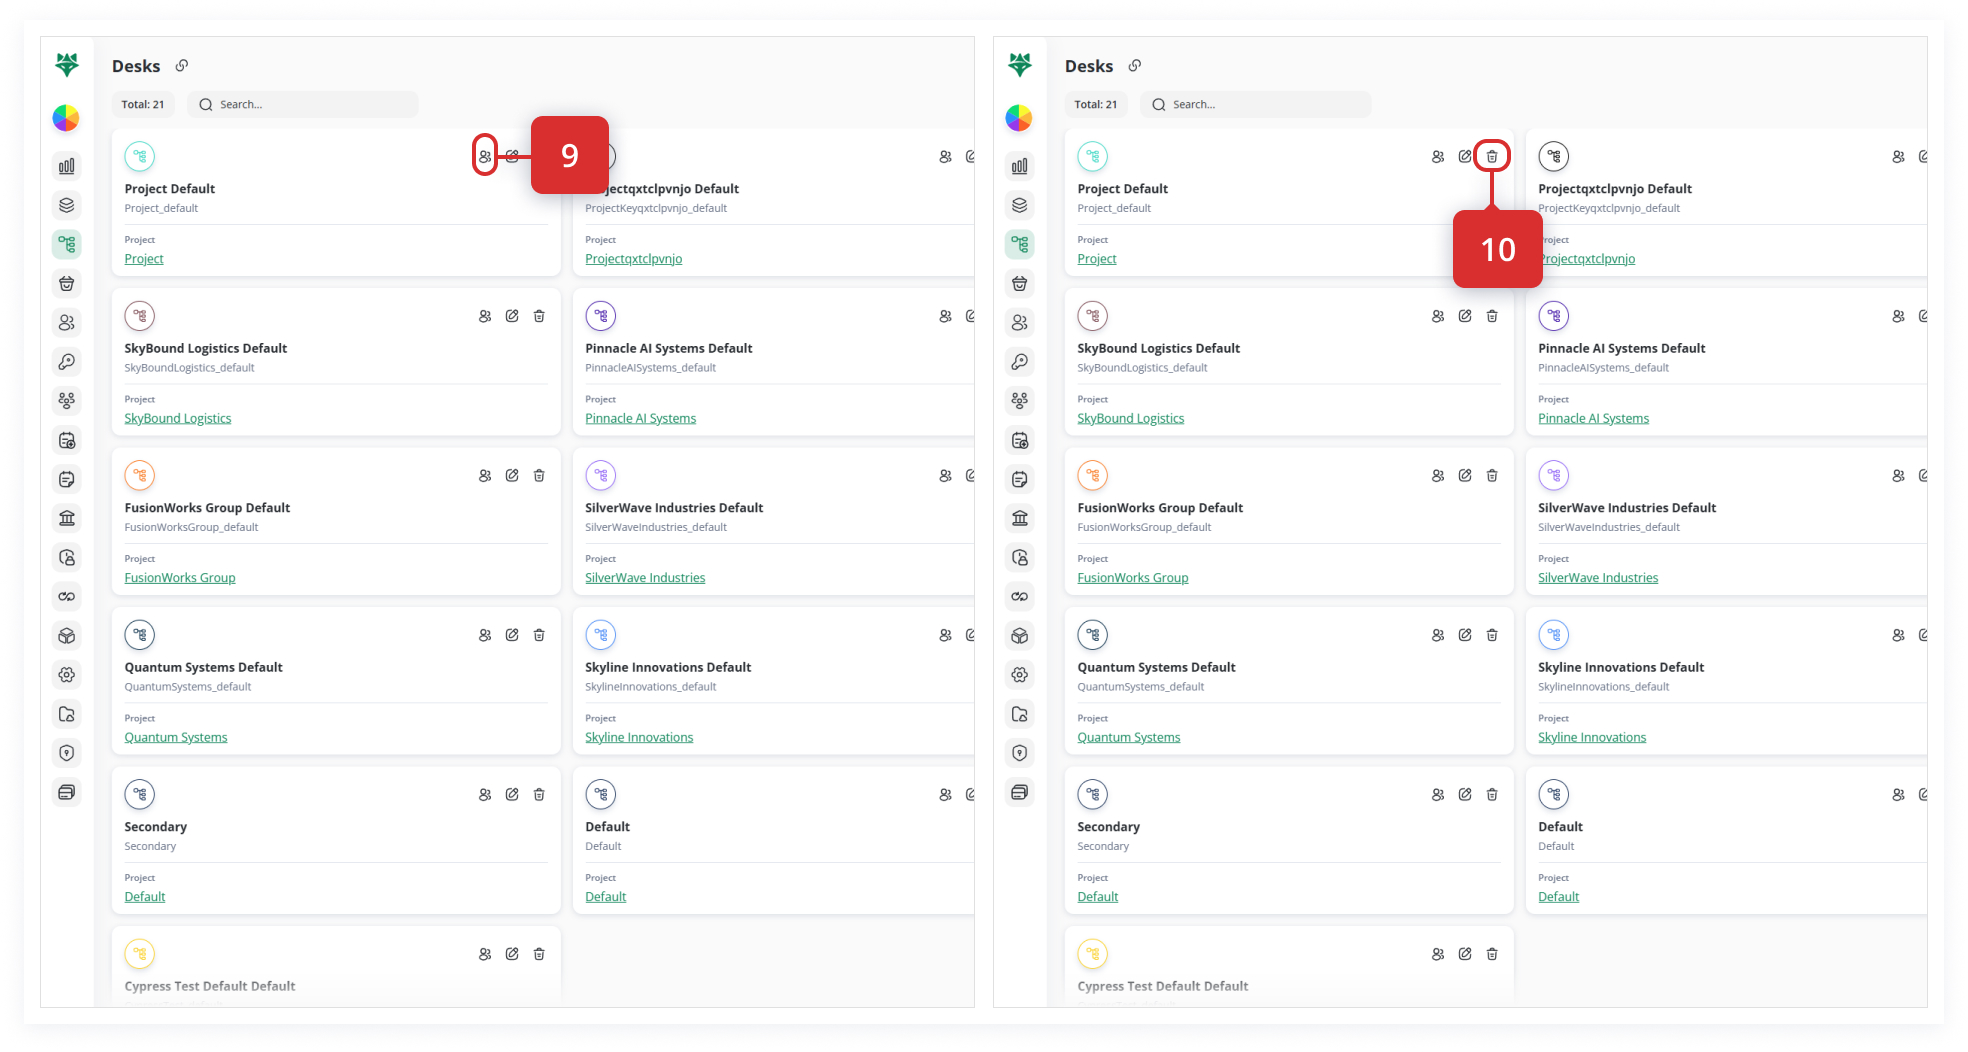
Step 9 Quickly View Members (without Editing)
Back on the main Desks grid, hover any Desk card.
Click the 👥 Show members icon to get a read-only peek at its roster.
Use this to audit who’s on each team without risking accidental changes.
Step 10. Remove an Existing Member
In the Members panel, find the Employee you want to remove.
Click the 🗑️ trash icon beside their name.
They lose access to this Desk—useful when someone leaves the team.
Following these detailed steps and considerations ensures that your WBCS environment stays organized, secure, and aligned with your company’s evolving team structures.