3. How to Edit a Client
After creating a client, the Edit window will open automatically.
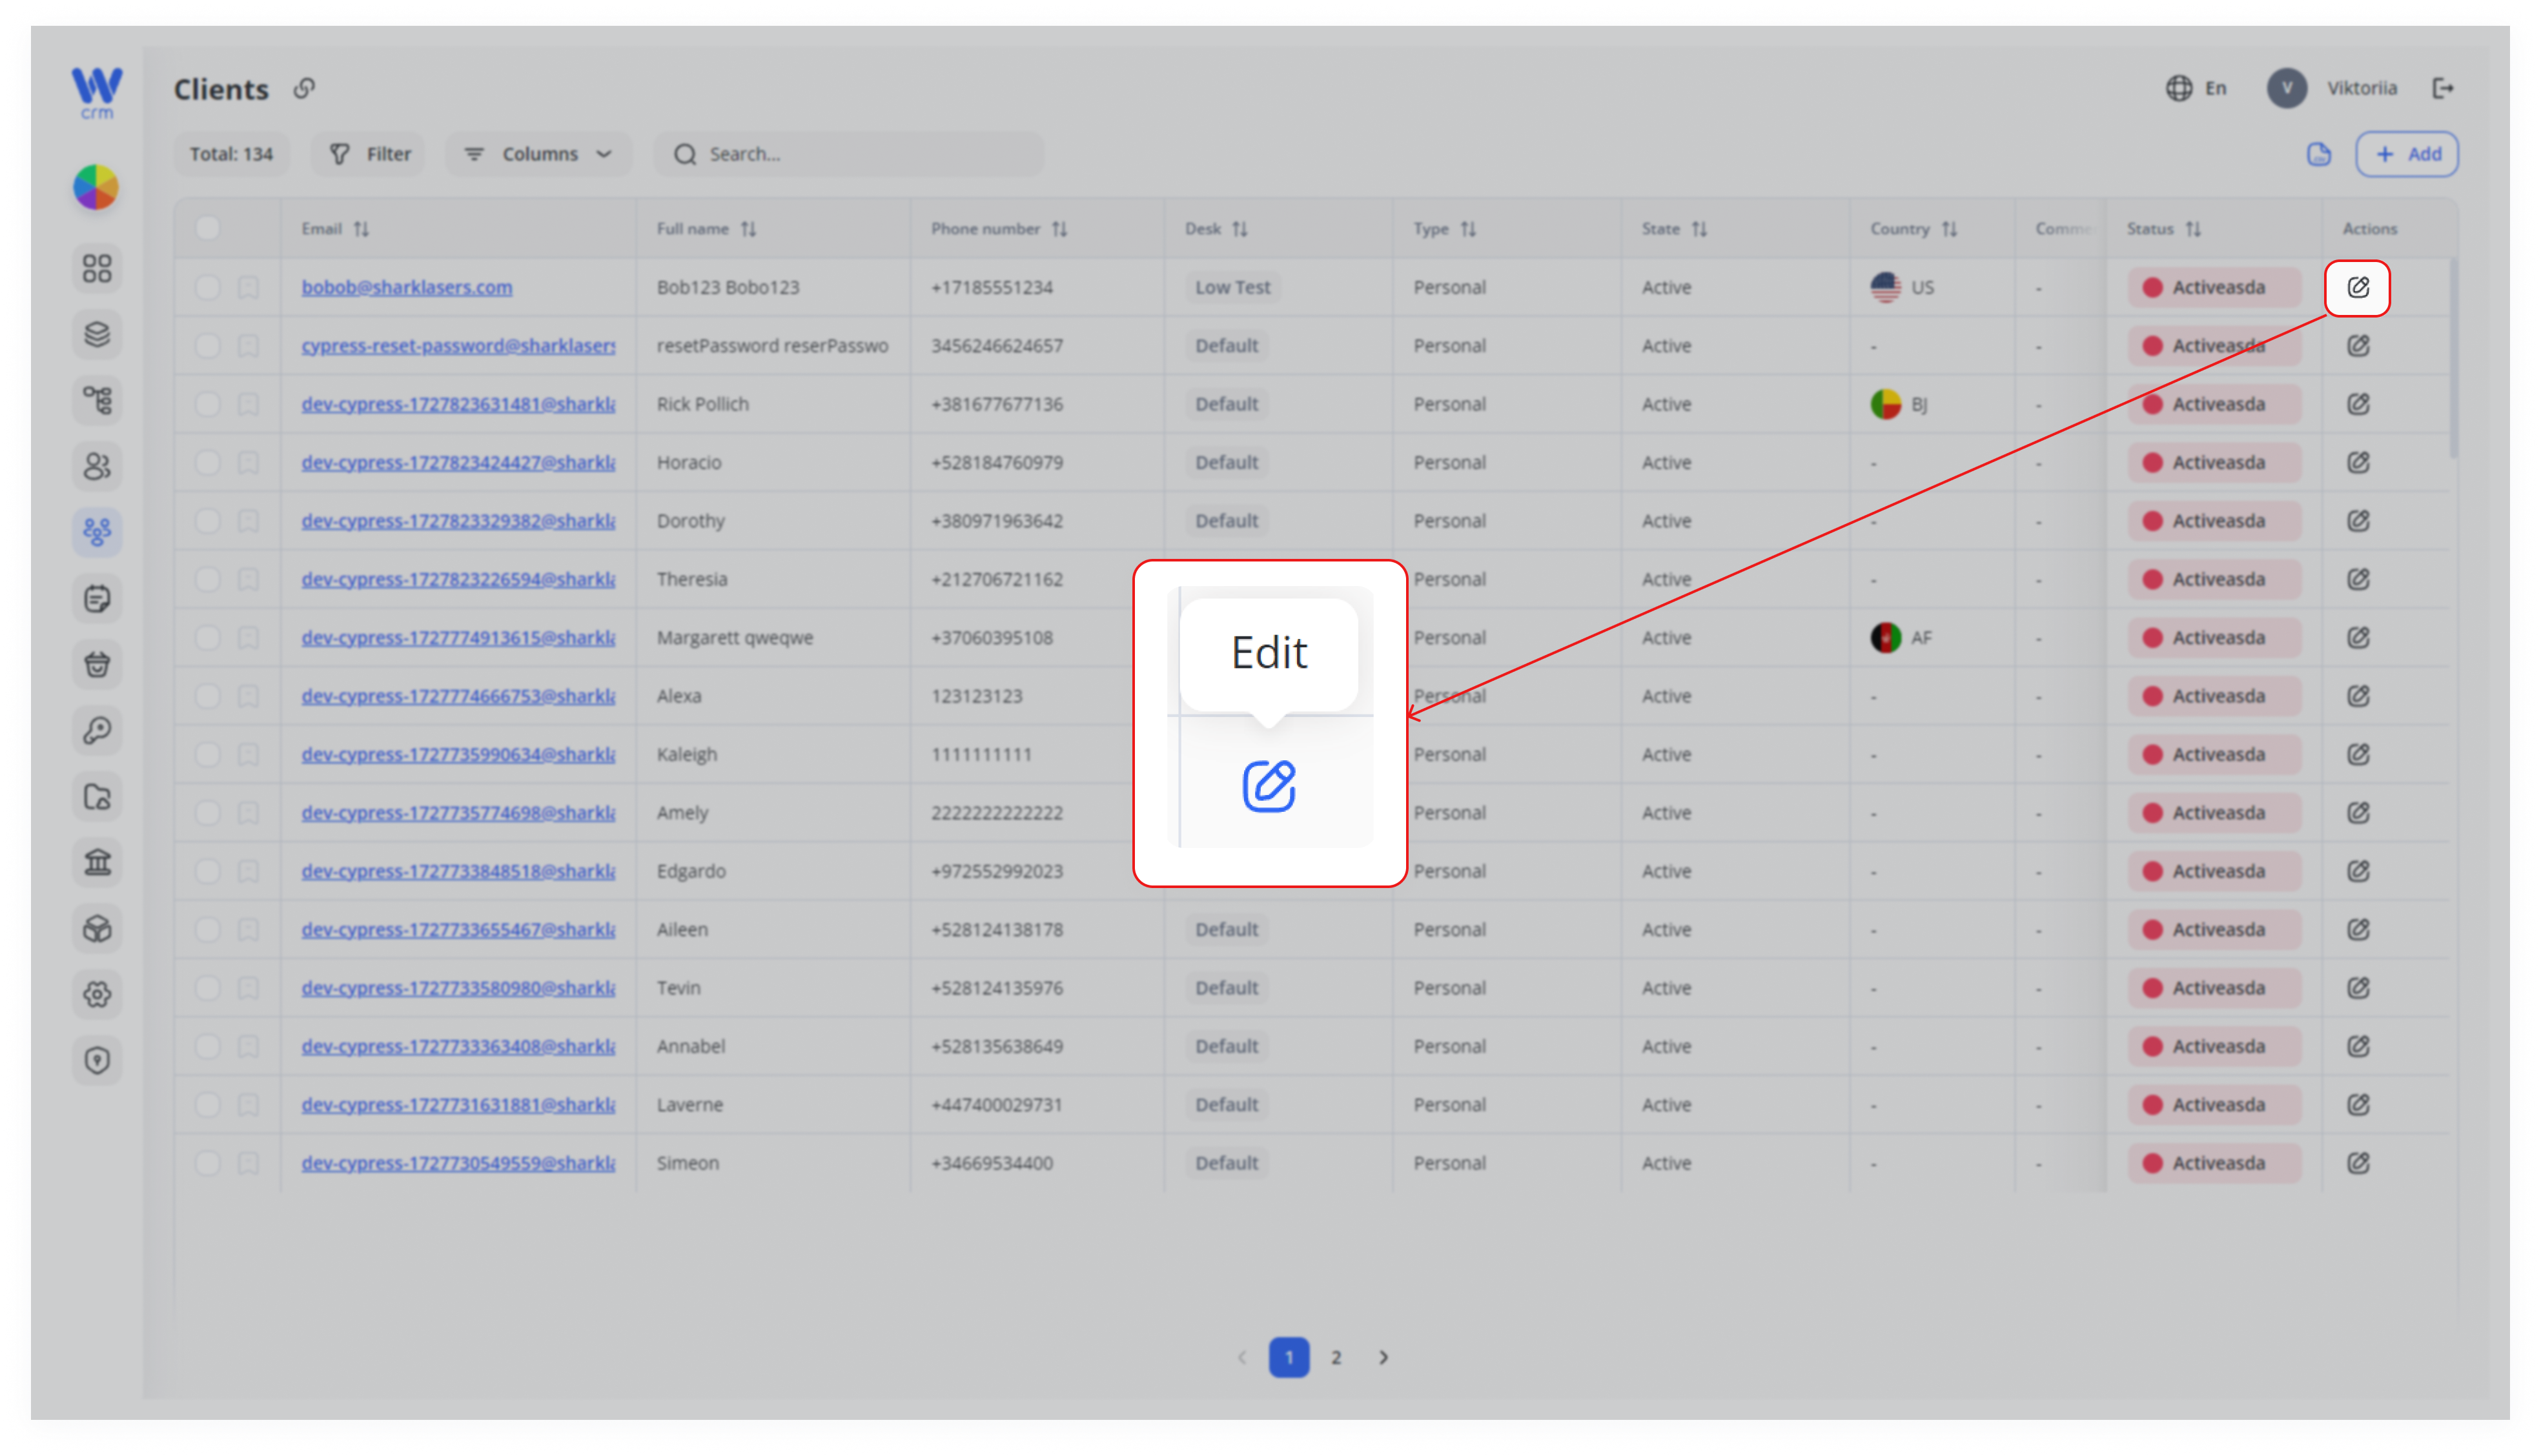
To open the Edit window from the Clients tab, click the edit icon in the Actions column of the specific client's row:
In the Edit window, you can:
-
-
Edit the client’s information that you entered during the creation stage (except for type and project). This also includes reassigning clients to another desk or status.
-
Add or edit Actions: comments, notes, and other relevant information within the CRM.
-
Add or edit Requests: for instance, support tickets, call requests, etc.
-
Upload Documents: passport or ID, and bank card (front and back).
-
Check the client’s Transactions.
-
Add or edit client’s Accounts with Assets (currency and balance on this account).
-
Note: Information about current client’s Requests, Transactions and Accounts pull up automatically from relevant modules.
To add an Action:
1. Open the Client’s Record
In the Clients list, find the client you wish to edit.
Click the Edit icon (pencil) in the Actions column to open that client’s detailed view.
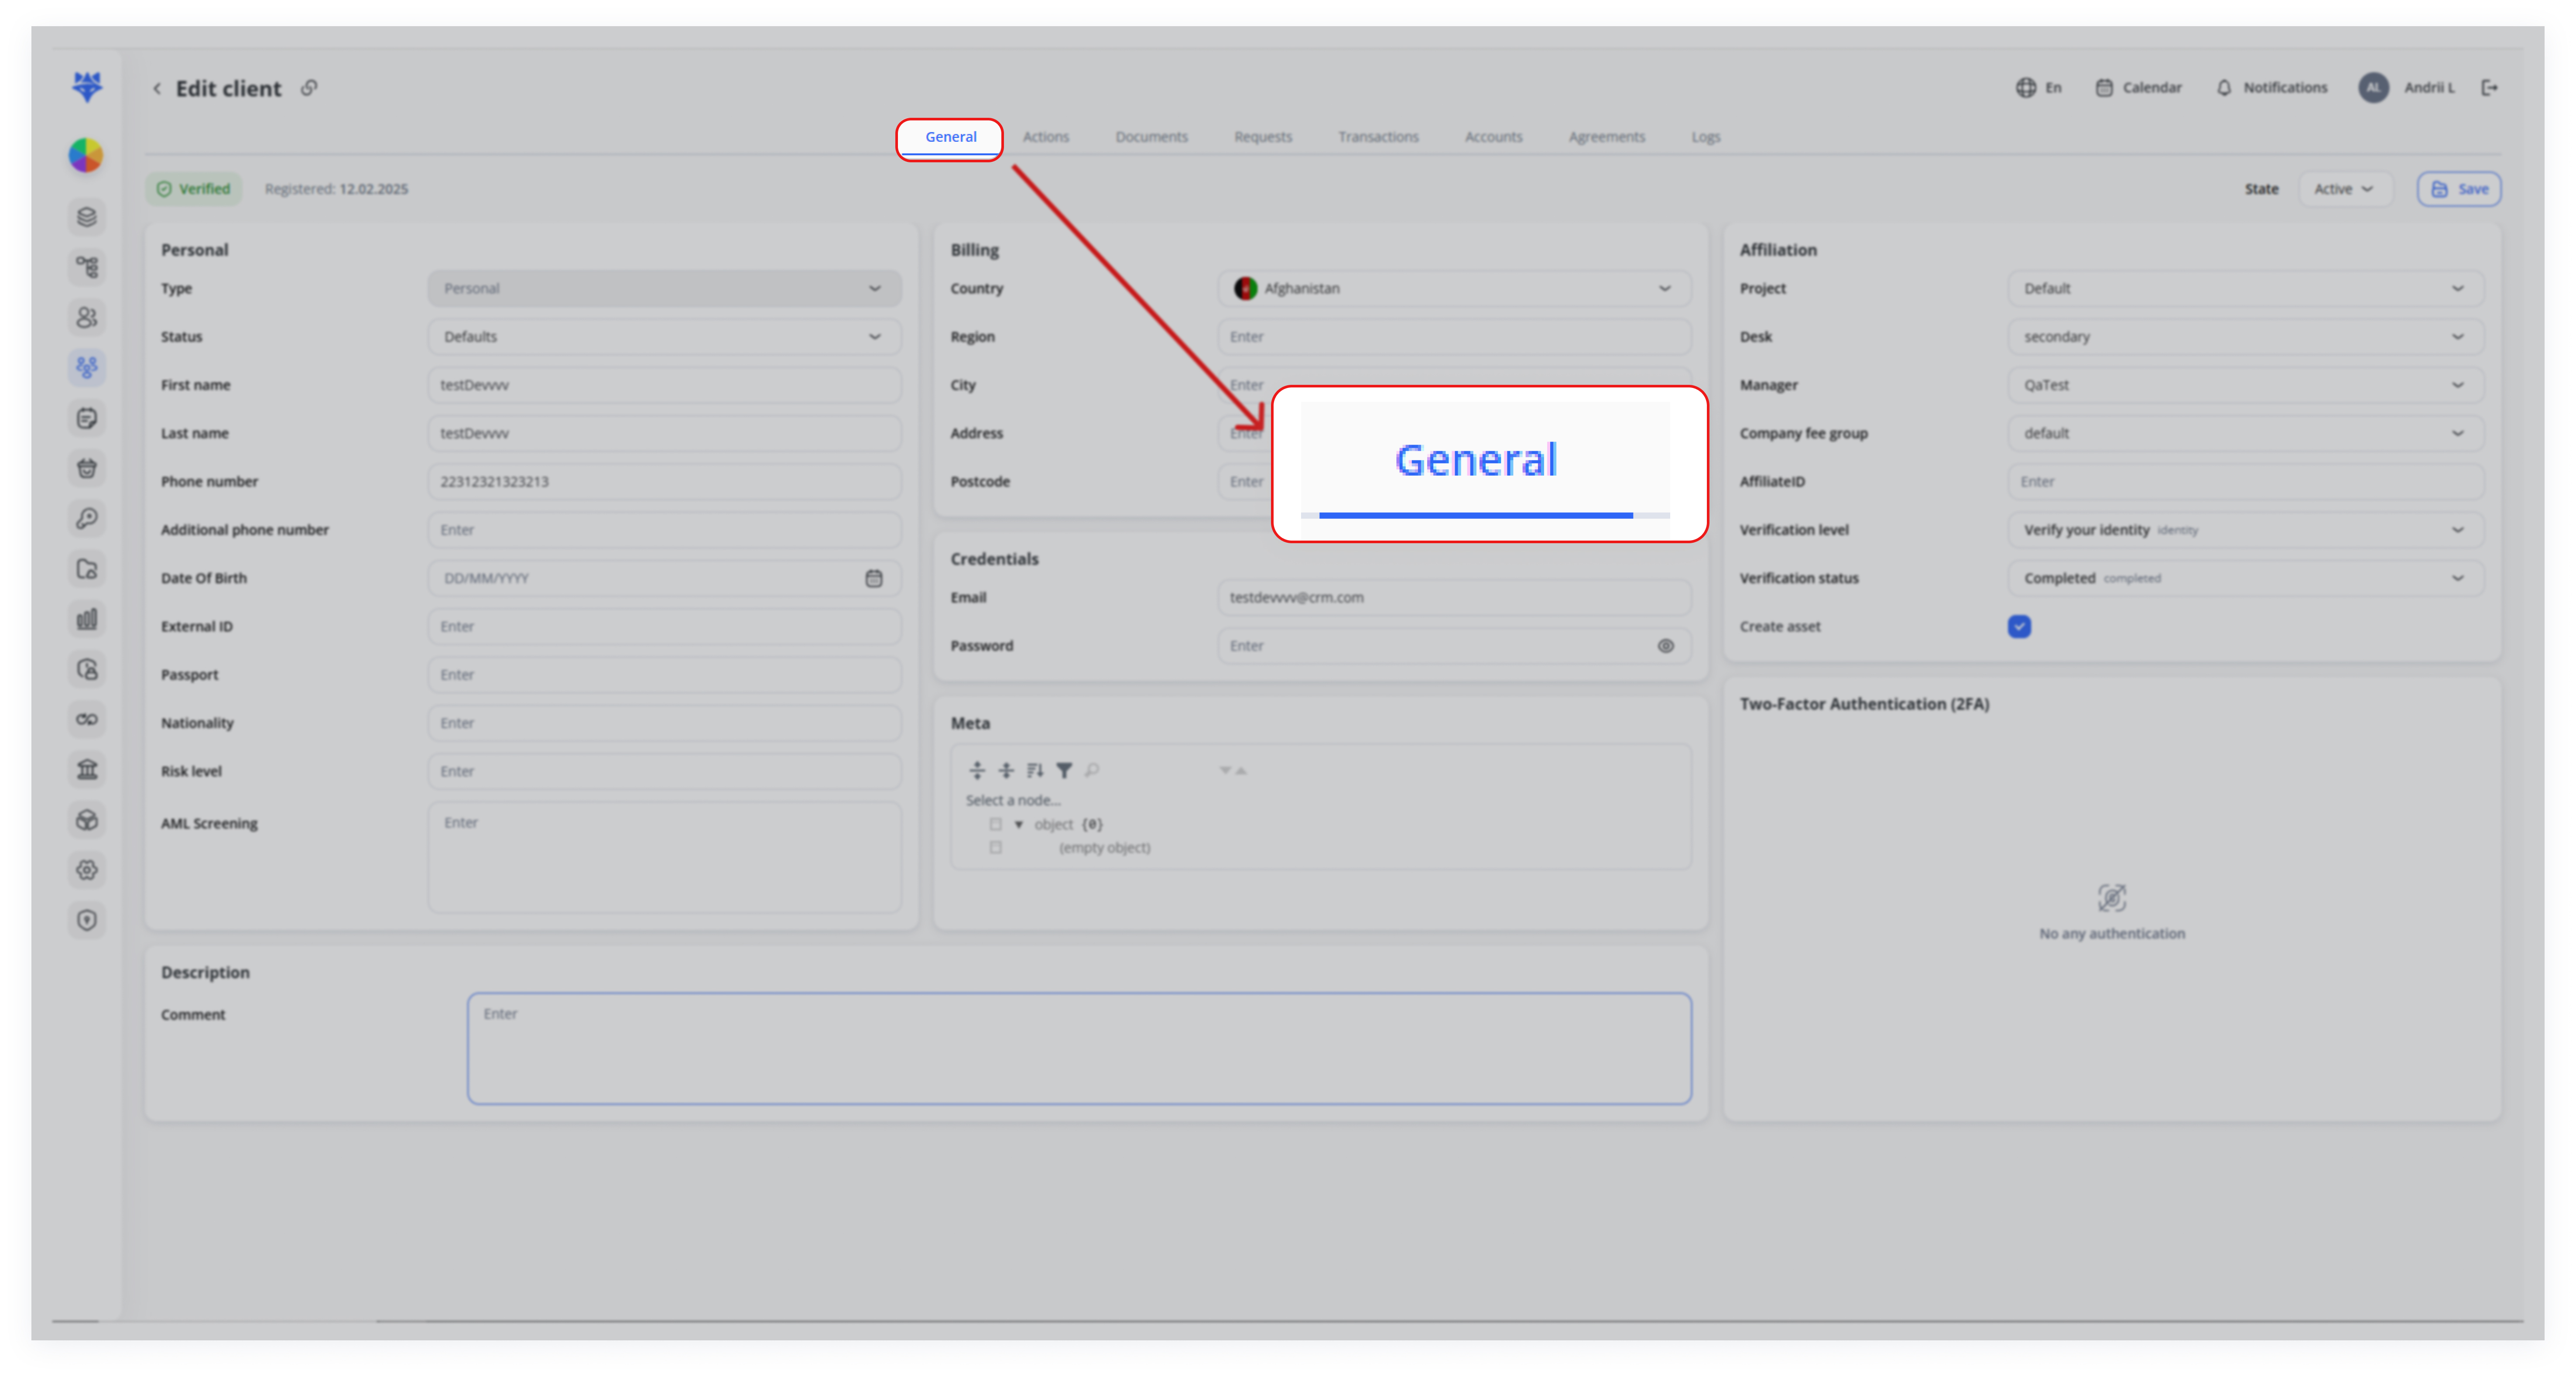
The Edit client screen has multiple tabs across the top (e.g., General, Actions, Documents, etc.).
By default, you’ll land on the General tab, where you can adjust Personal info (first/last name, phone, DOB), Billing info (country, city, address), and more.
3. Adjust Affiliation & Credentials
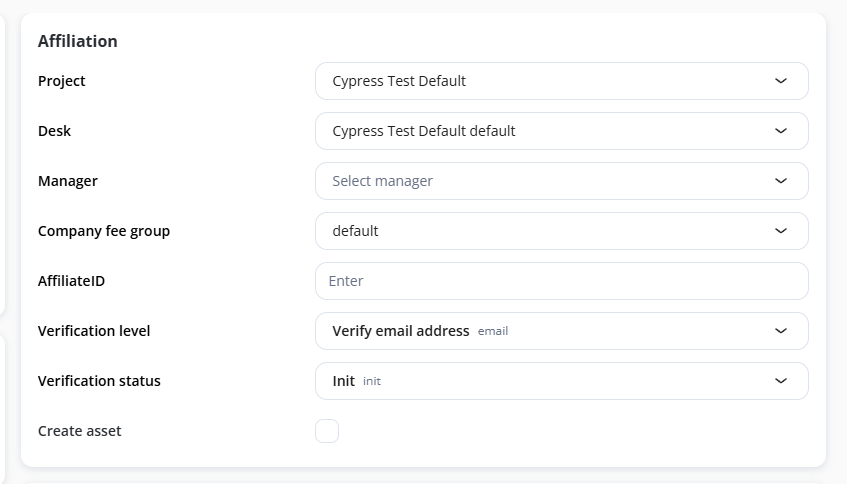
On the right side, you can modify the Project, Desk, Manager, and Company fee group under Affiliation.
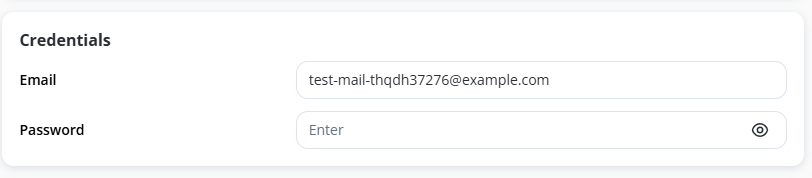
Update login details in the Credentials panel (e.g., email, password).
4. Additional Fields
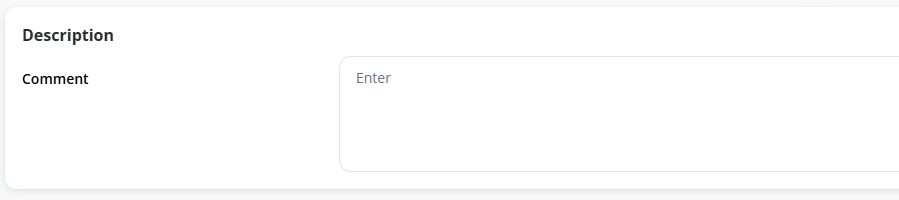
Description: Add notes under “Comment.”
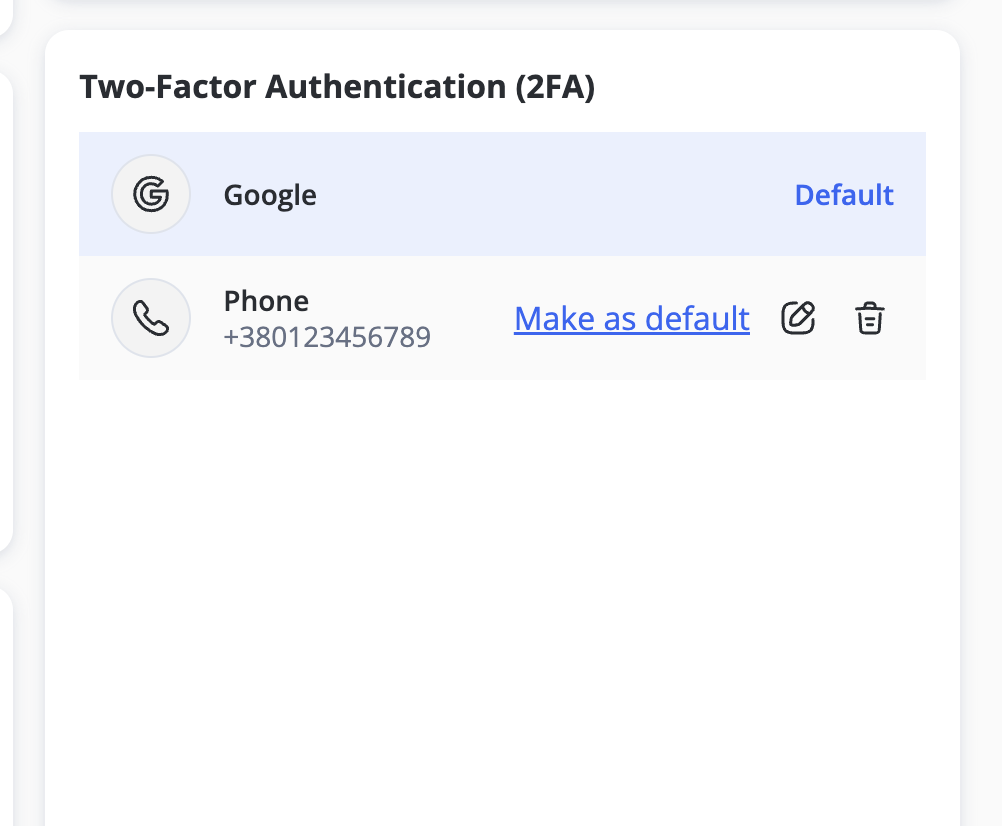
Two-Factor Authentication (2FA): Manage or enable security options if needed.

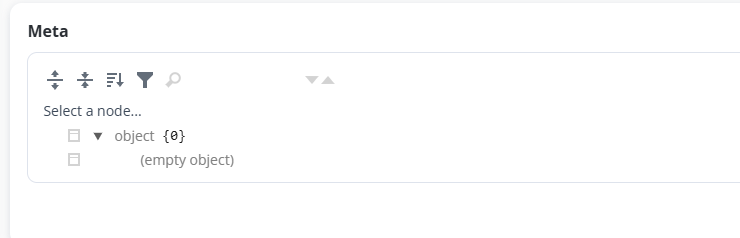
Meta: Use this section for custom JSON or advanced data fields.
5. Save Your Changes
At the top‐right (or bottom‐right, depending on your layout), click Save to apply updates.
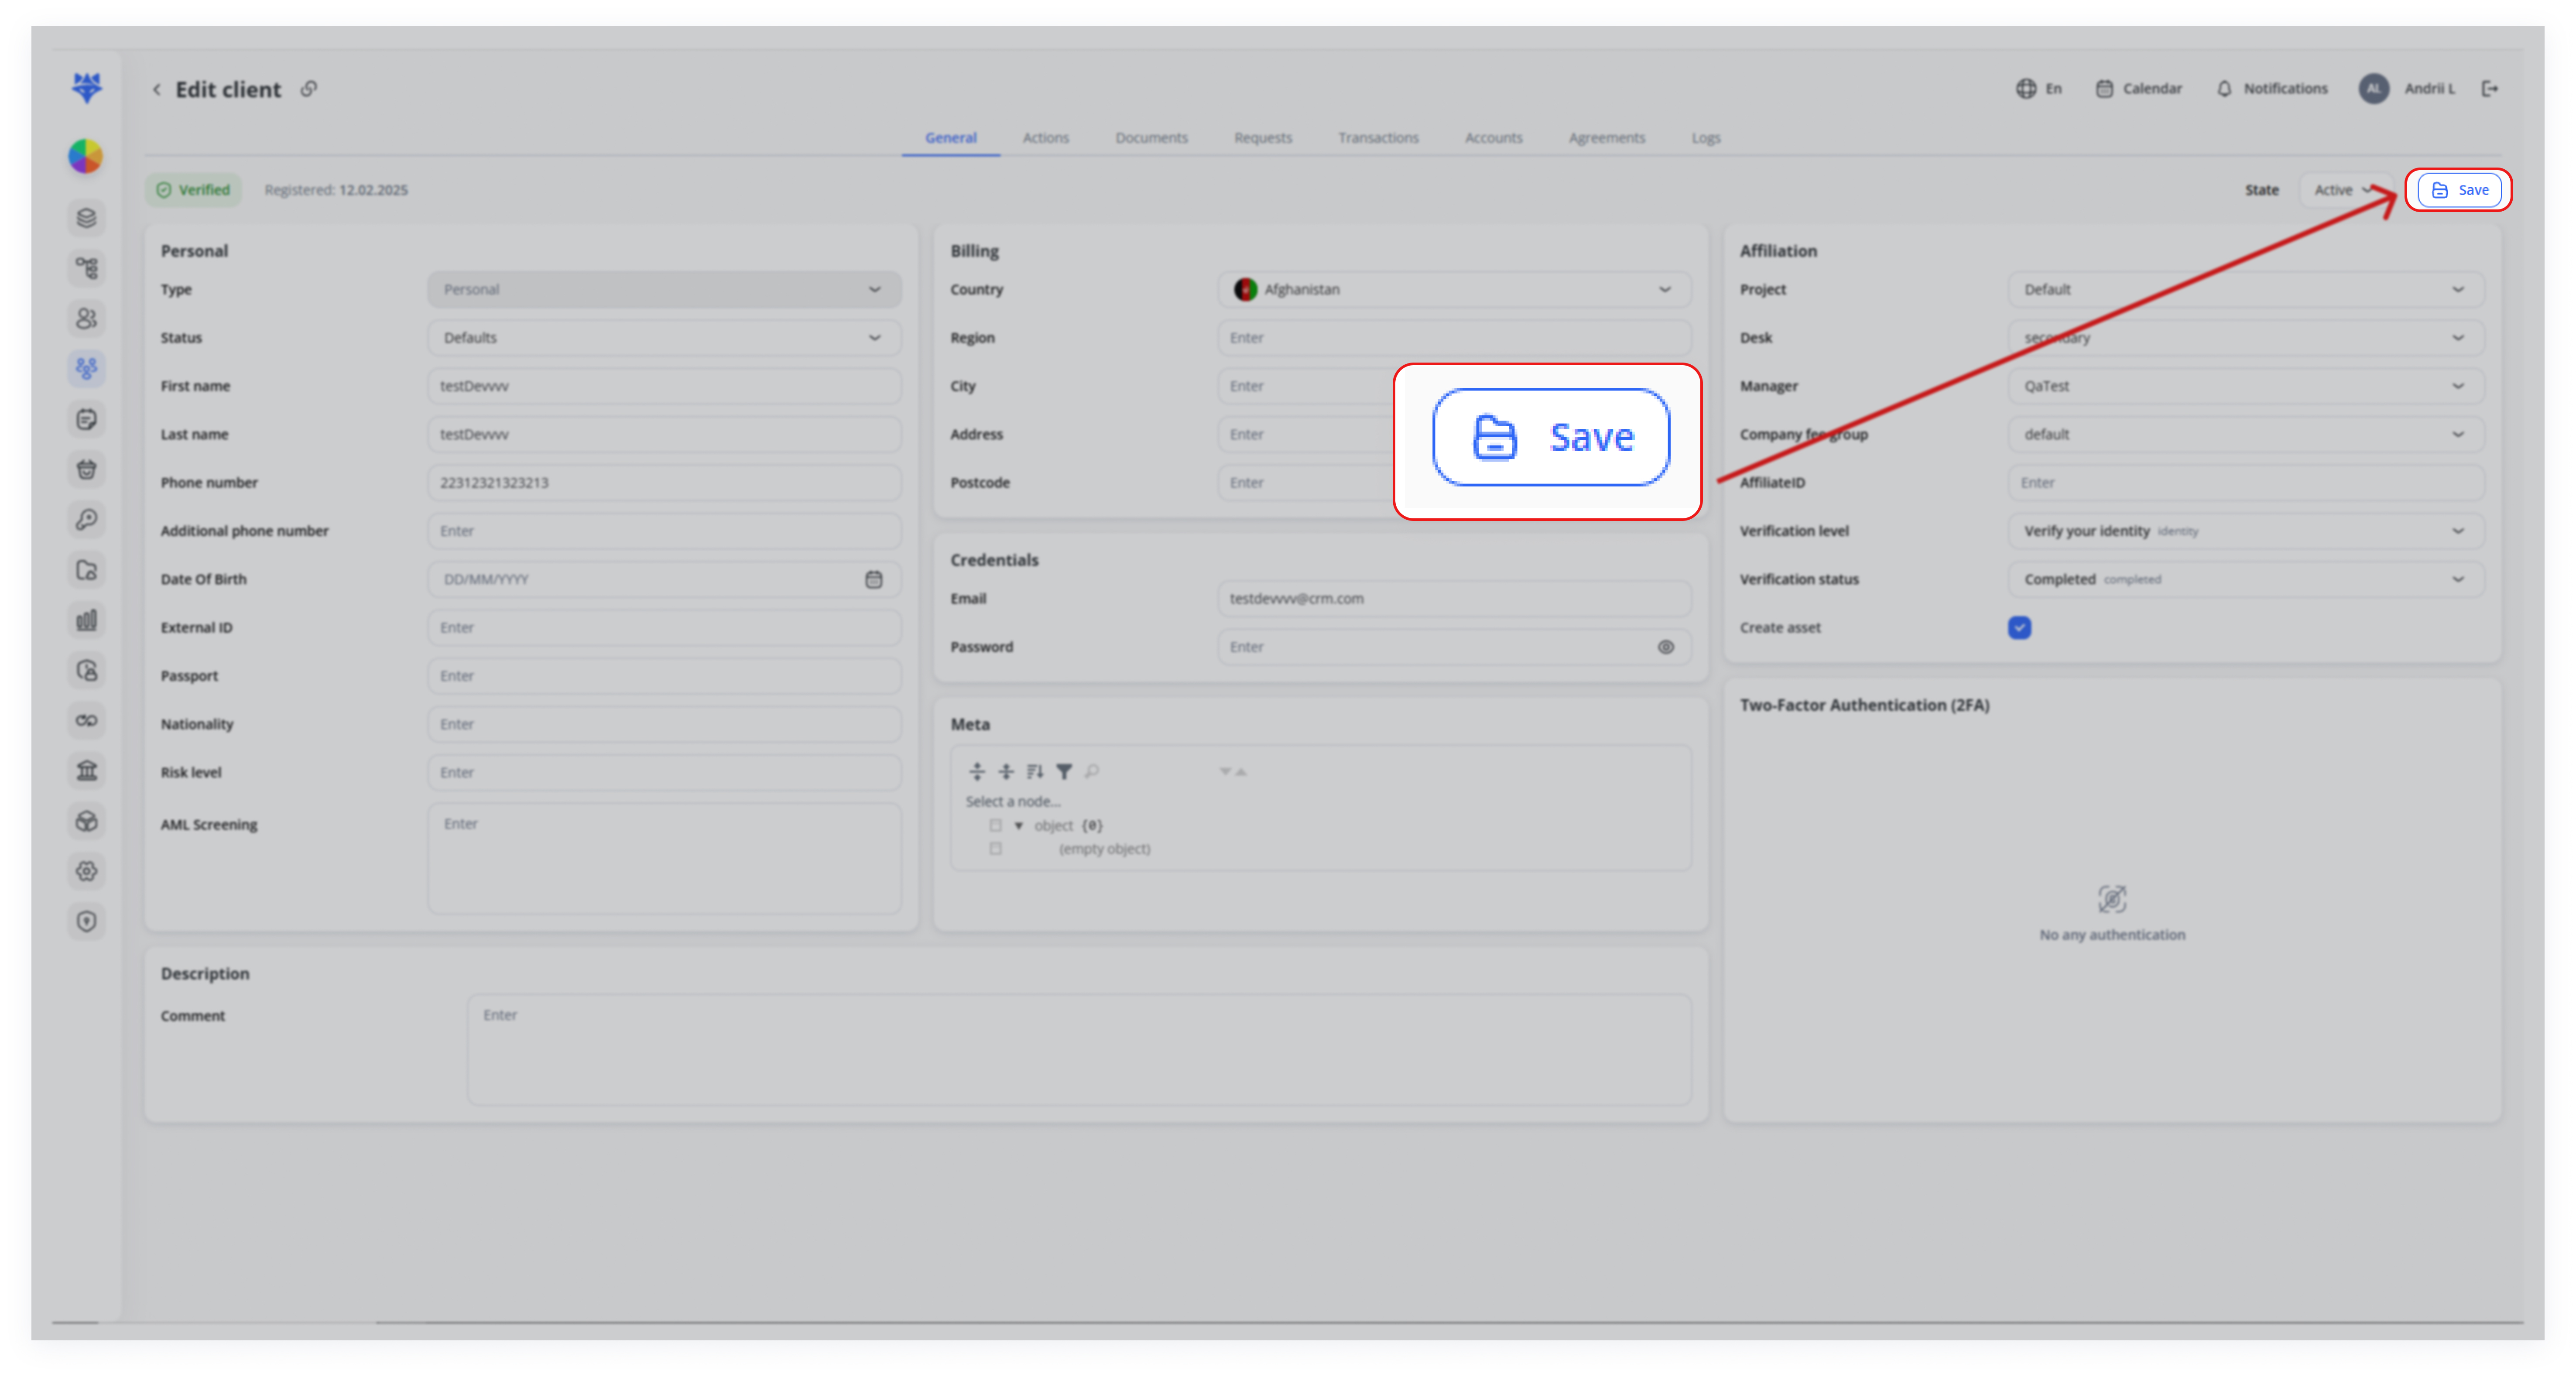
The client’s record is immediately updated with your changes.
Adding an Action
1. Open the Actions tab.
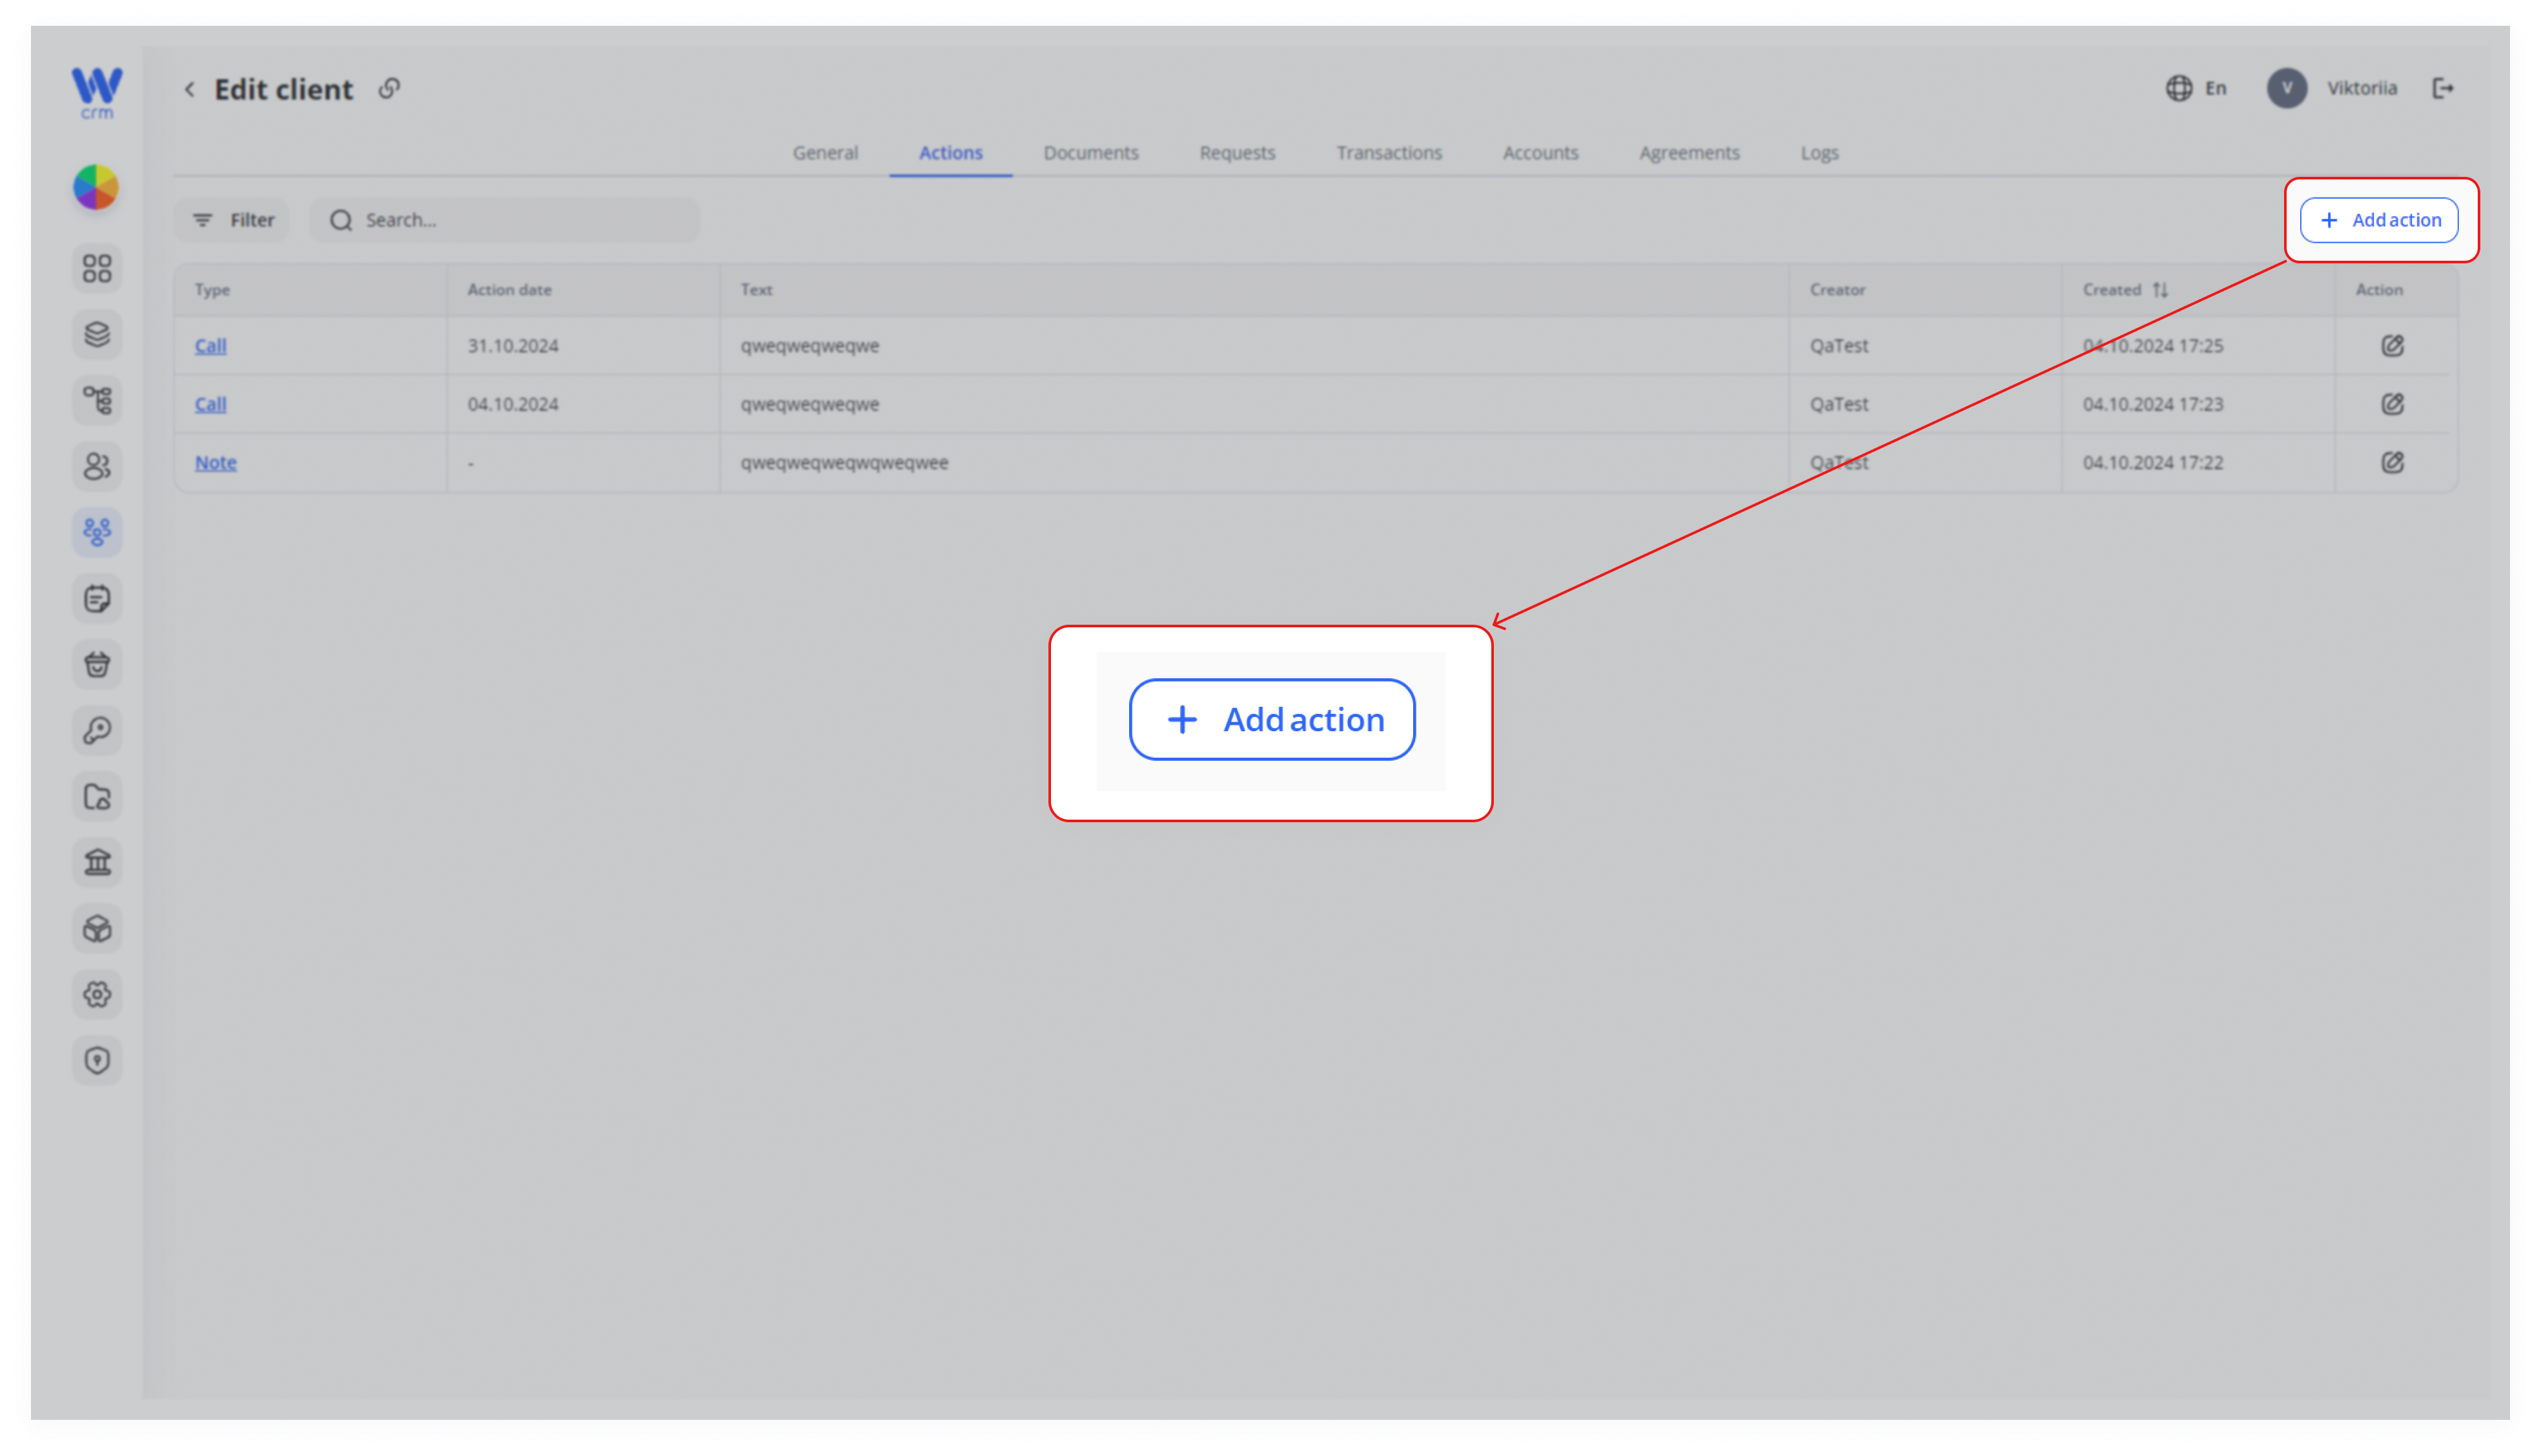
2. Click the Add action button in the top right.
3. A window will open where you can fill in the action's details. Enter or select from the drop-down list:
-
-
-
Type: Select Note, Call, or Comment.
-
Text: The details of the action.
-
Action Date: Only available for the Call type.
-
Responsible: The employee responsible for the action. Available only for Call and Comment types.
-
-
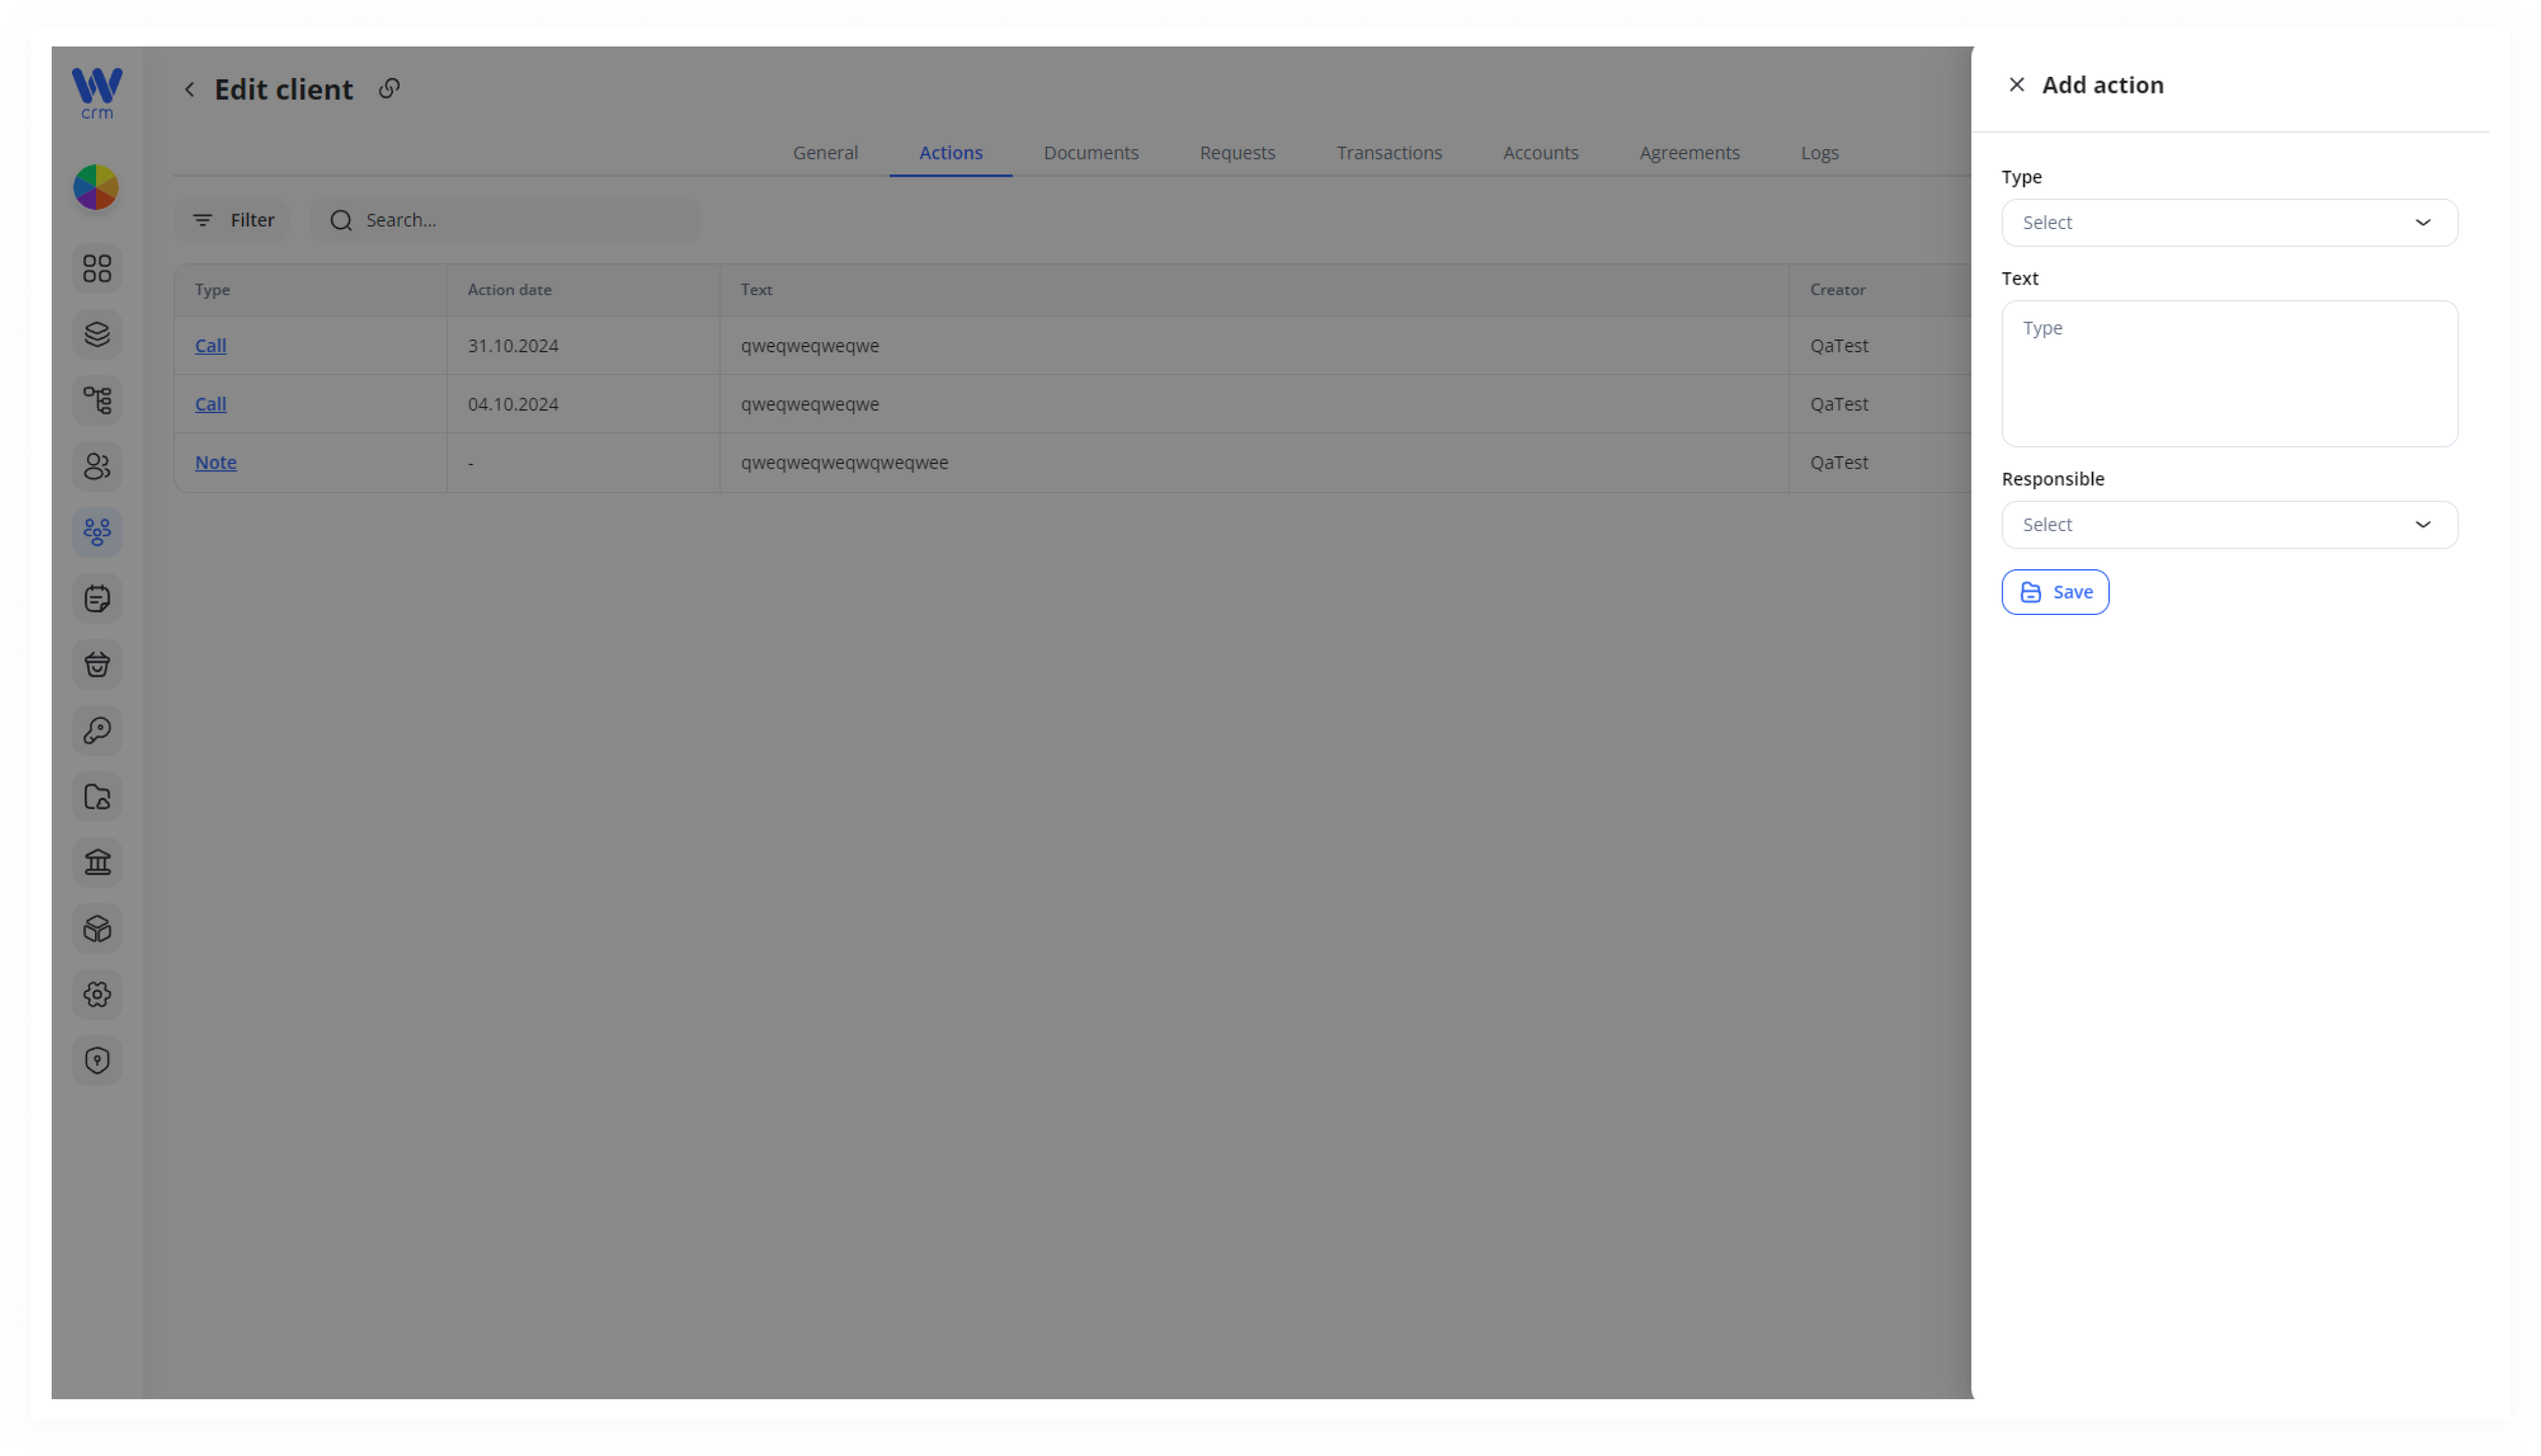
4. Click Save to apply the changes.
Note: You can edit Actions but cannot delete them. You also cannot change the type of the action after its creation.
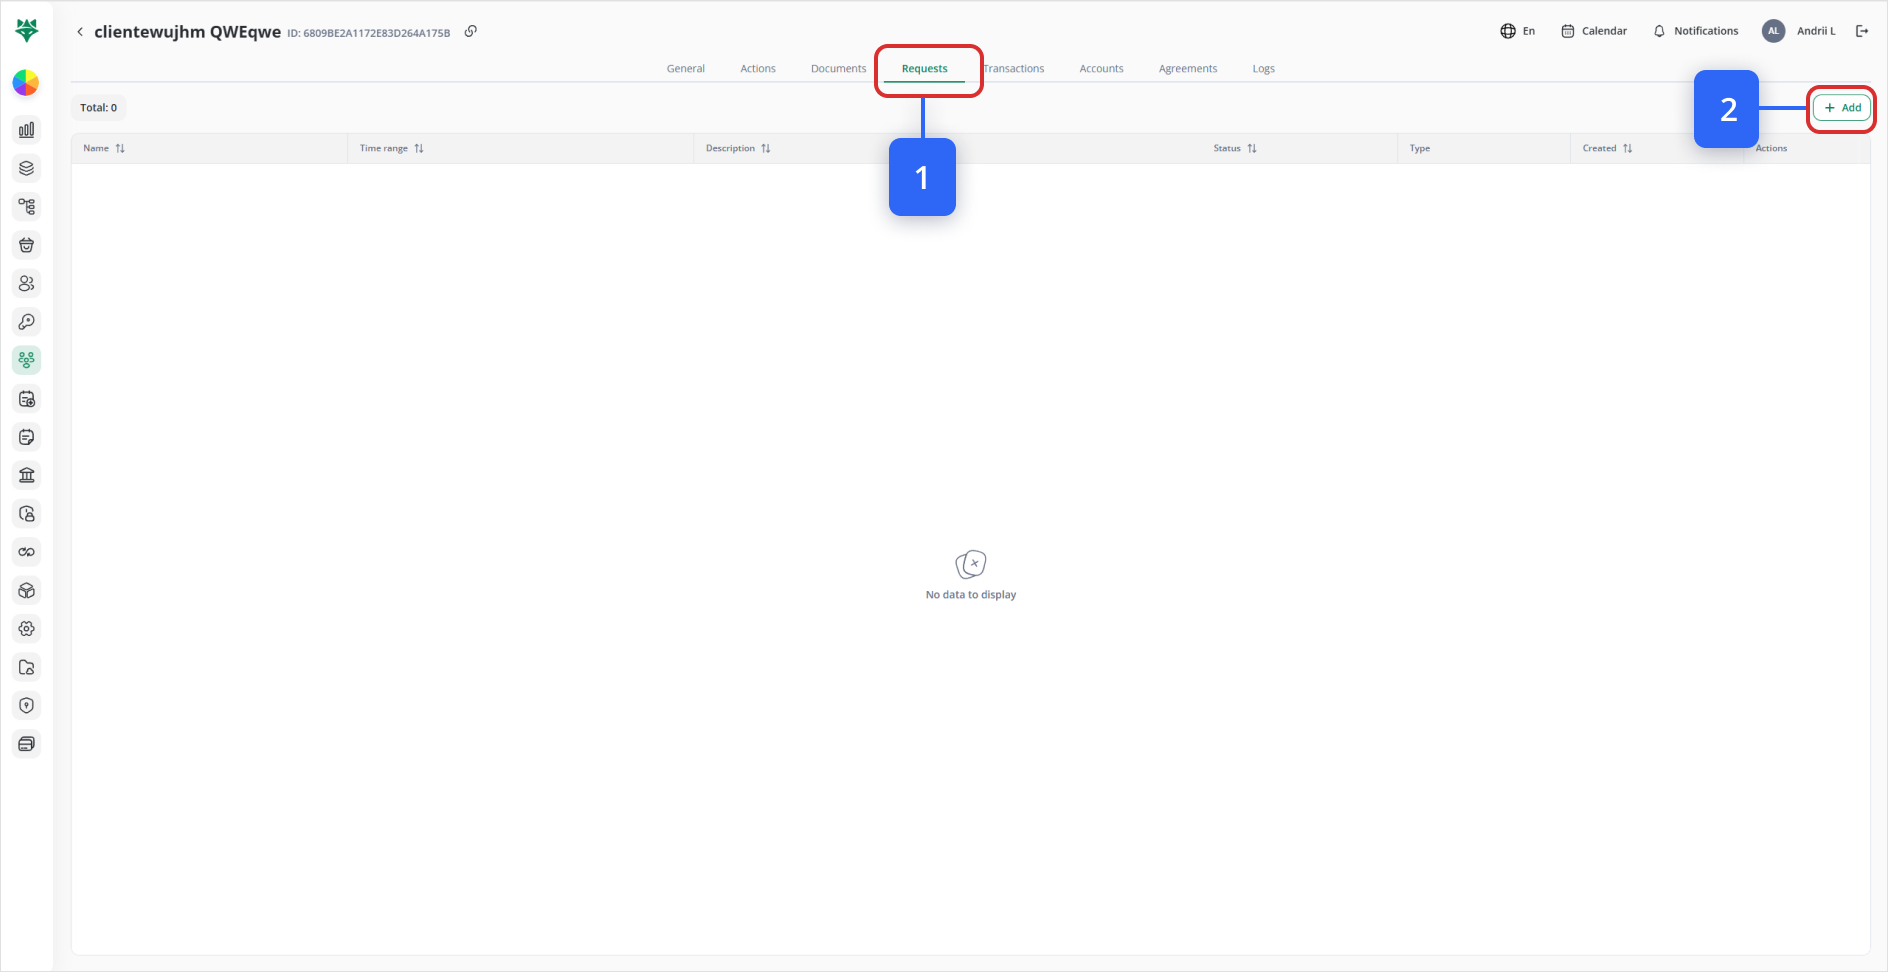
To add a Request:
- Open the Requests tab.
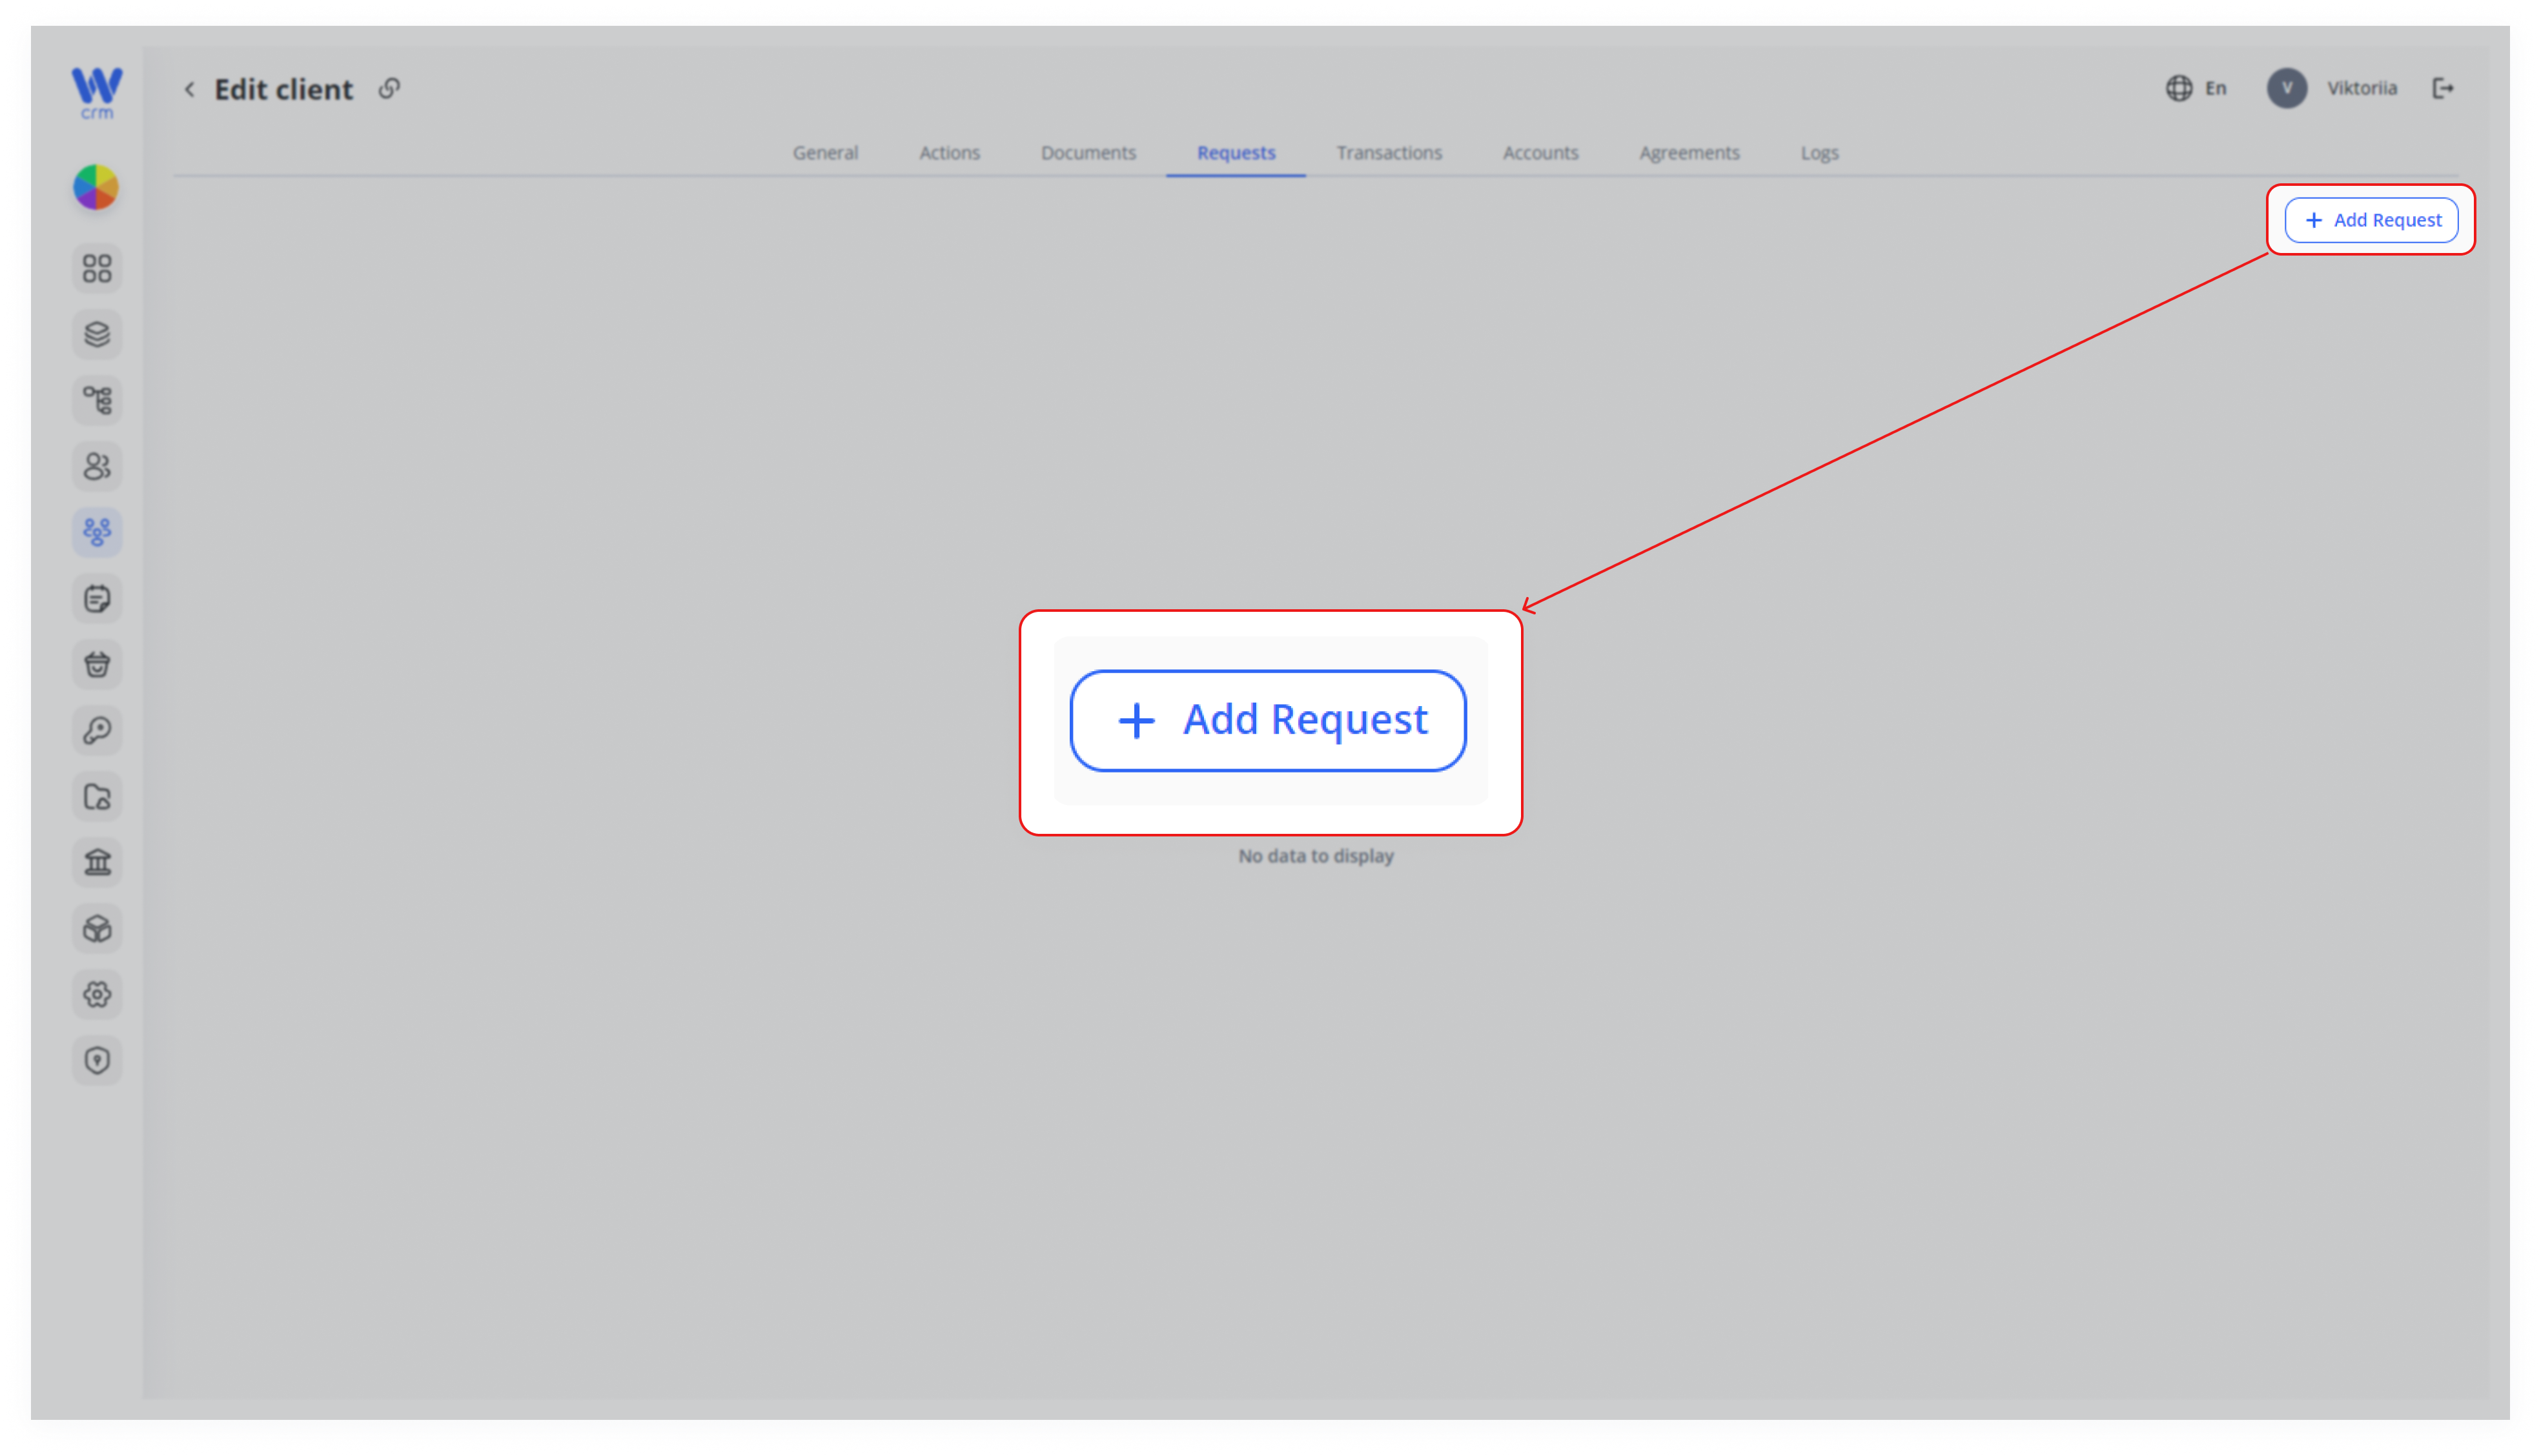
- Click on the Add Request button in the top right.
3. A window will open where you can fill in the request's details. Enter or select from the drop-down list:
-
-
-
Name
-
Time Range
-
Project
-
Description
-
Additional Information
-
Attached Files
-
-
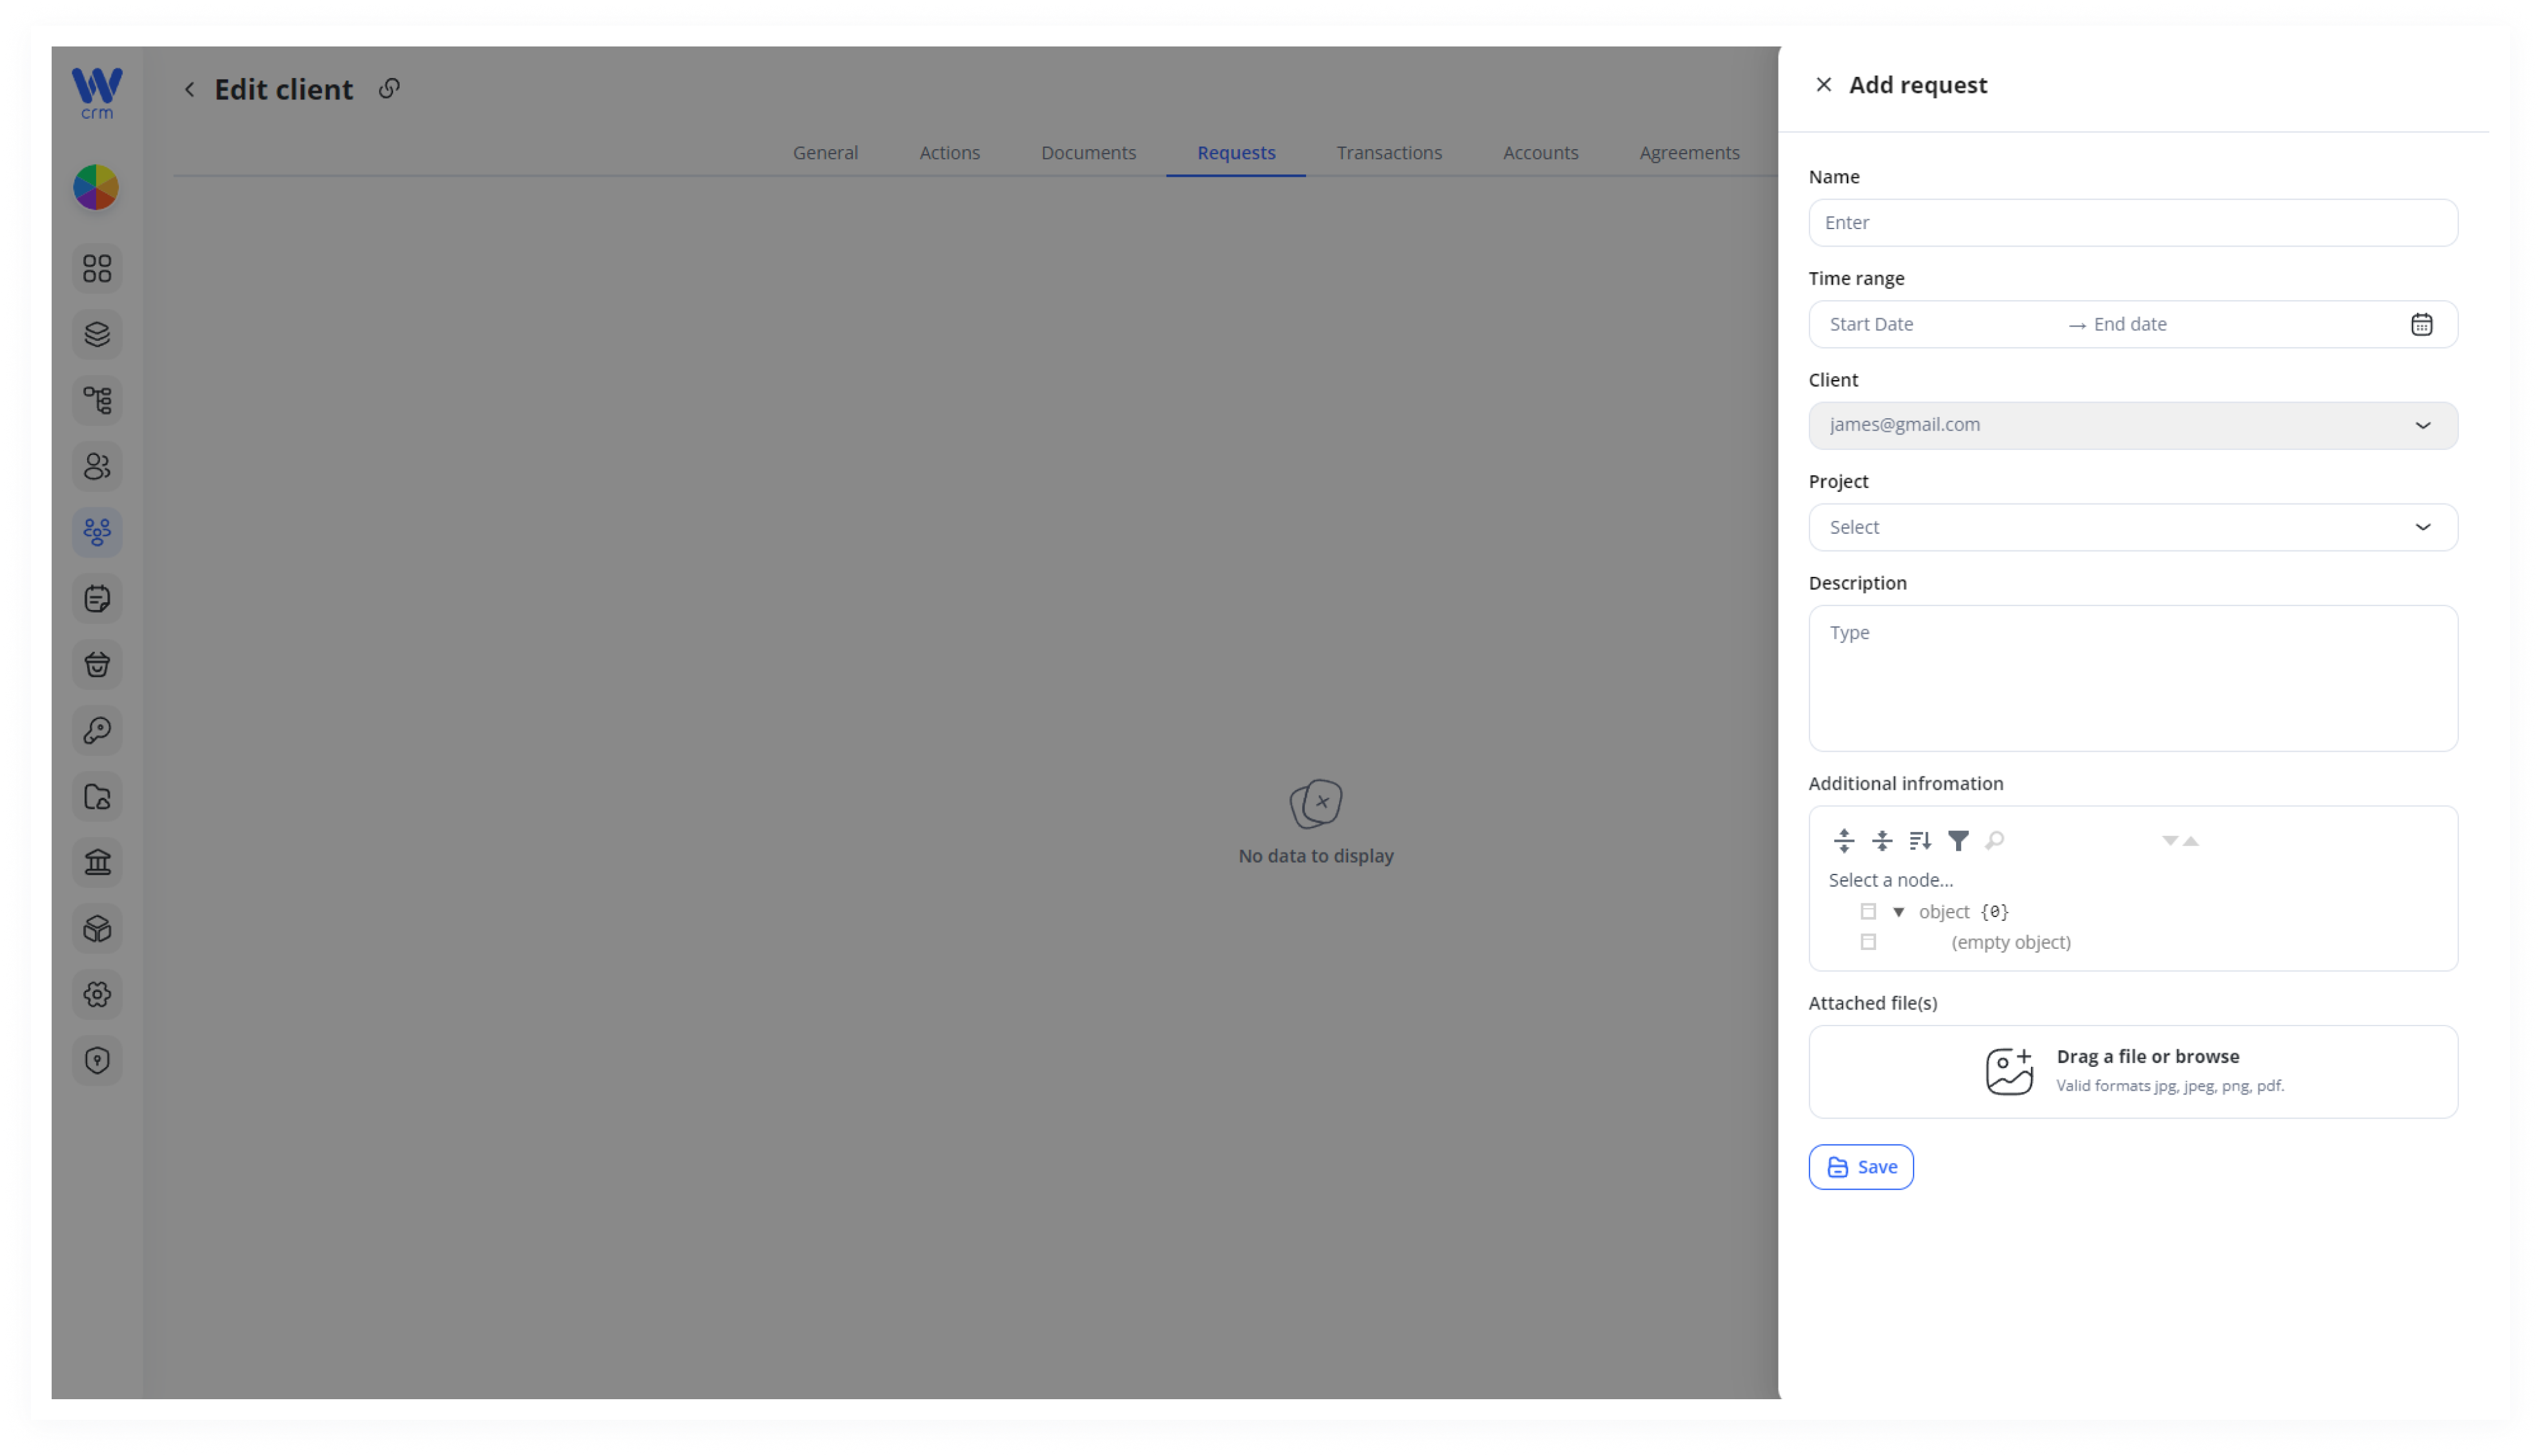
4. Click Save to apply the changes.
To add an Account:
-
-
Open the Accounts tab.
-
Click on the Add account button.
-
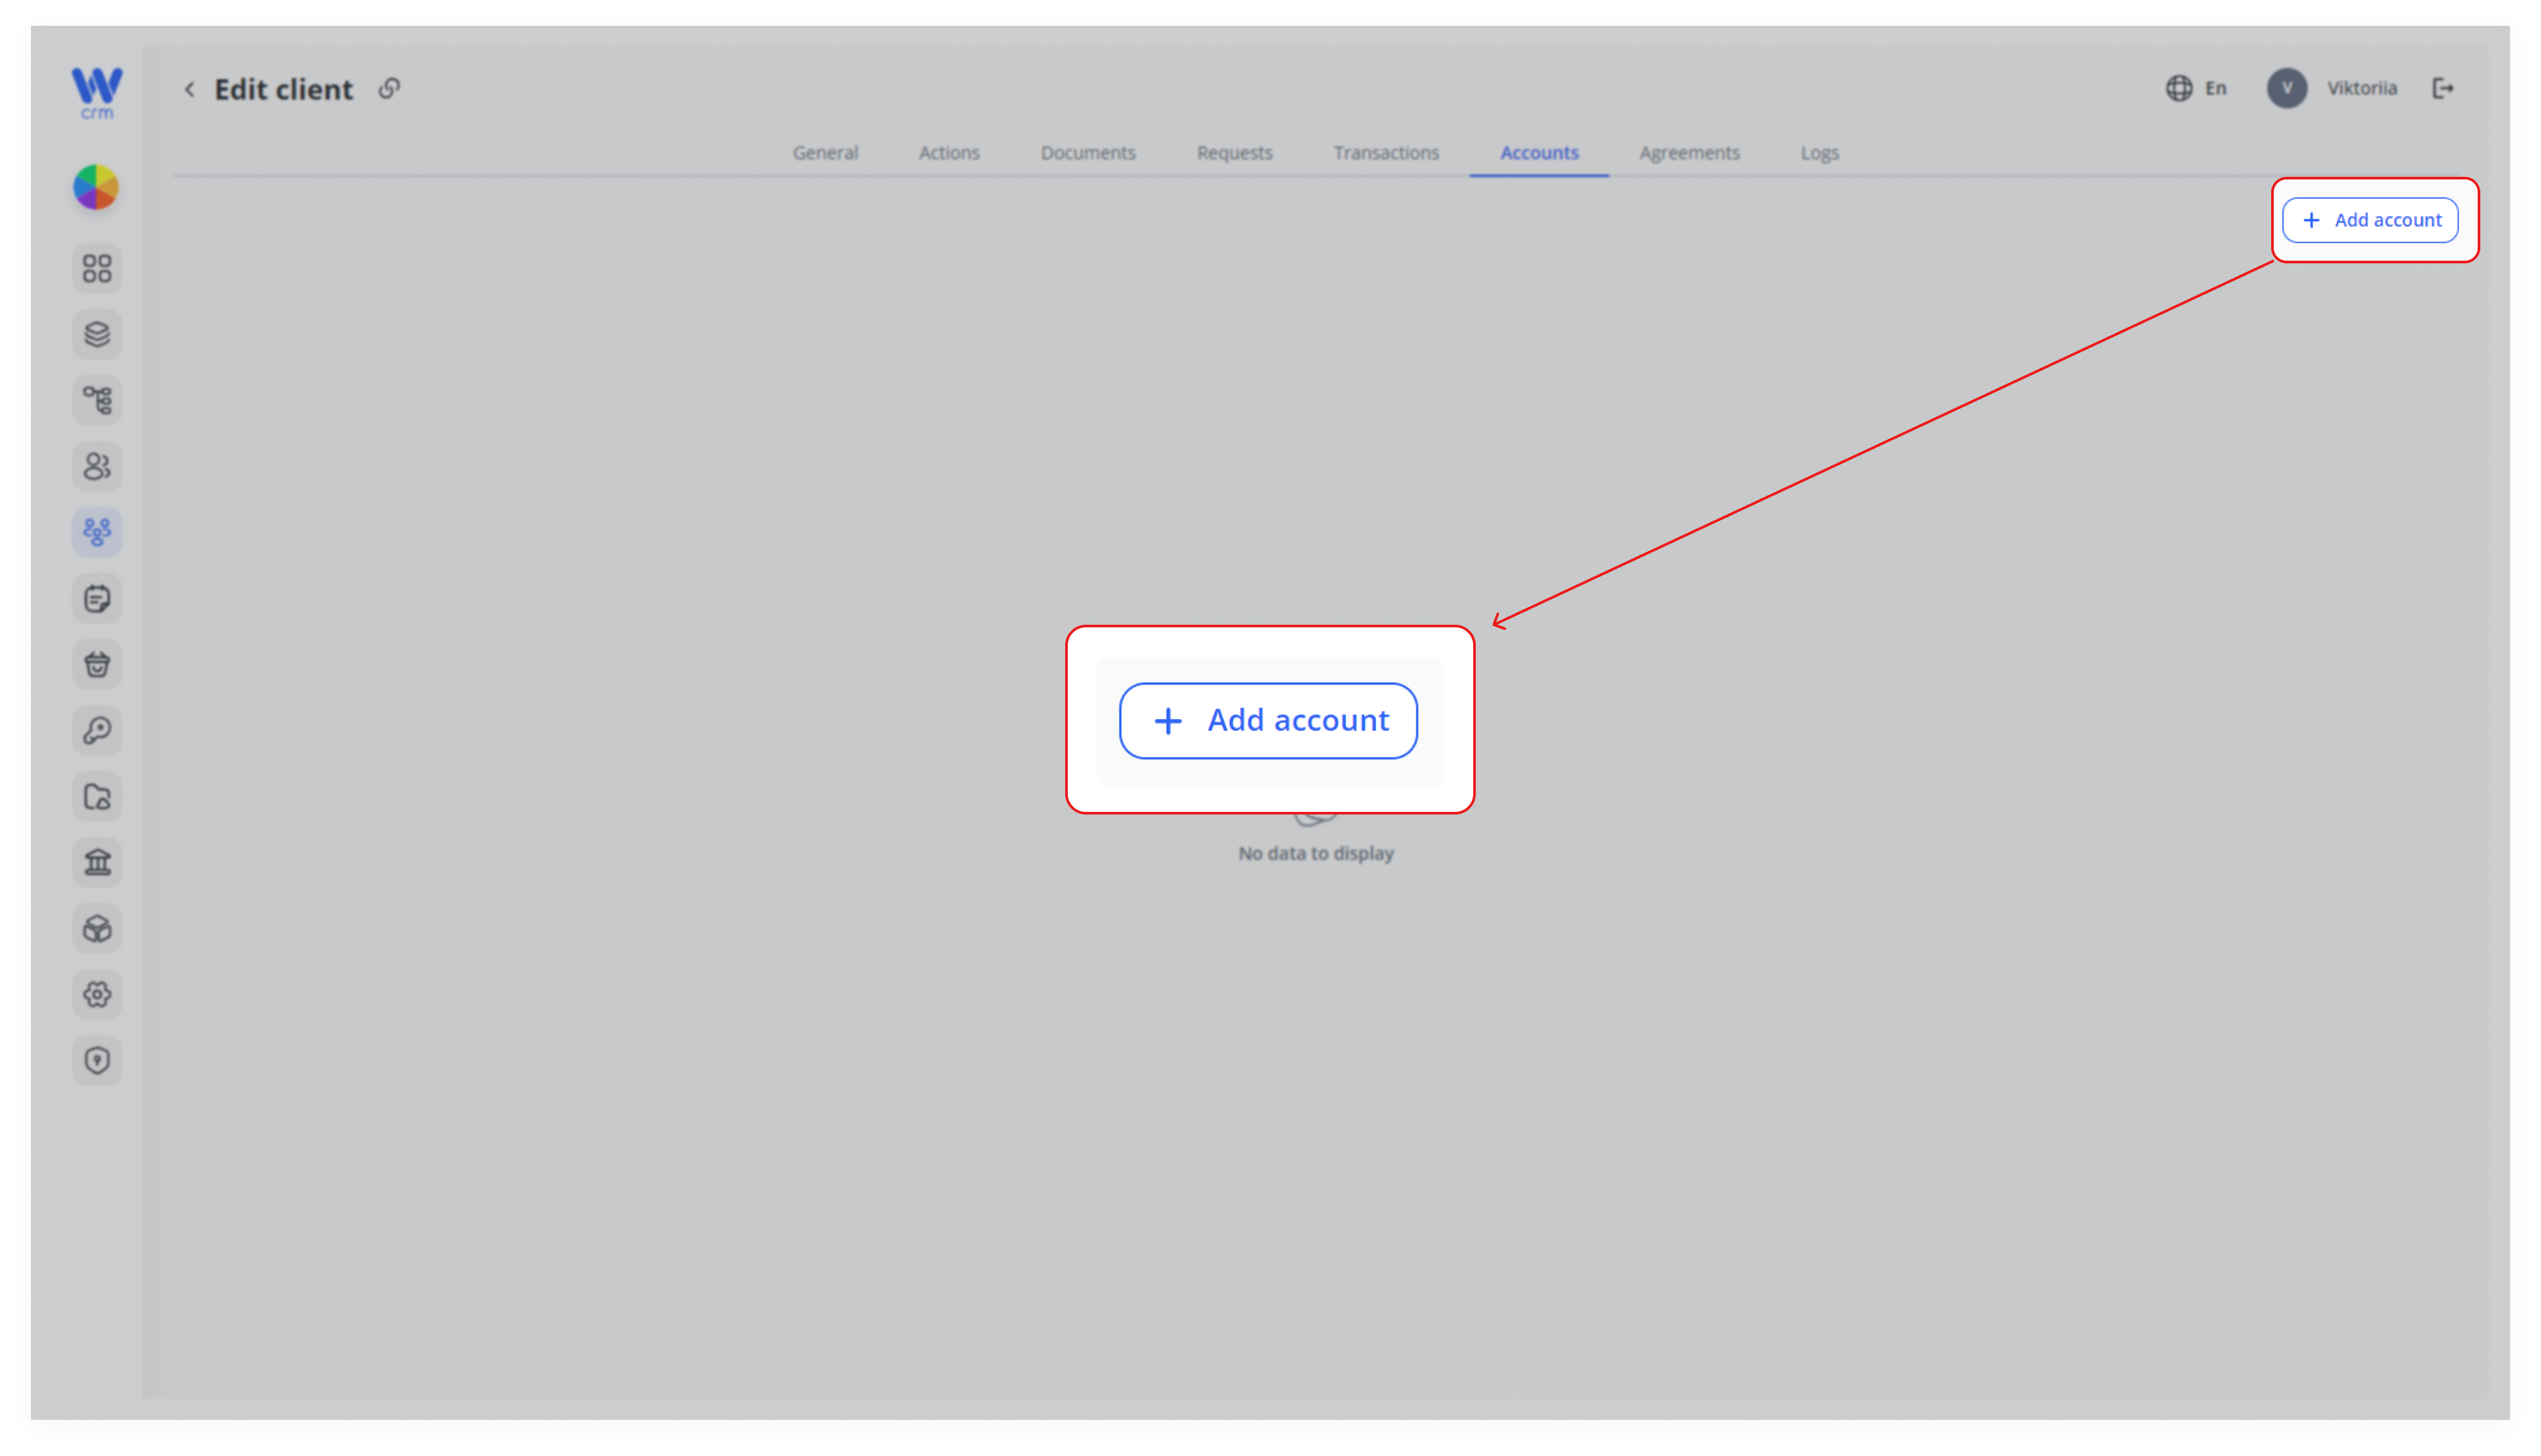
3. Select from the drop-down list Type of the account.
4. If known, fill in External ID to connect the account with bank etc.
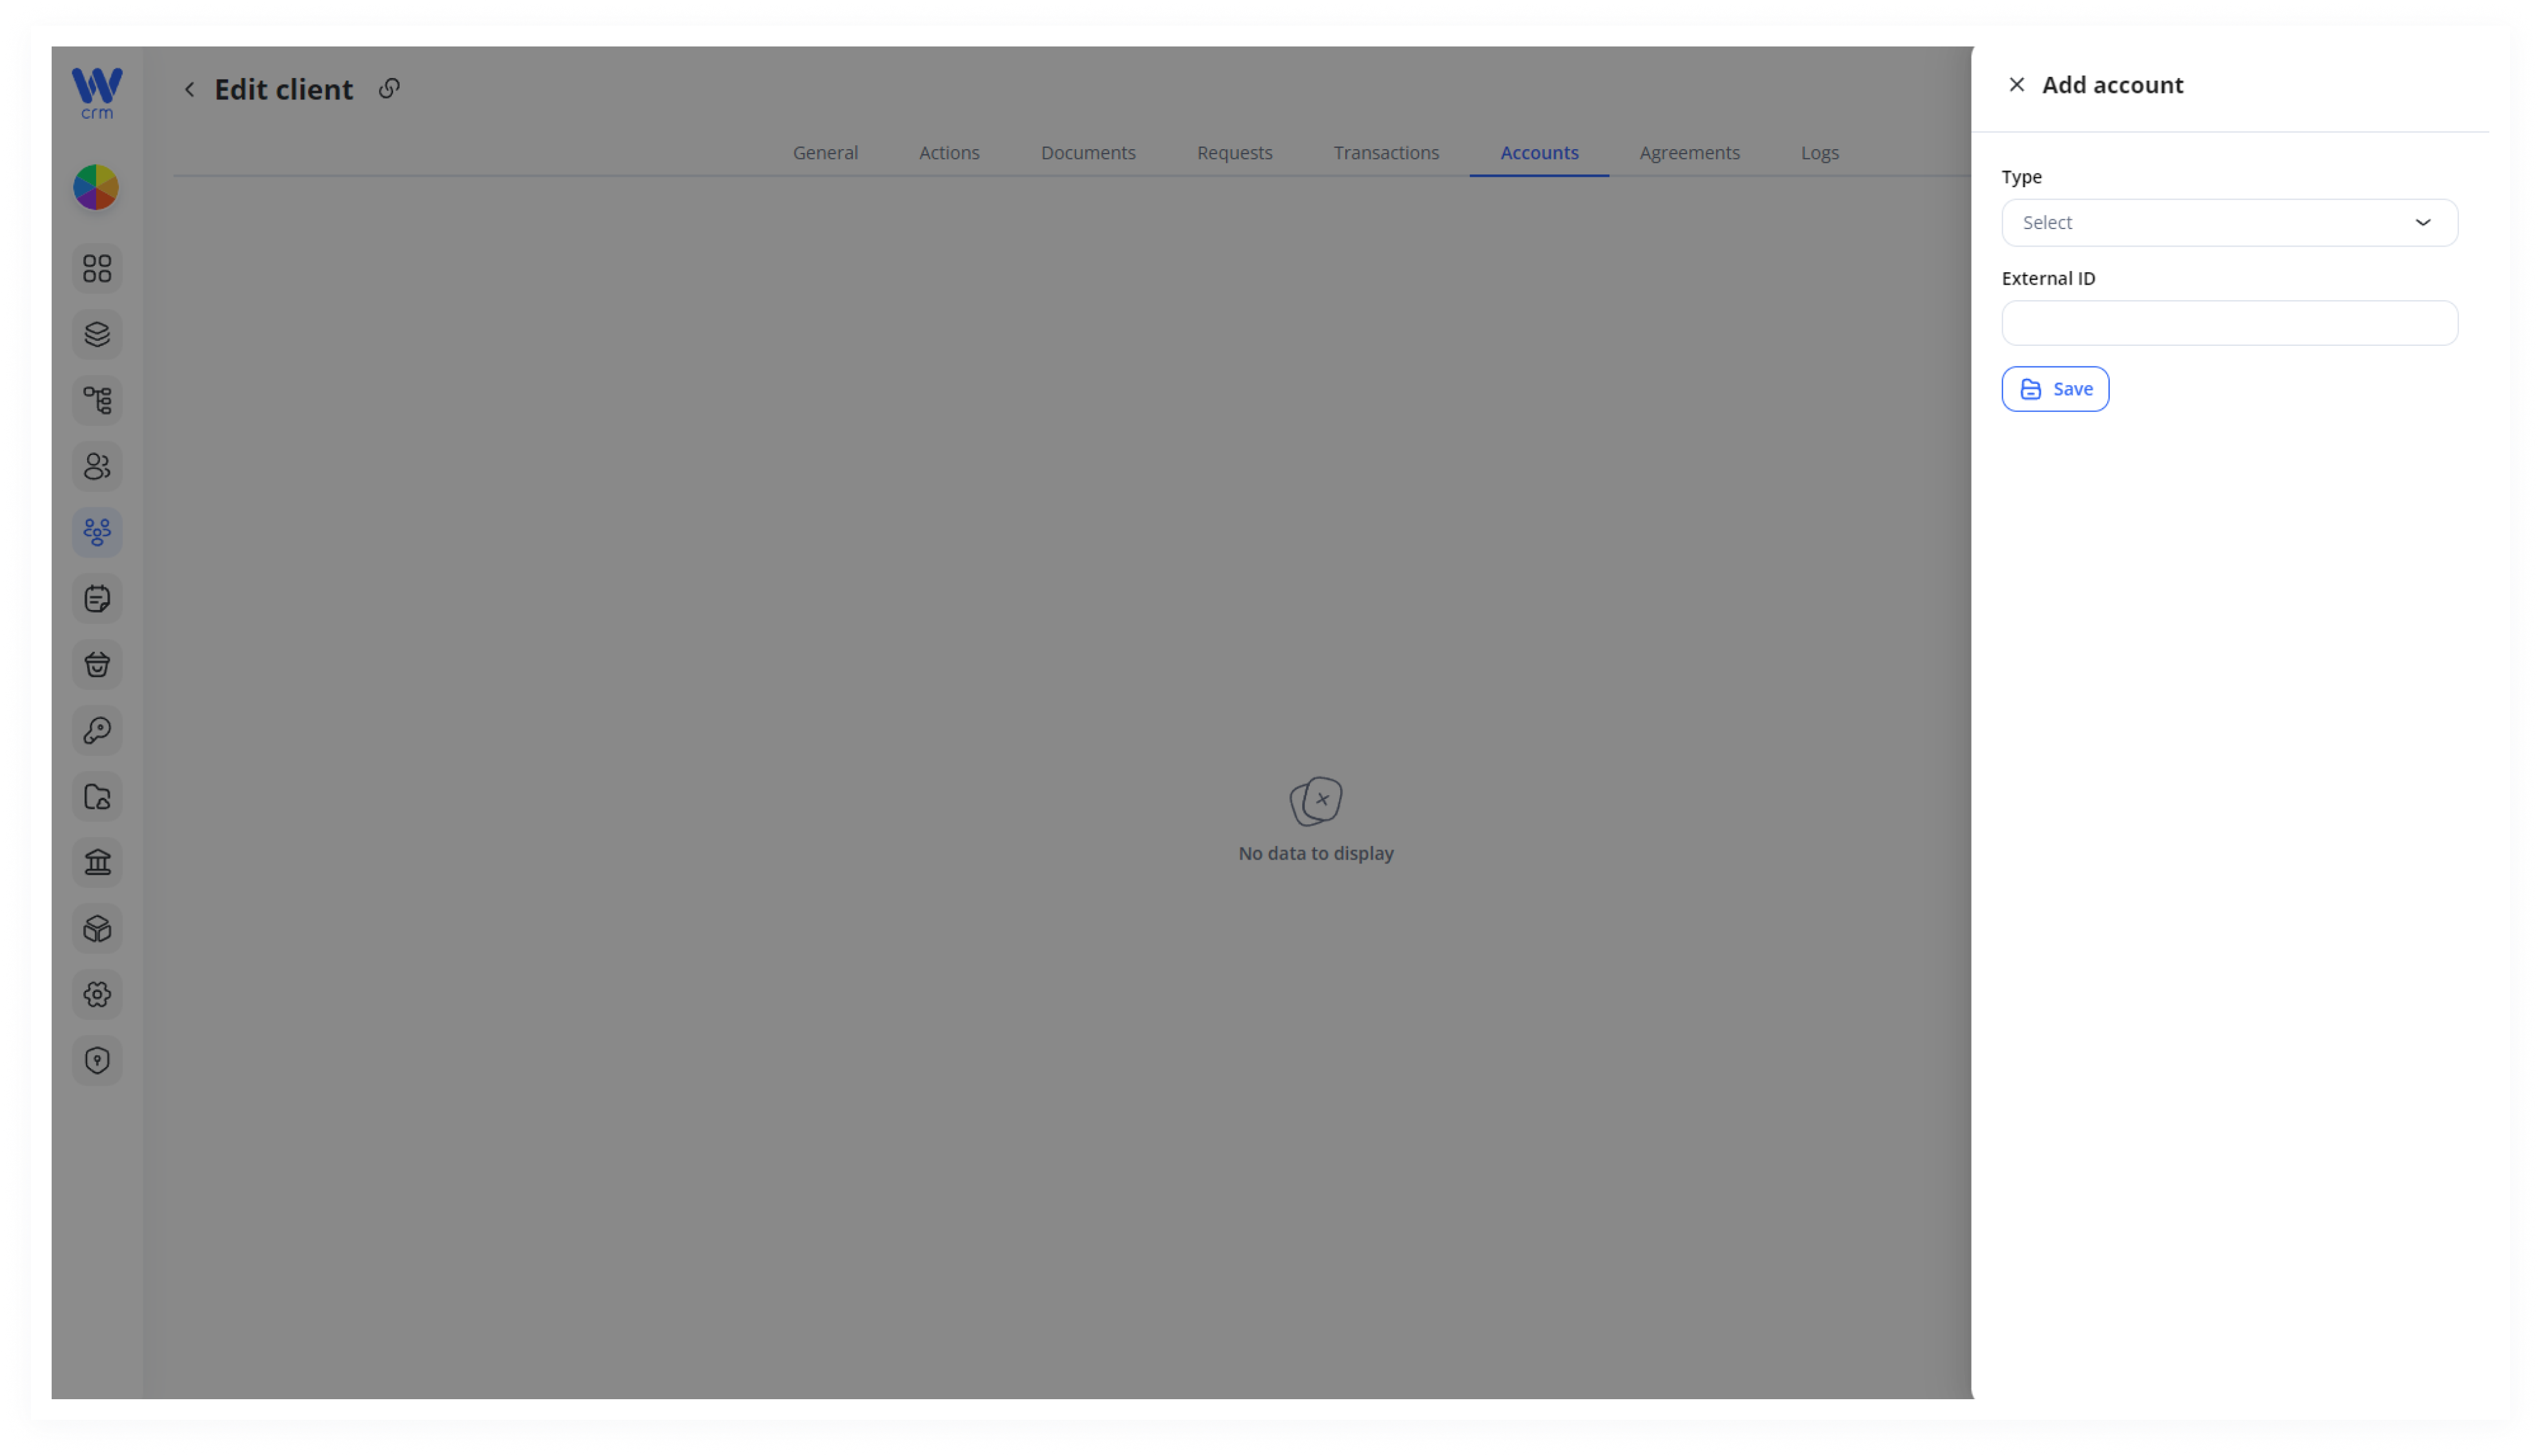
5. Click Save to apply the changes.
To add an Asset to the account:
-
- Click on the Add asset icon at the account’s row.
- Click on the Add asset icon at the account’s row.
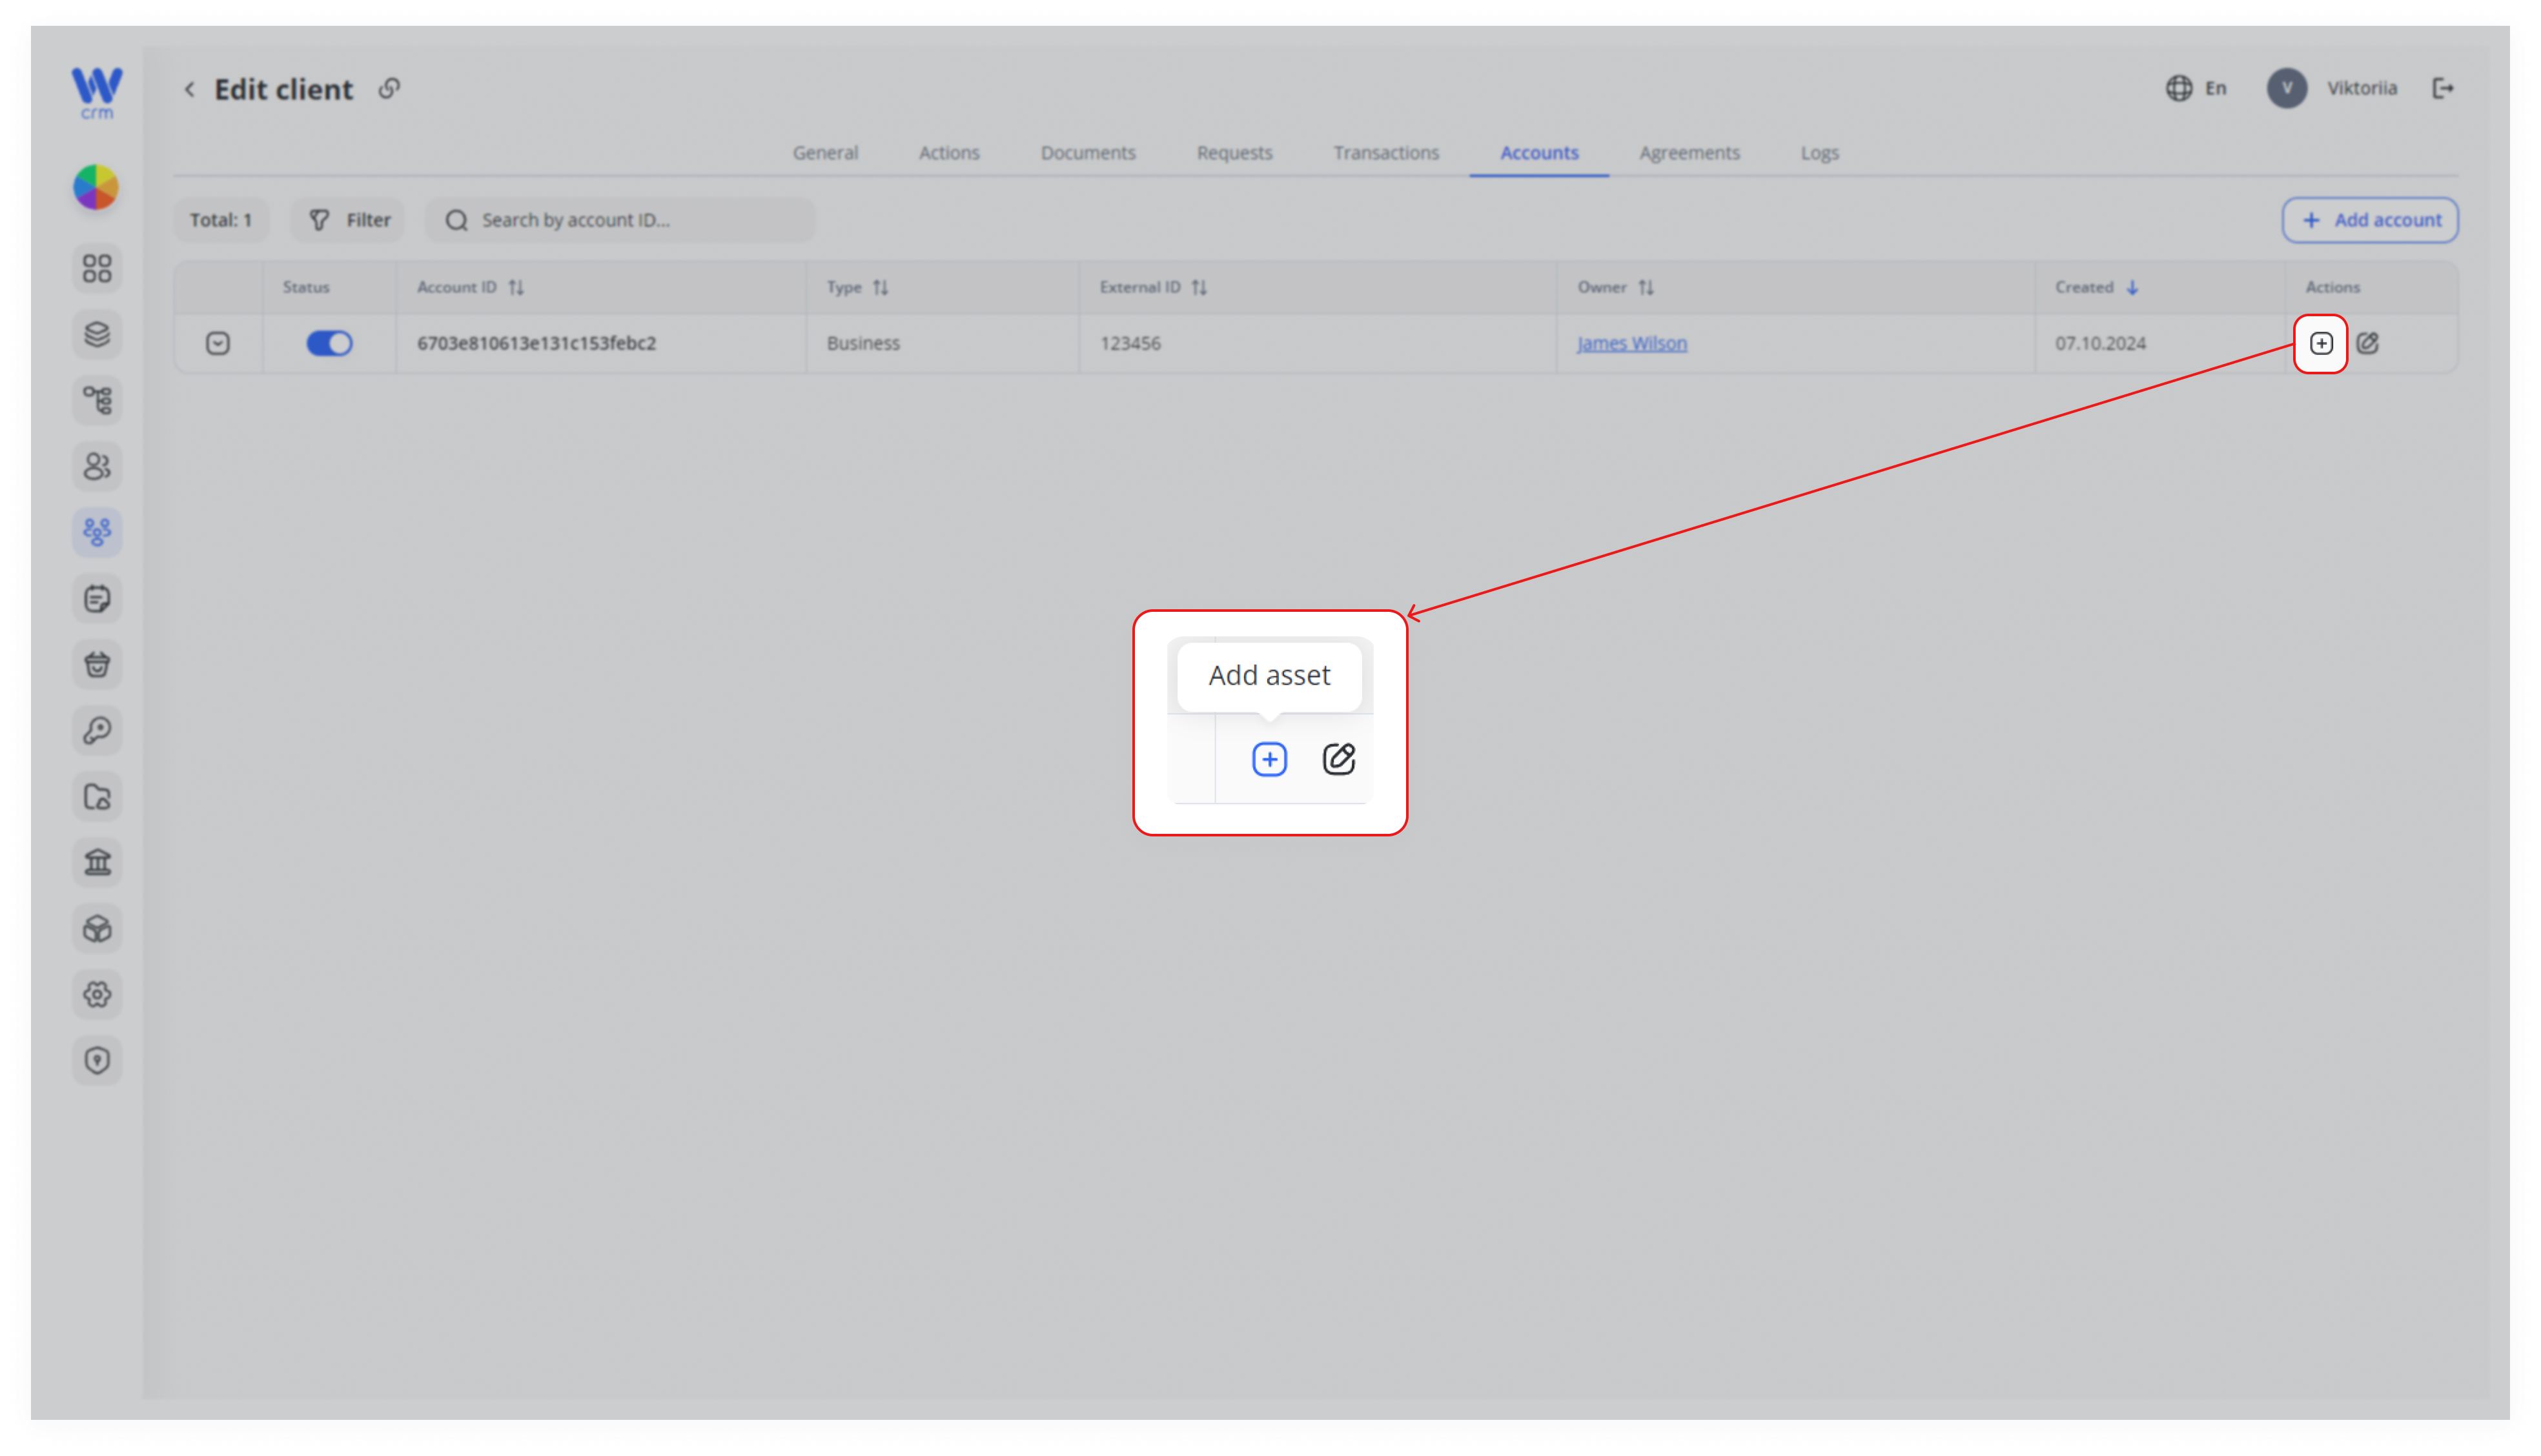
2. Select Currency. The system will automatically identify its type.
3. Fill in Balance. For fiat currencies also optionally fill in or select from the drop-down list Address, External ID and Bank.
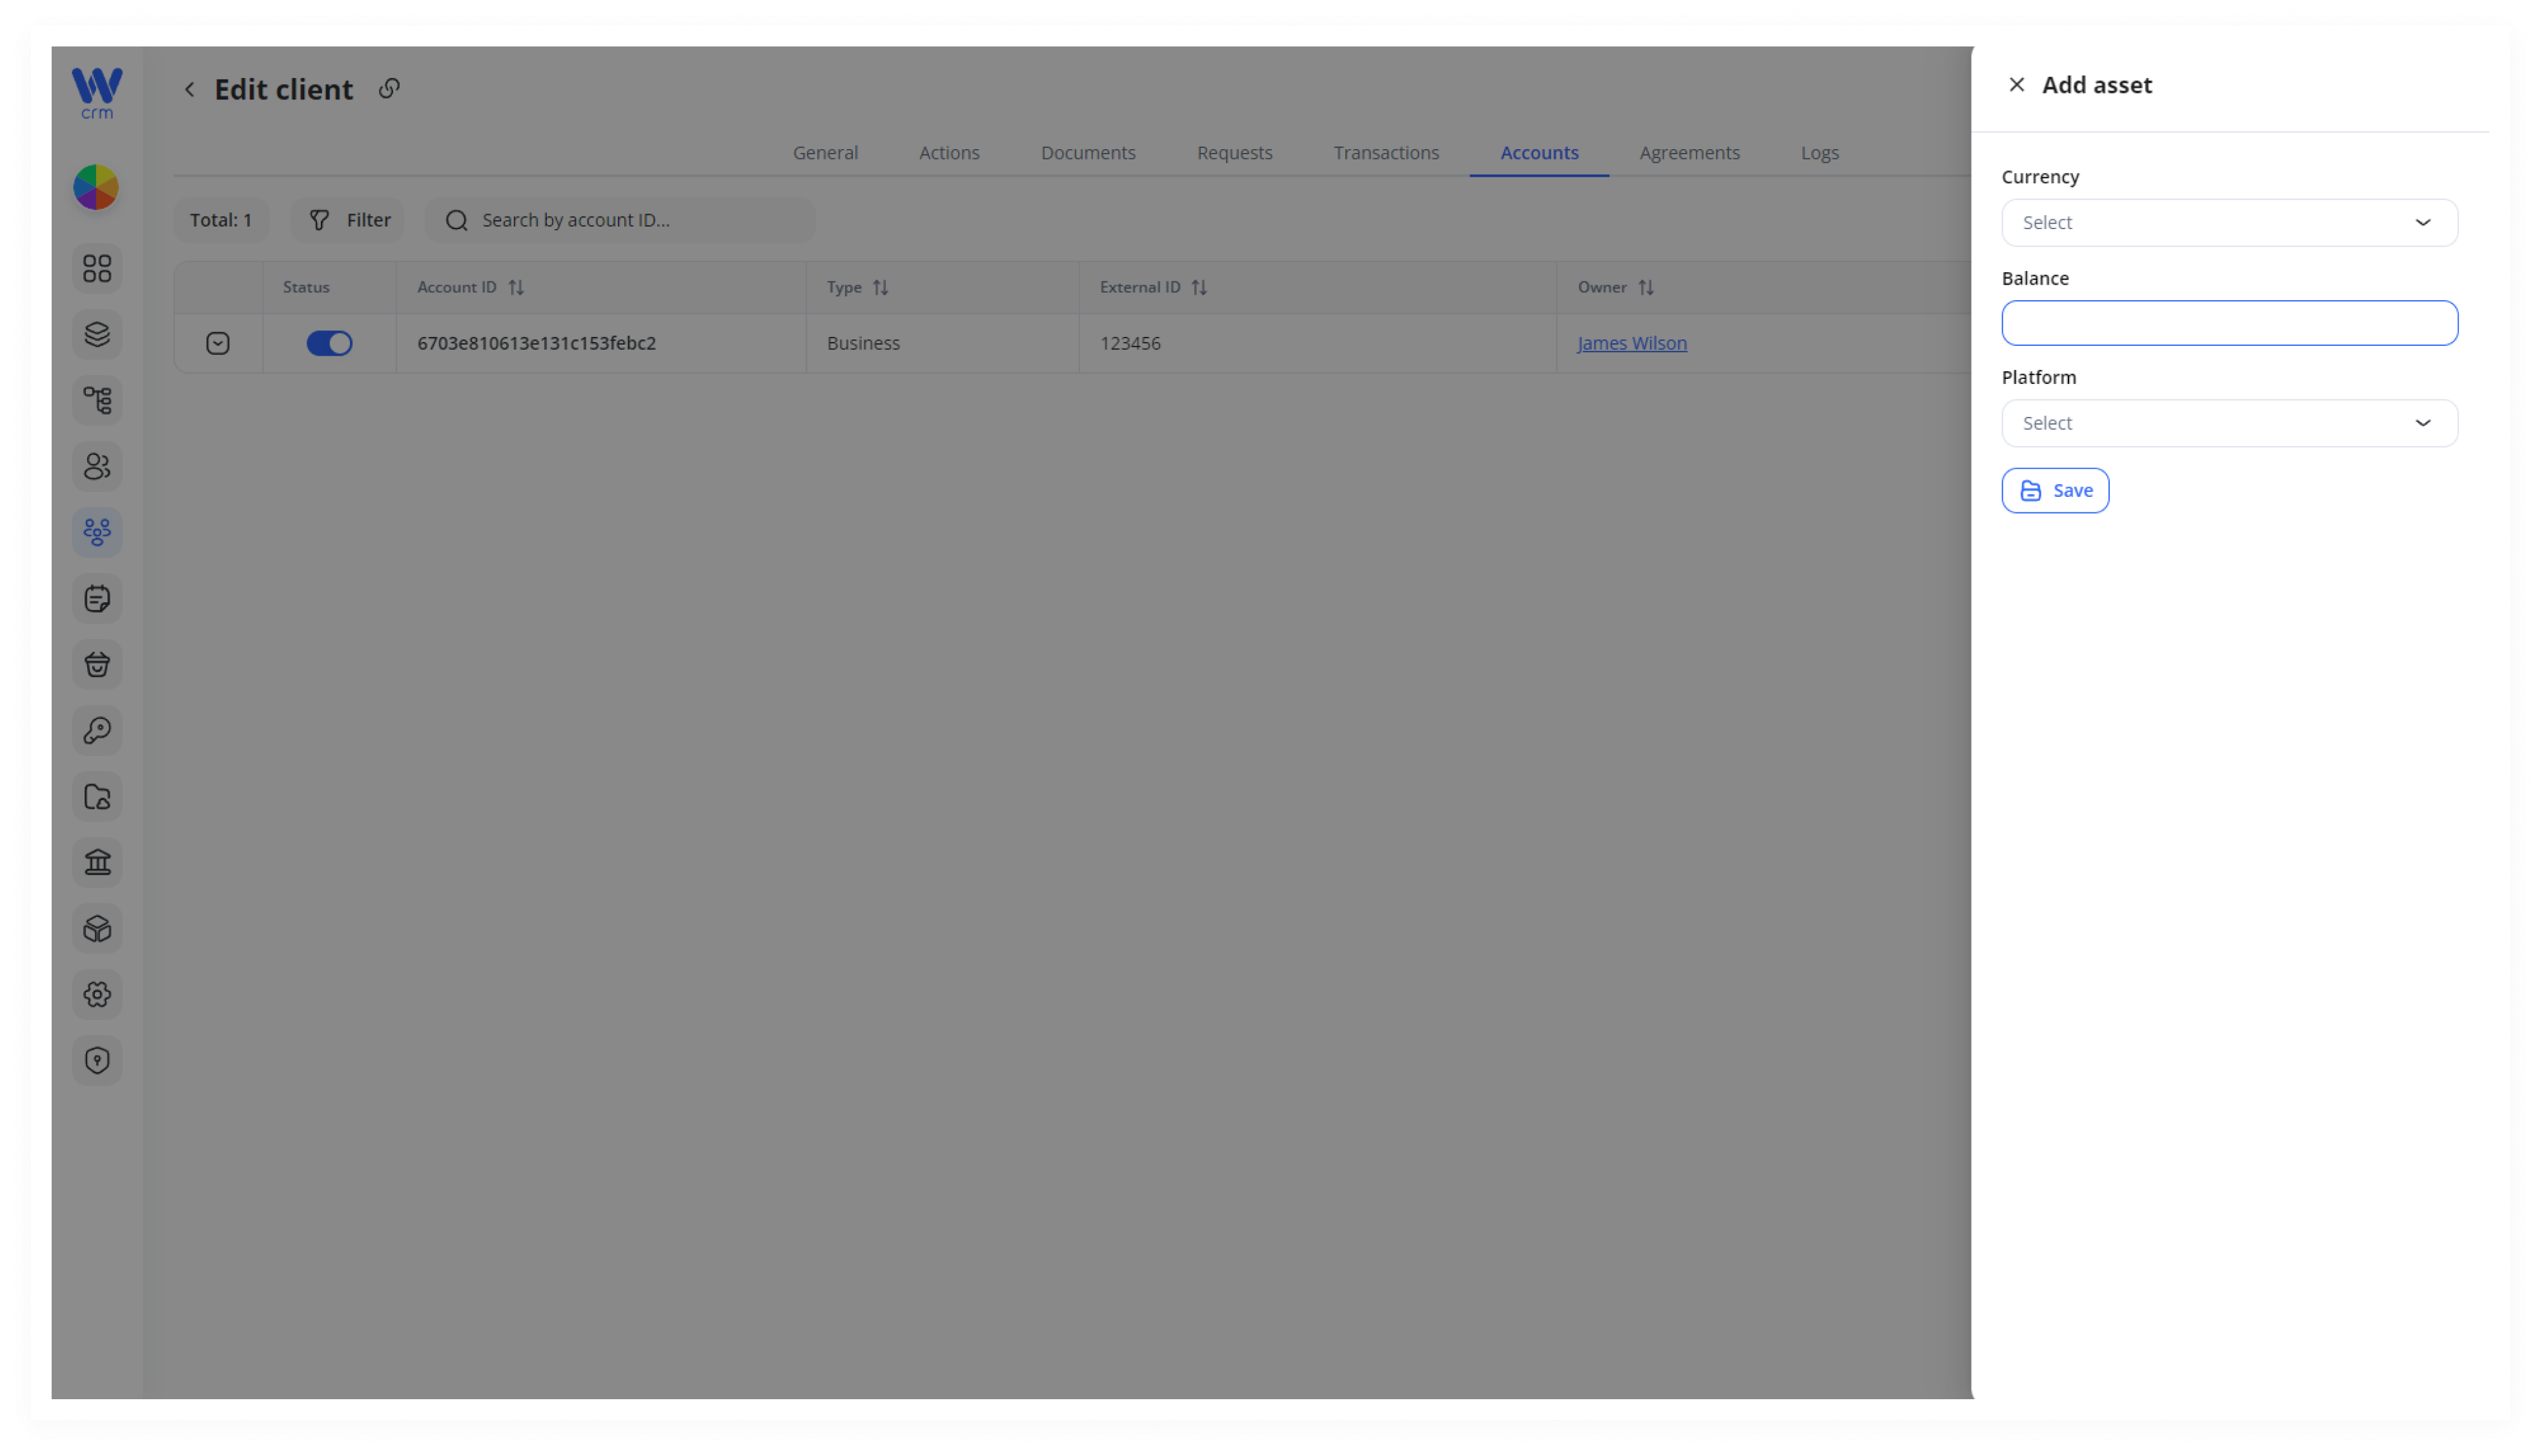
4. Click Save to apply the changes.
-
Open the Client’s Record
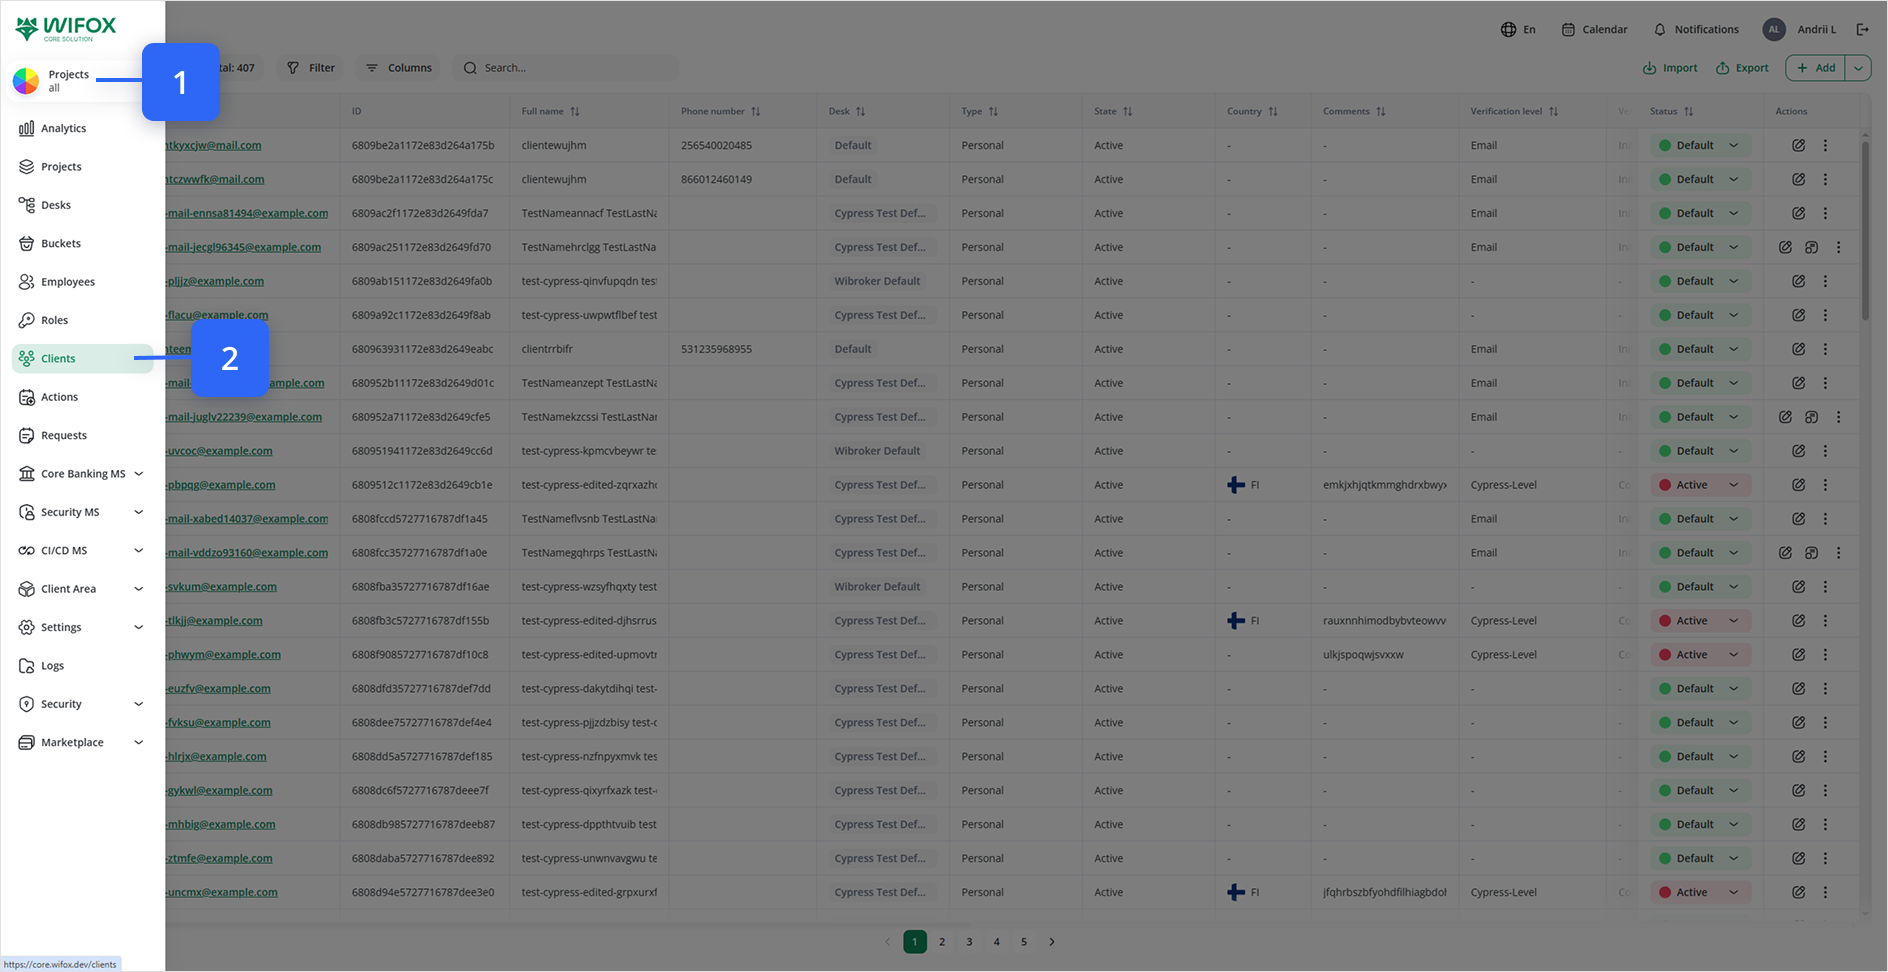
In the Clients list, locate the row for the client you want to edit (Look at #1 on the image below).
Click the Edit (pencil) icon in the Actions column (Look at #2 on the image below).
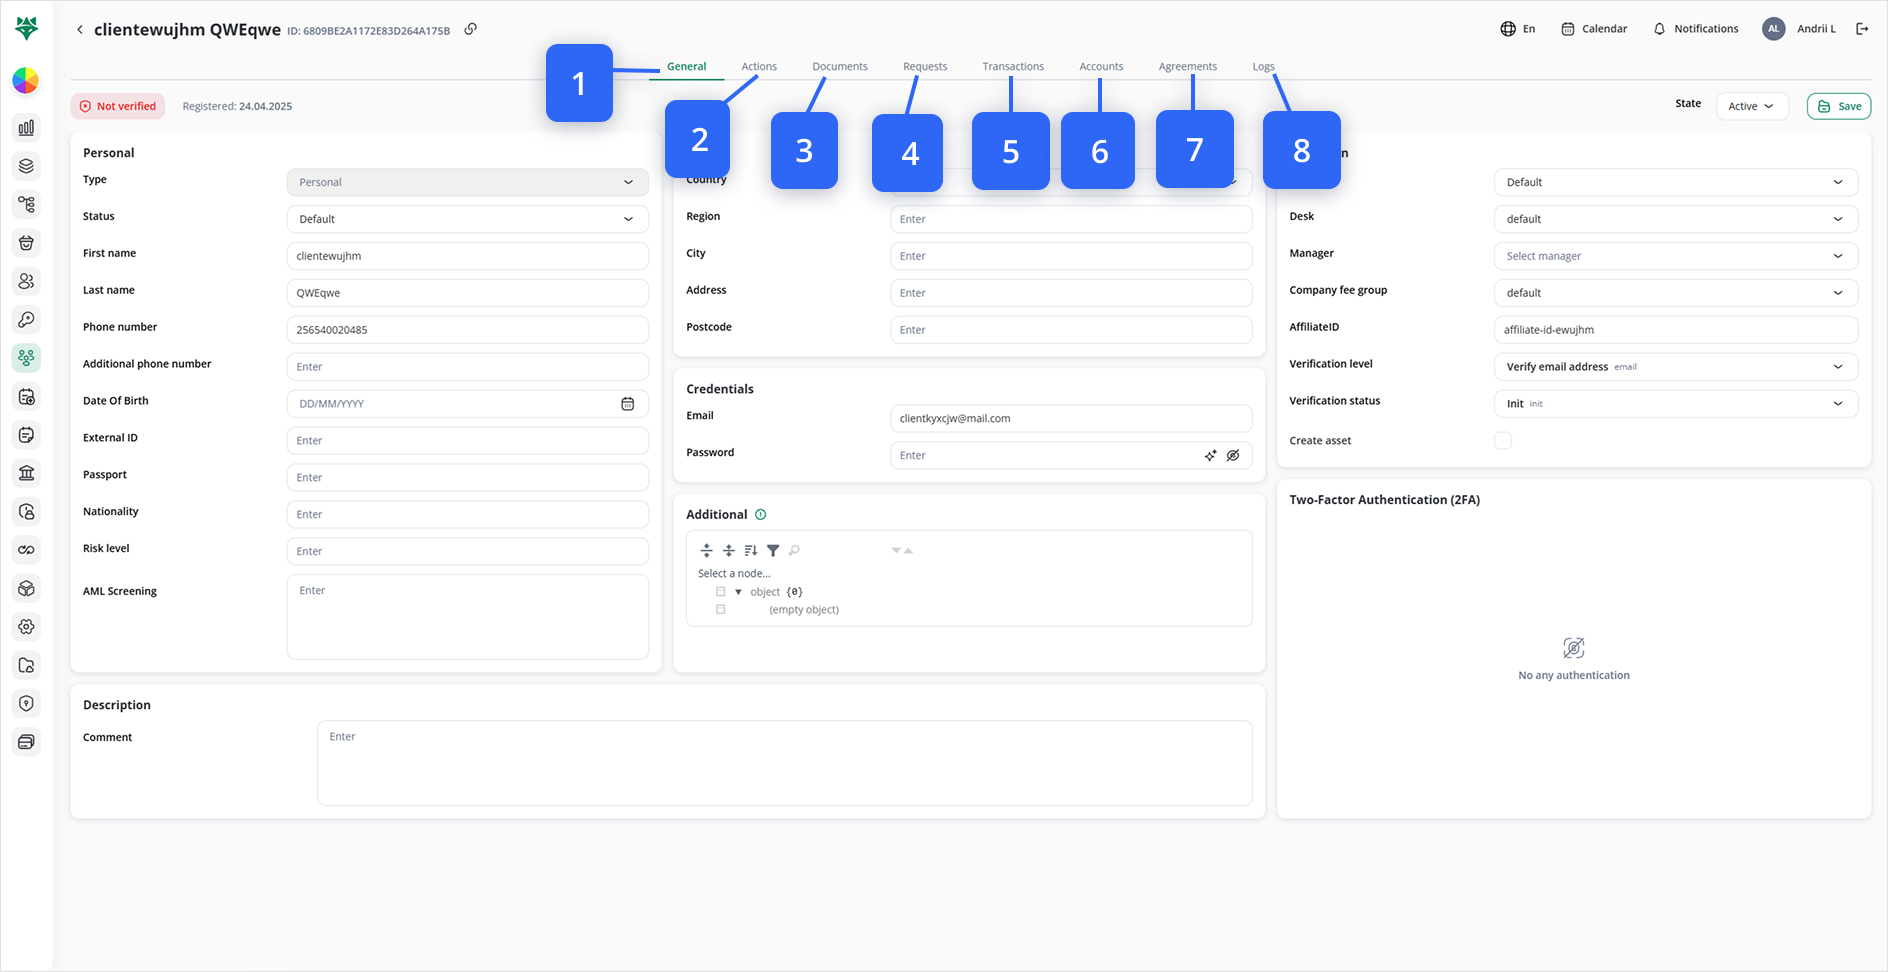
At the top of the client’s detail view you’ll see these tabs:
- General (default) (1)
- Actions (2)
- Documents (3)
- Requests (4)
- Transactions (5)
- Accounts (6)
- Agreements (7)
- Logs (8)
General Tab
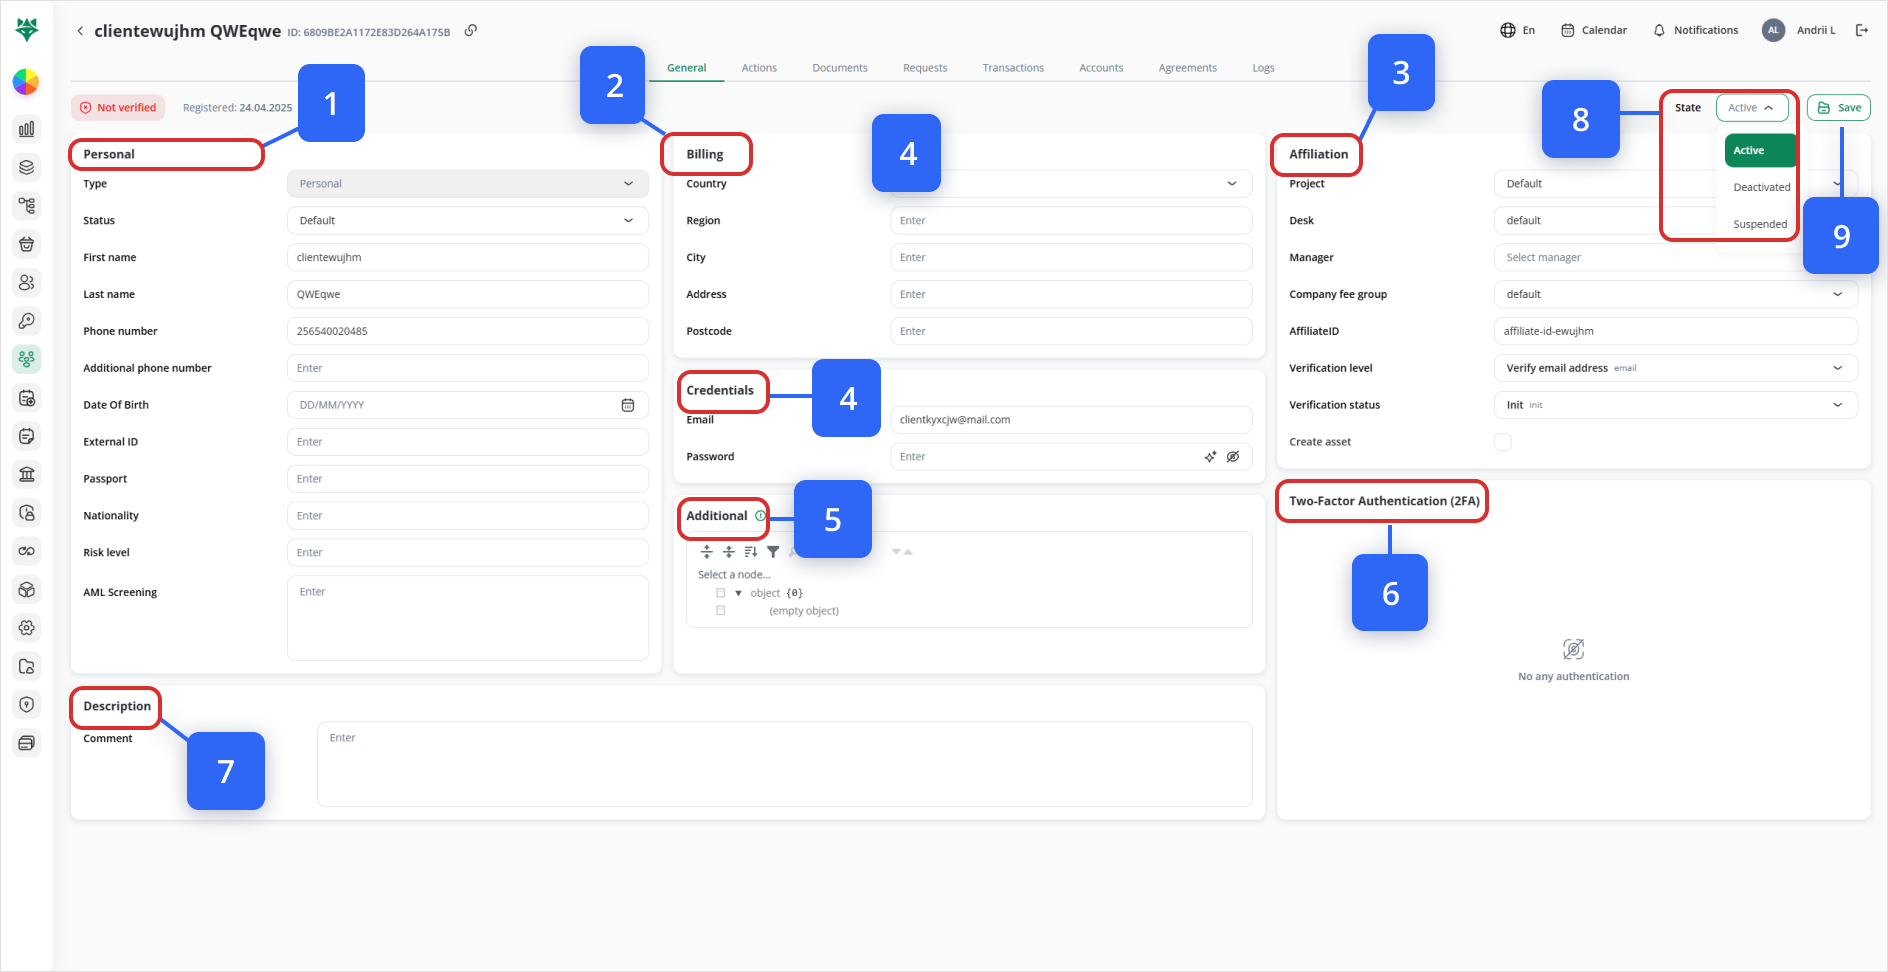
- Personal: Edit first/last name, phone, date of birth, passport, nationality, risk level, AML notes, etc.
- Billing: Update country, region, city, address, postcode.
- Affiliation: Change Project, Desk, Manager or Company fee group; update verification level/status.
- Credentials: Modify email or password (use the sparkle icon to generate and the eye icon to show/hide).
- Additional: Use the JSON tree picker to add or remove custom metadata fields.
- Two-Factor Authentication (2FA): View existing methods; hover over a method to Make default or delete non-default entries.
- Description: Add or edit free-form comments.
- State: Use the dropdown at top-right of the form to change the client’s status (e.g. Active, Deactivated, Suspended).
- Click Save when you’re done.
Actions Tab
1. Click Add action in the top-right.
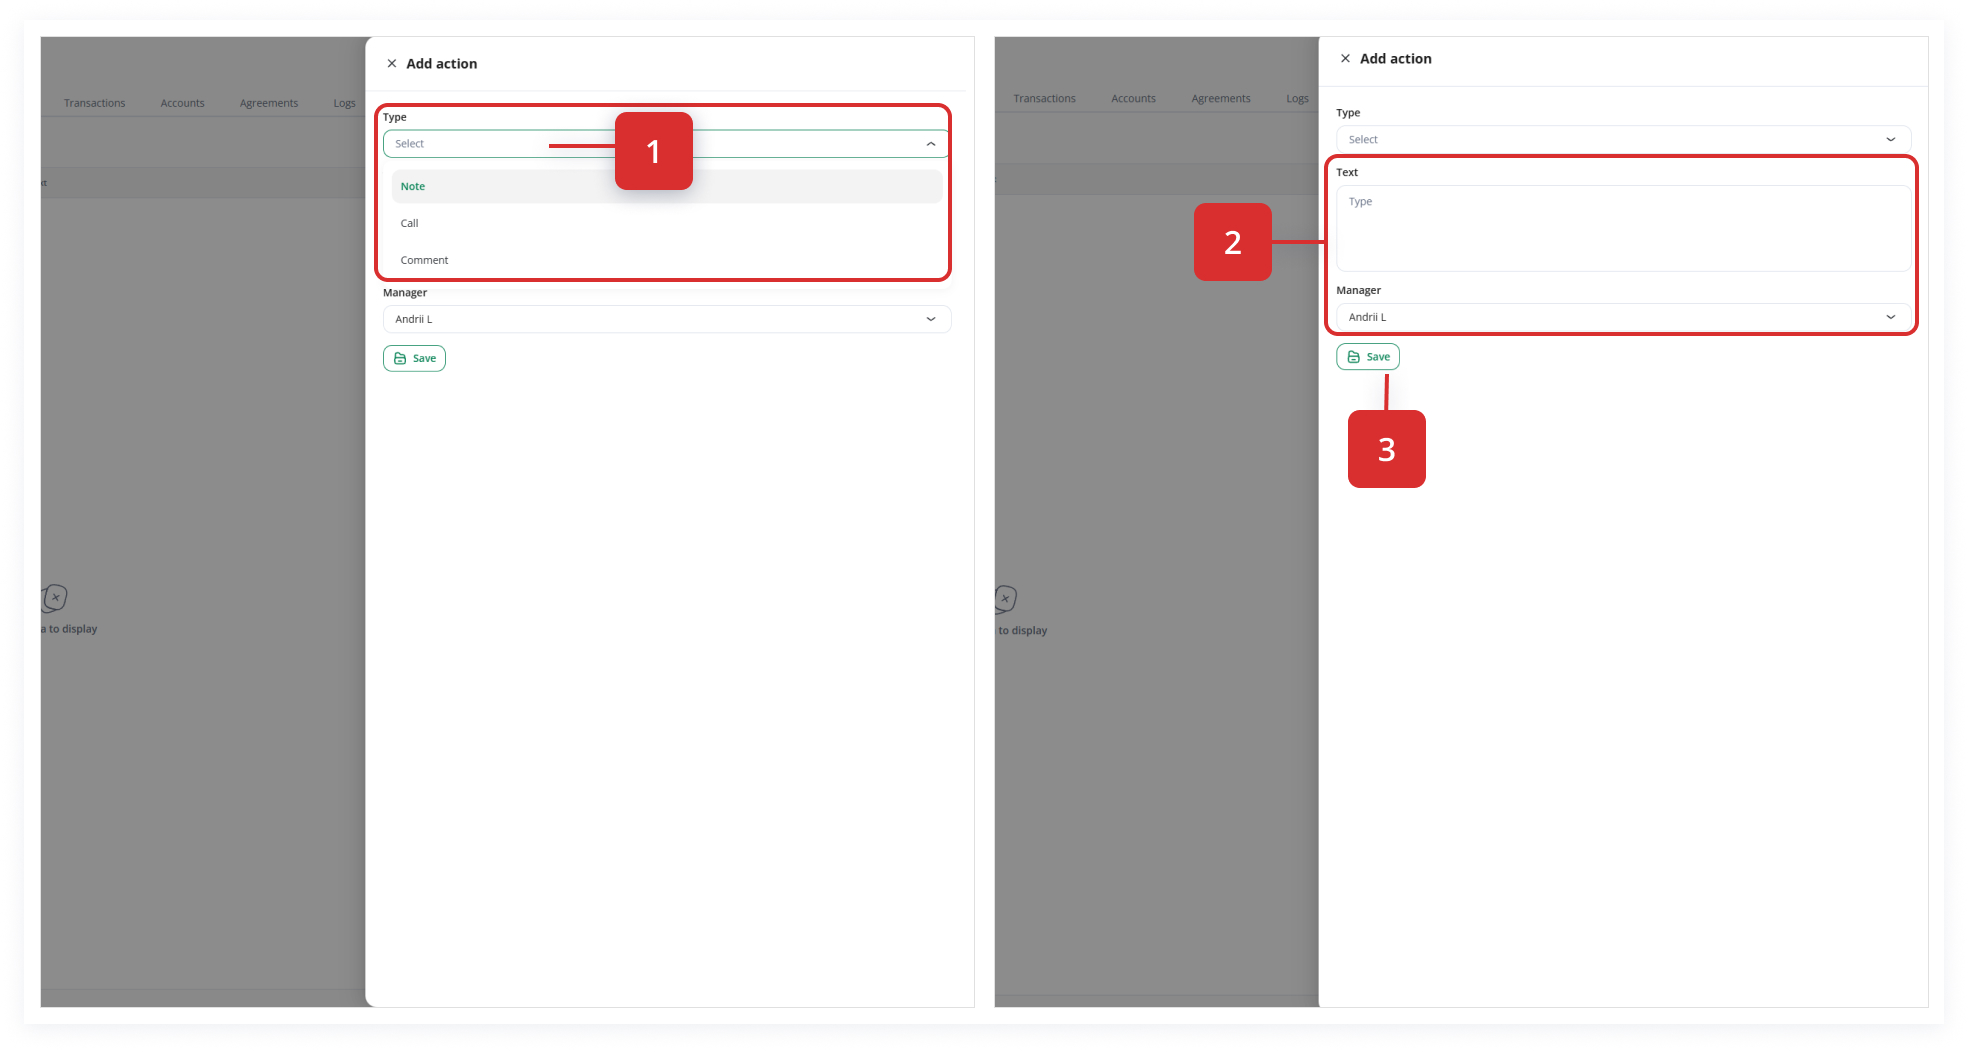
2. Choose a Type (Note / Call / Comment). (Step 1)
If Call, set an Action Date.
3. Enter the Text of your action.
For Call or Comment, select a Manager. (Step 2)
6. Click Save. (Step 3)
Note: You can edit any action later, but you cannot delete it or change its Type.
Documents Tab
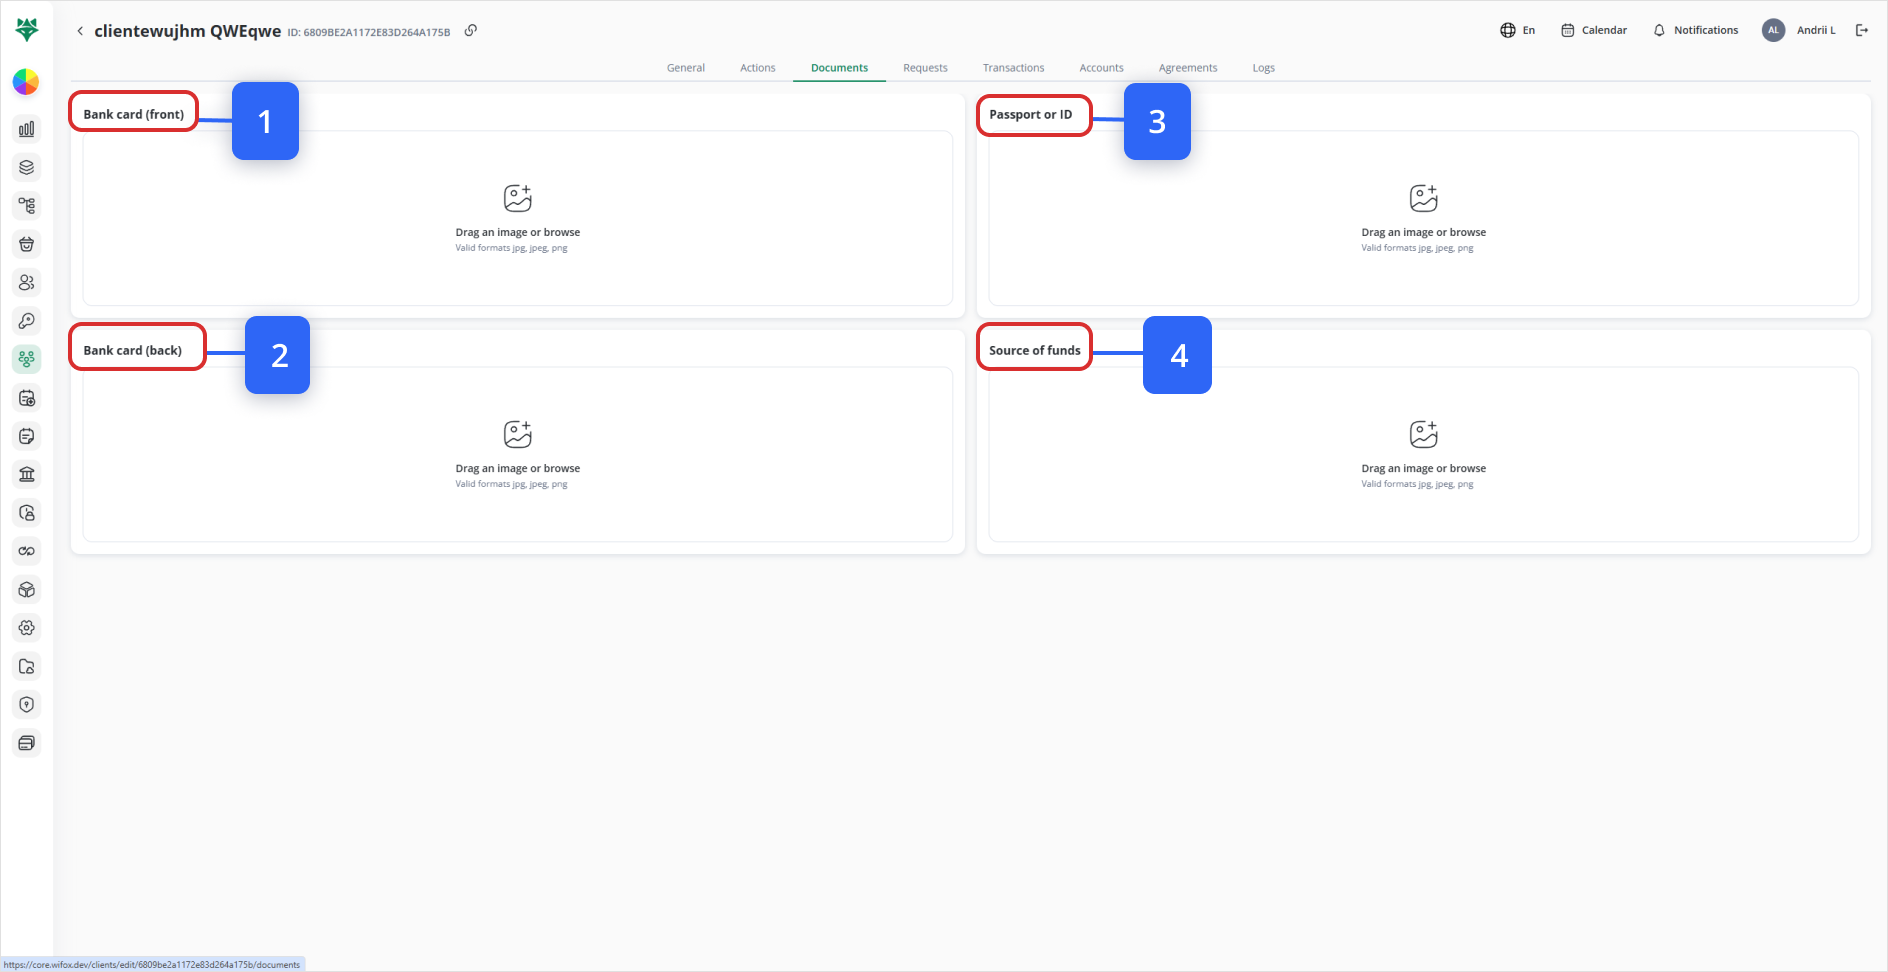
Upload or replace verification documents by dragging or browsing to add images for:
- Bank card (front) (1)
- Bank card (back) (2)
- Passport or ID (3)
- Source of funds (4)
Files save automatically.
Requests Tab
Click Add in the top-right.
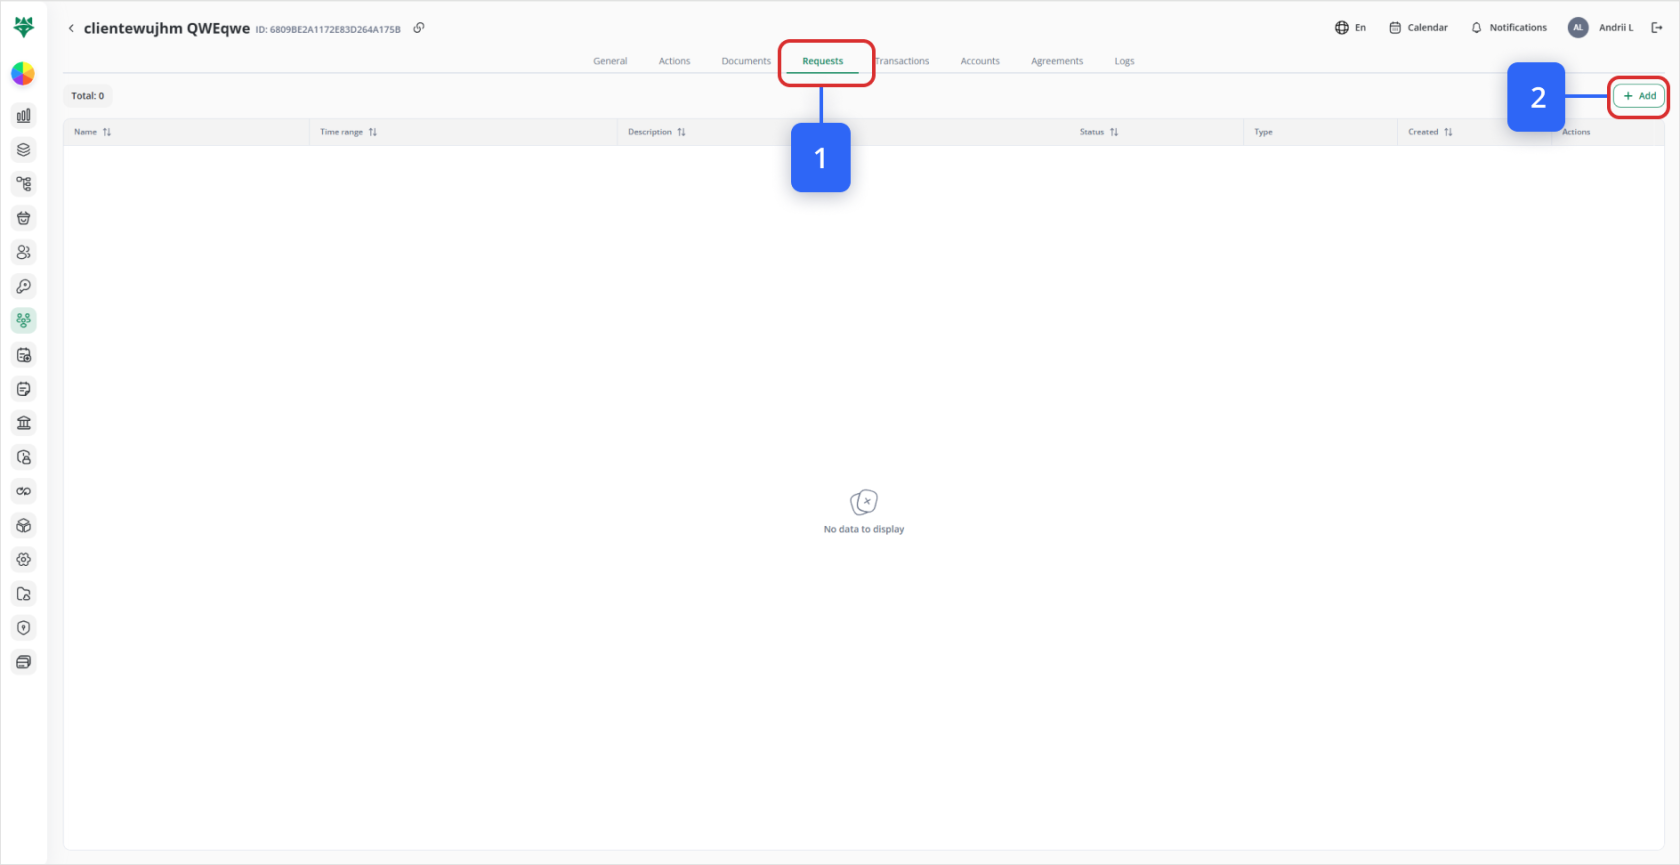
2. Fill in:
Name
Time range (start/end)
Project
Description
Additional information (free text)
Attach files if needed
Click Save.
New requests will appear in this list with status and creation date.
3.
Transactions Tab
-
-
View all financial transactions associated with this client.
-
No editing here—transactions are pulled from the Transactions module.
-
-
Accounts Tab
-
Click Add account.
-
Select the Account Type (e.g. Fiat, Crypto).
-
Optionally enter an External ID to link to a bank or external system.
-
Click Save.
-
To add funds or balances, click the Add asset icon on the account row, then:
-
Choose a Currency (system auto-detects fiat vs. crypto).
-
Enter a Balance.
-
For fiat, you may also enter an Address, External ID or Bank.
-
Click Save.
-
-
-
Agreements Tab
-
View any contractual agreements or signed documents linked to this client.
-
No direct editing—agreements are managed in the Agreements module.
-
-
Logs Tab
-
See a timestamped audit trail of all changes made to this client record.
-
Perfect for tracking who did what, and when.
-
Once you finish editing in any tab, be sure to click Save (where available) to commit your updates.
-
1.