
3. How to Create an Employee
Whether you need to update a user’s details, reassign them to different Projects, or completely revoke their access, the Employees module gives you a single place to do it. Follow the steps below, using the numbered calls out to guide you through each action.
Why You Might Edit an Employee
-
Change Contact or Name when someone legally updates their name or email.
-
Adjust Role or Permissions if they’re promoted or change teams.
-
Reassign Projects & Desks as responsibilities shift.
-
Enable / Disable 2FA for security policy updates.
Before You Begin
-
You cannot edit your own Role to a higher privilege than you currently hold.
-
To add a user to a Desk, they must already be assigned to that Project.
Step-by-Step Instructions
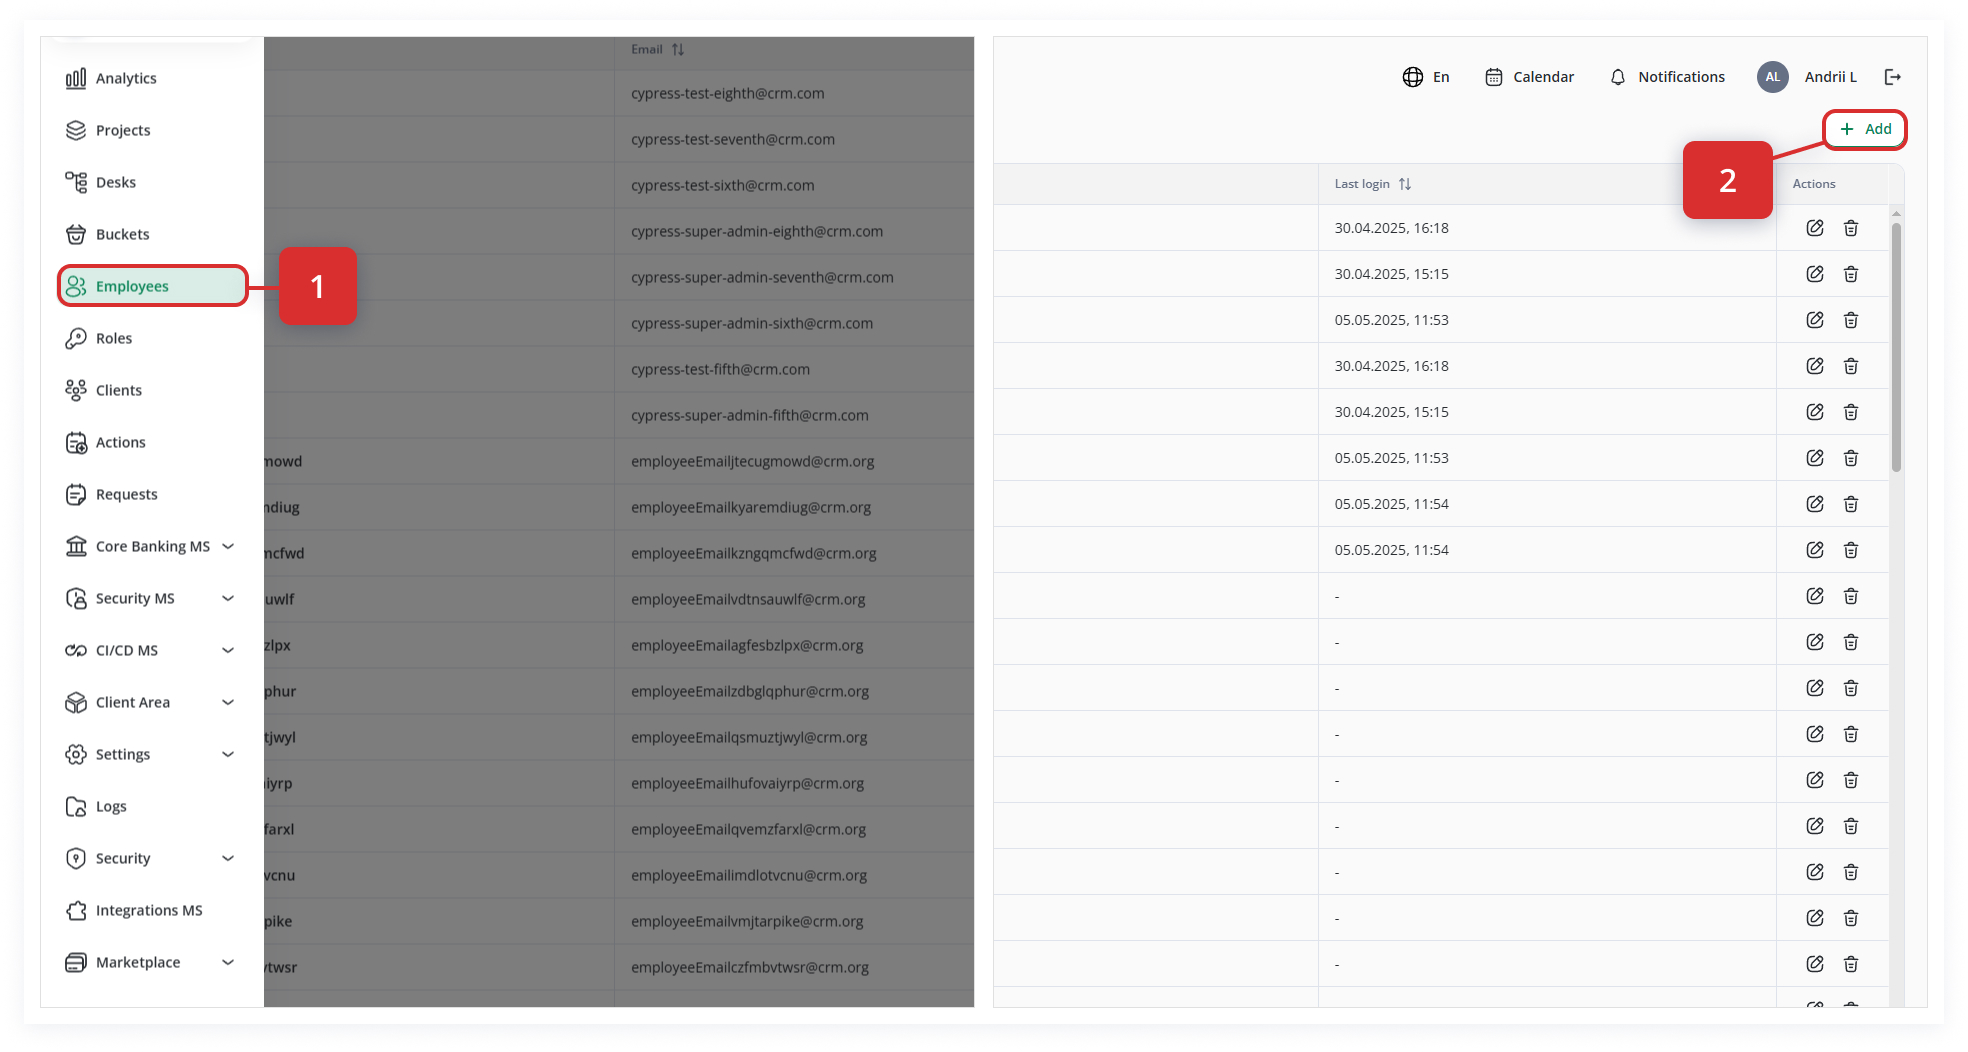
1. Open the Employees List
2. Launch the “Add Employee” Form
In the top-right corner of the Employees table, click + Add. A blank “Add employee” form appears.
3. Fill Out the General Information
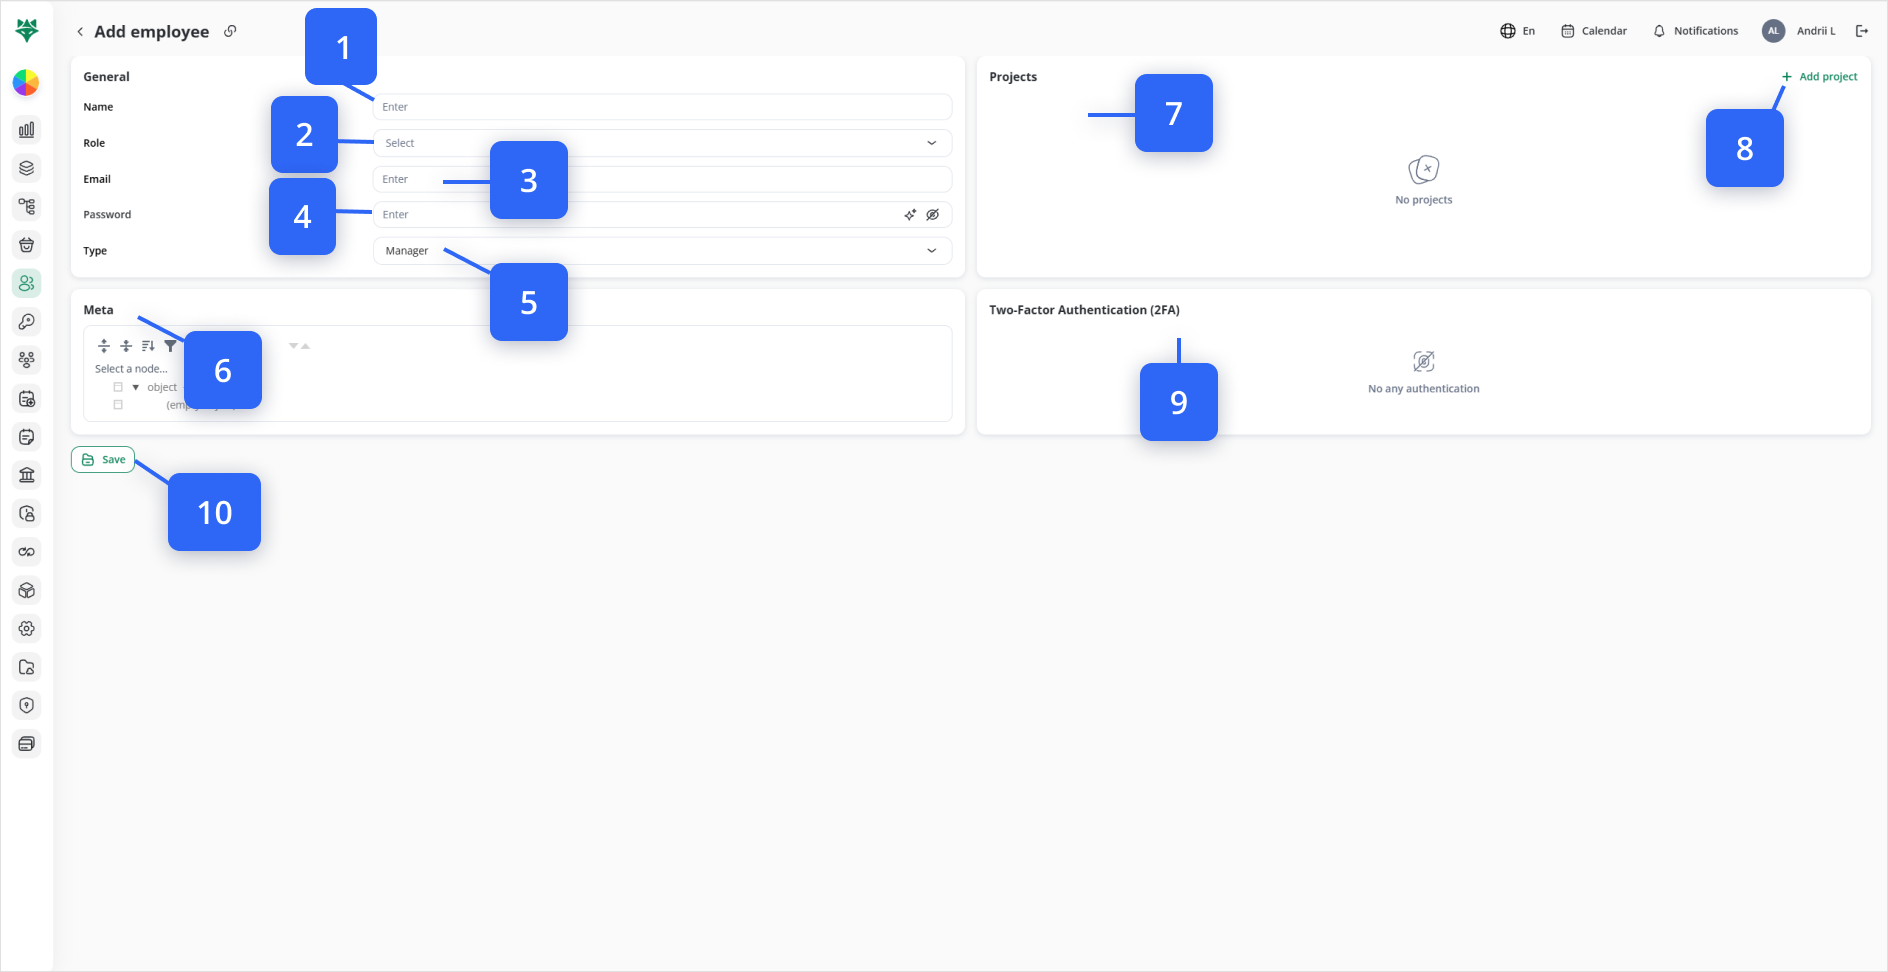
On the left side of the form, complete the core fields:
-
Name (Step #1): Enter the full name as you want it displayed (e.g. “Jane Doe”). Where: Topmost text box.
-
Role (Step #2): Select the system role (Admin, Viewer, etc.) from the dropdown. This determines which modules and actions the user can access. Where: Directly under Name, as a dropdown.
-
Email (Step #3): Enter the user’s email address, which becomes their login and the target for system notifications. Where: Under Role, as a text box.
-
Password (Step #4): Type a secure password (minimum 8 characters, with uppercase, lowercase, number, and special character). Where: Under Email, as a text box with two icons on the right.
-
Click the ✨ “Generate” icon to auto-create a strong password.
-
Use the 👁 “Show/Hide” icon to verify your entry.
-
-
Type (Step #5): Choose a user category (Manager, Support, Sales, etc.) from the dropdown—useful for reporting and default assignments. Where: Under Password, as a dropdown.
4. (Optional) Tag with Custom Metadata
Below General, use the Meta tree picker (Step #6) to assign any custom tags—such as Region, Business Unit, or Department. These tags power advanced filters and permission scopes elsewhere.
5. Assign Projects
On the right side of the form:
-
Projects Panel (Step #7): Shows which Projects this employee can access.
-
Click + Add project (Step #8) to open a dropdown of all available Projects. Select one or more to grant access.
-
Once a Project is assigned, you can later add the employee to specific Desks within that Project via the Desks module.
-
6. Configure Two-Factor Authentication (2FA)
Below the Projects panel, the Two-Factor Authentication section (Step #9) displays whether WebAuthn or TFA is enabled for this user. No action is needed here during creation—2FA setup occurs on first login.
7. Save Your New Employee
When all required fields are complete (and any optional settings chosen), click Save in the bottom-left corner of the form (Step #10). You’ll return to the main Employees list, where the new user now appears with their details, assigned Projects, and metadata.
By following these steps—each tied to the corresponding form element—you’ll ensure every new employee is correctly configured with the proper access, roles, and security settings in WBCS.
Best Practices & Tips