
3. How to Create a Request
ToThe createRequests module is your single pane of glass for all client-initiated actions—support tickets, callback bookings, document uploads, feedback submissions, and more. Each request is automatically tied to a request,specific Client and Project, ensuring that nothing falls through the cracks. By using Requests you gain:
-
Centralized Tracking: Every inquiry lives in one list with clear status indicators (Active, Archived).
-
Structured Context: Attach files, set time windows, and capture custom data so your team has everything they need.
-
Accountability & Audit: Who opened, who owns, when it was created—and a complete message thread for full transparency.
Below is a step-by-step guide to creating and viewing requests in the system.
1. Open the Requests Module
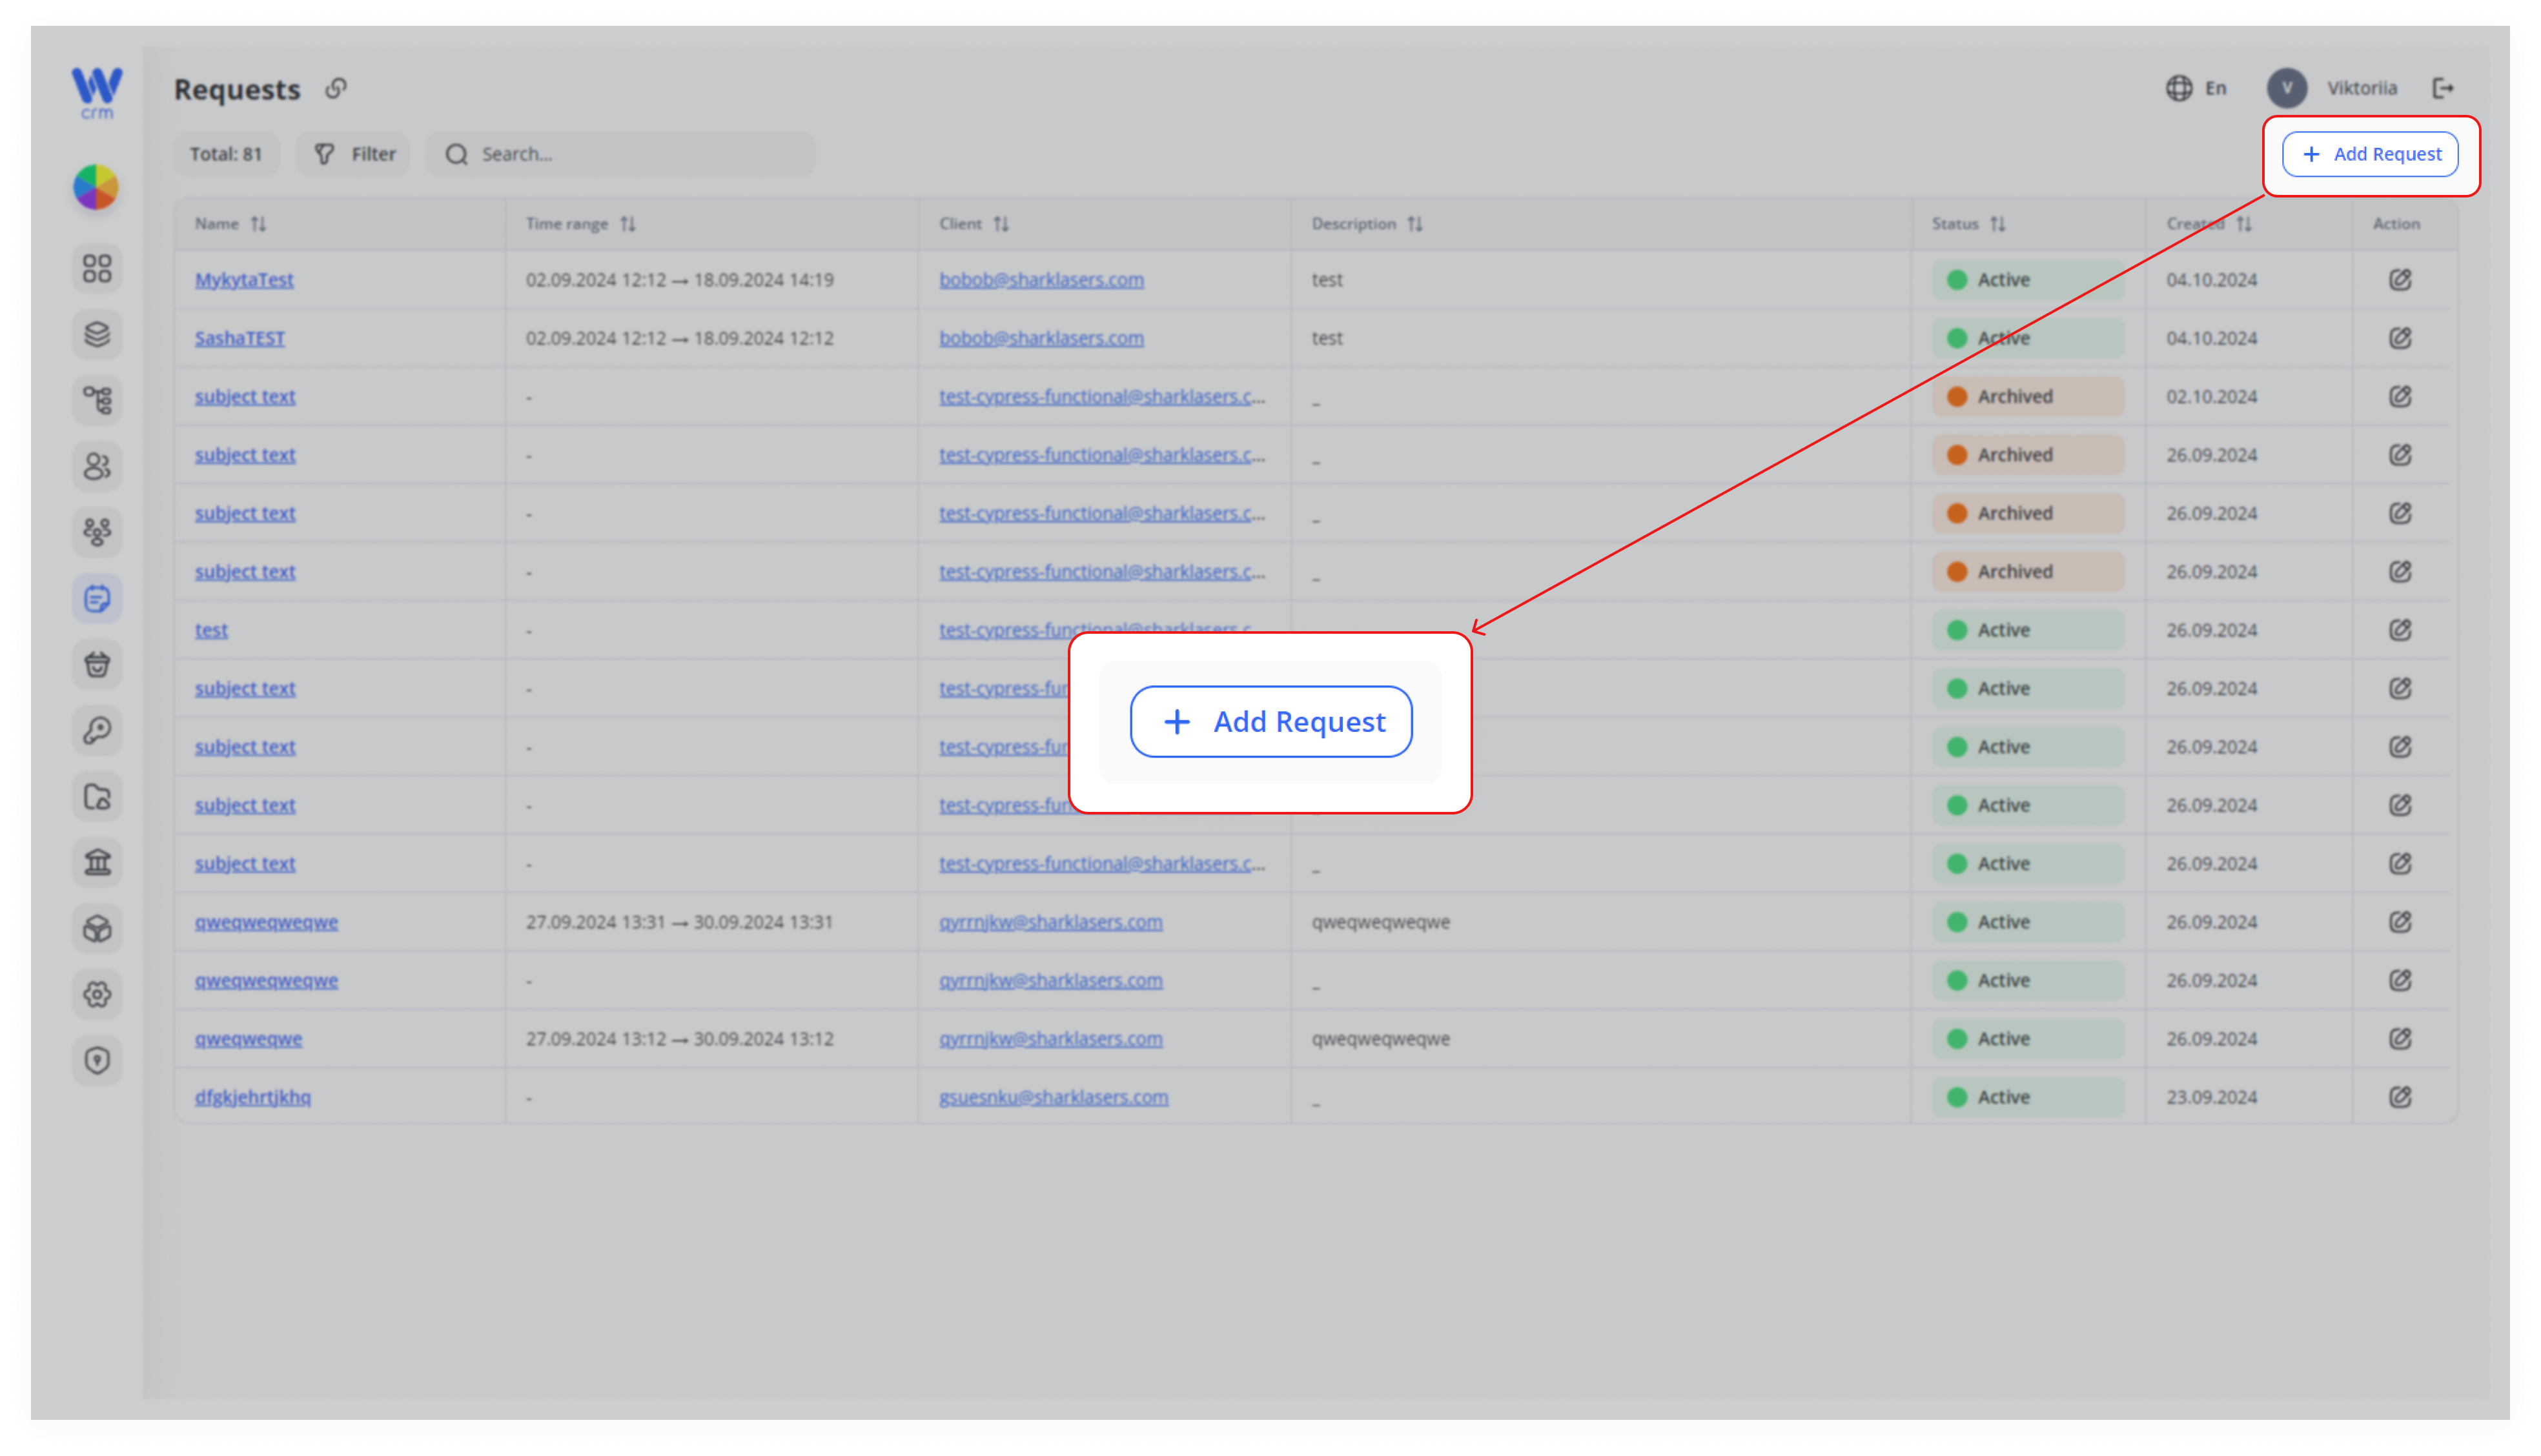
From the left-hand nav, click Requests. The main Requests list shows total count, filters, search, and the table of existing requests.
2. Launch the “Add Request” Form
Click the + Add Request button atin the top top-right of the Requests tab:corner.
A3. windowComplete willthe openGeneral whereSection
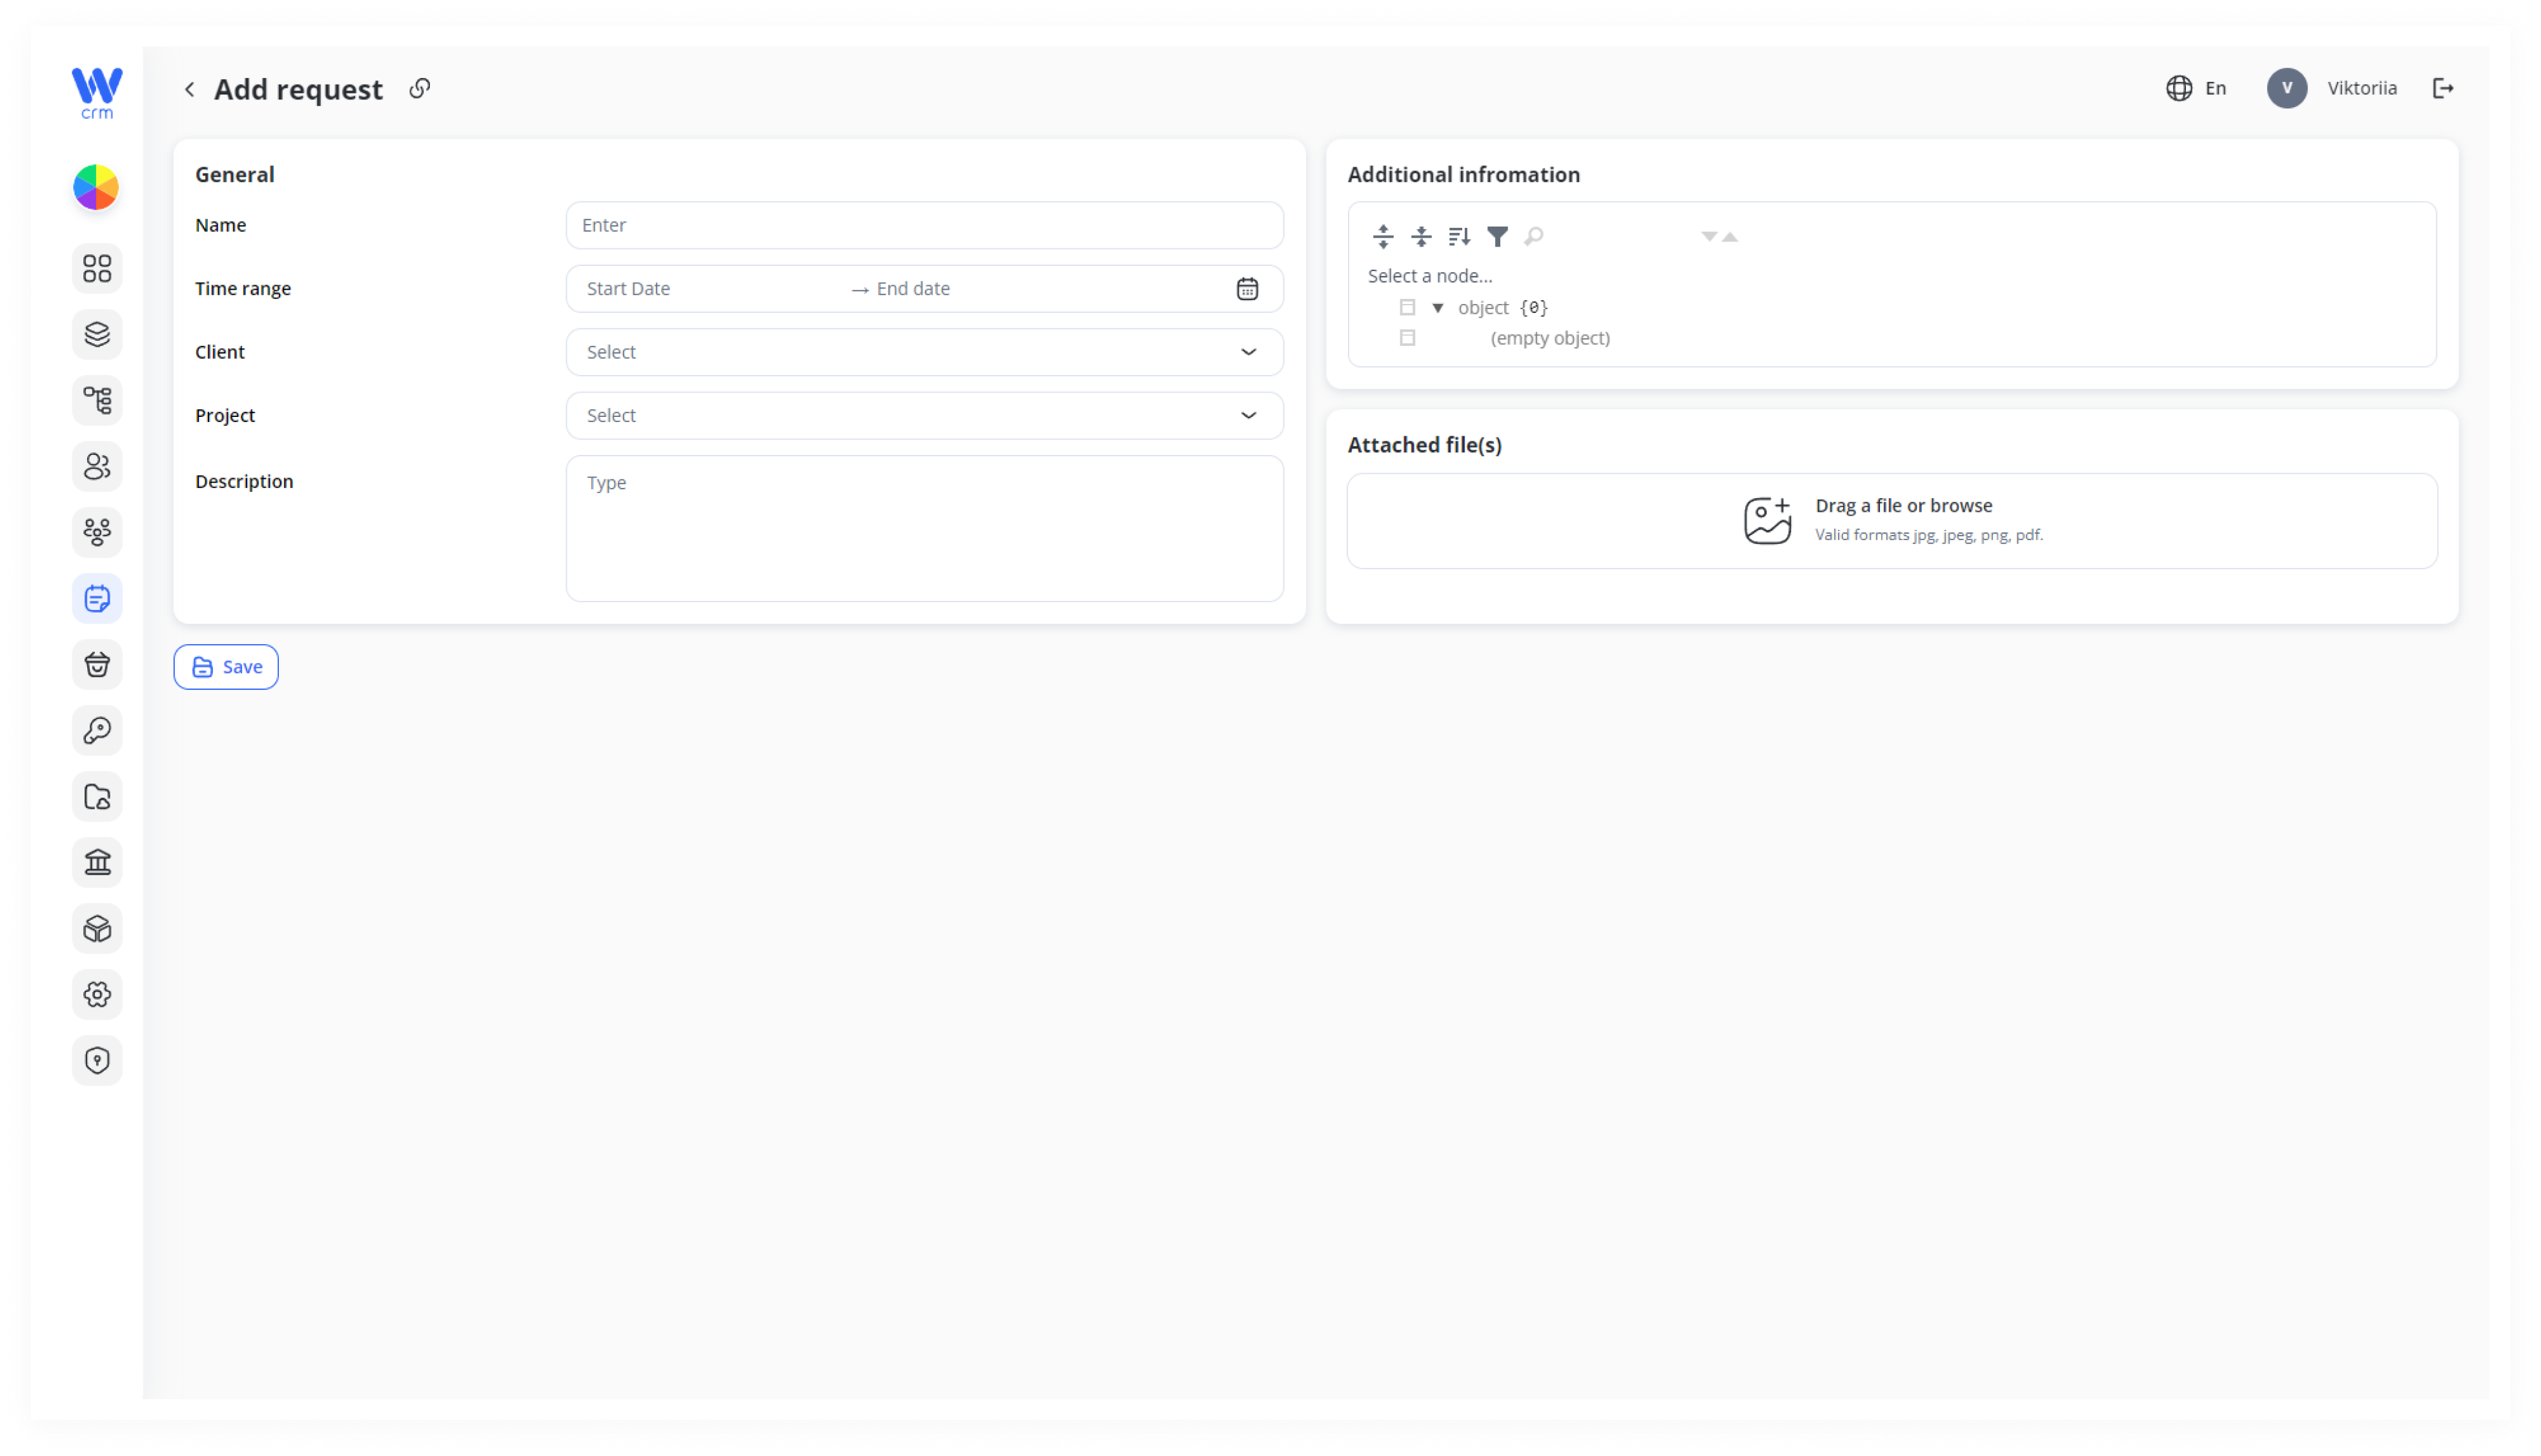
Fill in theeach requestfield parameters.as Enterfollows:
| Field | Description |
|---|---|
| Name | Descriptive title (e.g., “Network Outage” or |
| Time |
(Optional) |
| Client | Pick the client from the dropdown. This cannot be changed after saving. |
| Project | Choose the project context (e.g., “Web Portal Support”). |
| Description | Free-text details provided by the client or added by you for |
Client: The client to which the request is assigned.
Project: The project to which the request is assigned.
Note: Once saved, you cannot change the client of the request.
Optionally,4. youAdd canCustom enterData a(Additional Information)
Use the Description.Additional informationYou alsoJSON can attach filestree to theset requestsany viastructured thefields (e.g., priority: "high", documentType: "KYC"). This is ideal for downstream automation or reporting.
5. Attach Supporting Files
Drag-drop or click Browse under Attached file(s) blockto andupload addscreenshots, alogs, customor fieldPDFs. viaValid Additionalformats: information.JPG, PNG, PDF.
ClickWhen ready, click Save to saveat the request.bottom of the panel.
The panel closes and your new request appears at the top of the Requests list with Status = Active.
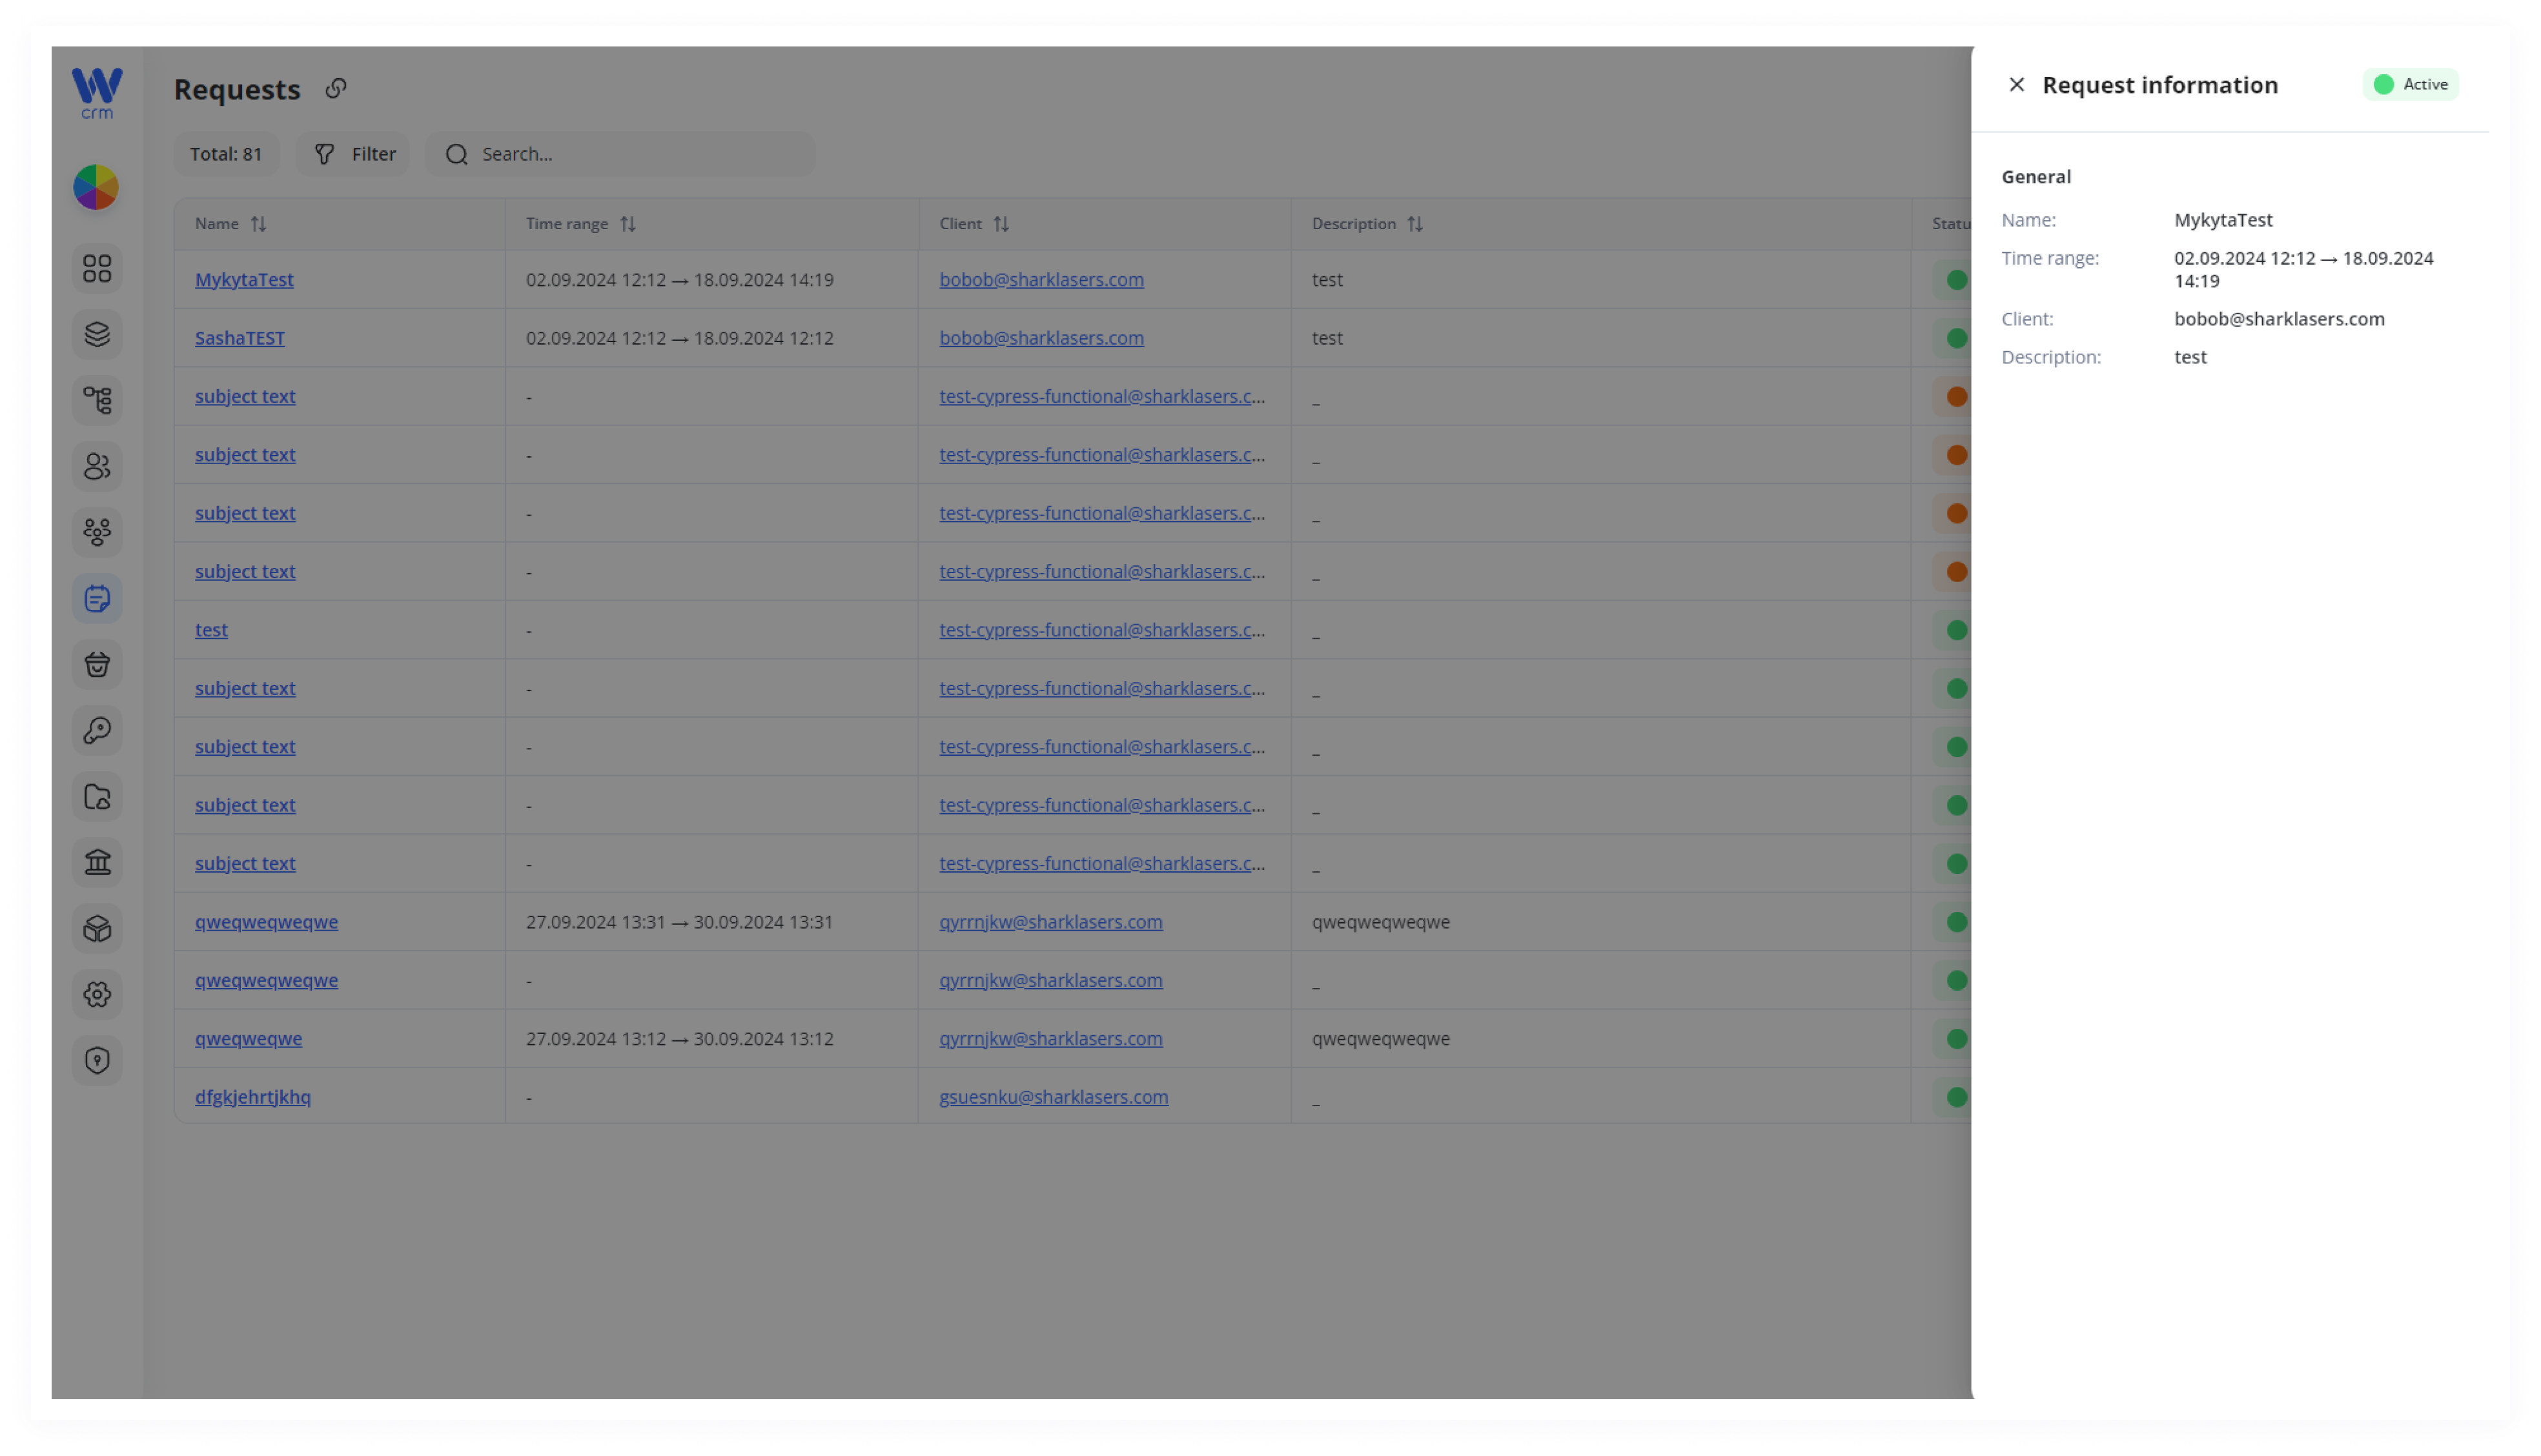
To view information about created requests, go to the Requests tab and click on the name of the specific request. A drawer will appear with information about it:
Viewing & Managing a Request
Open a Request: Click any request’s Name in the list.
Inspect Details: A Request information drawer opens on the right, displaying:
- General fields (Name, Time range, Client, Description)
- Status badge (Active, Archived)
- Attached files and any custom data
- Full message thread and metadata
Conclusion
By leveraging the Requests module you ensure that every client touchpoint is:
-
Logged: No more lost emails or ad-hoc notes.
-
Linked: Always tied to the right client and project for clear ownership.
-
Transparent: Full audit trail and effortless status tracking.
This standardized process boosts team efficiency, improves response times, and elevates client satisfaction across all service lines