
3. How to Create a Project
1. Open the Projects Module
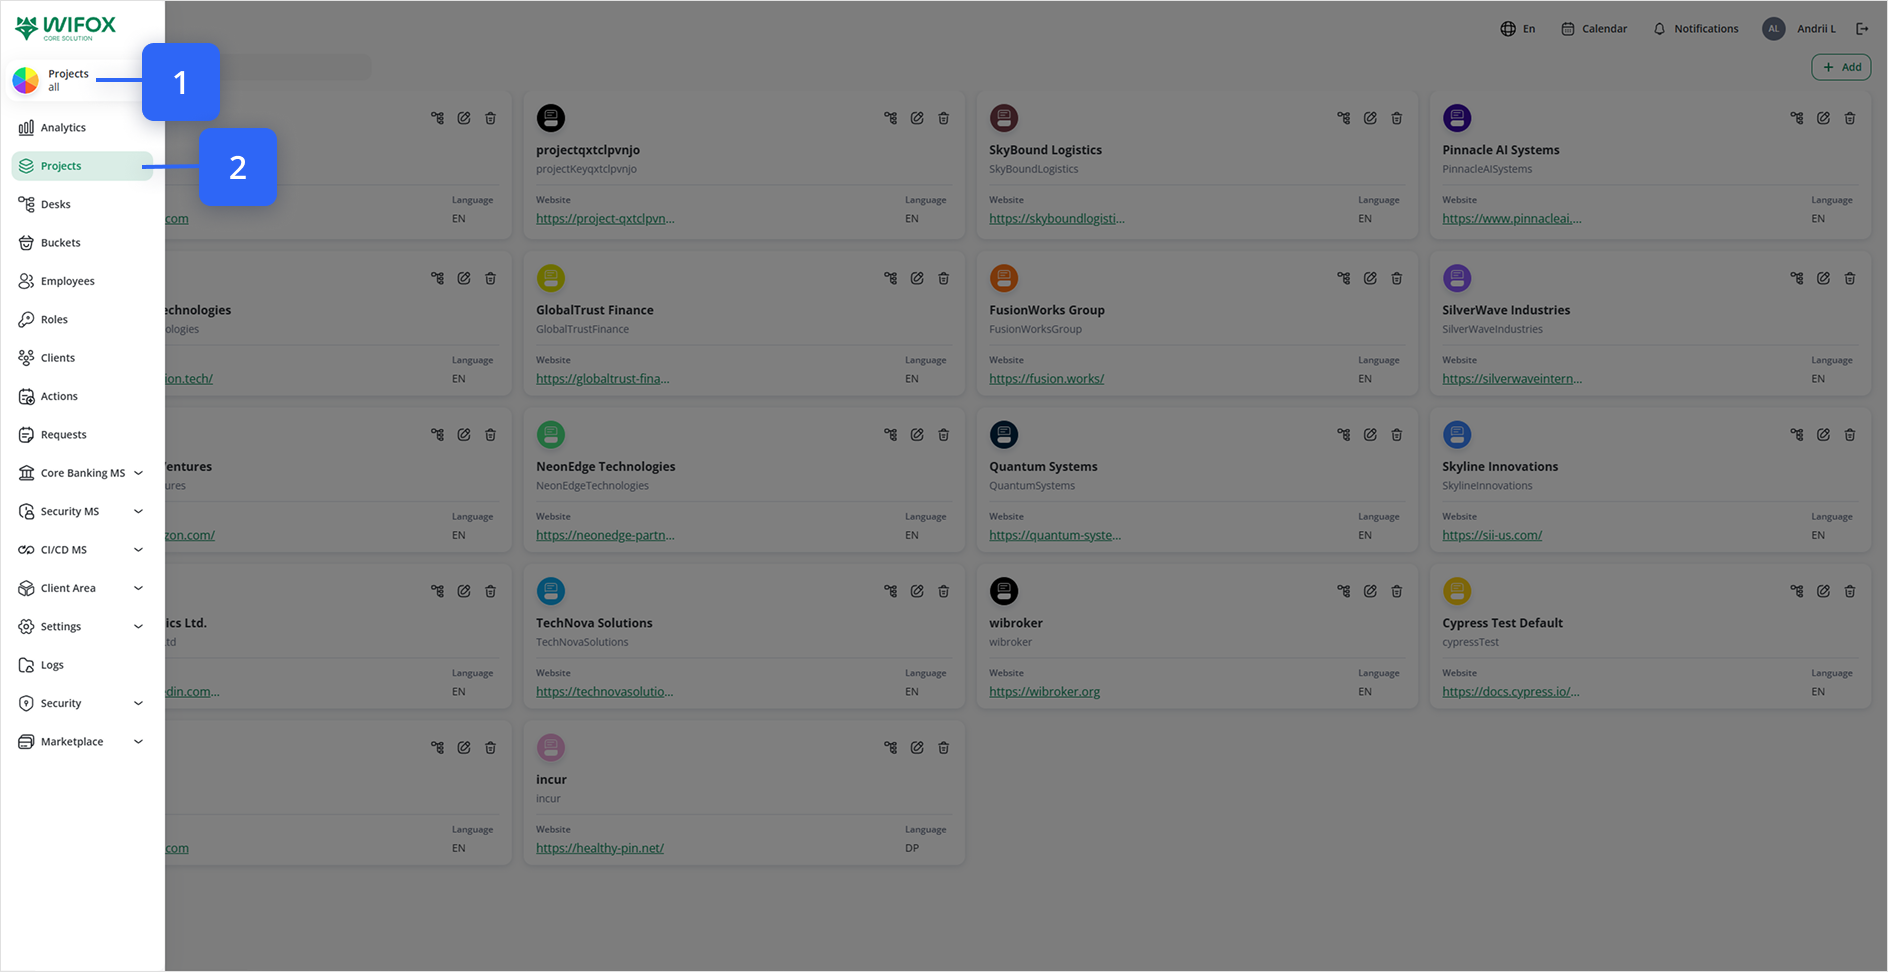
From the left-hand nav, click Projects.
2. Click Add to Create a New Project
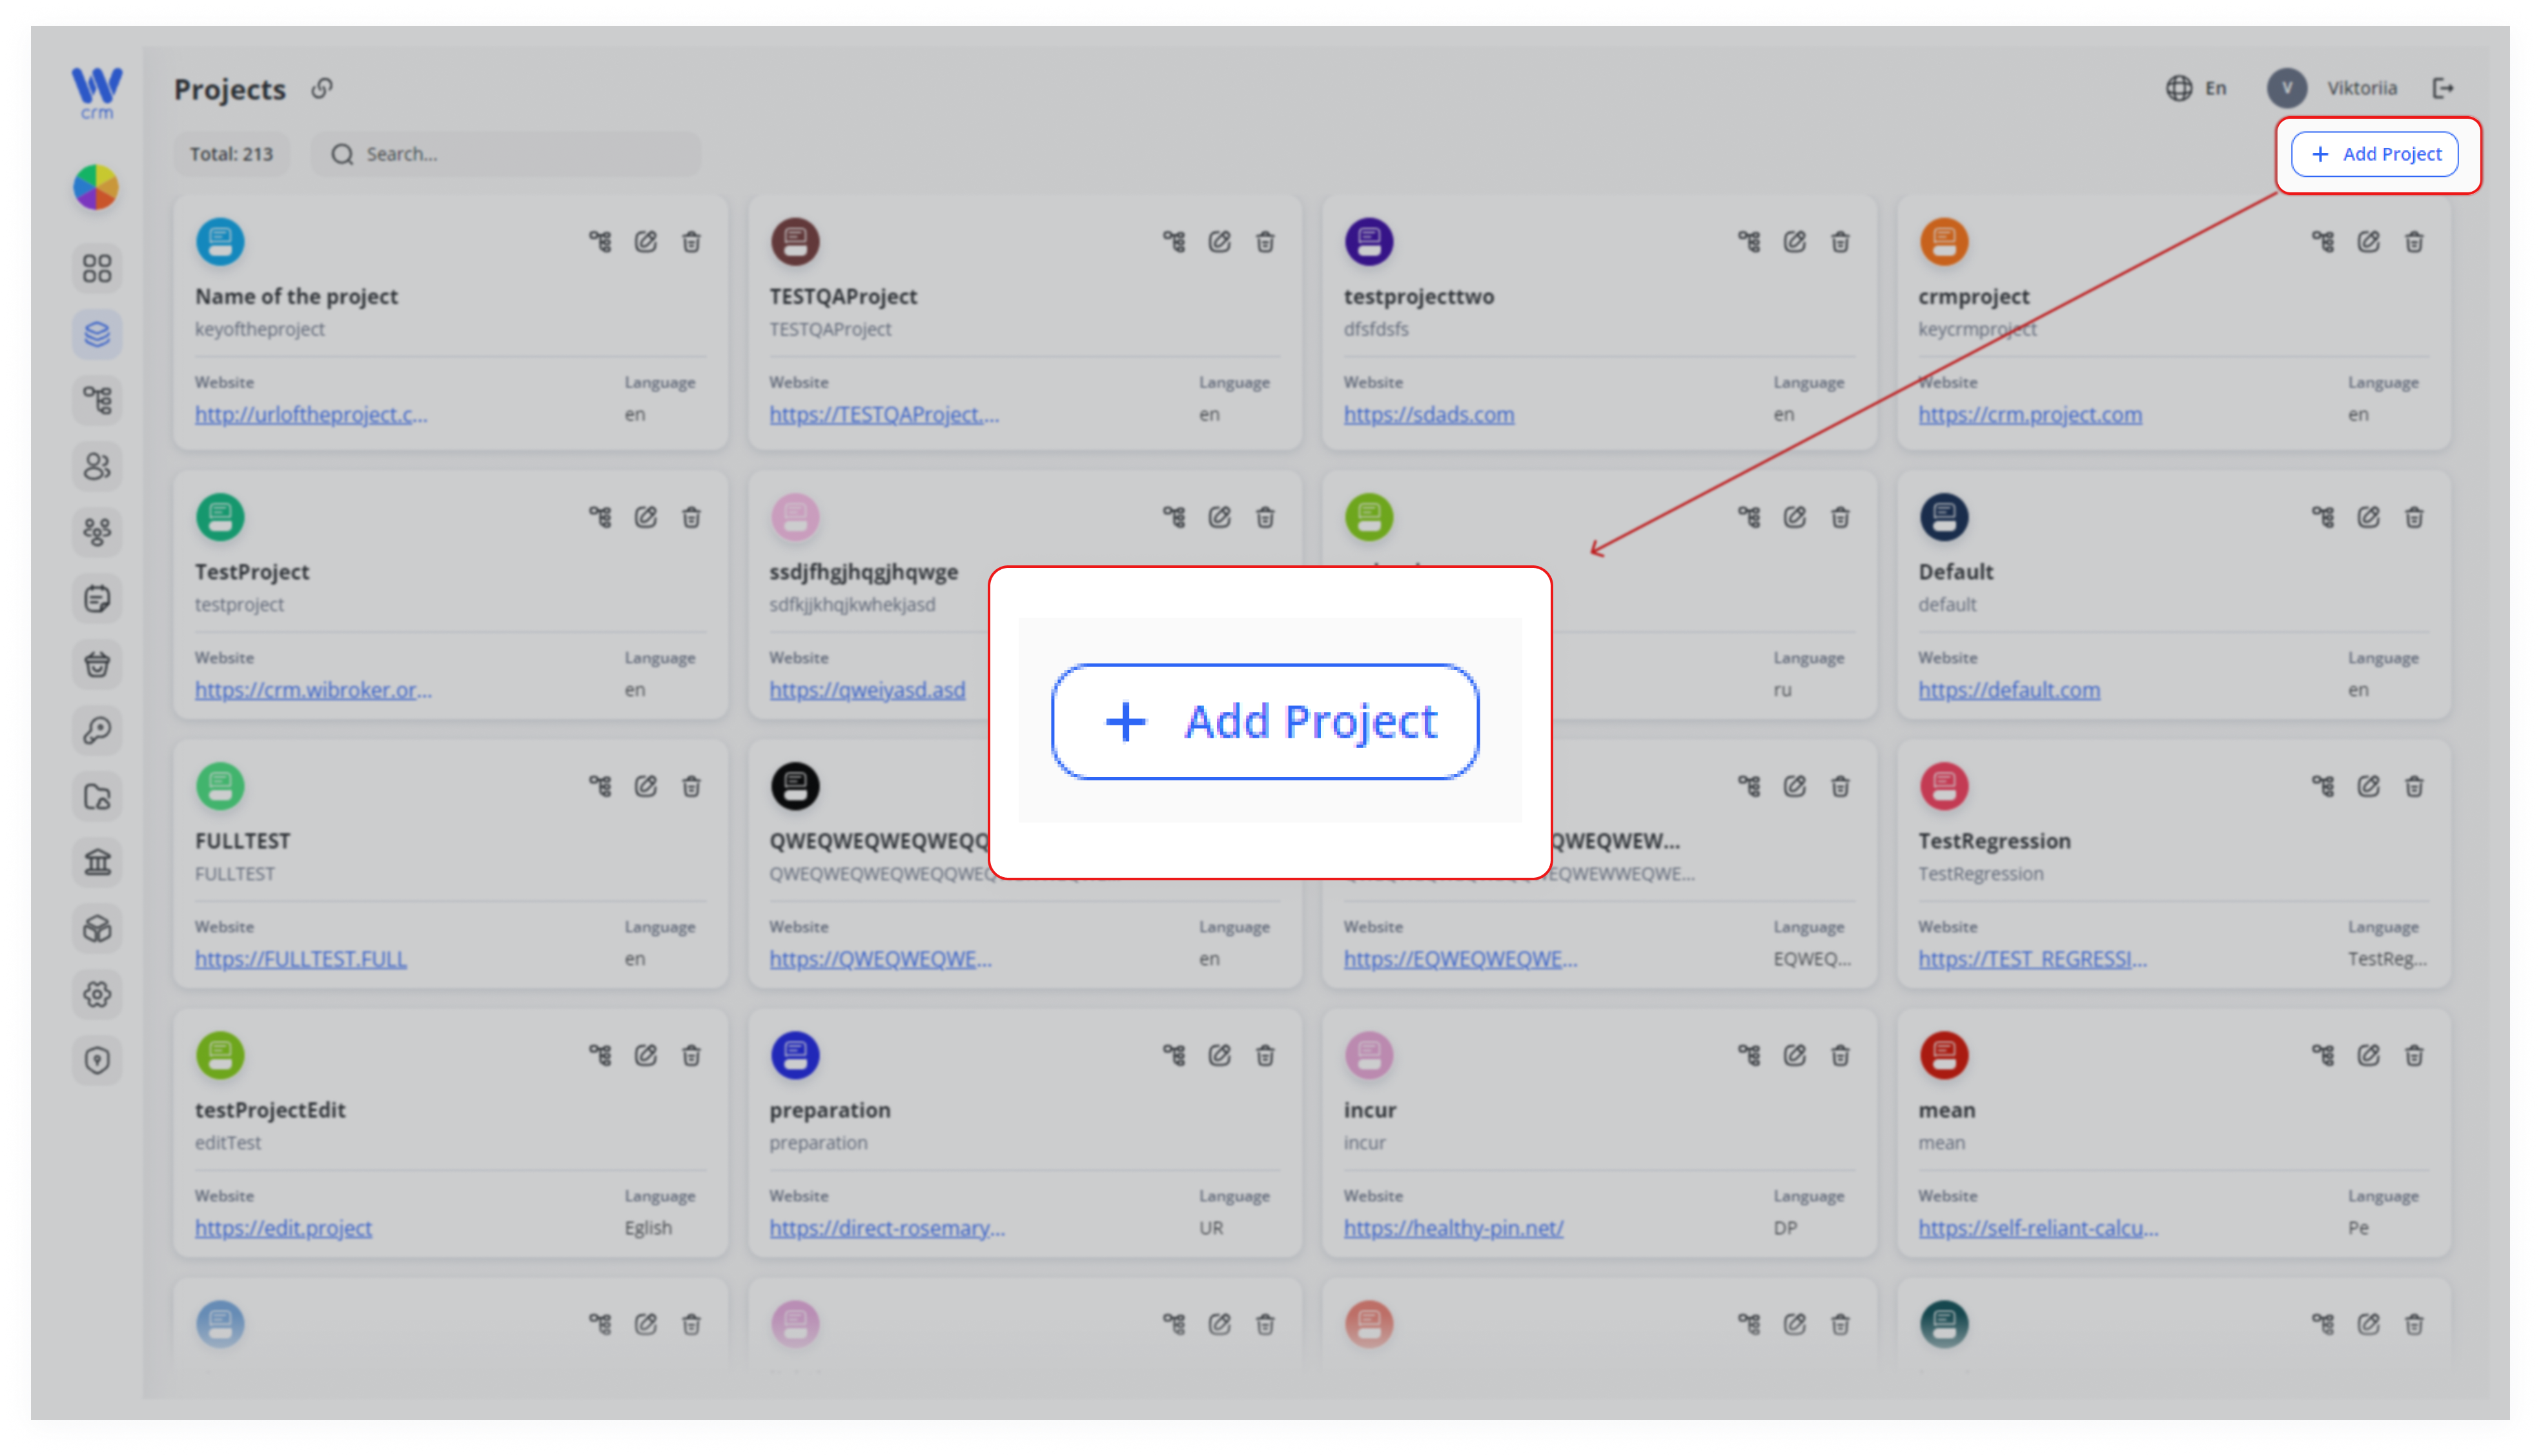
In the top-right corner of the Projects list, click the + Add button.
3. Fill in the General Section
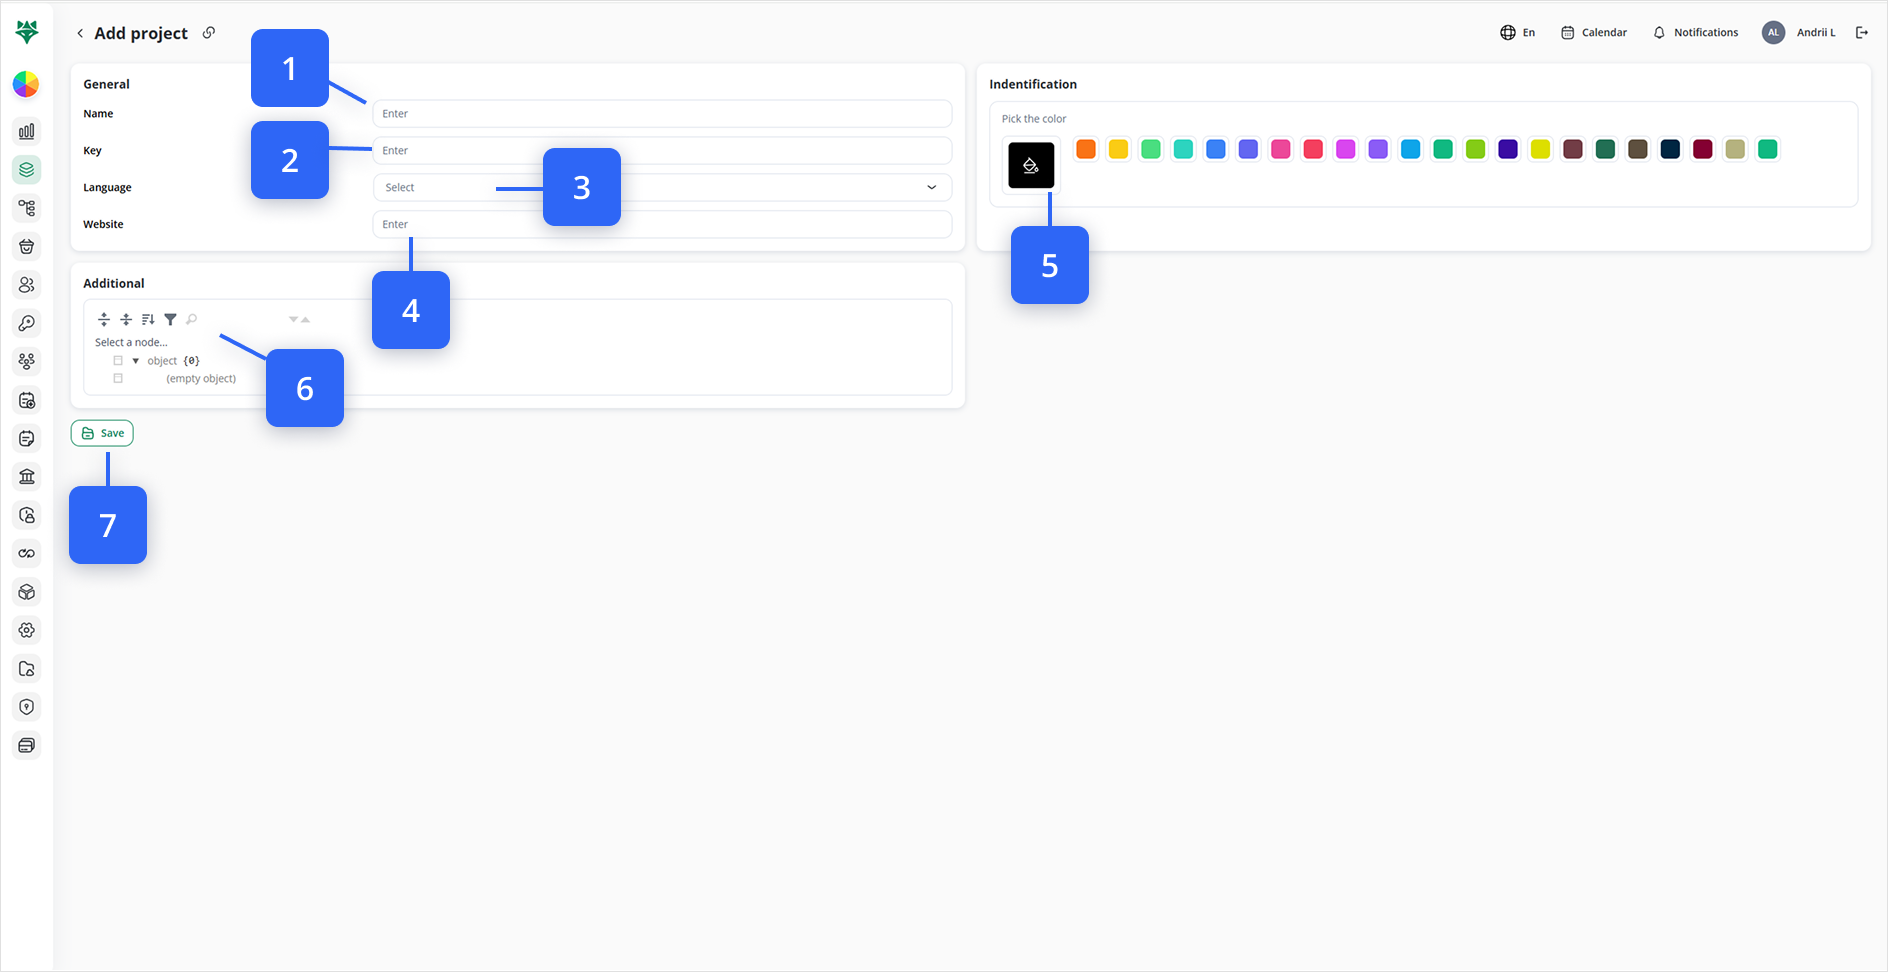
Name (Step #1): Human-readable project name (e.g. “Acme Website”)
Key (Step #2): Unique internal code (e.g. ACME_WEB)
Language (Step #3): Select the project’s default locale
Website (Step #4): (Optional) URL for the project’s live site
4. Choose a Color/Icon for Easy Identification
Click the color swatch in the Identification panel (Step #5)
Select one of the preset colors (or custom icon) to visually tag this project throughout the app
5. (Optional) Configure Additional Settings
Use the Additional tree picker to assign this project to any high-level nodes (e.g. regions, business units, custom tags) (Step #6)
6. Save Your New Project (Step #7)
Once all required fields are set, click Save at the bottom left. You’ll be returned to the Projects list, where your new entry will appear with its chosen color and key.