
3. How to Create a Desk
Desks in Wifox Business Core Solution are the building blocks of your organizational structure within each Project. Think of a Desk as a department, office, or specialized workstream—such as “Sales,” “Support,” or “Analytics.” By creating multiple Desks, you can keep client data, employee assignments, and workflows neatly separated, ensuring that each team only sees and manages the records relevant to their function.
Step 1. Open the Desks Module
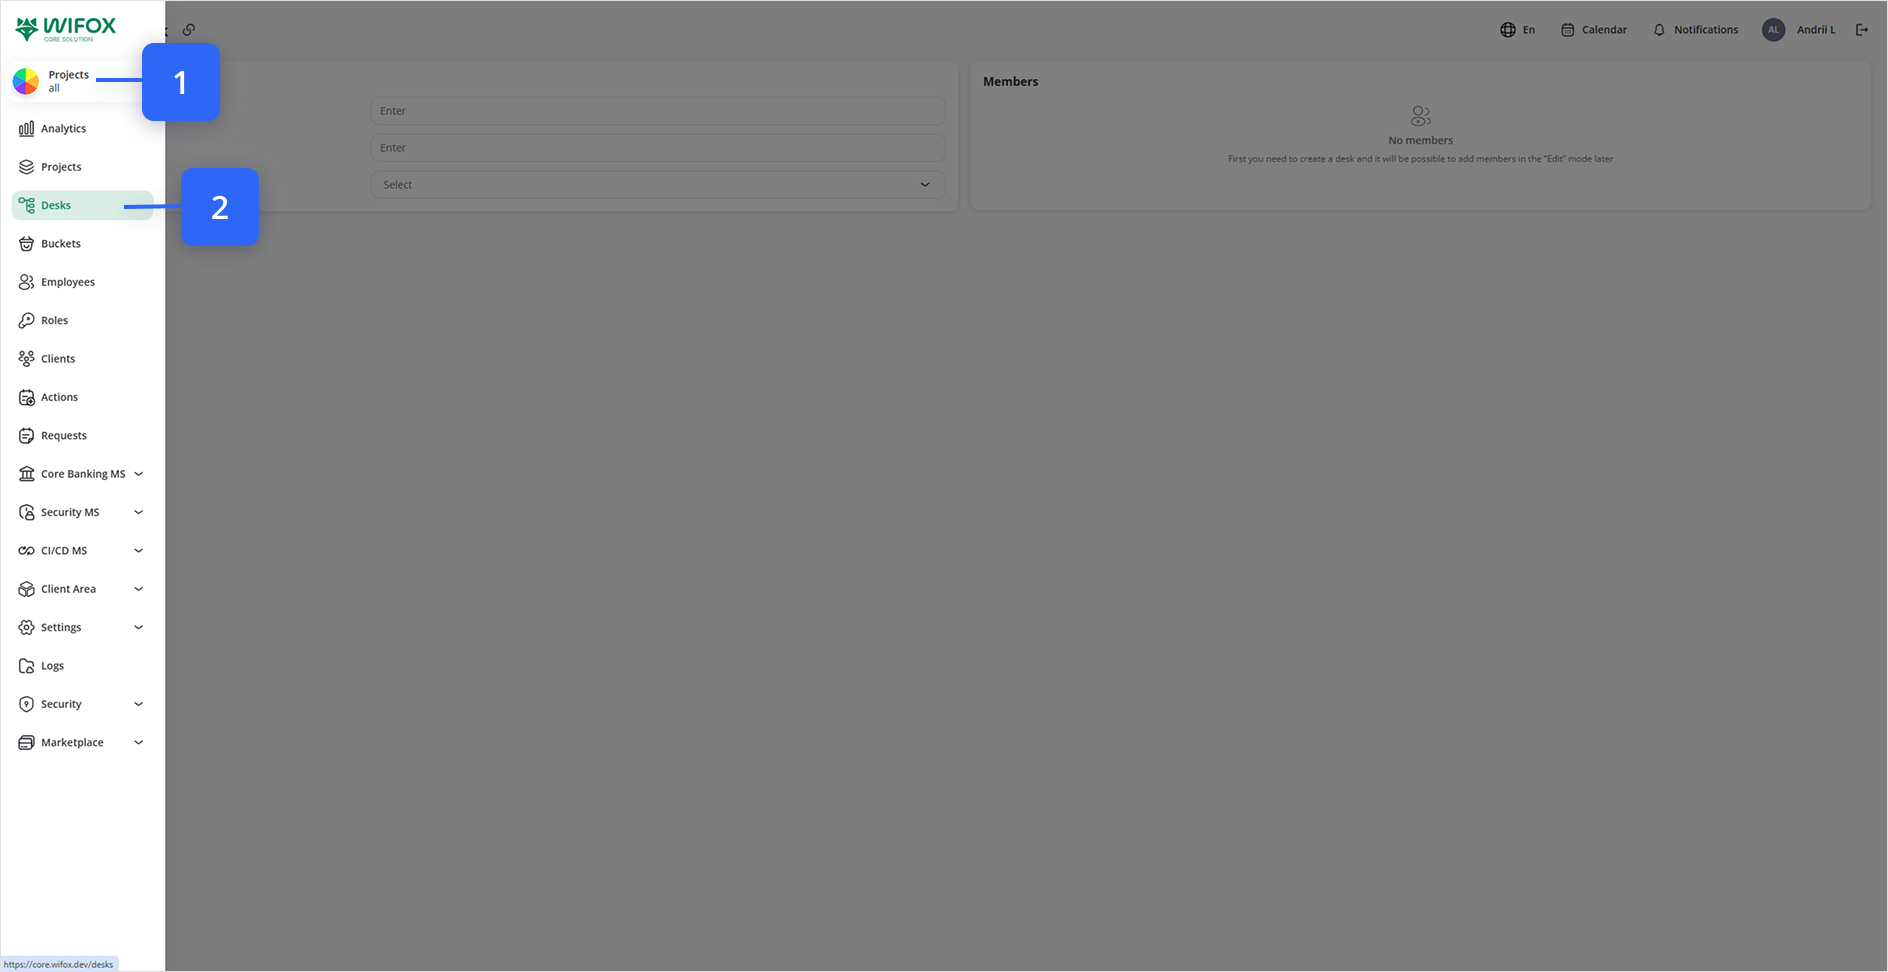
Step 2. Click “+ Add to Create a New DeskAdd”
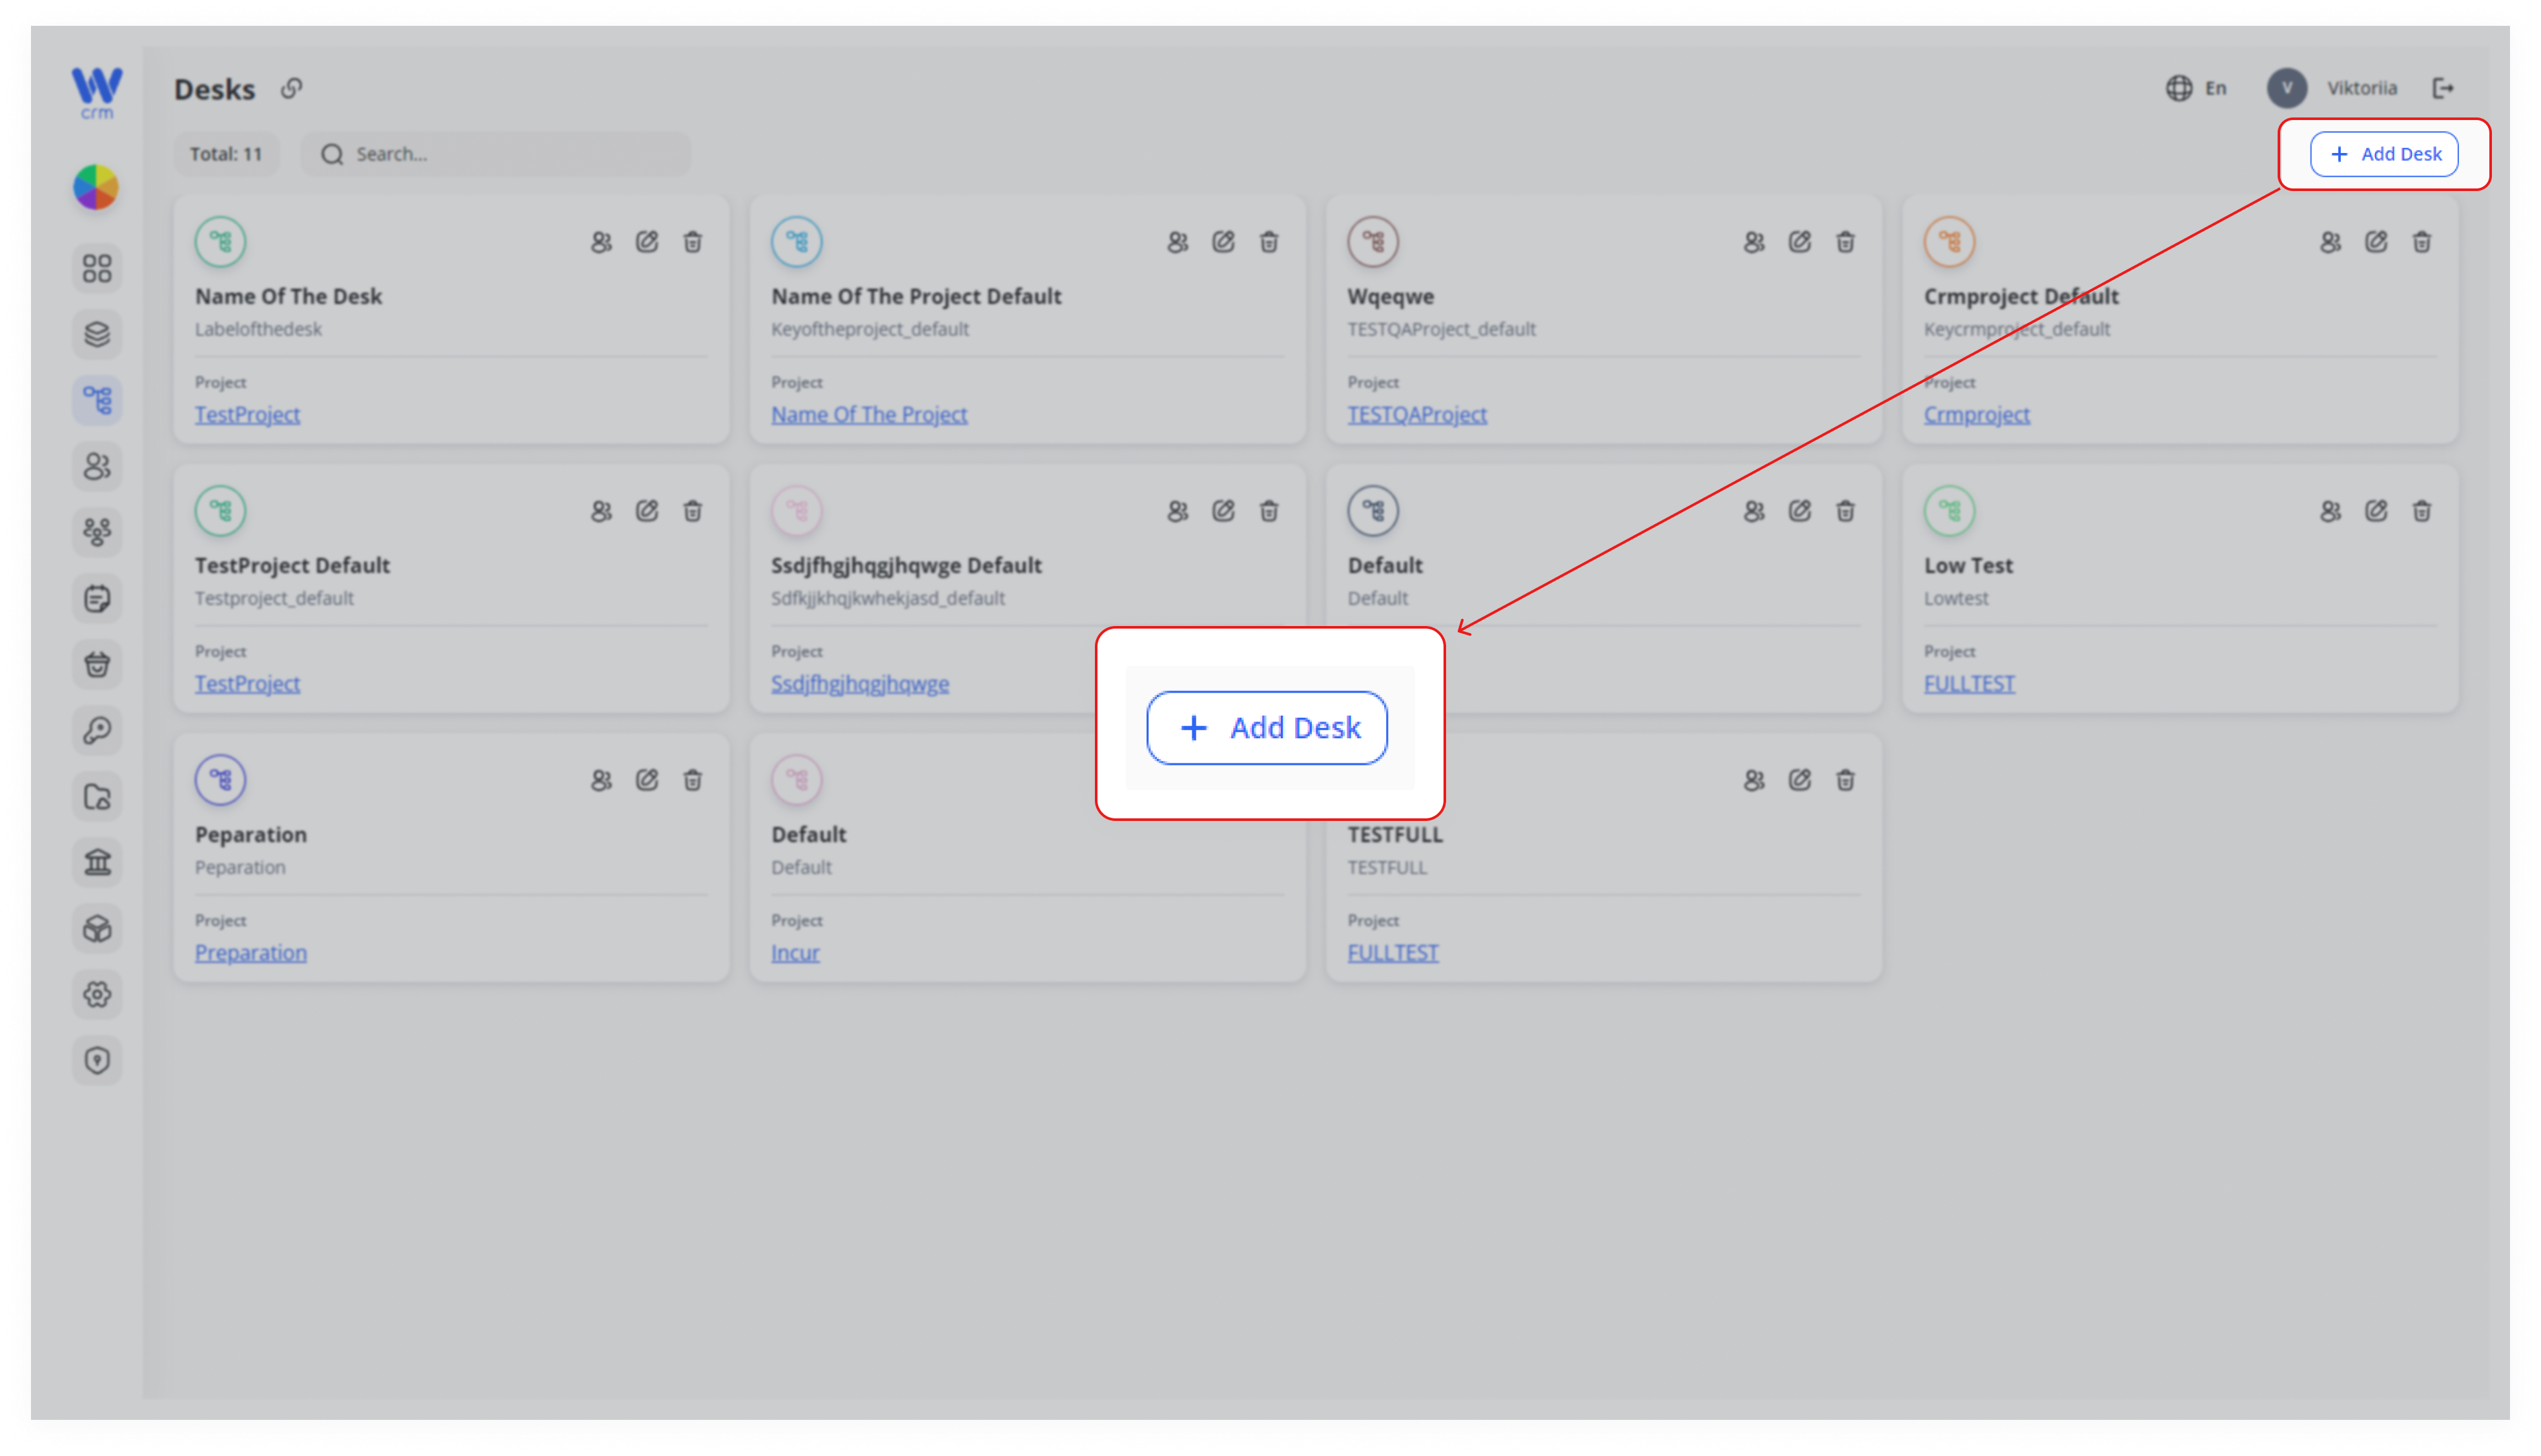
In the top-right corner of the Desks list,screen, click the + Add button. The “Add desk” form will slide in, ready for your input.
Step 3. Fill inComplete the General Section
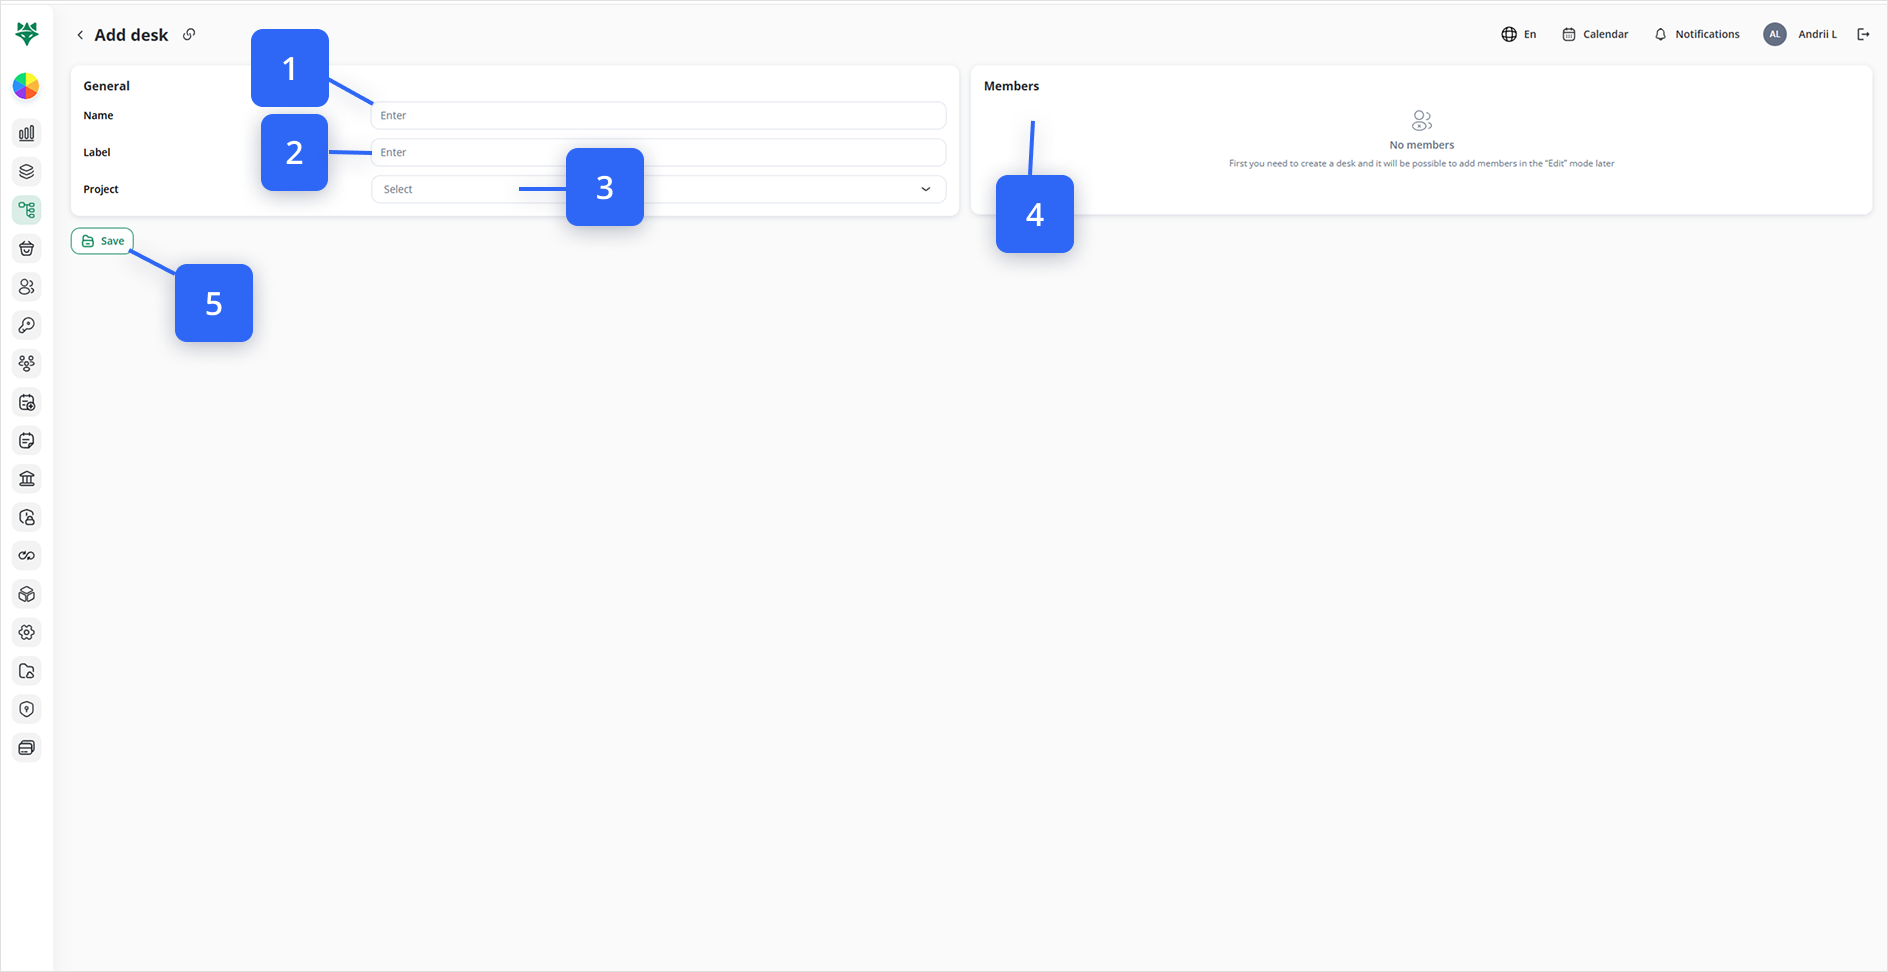
All three fields are required:
-
Name (Step #1)
-
Definition: The
namehuman-readableoftitle for thedeskDesk (e.g., “Support Queue” or “NYC Sales Team”). -
Importance: Appears throughout the UI wherever this Desk is referenced. Choose a clear, descriptive name.
-
-
Label (Step #2)
-
Definition: A unique internal key used by APIs and the system (e.g.,
SUPPORT_QUEUEorNYC_SALES). -
Format Rules: Only letters, numbers, and underscores—no spaces or special characters.
-
-
Project (Step #3)
-
Definition: The
uniqueparentidentifierProjectofunder which this Desk belongs. -
Action: Click the
actions,deskdropdown and select the appropriate Project. This links all Desk data (e.g.clients,SUPPORT_QUEUE)Project(Step #3): The projectemployees) towhichthattheProject’sdeskscope.is
assigned.Select -
Step 4. Review the Members Panel (Step #4)
InTo the right-handright of the General fields is the Members tabsection, you’llwhich seeinitially shows No members. byYou default.
(Membersadd canemployees only be added afteruntil the deskDesk exists — exists—see “How to Edit a Desk” for thatinviting flow.)
5.and Saveassigning Your New Desk (Step #5)
Once all required fields are set, click Save at the bottom-left.
Your new desk will now appear in the Desks list, ready for members to be added in Edit mode.managers.
You will also see the Members tab here, but you will only be able to add new members to the desk in the Edit mode.
Step 5. Save Your New Desk (Step #5)
Once you’ve entered Name, Label, and Project, click the green Save button at the bottom-left. Your form will close, and the new Desk appears in the grid, ready for further configuration.
By following these steps, you can rapidly spin up new Desks to reflect any organizational structure—whether by geography, department, or lead source. Each Desk provides its own workspace for clients, employees, and workflows, keeping your CRM data organized, secure, and easy to manage as your team grows.