
3. How to Create a Desk
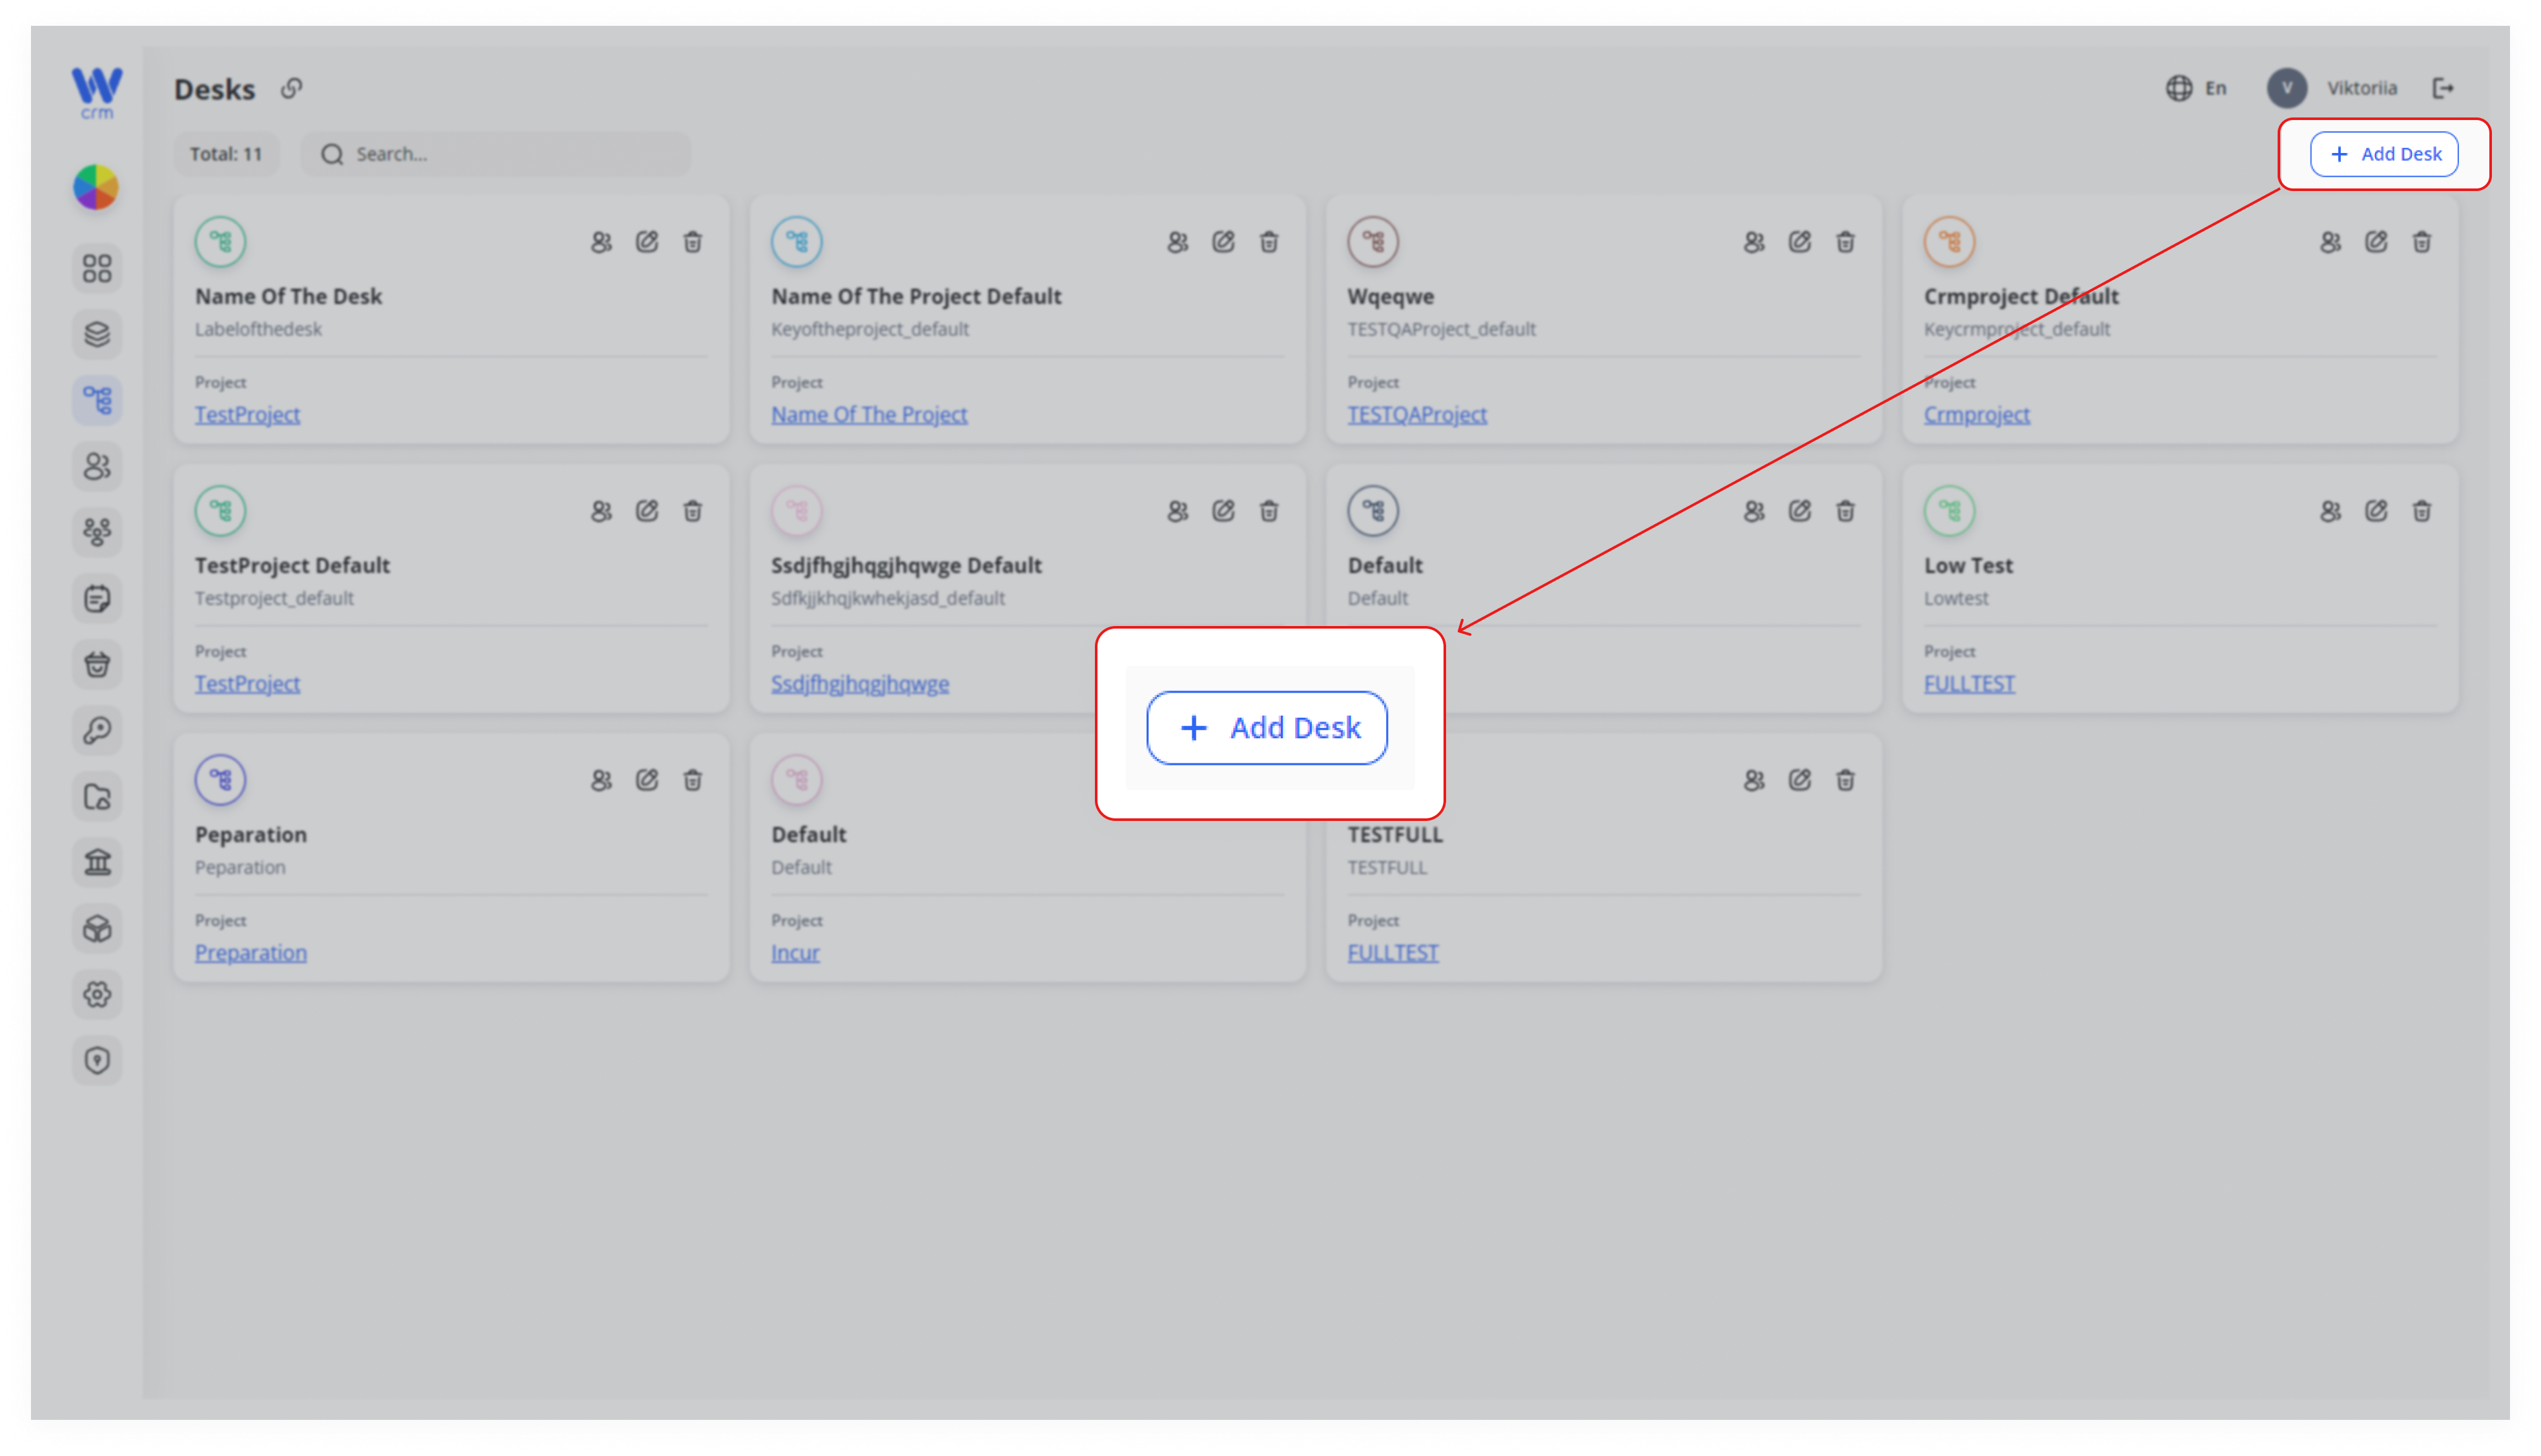
1. To create a desk, click the Add Desk button at the top right of the Desks tab:
2. A window will open where you can fill in the desk parameters. Enter or select from the drop-down list:
-
-
-
Name: The name of the desk.
-
Label: The unique identifier of the desk.
-
Project: The project to which the desk is assigned.
-
-
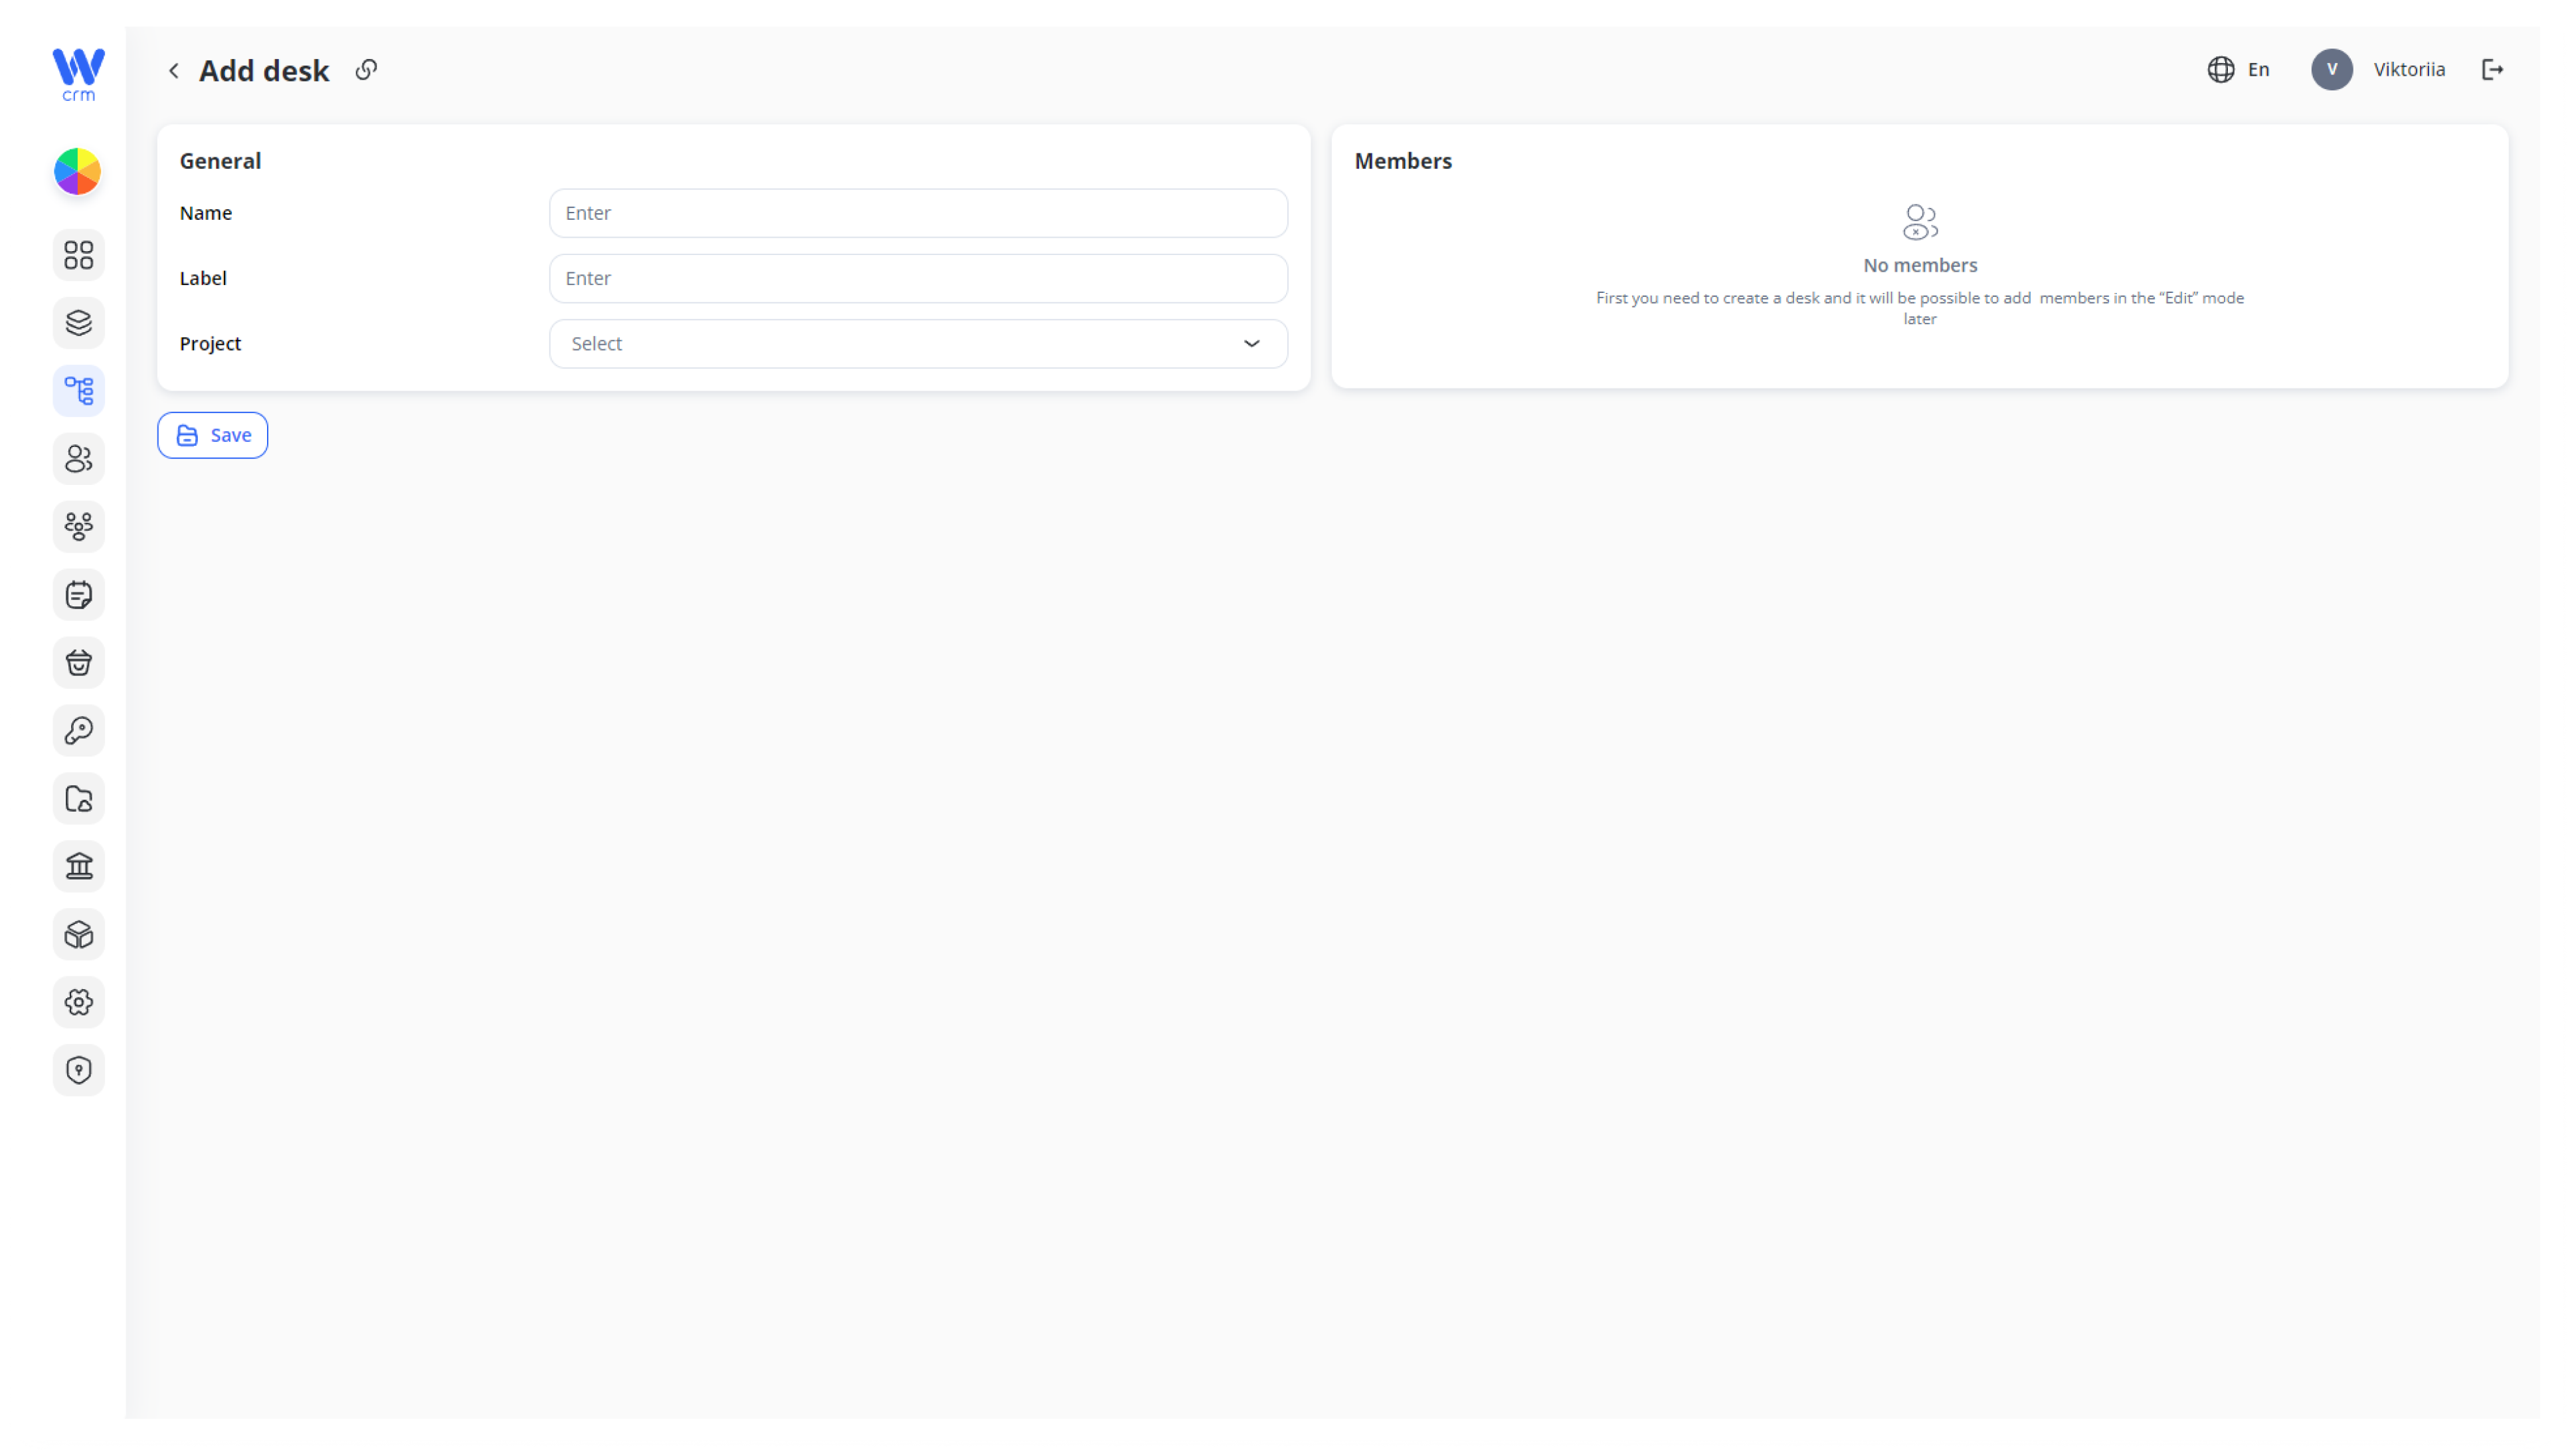
You will also see the Members tab here, but you will only be able to add new members to the desk in the Edit mode.
1. Open the Desks Module
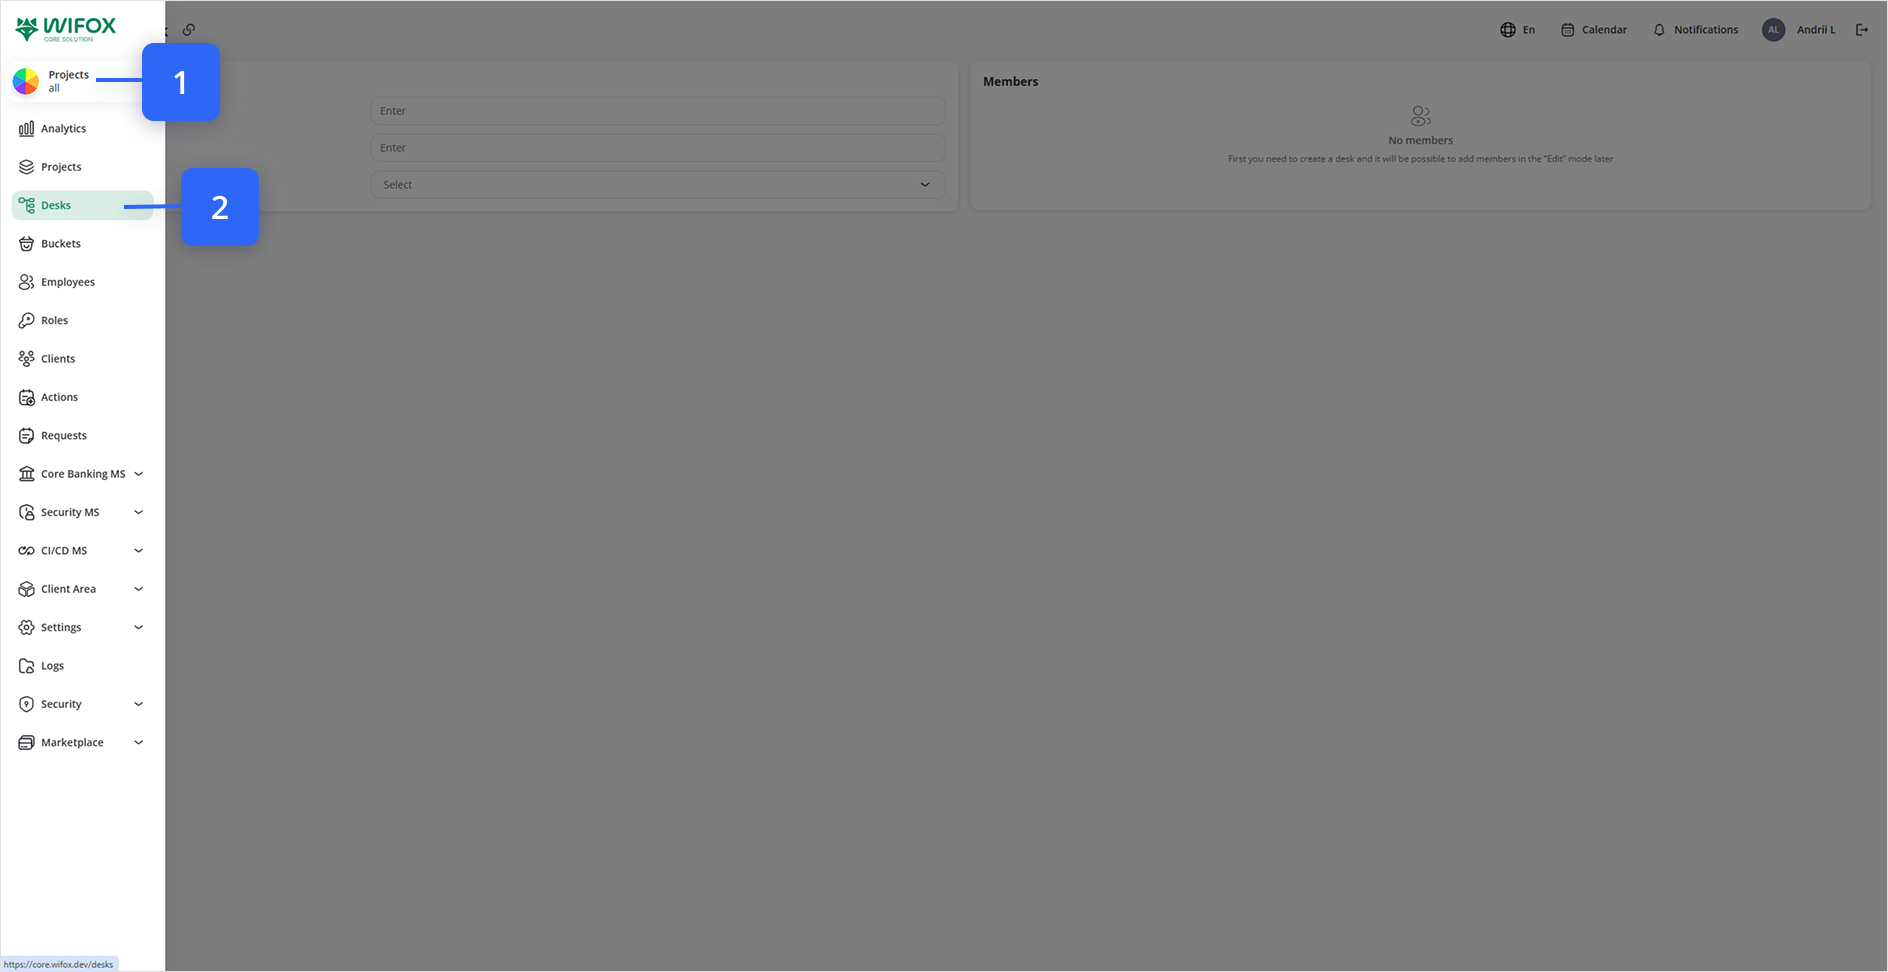
From the left-hand nav, click Desks to display the list of all desks.
Click + Add to Create a New Desk
In the top-right corner of the Desks list, click the + Add button.
Fill in the General Section
Name (Step #1): Human-readable desk name (e.g. “Support Queue”)
Label (Step #2): Unique internal identifier (e.g. SUPPORT_QUEUE)
Project (Step #3): Select the parent project from the dropdown
Review the Members Panel
In the right-hand Members tab you’ll see No members by default.
(Members can only be added after the desk exists — see “Edit a Desk” for that flow.)
Save Your New Desk
Once all required fields are set, click Save at the bottom-left.
Editable: Desk Name
Fixed: Desk Label & Project
Your new desk will now appear in the Desks list, ready for members to be added in Edit mode.