
2. How to Create a Client
Client profiles are automatically created when they register on your site.
1. Open the Clients Module
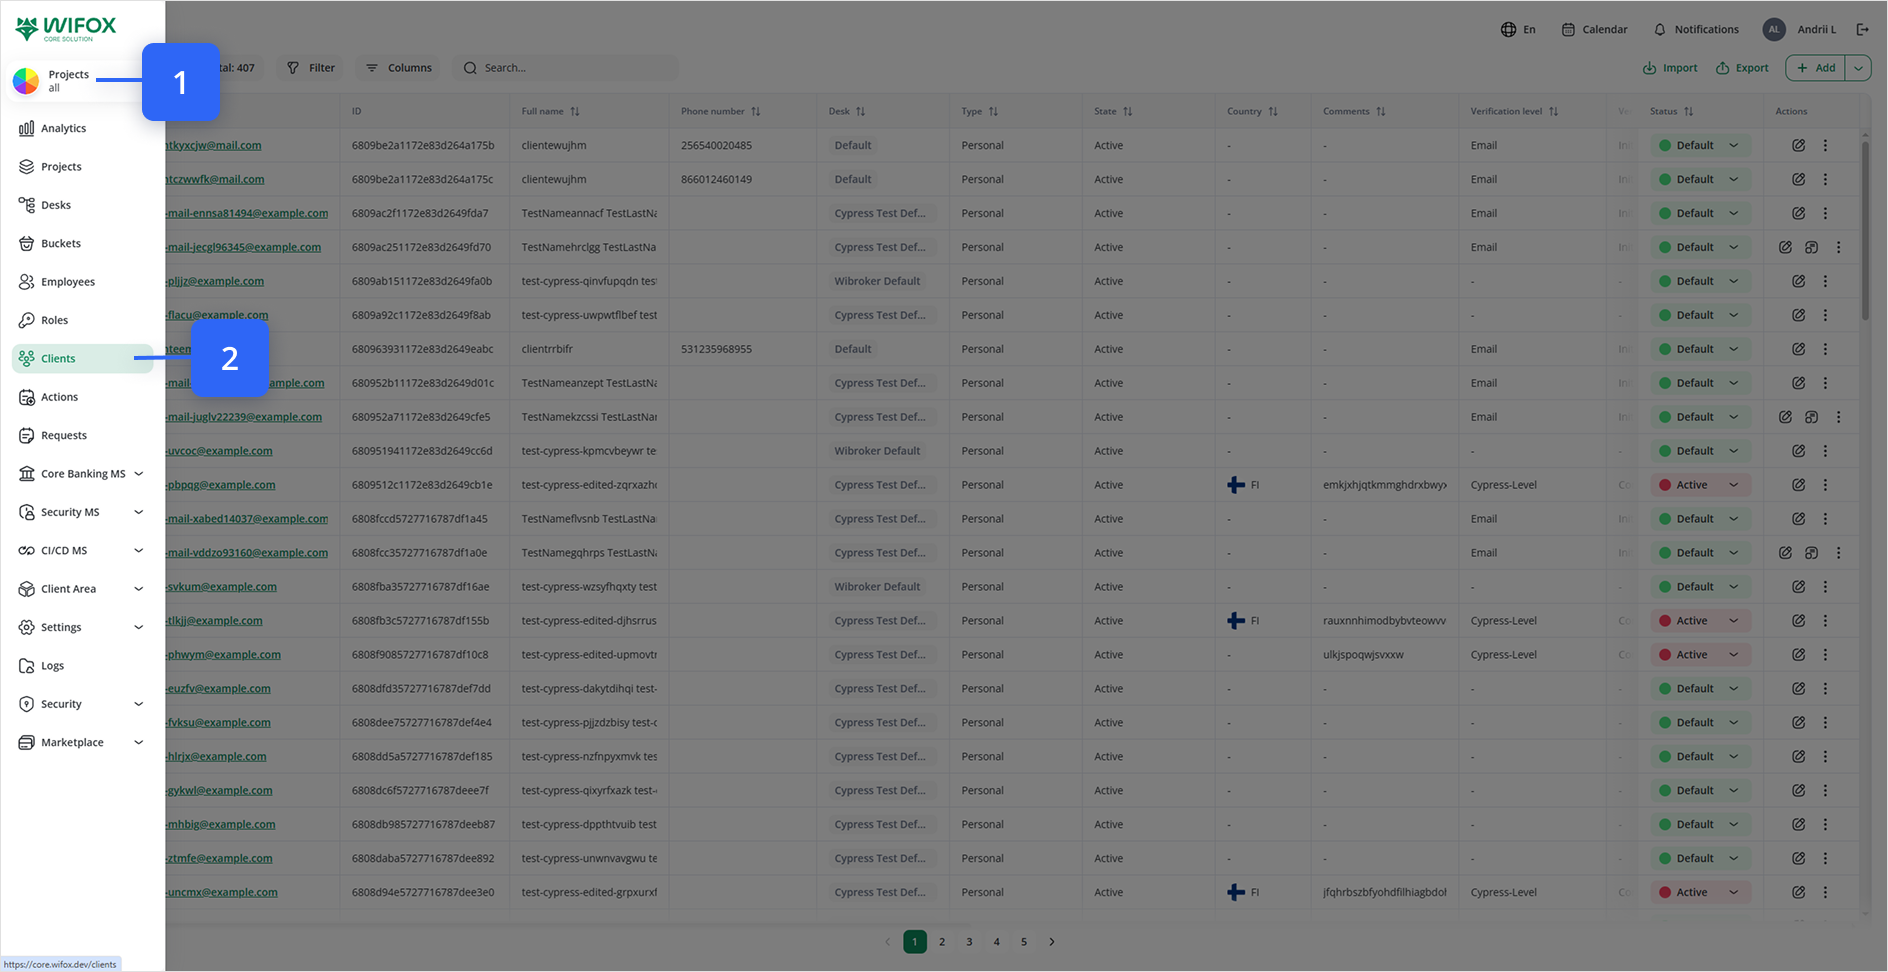
2. Launch the “Add Client” Menu
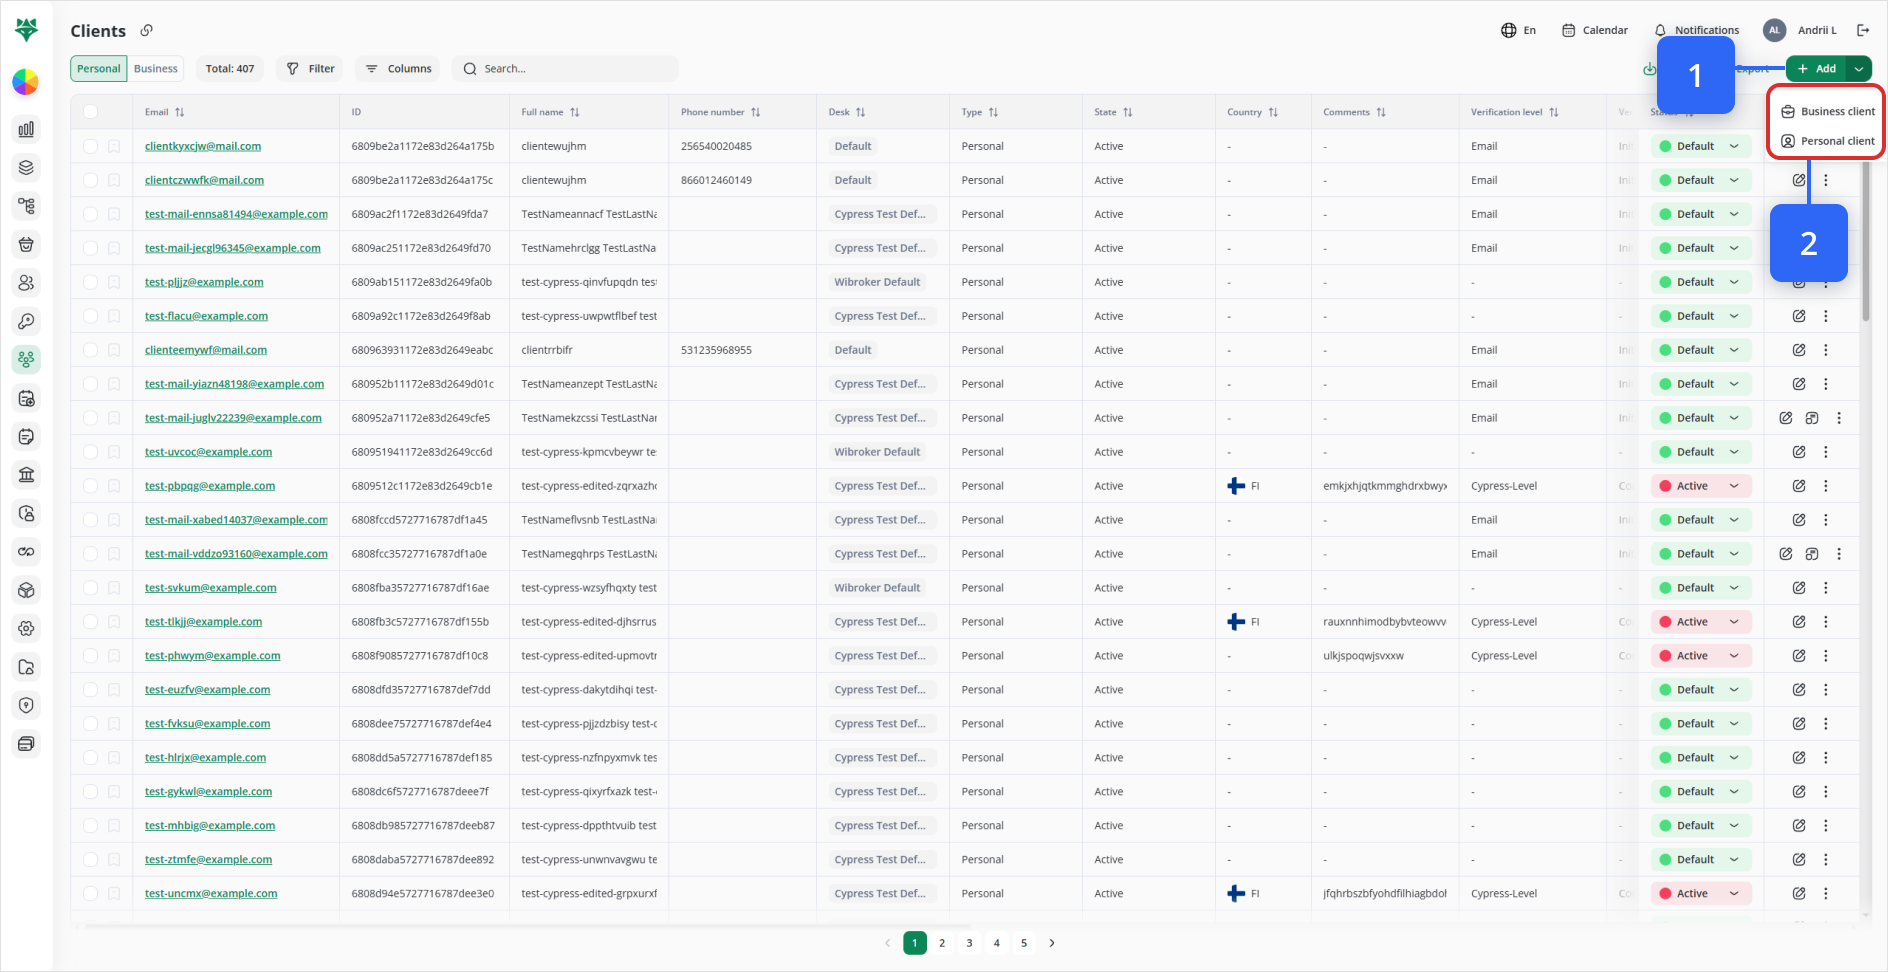
In the top-right corner of the Clients list, click + Add (Look at #1 on the image above).
3. Choose Client Type
From the dropdown, select either Business client or Personal client (Look at #2 on the image above).
4.1. Create a Business Client (3-Step Wizard)
- Step 1 — Add Company Information
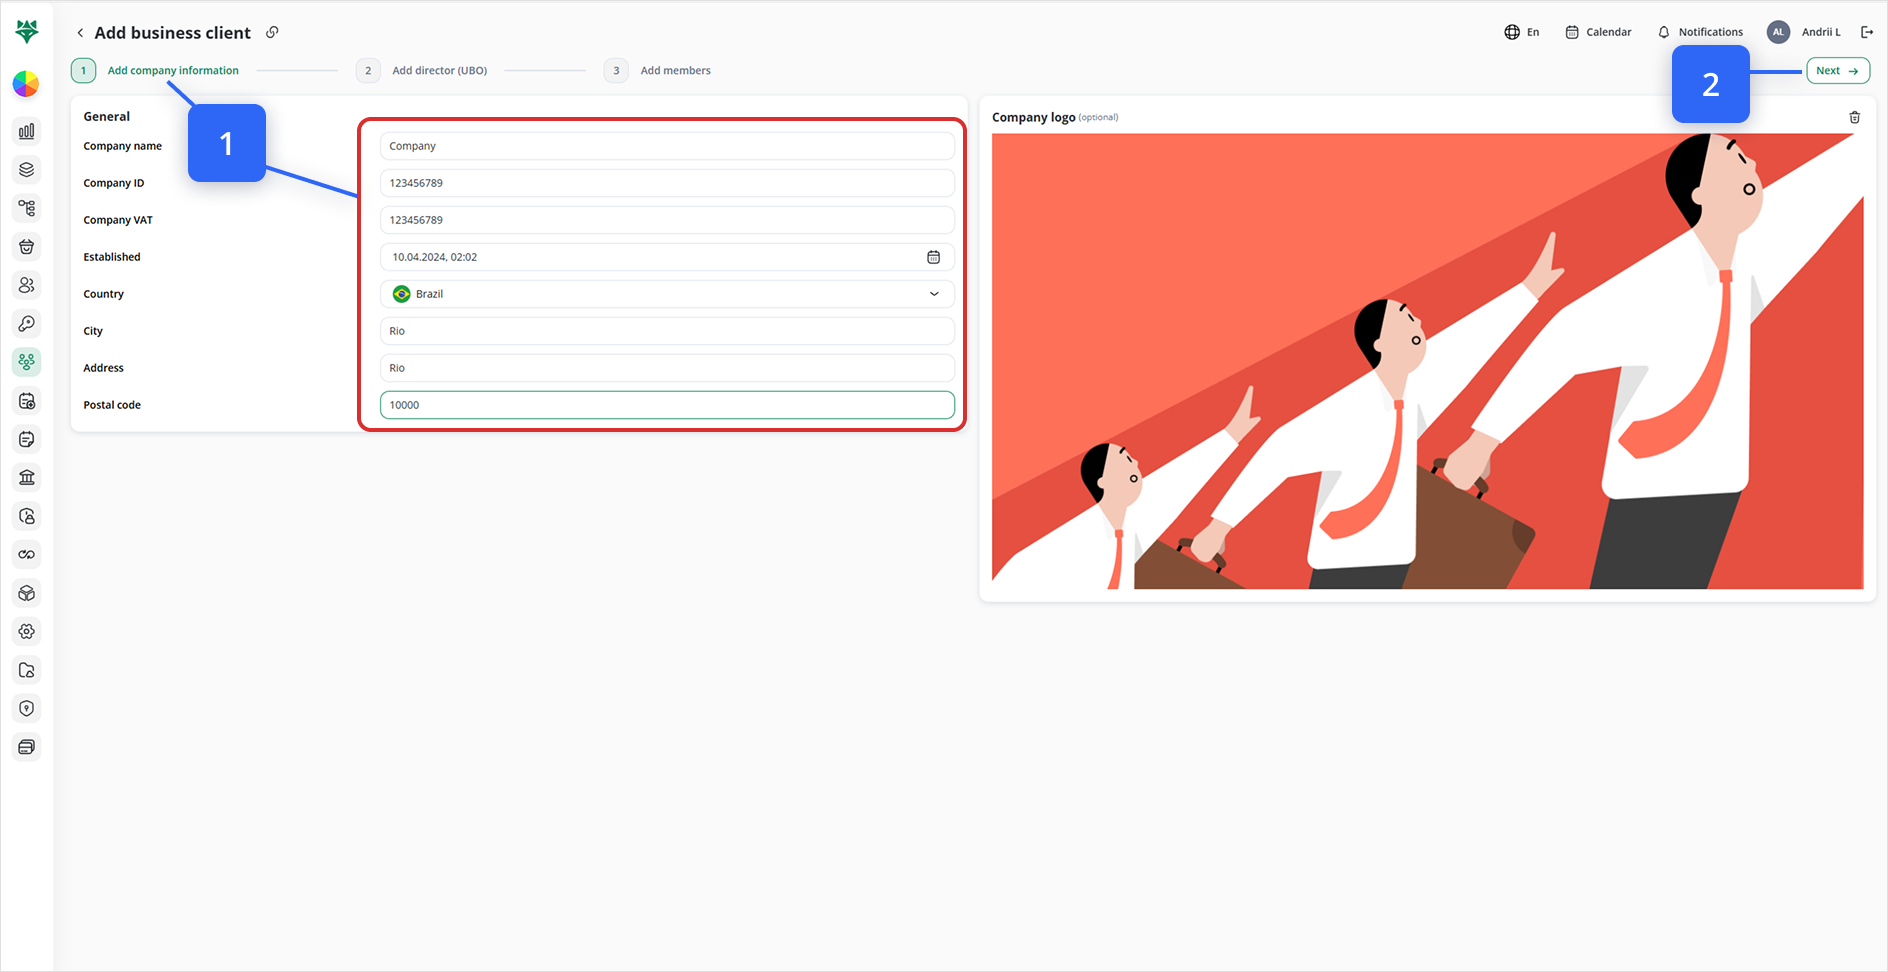
Company name: Enter the legal name.
Company ID: Your internal identifier.
Company VAT: VAT or tax number.
Established: Pick a date.
Country: Select from the list.
City, Address, Postal code: Fill in billing address.
(Optional) Company logo: Drag-and-drop or browse to upload.
Click Next →.
- Step 2 — Add Director (UBO)
Note: Toggling the Allow checkbox at the top of the “Add director (UBO)” form will expand the Credentials fields below (email, password), letting you edit or enter those values for the UBO.
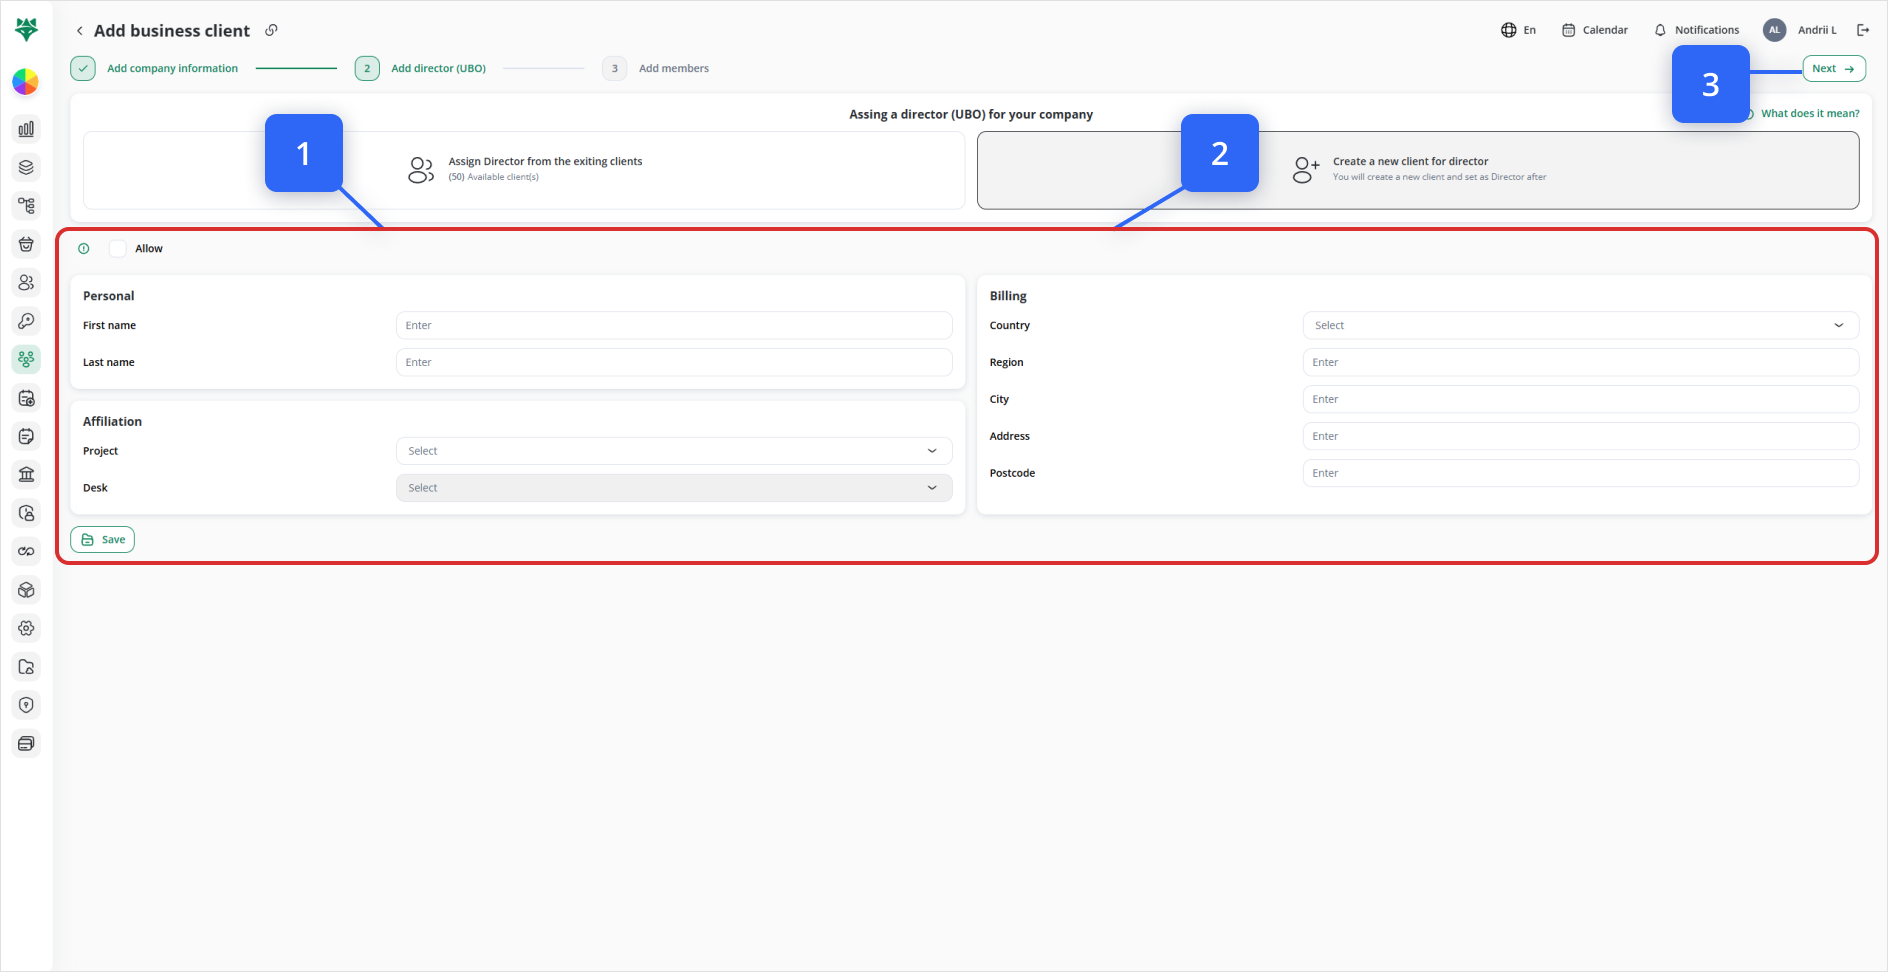
2.1 Assign an Existing Client as Director (Look at #1 on the image)
Select the “Assign Director from the existing clients” card – it will be highlighted in green.
In the Client ▼ dropdown, start typing the name or email of an existing client. A filtered list appears; click the one you want.
(Optional) Click View & Edit Info to review or change that client’s personal details in a pop-over.
Once selected, the Personal, Affiliation, and Credentials panels below will auto-populate.
If you need to override or complete any fields (e.g. add an email or password), check the Allow box at the top of the form, then edit those fields directly.
2.2 Create a New Client as Director (Look at #2 on the image)
Click the Create a new client for director card on the right.
A blank Personal panel appears below (just like when adding a personal client).
Fill in First name, Last name, Email, Password, and any other required fields.
Complete the Affiliation panel by choosing the company’s Project and Desk for this director.
Click Save (bottom-left) to create that client and set them as your UBO.
When you’ve picked or created the UBO, use the Next → button (top-right) to proceed to adding additional members. (Look at #3 on the image)
- Step 3 — Add Members
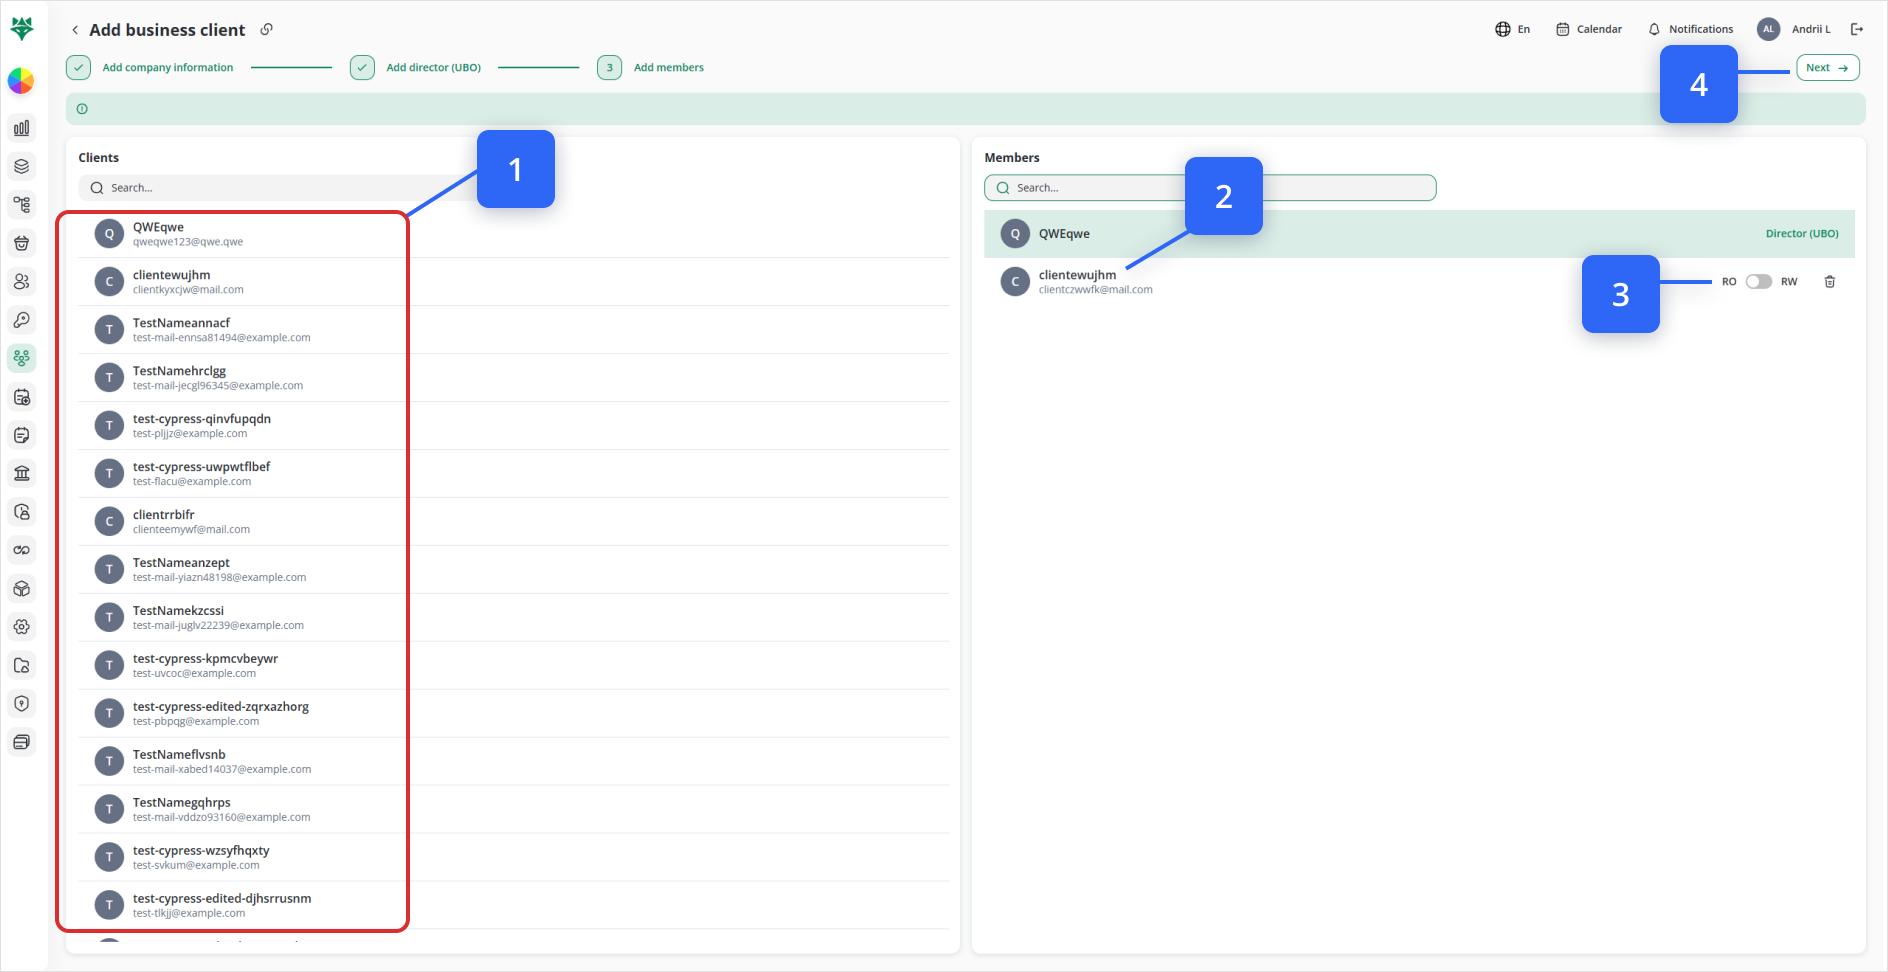
In the Clients panel, search or scroll to find additional client contacts (Look at #1 on the image).
Click each name to move them into the Members panel (Look at #2 on the image).
For each member, toggle between RO (read-only) and RW (read-write), or click the trash icon to remove (Look at #3 on the image).
Click Next → to finalize (Look at #4 on the image).
4.2. Create a Personal Client
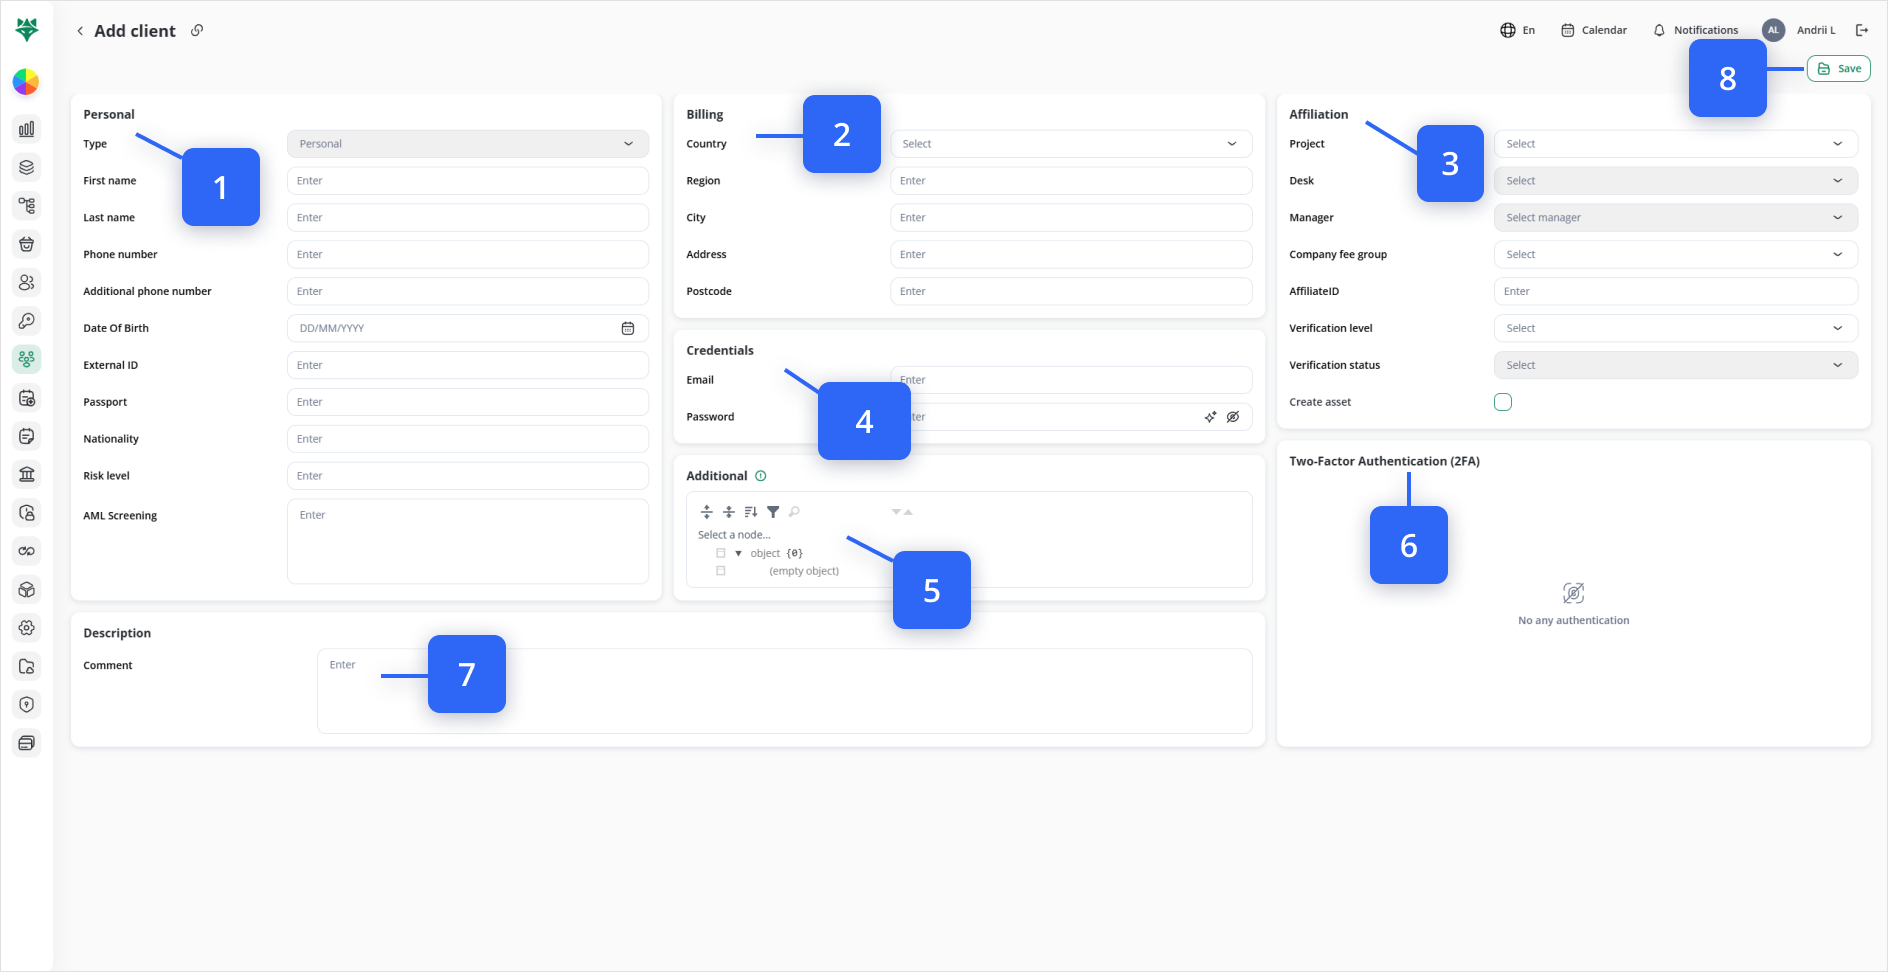
Once you’ve chosen Personal client, the full “Add client” form appears on a single page. It’s organized into 7 panels:
- Personal (Step 1)
Type: Pre-set to Personal and cannot be changed.
First name: Enter the client’s given name.
Last name: Enter the client’s family name.
Phone number: Primary contact number.
Additional phone number: Secondary contact number (optional).
Date Of Birth: Use the date-picker to select.
External ID: Any external reference or CRM ID.
Passport: Passport or government ID number.
Nationality: Country of citizenship.
Risk level: Internal risk categorization (e.g. Low, Medium, High).
AML Screening: Notes or results from anti–money-laundering checks.
- Billing (Step 2)
Country: Dropdown to select the billing country.
Region: Free-form region/state field.
City: Billing city.
Address: Street address.
Postcode: ZIP or postal code.
- Affiliation (Step 3)
Project: Assign this client to a Project.
Desk (Optional): Restrict to one of the project’s Desks.
Manager: Select the internal user who “owns” this client.
Company fee group: Drop-down of predefined fee tiers.
AffiliateID: ID for tracking source or partner.
Verification level: KYC level (e.g. Email, Video, In-person).
Verification status: Current status (Pending, Approved, Rejected).
Create asset: Check to automatically generate an asset record.
- Credentials (Step 4)
Email: Client’s login address (required).
Password:
✨ Sparkle icon – auto-generate a secure password.
👁️ Eye icon – toggle show/hide.
- Additional (Step 5)
A JSON-style tree picker for any custom metadata (e.g. “WhatsApp: +123…”).
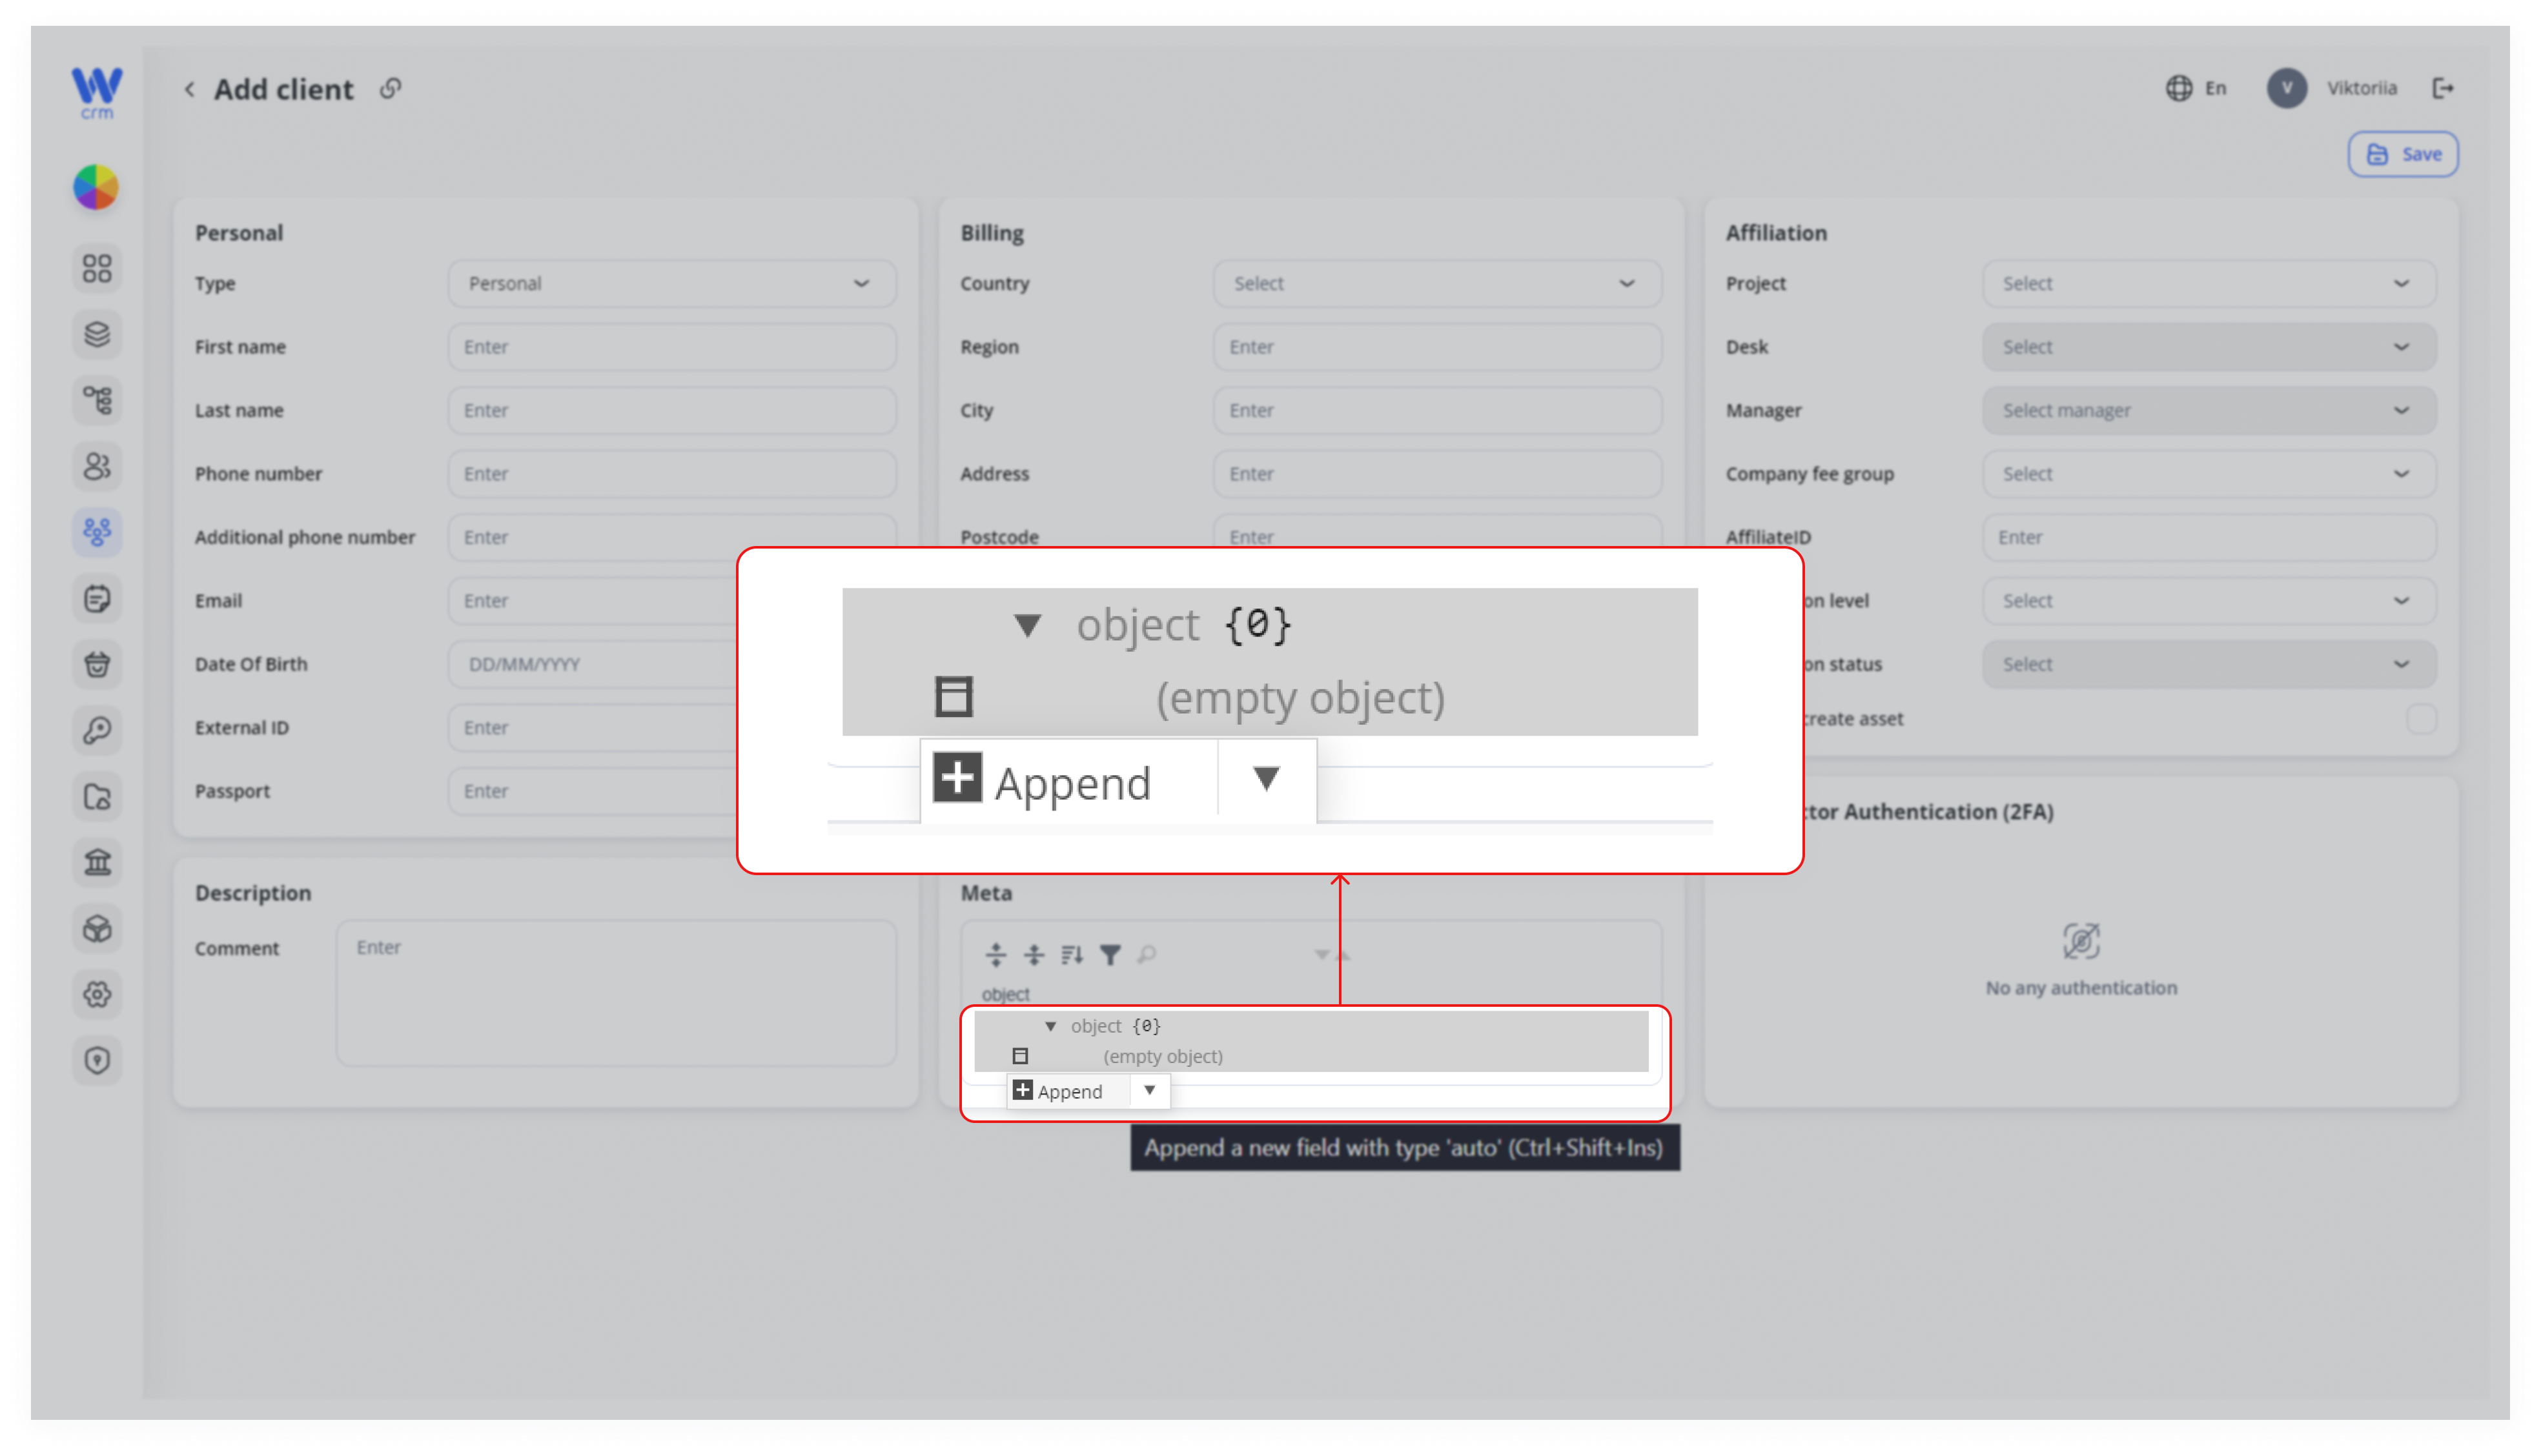
Click the tree icon next to (empty object).
Click Append to add a new field and value pair.
Enter your key and value; it saves automatically on form submit.
- Two-Factor Authentication (2FA) (Step 6)
Displays any preconfigured methods (Email, Google, Phone). You cannot add here, but you can review them.
Get more information about authentication types in WiWifox CRMBusiness Core Solution [here]
- Description (Step 7)
Comment: Free-form notes about this client.
5. Save Your New Client (Step 8)
When all required fields are filled in, click Save (top-right). You’ll return to the Clients list, where your new personal client now appears.
Note: You cannot change the type of the client and/or the client’s email after saving their information.
You can view all clients in the Clients tab. To get full information about the client, click on the client’s email in the Email column:
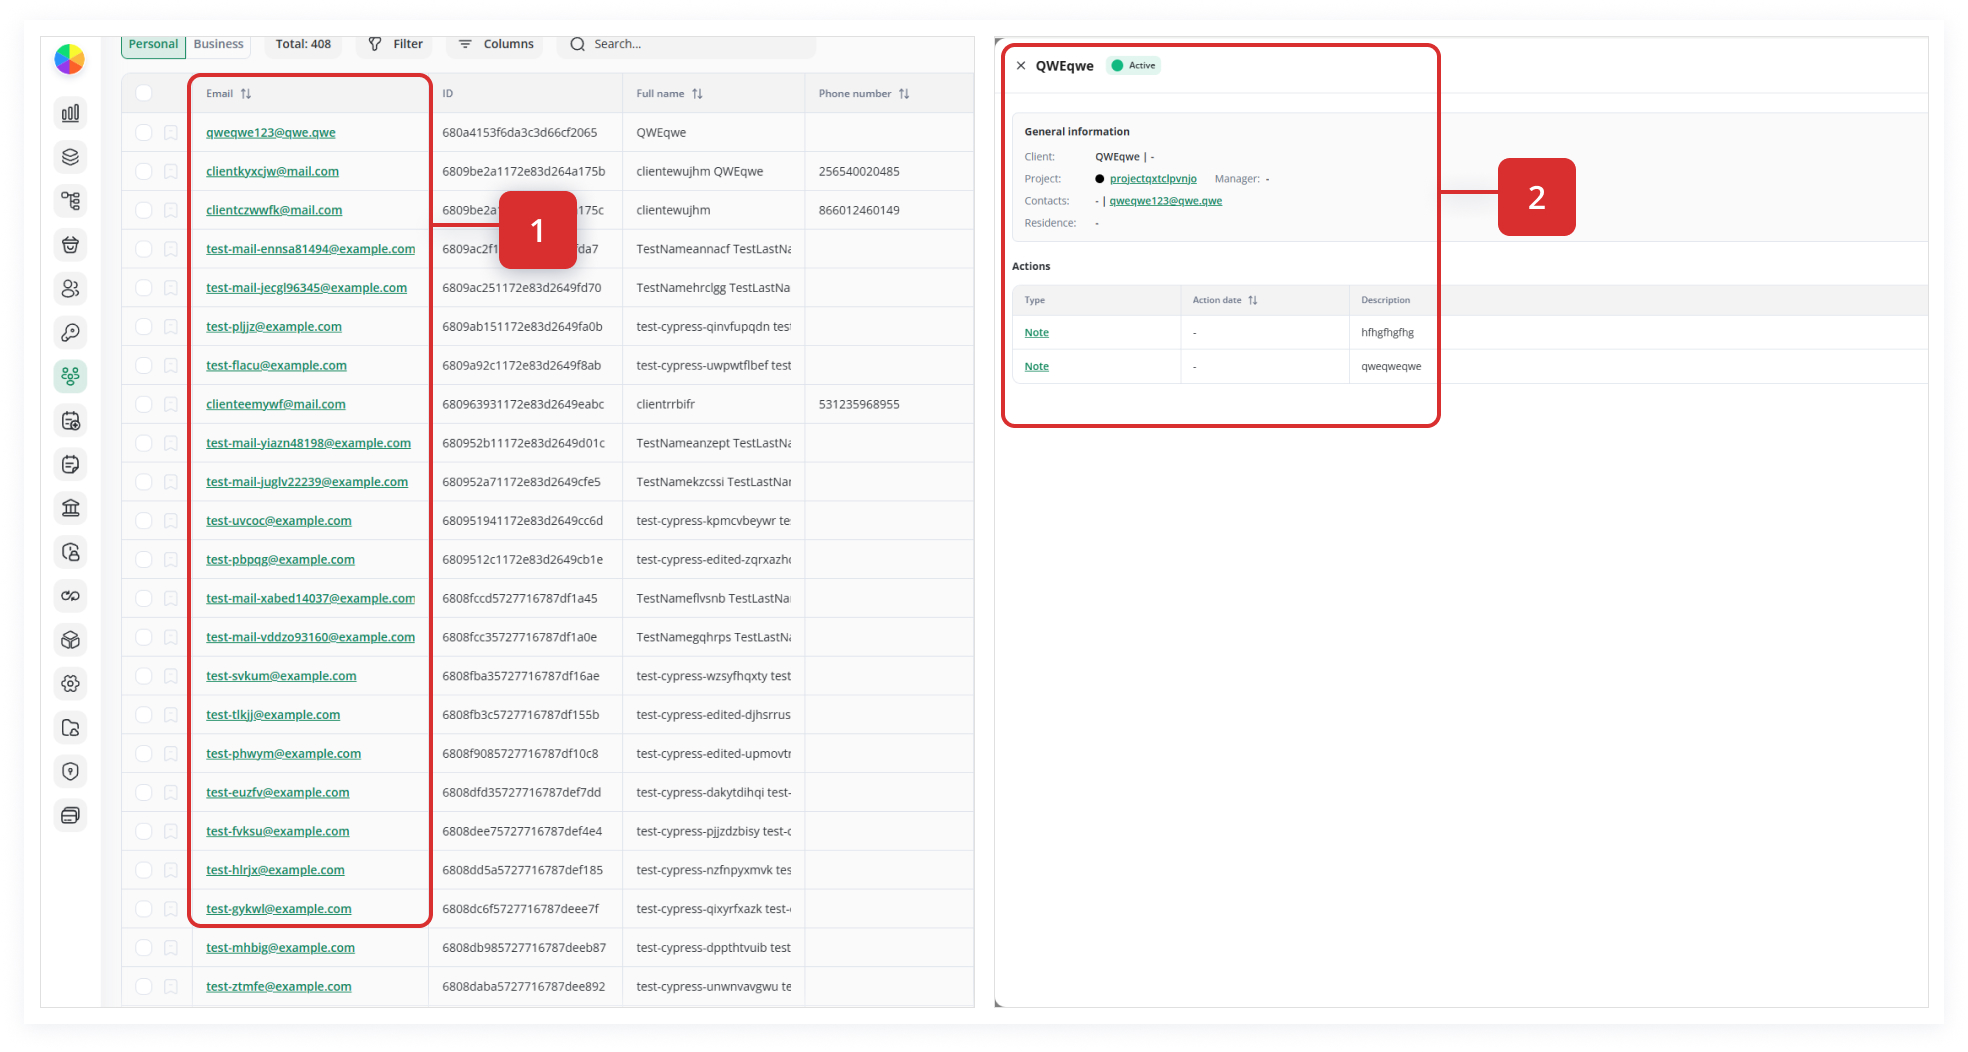
A drawer will open on the right with information about the client.