
10. How to Customize Columns
The Columns customization allows you to customize the order and visibility of columns. This helps you focus on specific data fields (e.g., ID, Country, Type) that are most relevant to you.
Why Customize Columns?
-
Focus on Essentials
Hide fields you rarely use (e.g. “External ID” or “Registration IP”) so your eye lands on high-priority data like Email, Phone number, or Verification status. -
Boost Readability
Reducing visual noise speeds up scanning and reduces mistakes when you’re sorting or reviewing long lists. -
Tailor Your Workflow
Move “Desk” next to “Manager,” or “State” right after “Type”—whatever sequence best matches your daily tasks.
Use Cases
How It Works
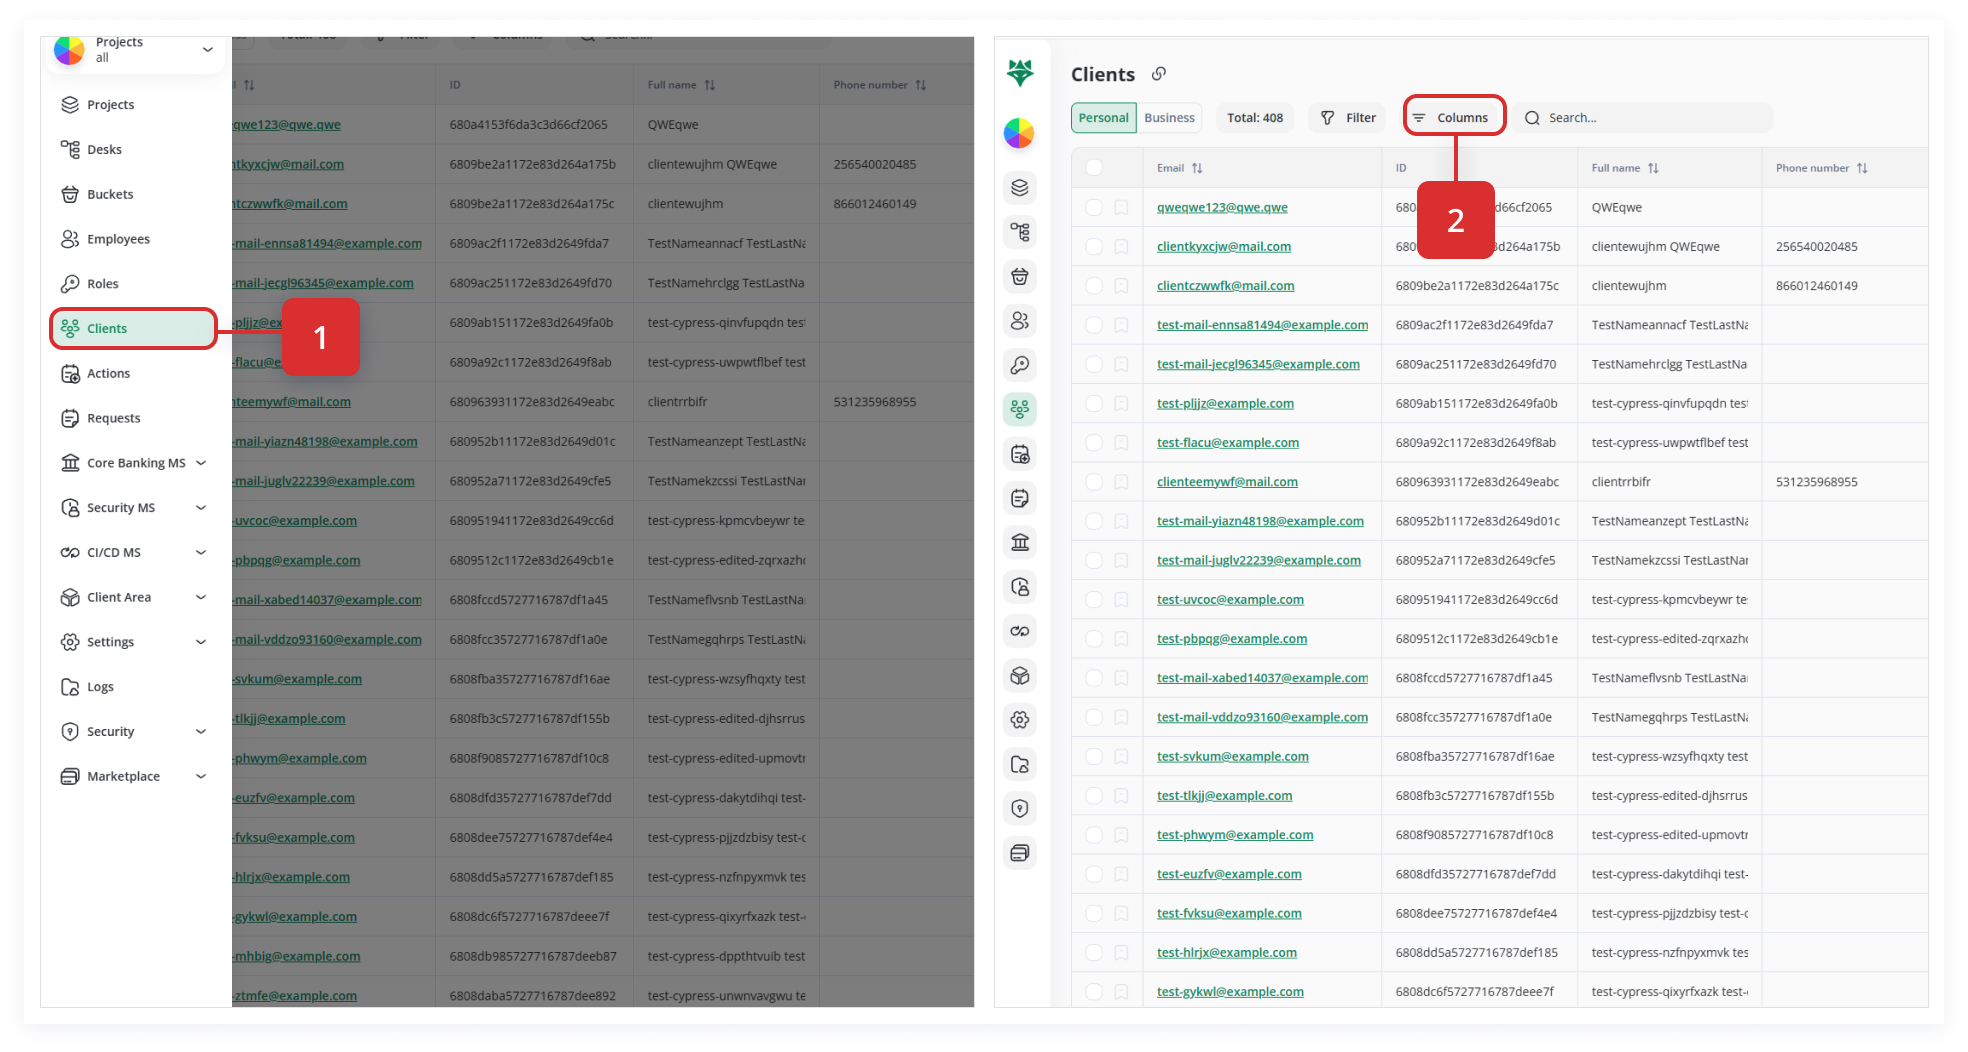
1. Access the Columns Panel
-
Click Columns in the top toolbar of the Clients page (Screenshot 1: Columns button).
-
A slide-out panel titled Customize columns appears on the right.
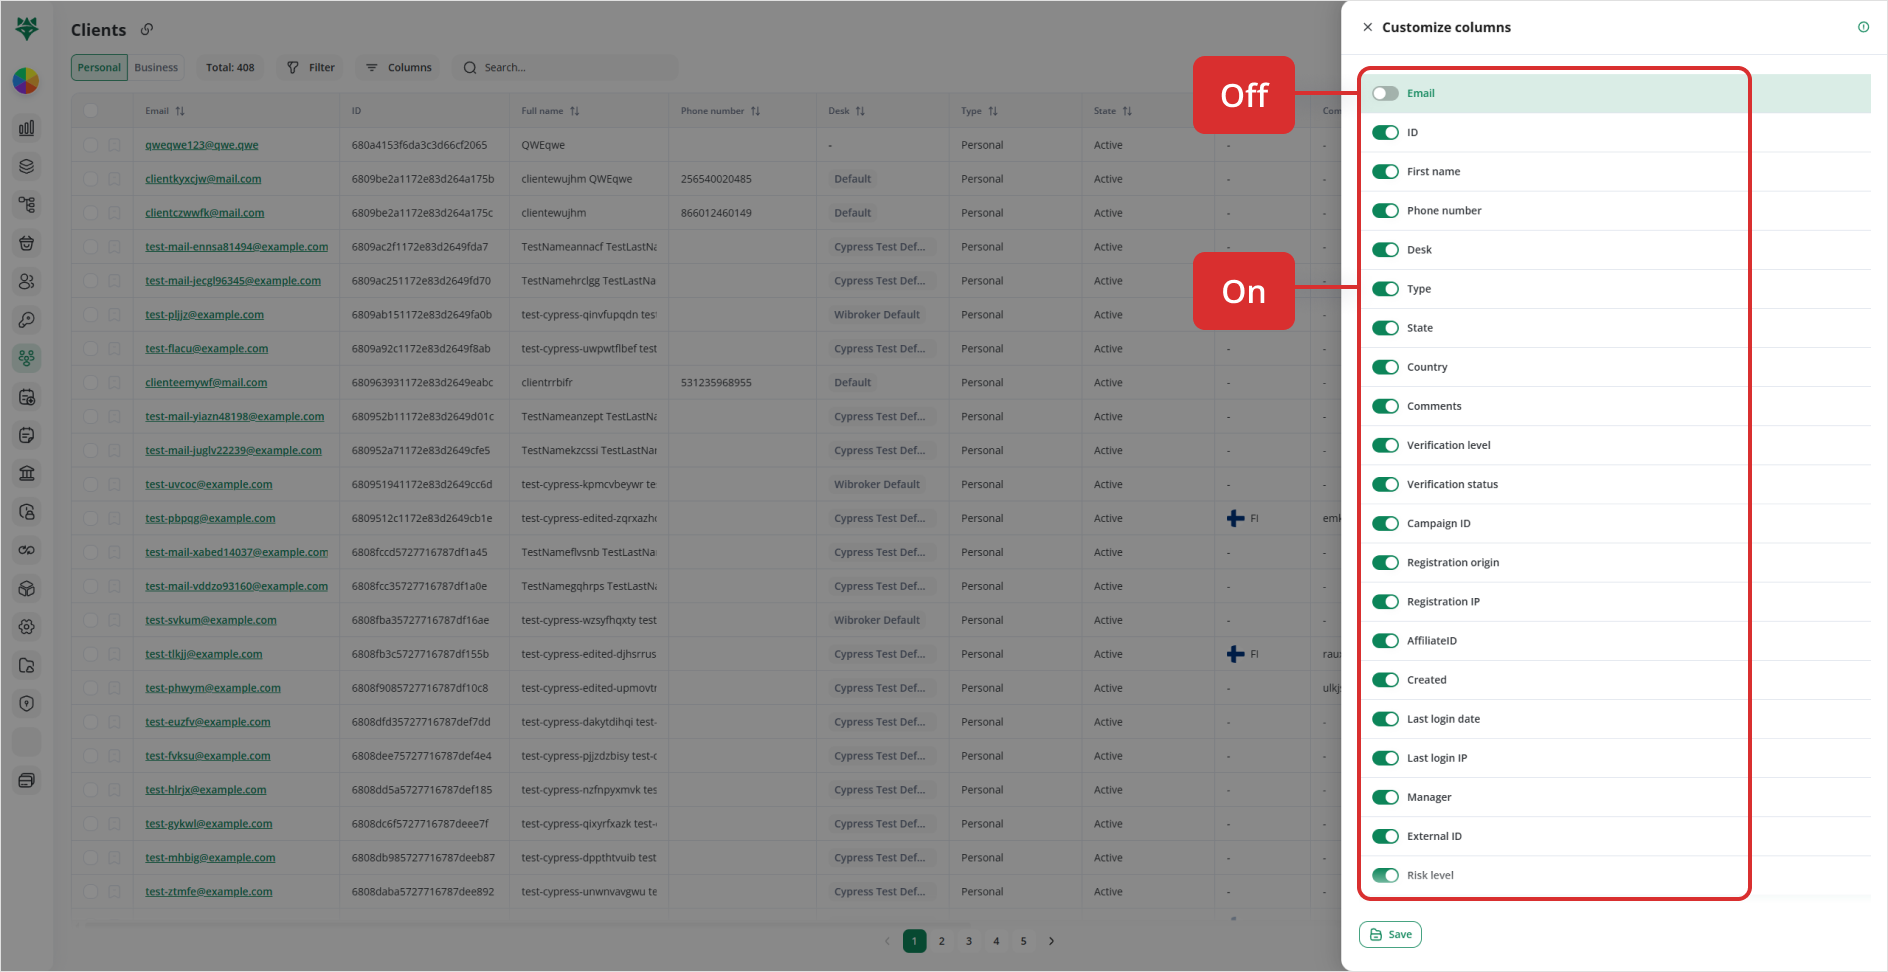
2. Show/Hide Columns Using Toggles
-
Each available column is listed with an On/Off toggle (Screenshot 2: Toggles).
-
On (green) = column will display in the table.
-
Off (grey) = column is hidden.
Tip: Required/system fields (like Email or ID) may be non-toggleable or locked in the list.
3. Reorder Columns
-
Look for the “drag” handle (⋮⋮) on the left of each toggle row.
-
Click-and-hold that handle to drag the field up or down in the list—this sets its left-to-right position in your table.
Note: You can often click and drag this handle to rearrange the order in which columns appear in the Clients table.
4. Save Your Changes
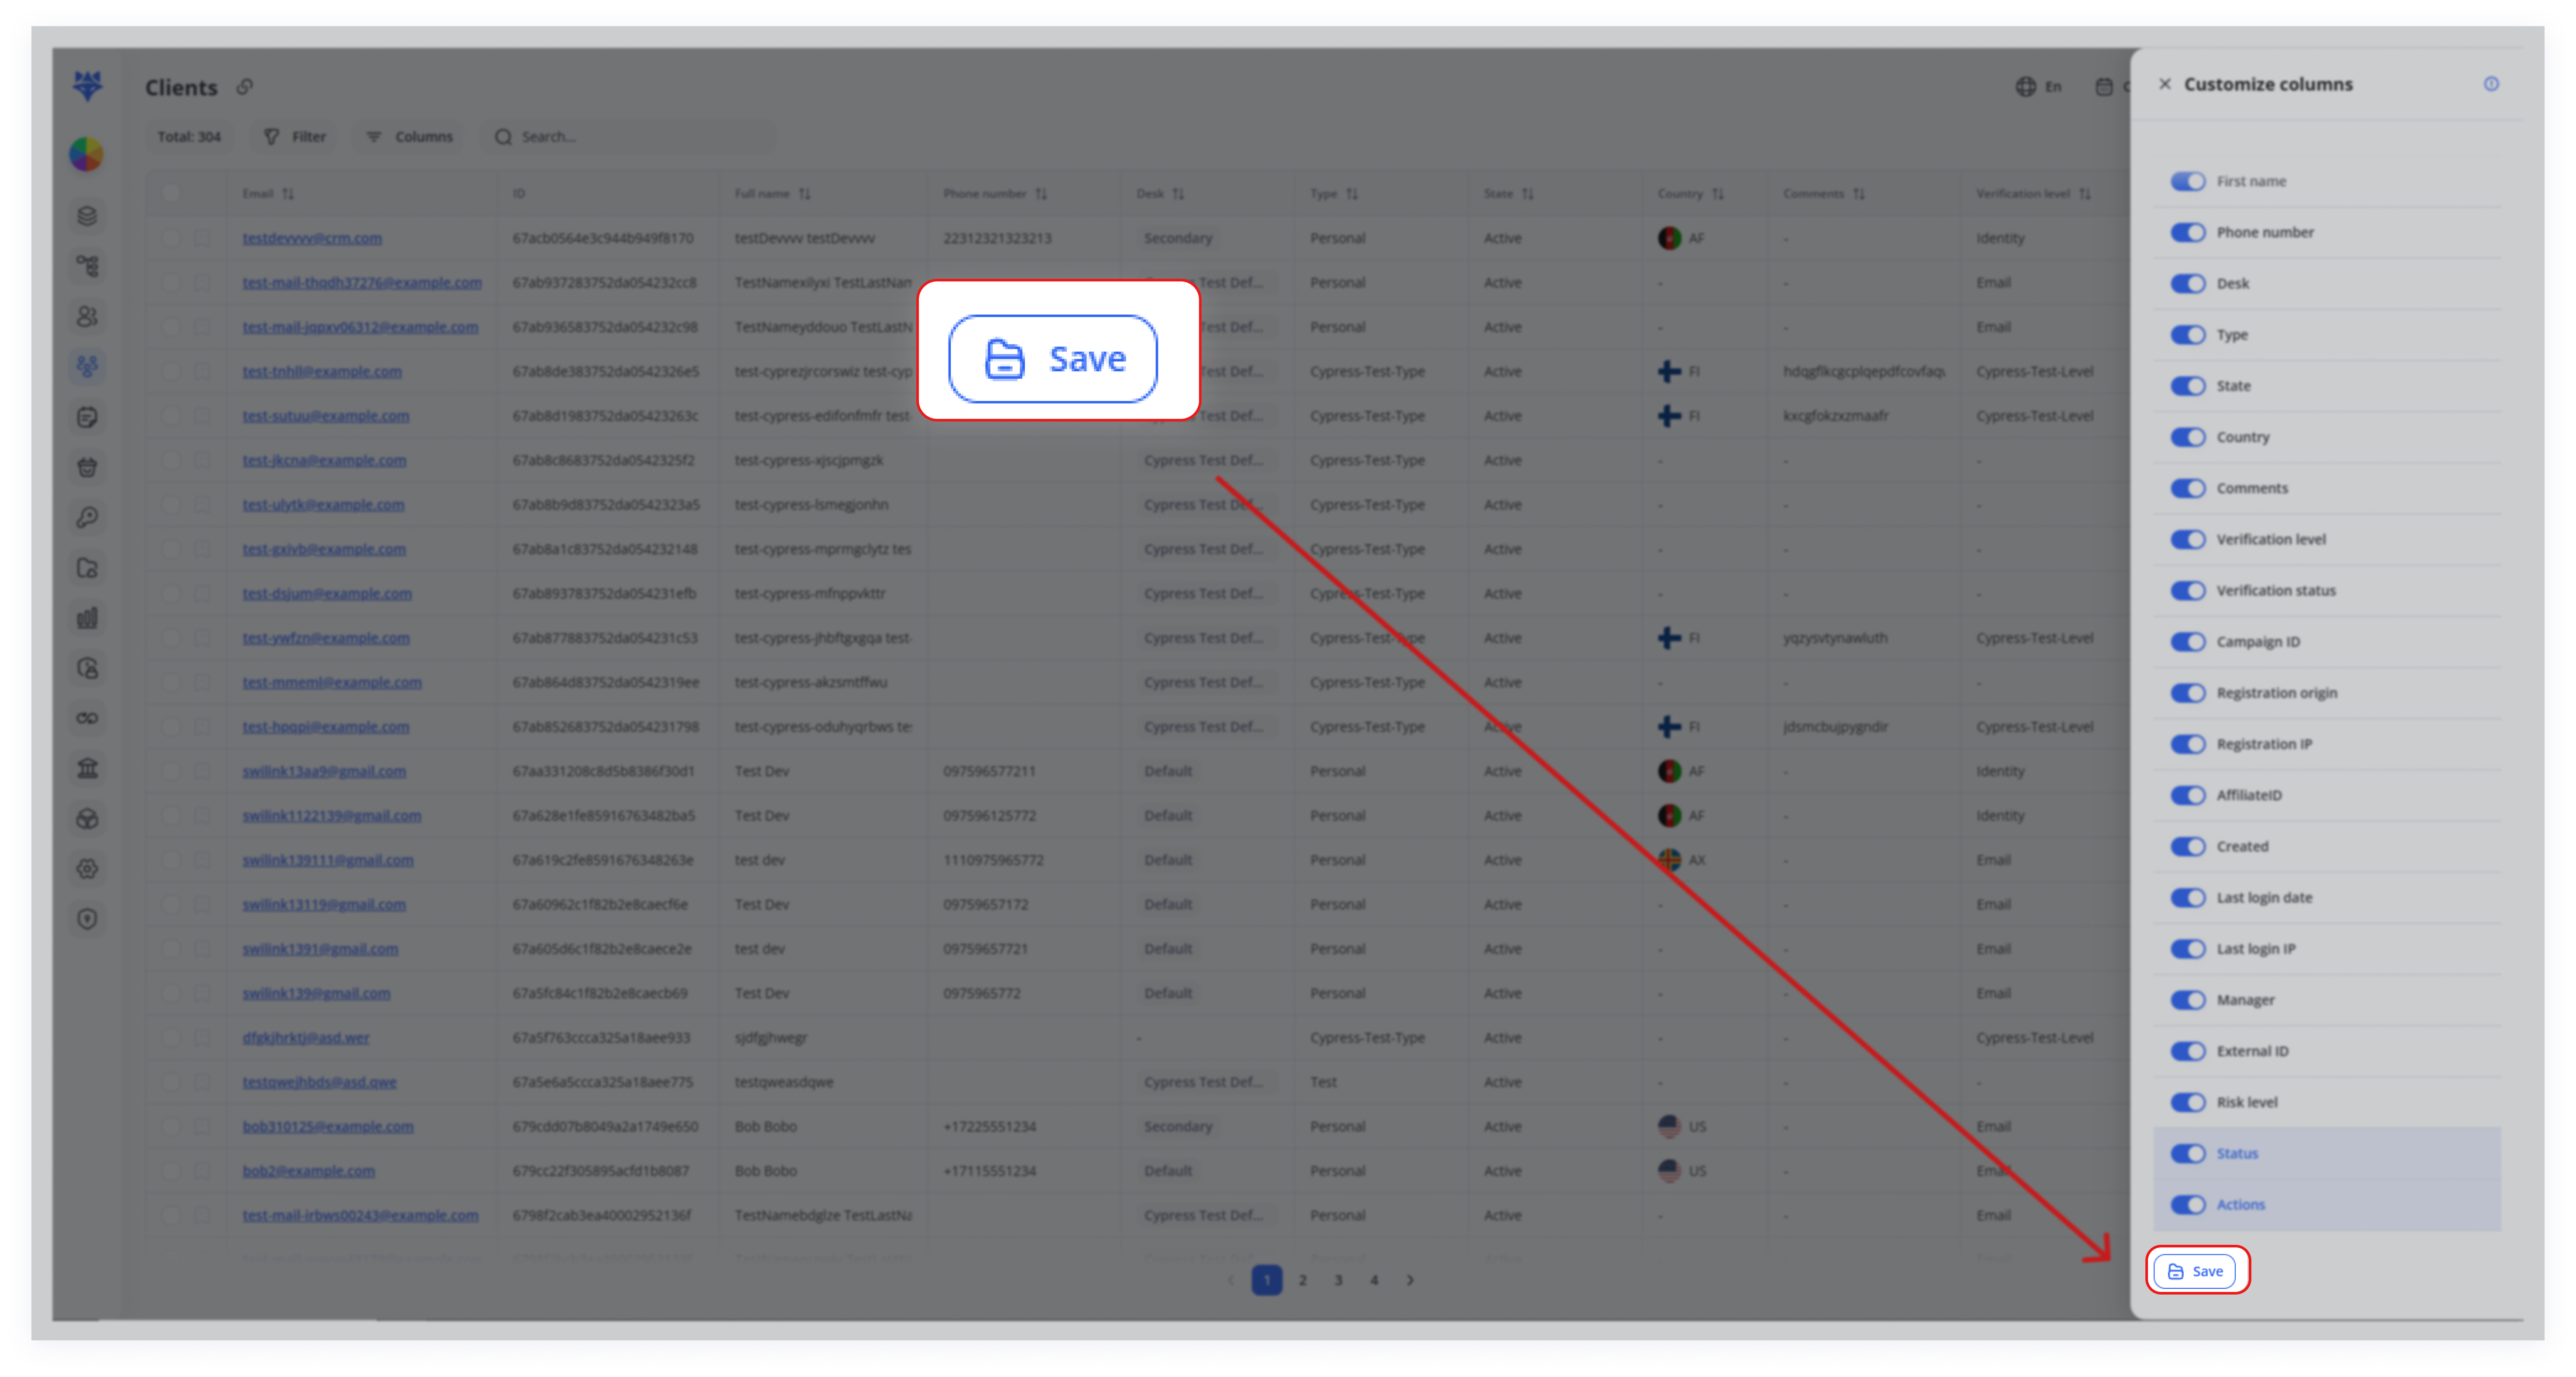
After adjusting the toggles (and reordering if needed), remember that some columns are unable to move because of their fixed position in the table (these columns are marked accordingly).
Note: Once you’ve made your changes, click the Save button at the bottom of the panel. This ensures your customized layout is applied. (Screenshot 3: Save button)
5. Instant Table Update
The panel slides away and your Clients table immediately refreshes to match your selections.
Pro Tips
-
Personal vs. Global Views
If your workspace supports it, save your column layout as a personal default without affecting colleagues’ views. -
Revert to Defaults
If you ever need to reset, simply open Columns again and click Reset (if available) or turn all toggles back on then rearrange. -
Combine with Filters
For maximum efficiency, first apply a filter (e.g. show only “Pending” clients), then customize columns to focus on the data fields most relevant to that subset.
Customizing your columns transforms the Clients table from a static report into a dynamic dashboard tailored to your role. By hiding distractions, promoting key fields, and arranging columns in your ideal sequence, you’ll navigate your client data faster, make fewer errors, and stay focused on what matters most. Experiment with different layouts and use cases—you’ll likely find that a small tweak in column settings leads to big gains in productivity.